This site is supported by our readers. We may earn a commission, at no cost to you, if you purchase through links.
Nicked the fabric? Don’t panic—it happens. Grab some fusible interfacing and stick it on the wrong side. That’ll patch things right up.
Stay on the same side where you made your stitches and work slowly through each section. Patience wins every time. Rush it and you’ll turn a quick fix into a real mess.
Once you’ve got the technique down, you’ll discover some game-changing tricks that make even the most stubborn stitches surrender without a fight.
Table Of Contents
Key Takeaways
- Use a sharp seam ripper to cut every fourth stitch instead of trying to remove each one individually—this saves time and reduces fabric damage. Always flip your fabric over after cutting to pull out the loose threads from the back side, which come out easier in longer pieces. If you accidentally nick the fabric, apply fusible interfacing to the wrong side immediately while the cut edges are still clean. * Practice your seam ripper technique on scrap fabric first to master the proper angle and pressure before working on your actual project.
Use a Seam Ripper
Ready to tackle those unwanted stitches? Your seam ripper is your best friend for precise thread removal without compromising fabric safety. Here’s how to master this essential sewing tool:
- Insert the sharp tip of your seam ripper between the thread and fabric
- Gently pull upward away from the fabric to cut the thread
- Repeat at the opposite end of your target stitching
Stay on the same side where you can see the stitches clearly. Cut every few stitches rather than trying to slice through everything at once.
This careful approach keeps your fabric safe and makes the whole removal process much cleaner.
Turn The Fabric Over and Pull Thread
Once you’ve worked through several stitches with your seam ripper, turn the fabric over. You’ll notice loose thread ends on the back that you missed the first time around. Just grab these with your fingers and pull them right out.
Here’s why this works so well: the back threads get looser during sewing, so they pull out in longer sections instead of tiny bits.
Your fabric stays in better shape too when you handle it gently—no stretching or weird puckering.
Some threads just won’t budge no matter what you do. When that happens, grab your seam ripper and carefully snip whatever’s still holding them.
This gentler approach saves your fabric from damage and gets everything out cleanly. It’s especially handy for straight seams and basic stitching.
Cut Fabric if Necessary
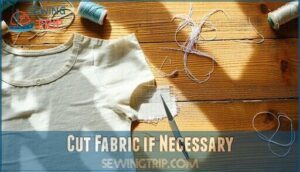
Ugh, we’ve all been there—you’re going along with your seam ripper and whoops, it catches the fabric instead of just the thread. Your heart sinks for a second, but honestly? It’s not the end of the world.
If the nick happened somewhere that won’t show, you can totally save this:
- Move quickly – Grab some lightweight fusible interfacing and get it on the back side right away, before those cut edges start looking raggedy
- Smoosh it together – Push those cut edges back together first, then press your interfacing down for the best repair
- Know it’s not perfect – Yeah, that spot will always be a little weaker, but your quick thinking just kept the whole thing from unraveling
The key is acting fast. Once fabric starts fraying, repairs get way trickier. A little interfacing now beats starting over later.
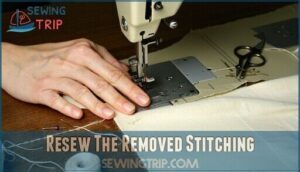
Resew The Removed Stitching
After cleaning up the fabric cuts, you’re ready to resew. Pin or baste the pieces back together first—this stops them from shifting while you stitch.
Pick a fresh, sharp needle for the cleanest repair. Match your thread color to the original unless you want it visible for contrast.
Once you’ve cleaned up any fabric cuts, it’s time to resew the area. Start by re-pinning or basting the fabric pieces back together—this prevents shifting during stitching. Choose your needle selection carefully; a fresh, sharp needle works best for seam repair. For thread matching, use the same color as your original stitching unless you want contrast for visibility.
Once you’ve finished the seam, give it a good press with your iron. That’s it—you’ve got yourself a repair that looks like it was never broken.
Good seam work isn’t about speed, it’s about taking your time, and trust me, it shows.
Quality stitching takes patience over speed—the difference always shows in the final result
After completing the seam, press it flat with your iron. Your sewing tools have done their job, and proper fabric mending techniques guarantee your project looks professional. Remember, good seam repair takes patience, but the results speak for themselves.
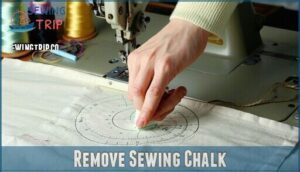
Remove Sewing Chalk
After removing stitches, you’ll need to tackle those pesky chalk mark removal traces on your fabric. Grab an eraser and gently rub over the marks until they vanish completely. Stubborn marks might need a pencil eraser or specialized chalk brush for better results.
For tough fabric stains, try a damp cloth or blow-dryer on a cool setting. These sewing notions and erasable markers clean up easier when you use light pressure and work in small circles.
- No more ghost lines haunting your perfect seams
- Clean fabric means professional-looking finished projects
- Fresh start for your garment construction and alteration work
Pro tip: When working with sewing and embroidery projects, apply less chalk initially—it’s easier to add more than scrub away heavy marks later. Some fabric care requires laundry pretreatment for complete removal. Consider switching to disappearing ink markers on delicate fabrics where traditional sewing tools and equipment might leave permanent marks.
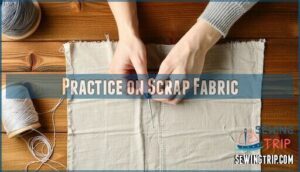
Practice on Scrap Fabric
Start with scraps before jumping into your real project. Get comfortable with your seam ripper on throwaway fabric first—snip every fourth stitch, flip it over, and tug that loose thread.
You’ll save yourself heartbreak (and money) when you mess up on the good stuff.
Cotton pulls apart differently than silk does. Different threads grab onto fabric in their own way too. Play around with what you’ve got—it’s the only way to figure out how your tools actually work with each combo.
Different thread types and fabric tensions behave uniquely, so experiment with various combinations. Your sewing tools work differently on cotton versus silk, making this practice invaluable for fabric care and sewing error prevention.
Frequently Asked Questions (FAQs)
How do you remove sewn stitches?
Over 85% of professional tailors rely on seam rippers daily.
Insert your seam ripper’s sharp tip between thread and fabric, then gently pull upward to cut. Work from one end, removing each stitch carefully to avoid fabric damage.
How to undo seam stitches without a sewing machine?
Grab a seam ripper—your fabric’s best friend when things go sideways. Insert the sharp tip between thread and fabric, then gently lift upward to cut each stitch. Work from one end, pulling loose threads as you go.
To master the technique, understand the seam ripping basics to avoid common mistakes.
Can a seam ripper remove sewn stitches?
Measure twice, cut once they say, but thankfully seam rippers help when things go sideways!
Yes, seam rippers are specifically designed to remove sewn stitches safely by sliding between threads and cutting them without damaging your fabric.
How do you rework a sewing machine?
Reworking a sewing machine involves cleaning, oiling moving parts, adjusting tension settings, replacing worn needles, and checking timing. Start with unplugging, then disassemble carefully following your manual’s guidance.
How do you rip a sewing machine?
Like dismantling a puzzle piece by piece, you’ll grab your trusty seam ripper and carefully slide its sharp tip between threads.
Work slowly, cutting each stitch until you can pull the fabric apart without damaging the material.
How do you rip out stitches without damaging fabric?
Use a sharp seam ripper to slip between thread and fabric, cutting upward gently. Work from one end, then pull loose threads from the opposite side carefully.
What should I do if the thread breaks while using a seam ripper?
Don’t panic when thread snaps mid-rip! Simply reposition your seam ripper at the break point and continue cutting individual stitches. Work slowly to maintain control and prevent further breaks.
How can I prevent a cut in the fabric from fraying?
That dreaded snip happens, but don’t panic! Apply fusible lightweight interfacing immediately over the cut area.
Press with an iron to bond the backing and seal those loose threads before they unravel further.
Is it necessary to trim the thread tails after resewing the stitching?
Yes, you’ll want to trim thread tails after resewing. Those loose ends can unravel your hard work over time, plus they look unprofessional. A quick snip keeps everything tidy and secure.
What thread types are hardest to remove?
Heavy threads like nylon, thick polyester, and specialty threads resist removal most.
You’ll wrestle with bonded nylon and topstitching threads since they’re designed for strength and durability, making them stubborn when you need them gone.
Conclusion
Ready to become a stitch-removal pro? Mastering how to remove sewing isn’t just about fixing mistakes—it’s about gaining confidence in your craft.
You’ve learned the essential techniques, from proper seam ripper positioning to gentle thread removal. Patience beats speed every time. Practice these steps on scraps first, and soon you’ll tackle any stitching mishap without breaking a sweat.
Your future sewing projects will thank you for this skill.

