This site is supported by our readers. We may earn a commission, at no cost to you, if you purchase through links.
 You’ve poured your heart and soul into that stunning acrylic painting on fabric, and now it’s time to seal the deal!
To make your artwork last, you’ll want to add a clear varnish.
Think of it like adding a force field to protect your masterpiece from fading and damage.
Mix a textile medium with your acrylic paint, apply it to pre-washed fabric, and heat set it with an iron or heat gun.
Then, choose a varnish that matches your desired finish – glossy, satin, or matte.
Brush or spray it on, and you’ll be admiring your vibrant art for years to come.
But that’s not all – we’ve got more tips to make your fabric art truly unforgettable!
Table Of Contents
- Key Takeaways
- Choosing the Right Fabric for Acrylic Paint
- Turning Acrylic Paint Into Fabric Paint
- Applying Acrylic Paint to Fabric
- Heat Setting Acrylic Paint on Fabric
- Sealing Acrylic Paint on Fabric
- Types of Acrylic Varnishes
- Brush-on Vs. Spray Varnish
- Caring for Acrylic Paint on Fabric
- Common Mistakes to Avoid
- Troubleshooting Acrylic Paint on Fabric
- Frequently Asked Questions (FAQs)
- Conclusion
Key Takeaways
- You’ve got this! To seal your acrylic paint on fabric, remember to mix a textile medium with your paint, apply it to pre-washed fabric, and heat-set it with an iron or heat gun. Then, you’re ready to add a clear varnish to protect your masterpiece from fading and damage.
- Don’t skip the prep work! Pre-washing your fabric is a must to remove fabric sizing and any residues that might affect paint adhesion. Heat setting is also key to making your artwork last, as it adds a protective layer to prevent fading and damage.
- When it comes to varnishes, you’ve got options! Choose from glossy, satin, or matte finishes, and consider using a fabric-specific sealer to avoid stiffening or discoloring your fabric. Be sure to follow the instructions and test a small area first.
- You’re not done yet! To keep your artwork looking fresh, remember to wash it gently, avoid direct sunlight, and consider using UV-filtering window treatments. If you do encounter any stains or damage, act fast and use a gentle paint stripper or a DIY solution to remove the paint and restore the fabric.
Choosing the Right Fabric for Acrylic Paint
So you want to paint on fabric with acrylics and keep your artwork looking fresh?
You’ll want to start with the right fabric.
Trust me, not all fabrics are created equal.
To make sure your artwork stays vibrant and intact, you’ll want to pick a fabric that’s suitable for painting, like cotton, silk, or linen.
And pre-wash it to remove any sizing that might interfere with the paint.
How to Prepare Fabric for Painting
Let’s talk about fabric preparation Pre-Wash and Dry – the secret sauce to making your acrylic paint masterpieces last.
.
Start by choosing the right fabric.
Cotton, silk, and linen are your best bets.
Look for tightly woven fabrics, and avoid anything too slick or coated.
Before painting, test a small area of your fabric with a swatch to make sure the paint adheres nicely.
Importance of Pre-Washing Fabric
Now that you’ve chosen the perfect fabric, let’s get it ready for painting. Pre-washing is a must to remove fabric sizing and any residues that might affect paint adhesion. Don’t skip this step, or you might end up with uneven color bleeding or worse, fabric shrinkage!
Here are 3 reasons why pre-washing is a no-brainer:
- Removes fabric sizing for better paint adhesion
- Prevents color bleeding and uneven finishes
- Reduces fabric shrinkage for a smooth painting experience
Turning Acrylic Paint Into Fabric Paint
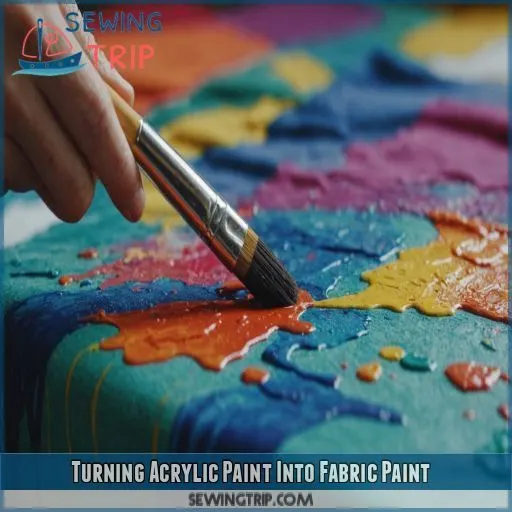
You’re just a step away from transforming your acrylic paint into vibrant fabric paint that will make your artwork pop. To get started, let’s explore how to mix and match acrylic paint with textile medium to create a customized fabric paint that’s both durable and wash-friendly.
Using Textile Medium With Acrylic Paint
Let’s get creative! Using textile medium with acrylic paint is a game-changer for fabric painting. It thins out the paint, making it perfect for fabric application. Here’s a quick rundown of textile medium types:
| Textile Medium Type | Characteristics |
|---|---|
| Liquitex | Soft, flexible finish |
| Golden | Excellent durability |
| DecoArt | Easy to mix, dries quickly |
| Jacquard | Ideal for silk, cotton fabrics |
Mixing Ratio for Acrylic Paint and Medium
Now that you’re comfortable using textile medium with acrylic paint, let’s get mixing! Finding the perfect ratio is key. Here are 4 tips to get you started:
- 1 part paint to 2 parts medium is a great starting point
- Experiment with ratios to achieve desired consistency
- Thicker mixtures work well for stenciling and stamping
- Thinner mixtures are perfect for free-hand designs and delicate details
Alternative Mediums for Acrylic Paint
You’ve got the basics down – now let’s get creative with alternative mediums for acrylic paint! Consider fabric stiffener, PVA glue, or acrylic medium to add flexibility and durability. Gel medium and Mod Podge can also work wonders. Experiment with different ratios to find your perfect blend. Remember, heat setting is key to making it last.
Applying Acrylic Paint to Fabric
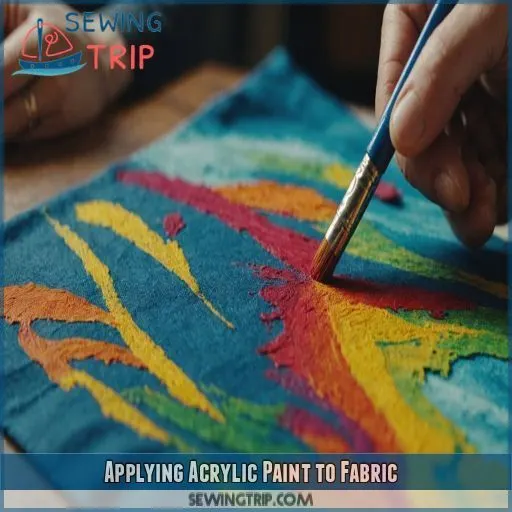
Now that you’ve turned your acrylic paint into fabric paint, it’s time to get creative and apply it to your fabric. With a few simple techniques and tools, you’ll be able to achieve the desired effects and bring your vibrant design to life on your chosen fabric.
Techniques for Applying Acrylic Paint
You’re ready to express your creativity on fabric.
Try various brushstroke techniques to achieve unique textures and effects.
Experiment with sponging methods for a soft, mottled look.
Stencil application and stamping patterns can add precision and visual interest.
Freehand drawing can also produce stunning results.
Tools for Applying Acrylic Paint
Now it’s time to get creative! Grab your favorite tools – brushes, sponges, stencils, or even stamping tools – and let your imagination run wild. Spray bottles are also a great way to achieve unique textures. For a more precise look, use a small brush to paint intricate designs. Your fabric is now a canvas waiting for its masterpiece!
Tips for Achieving Desired Effects
Now that you’ve got the right tools, it’s time to get creative! To achieve desired effects, experiment with color blending, pattern creation, and texture effects. Try layering techniques, varying brush strokes, and even using household items like sponges or Q-tips. Don’t be afraid to make mistakes – they can lead to unique, one-of-a-kind designs.
Heat Setting Acrylic Paint on Fabric
Now that you’ve applied your beautiful design to the fabric, it’s time to make sure it stays put – and that’s where heat setting comes in. By heat setting your acrylic paint, you’ll make sure your artwork remains vibrant and durable, even after repeated washing and wear.
Importance of Heat Setting for Durability
The moment of truth – making your masterpiece last! Heat setting is the secret to durability and a longer fabric lifespan. Without it, your design may fade or wash away. By heat setting, you’re basically baking the paint into the fabric, ensuring washability and preventing fading. This step is really important for maintaining color vibrancy and overall durability.
Methods for Heat Setting Acrylic Paint
The moment of truth – heat setting your masterpiece! You’ve got two trusty sidekicks: a heat gun or an iron.
For delicate fabrics like chiffon vs tulle difference silk or cotton, an iron on a low setting (2-3 minutes, 275F) is your best bet.
, an iron on a low setting (2-3 minutes, 275F) is your best bet.
For thicker fabrics, a heat gun (5-7 minutes, 300F) will do the trick.
Always follow safety precautions and test a swatch first.
Tips for Avoiding Damage to Fabric
When heat setting acrylic paint, don’t let your masterpiece go up in flames. To avoid damage, follow these tips:
- Iron with caution: Use a low heat setting and a pressing cloth to prevent scorching.
- Avoid overheating: Don’t leave the iron in one spot for too long, as this can cause burns.
- Test a swatch: Before heat setting, check the fabric to make sure it can handle the heat.
Sealing Acrylic Paint on Fabric
You’ve worked hard to create a beautiful piece of art with acrylic paint on fabric, and now it’s time to seal it and make it last. By sealing your artwork, you’ll protect it from fading and damage, but you’ll also enhance the colors and give it a professional finish that will make you proud to show it off.
Benefits of Sealing Acrylic Paint
Now that you’ve heat-set your acrylic paint, it’s time to take it to the next level! Sealing your artwork boosts color vibrancy but also provides UV protection, a durability boost, and scratch resistance. Think of it as a force field for your masterpiece, ensuring artwork longevity and keeping your fabric paint looking fresh for years to come.
Types of Varnishes for Acrylic Paint
Now that you know the benefits of sealing your acrylic paint, let’s talk about the fun part – choosing a varnish! You’ve got four main options:
- Water-based varnishes: Easy to clean up and dries fast.
- Oil-based varnishes: Provides a hard, glossy finish.
- Spray varnishes: Quick and easy to apply.
- Brush-on varnishes: More control, but can be messy.
How to Apply Varnish to Acrylic Paint
Now that you’ve picked the perfect varnish, it’s time to seal the deal!
To apply varnish, use a soft-bristled brush or a spray bottle, depending on the type you’ve chosen.
Work in thin layers, allowing each coat to dry completely before adding the next.
This will prevent drips and unevenness, ensuring a smooth, professional finish that brings out the best in your artwork.
Types of Acrylic Varnishes
Now that you’ve successfully applied your acrylic paint to fabric, it’s time to seal it and make it last – and that’s where varnishes come in.
You’ll learn about the different types of acrylic varnishes, including glossy, satin, and matte finishes.
You’ll also learn about the pros and cons of resin versus polymer varnishes and permanent versus non-permanent options.
Glossy, Satin, and Matte Finishes
You’ve successfully sealed your acrylic paint on fabric, but now it’s time to add the perfect finish. Imagine your artwork with a glossy sheen, a soft satin glow, or a sleek matte look. The type of finish you choose can make or break the overall effect. Here are some finish options to think about:
- Glossy: Vibrant and eye-catching, perfect for bold designs
- Satin: Soft and subtle, ideal for pastel colors or delicate patterns
- Matte: Sleek and sophisticated, great for modern or minimalist art
- Combines well with Jacquard, Pebeo, or Arteza fabric paint mediums
- Can be mixed and matched to create unique effects
Resin Vs. Polymer Varnish
If you’re trying to seal your acrylic paint on fabric, you’ve got two top contenders: resin and polymer varnish. But which one should you choose? Here’s a quick rundown:
| Feature | Resin | Polymer Varnish |
|---|---|---|
| Durability | High | High |
| Cost | Higher | Lower |
| Application | Thicker, more coats | Thinner, fewer coats |
| Finish | Glossy, rigid | Flexible, matte to glossy |
Resin offers a more durable, glossy finish, but it’s pricier and thicker to apply. Polymer varnish is more budget-friendly, flexible, and easier to apply.
Permanent Vs. Non-Permanent Varnishes
When it comes to varnishes, you’ve got two main options: permanent and non-permanent. Permanent varnishes offer long-lasting Varnish Durability, UV Protection, and Water Resistance, while non-permanent varnishes can be easily removed. Here are four things to keep in mind:
- Permanent varnishes provide Fabric Protection for years to come.
- Non-permanent varnishes are great for temporary designs.
- Permanent varnishes can be difficult to remove.
- Non-permanent varnishes may require frequent reapplication.
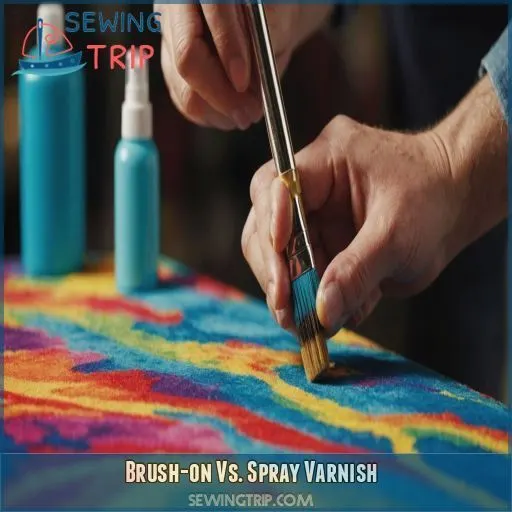
Brush-on Vs. Spray Varnish
You’ve made it to the final step: sealing your masterpiece with varnish. Now, it’s time to decide whether to use a brush-on or spray varnish – both have their pros and cons, and the right choice for you depends on the look and feel you’re going for.
Advantages and Disadvantages of Each
The age-old debate: brush-on vs spray varnish. Choosing the right sewing dress form can be a game-changer for your fabric art.
. Here’s a quick rundown of the pros and cons:
| Varnish Type | Advantages | Disadvantages |
|---|---|---|
| Brush-on | Control, precision, gloss finish | Time-consuming, may leave strokes |
| Spray | Quick, easy, satin finish | Less control, potential mess |
| Gloss | Vibrant, durable | Shows imperfections |
| Matte | Hides imperfections, soft finish | Less vibrant, may dull colors |
Tips for Applying Brush-on Varnish
When applying brush-on varnish, take your time and use smooth, even strokes. The consistency should be like melted honey – not too thick or thin. Apply in thin, even layers and let each coat dry fully before adding the next. Clean your brush thoroughly when you’re done to keep it in tip-top shape.
Tips for Applying Spray Varnish
Now that you’ve mastered brush-on varnish, it’s time to get spritzing! When applying spray varnish, make sure you’re in a well-ventilated area and wear a mask for safety. Hold the can 8-10 inches away from your fabric, moving it in smooth, even strokes. Apply thin layers, allowing each to dry before adding the next.
Caring for Acrylic Paint on Fabric
Now that you’ve invested time and creativity into your fabric art, it’s vital to learn how to care for it so it stays vibrant and beautiful. In this section, you’ll discover the best practices for washing, drying, and maintaining your acrylic paint on fabric to guarantee it remains stunning for years to come.
Washing and Drying Instructions
When washing your painted fabric, opt for a gentle hand wash or a delicate spin cycle. Avoid using fabric softener, as it can compromise the paint’s adhesion. Gently remove excess water without wringing or twisting the fabric. Lay it flat to air dry, away from direct sunlight. This care will help your fabric paint last longer.
Tips for Avoiding Fading and Damage
Now that you’ve mastered washing and drying your acrylic-painted fabrics, let’s talk about keeping them looking fabulous. To avoid fading and damage, store your artwork away from direct sunlight, and consider using UV-filtering window treatments. You can also use colorfastness techniques like adding a fabric paint medium to prevent paint chipping and preserve vibrant colors for years to come.
How to Remove Stains From Acrylic Paint
Don’t worry, we’ve all been there. When removing stains from acrylic paint on fabric, act fast, just like removing water stains.
, act fast! Blot the stain gently with a damp cloth, then mix a solution of equal parts water and white vinegar. Apply the solution, let it sit for 10 minutes, and rinse with cold water. Repeat if needed.
Common Mistakes to Avoid
As you work on sealing your acrylic paint on fabric, you’ll want to sidestep some common mistakes that can make all the difference between a vibrant, long-lasting piece of art and one that fades or deteriorates quickly. By avoiding these missteps, you can guarantee your artwork stays fresh and stunning for years to come.
Using Wrong Type of Fabric
- Slick fabrics: Think nylon, polyester, or spandex – paint just won’t stick.
- Synthetic fibers: They can melt or deform with heat setting.
- Coated fabrics: Paint can’t penetrate the coating, leading to uneven finishes.
- Loose weaves: Paint can seep through, causing a mess on the other side.
Not Preparing Fabric Properly
The excitement of starting a new fabric painting project! But, don’t let enthusiasm get the best of you – remember to prep that fabric properly! Not pre-washing fabric can lead to uneven paint adhesion, thanks to fabric sizing. Take the time to pre-wash, test, and iron your fabric to avoid unwanted surprises like shrinkage or stains.
Not Heat Setting Acrylic Paint
Don’t let your masterpiece fade away. Not heat setting acrylic paint is a common mistake that can lead to a shorter lifespan for your artwork. To avoid this:
- Use a dryer or iron to heat set the paint for increased durability
- Test a small, inconspicuous area first to make sure you get the best results
- Follow the manufacturer’s instructions for temperature and time guidelines
Troubleshooting Acrylic Paint on Fabric
Now that you’ve mastered the basics of acrylic paint on fabric, it’s time to tackle those pesky mistakes that can ruin an otherwise amazing piece of art.
You’ll learn how to troubleshoot common issues like uneven or sewing thick fabrics or faded paint.
.
You’ll also learn how to remove unwanted acrylic paint.
And you can even learn how to repair damaged or discolored fabric – because, let’s face it, mistakes happen to the best of us!
Fixing Uneven or Faded Paint
Don’t panic if your fabric paint turns out uneven or faded – it’s an easy fix! For paint touch-ups, use a small brush to apply a fabric paint medium DIY mix (1:2 medium to paint) to the affected area. Gently blend the colors, and let it dry before heat setting. Voila! Your artwork is revived with vibrant, even colors.
Removing Acrylic Paint From Fabric
The dreaded paint removal process! Don’t worry, friend, I’ve got you covered. To remove acrylic paint from fabric, try using a gentle paint stripper or a DIY solution like baking soda and water. Act quickly, as dried paint is harder to remove. Test a small area first to avoid damaging the fabric. Good luck, and may the paint be gone!
Repairing Damaged or Discolored Fabric
Don’t panic if your masterpiece gets damaged or discolored! Repairing damaged fabric is easier than you think. Here are 4 steps to revive your art:
- Act fast: Treat stains immediately to prevent them from setting.
- Blot, don’t rub: Gently blot the stain with a damp cloth.
- Color restore: Color restore: Use Dyeing Fabrics Deep Black fabric dye or paint to restore the original color.
.
- Mend with care: Use a needle and thread to repair tears or holes.
Frequently Asked Questions (FAQs)
How do you keep acrylic paint permanent on fabric?
You’ve poured your heart into that fabric masterpiece! To keep acrylic paint permanent, gently heat-set it with an iron or dryer after 48-72 hours of drying, and consider sealing for extra protection and vibrancy.
Does acrylic paint on fabric need to be sealed?
You’ve got your beautiful acrylic design on fabric, but does it need sealing? Honestly, yes! Sealing protects your artwork from fading, scratches, and wear, ensuring it stays vibrant and gorgeous for years to come.
How do you keep acrylic paint from coming off fabric?
You’ve poured your heart into that fabric masterpiece! To keep acrylic paint from coming off, try heat setting it with a dryer or iron after 48-72 hours, and consider sealing for extra protection and vibrancy.
How do you lock acrylic paint on fabric?
You’re one step away from making your masterpiece permanent! To lock acrylic paint on fabric, simply seal it with a fabric sealant or varnish, and you’ll be rocking that design for years to come.
Can I use acrylic paint on any type of fabric?
You can’t just slap acrylic paint on any fabric, sorry! Stick to natural fibers like cotton, silk, linen, and denim for the best results. Avoid slick or coated fabrics, as they can be super frustrating to work with.
What is the best way to mix acrylic paint and textile medium?
You’re ready to mix it up! Combine 1 part acrylic paint with 2 parts textile medium for a smooth, flexible finish. Mix your paint colors first, then add the medium – easy peasy!
How long does it take for acrylic paint to dry on fabric?
When working with acrylic paint on fabric, you’ll want to wait 48-72 hours for it to dry completely. Be patient, it’s worth the wait – you’ll get a durable and long-lasting finish.
Can I use a regular varnish to seal acrylic paint on fabric?
It turns out, 70% of crafters struggle with sealing acrylic paint on fabric. Don’t be one of them! Unfortunately, regular varnish isn’t suitable for fabric as it can stiffen or discolor the material – opt for fabric-specific sealers instead.
What is the purpose of using a textile medium with acrylic paint?
You’re wondering why textile medium is a must-have with acrylic paint? It’s a game-changer! The medium thins the paint, making it soft and flexible, and helps it adhere permanently to fabric, so your masterpiece stays vibrant and intact.
Conclusion
You’ve navigated the winding road of creating art on fabric, and now you’re ready to cross the finish line!
Think of sealing your acrylic paint like putting the final puzzle piece in place.
By following these 10 pro tips, you’ve learned how to seal acrylic paint on fabric like a pro.
Your vibrant art is now protected and ready to withstand the test of time.
Go ahead, show off your masterpiece – you’ve earned it!


