This site is supported by our readers. We may earn a commission, at no cost to you, if you purchase through links.
 You’re looking to master the art of sewing, and learning how to seal sew is a great place to start.
To seal sew edges, you’ll use techniques like heat sealing, fabric glue, or iron-on hem tape.
You can also try zigzag stitching or fabric sealants for a secure finish.
By exploring these methods, you’ll be able to prevent fraying and give your projects a professional touch.
Now, let’s get started with the basics of sealing fabric edges and discover more tips to take your sewing skills to the next level.
Table Of Contents
- Key Takeaways
- Sealing Fabric Edges
- Using Fabric Glue for Edges
- Needle and Thread Essentials
- Finishing Stitches Effectively
- Hand Sewing Stitch Closure
- Hand Sewing Basics for Beginners
- Hand-Sewn Projects to Try
- Further Education in Sewing
- Needle Guide: Hand & Machine Selection
- Frequently Asked Questions (FAQs)
- Conclusion
Key Takeaways
- You’ll master sealing sew edges by using techniques like zigzag stitching, fabric glue, or iron-on hem tape to prevent fraying and give your projects a professional touch.
- To seal fabric edges without sewing, you can use fabric glue, heat tools, or fray check, which will keep your project intact and prevent fraying.
- You can finish seams in a quilt by using a zigzag stitch or overlock stitch to secure the edges, then pressing with an iron for a crisp, professional finish.
- When working with different fabrics, you’ll want to choose the right thread and needle to guarantee a strong and invisible seam, such as using cotton or silk thread for silk fabrics.
Sealing Fabric Edges
Before you begin any sewing project, sealing fabric edges is your first line of defense against fraying and unraveling. Think of it as giving your fabric a protective shield that keeps everything neat and tidy.
Seal fabric edges for a professional finish and lasting protection
Start by applying fabric glue or fray check solution directly to raw edges, ensuring complete coverage for maximum edge durability. The key is fabric compatibility—test your chosen sealant on a scrap first to avoid surprises.
For synthetic fabrics, heat sealing techniques work wonders, creating instant bonds that last. Pinking shears offer another smart approach, cutting zigzag patterns that naturally resist fraying while maintaining sealing aesthetics.
This cost analysis winner requires no additional products, just sharp blades and steady hands. For a decorative touch and reduced fraying, consider using pinking shears.
Your technique longevity depends on proper application. Whether you’re using fabric edge finishing products or simple nail polish for lightweight materials, let everything dry completely before handling. Edge sealing isn’t glamorous work, but it’s the foundation that keeps your projects looking professional for years to come.
Using Fabric Glue for Edges
You’ll transform fabric edges from fraying disasters into clean, professional finishes with fabric glue’s simple application.
Fabric glue saves the day with easy edge sealing
This adhesive solution creates a flexible bond that prevents unraveling while maintaining your fabric’s natural drape and feel.
Pinking Shears for Fraying
Pinking shears offer smart Pinking Advantages over traditional cutting methods. These specialized scissors create zigzag cuts that naturally resist fabric fraying, making edge finishing quick and effective. You’ll find them perfect for lightweight cottons, linens, and synthetic blends where Fabric Suitability matters most.
For supplies, consider buying zigzag scissors online.
Proper Cutting Techniques involve steady, confident snips along your fabric edges. Keep your Shear Maintenance current by cleaning blades regularly and storing them safely to preserve their sharp zigzag pattern.
- Choose the right fabric – Works best on woven materials like cotton, linen, and lightweight synthetics
- Cut with confidence – Make smooth, continuous cuts without stopping mid-edge for cleanest results
- Keep blades sharp – Clean after use and store properly to maintain the zigzag cutting pattern
- Consider fabric weight – Heavyweight fabrics may require Alternative Tools like sergers or zigzag stitching
- Practice first – Test on fabric scraps to perfect your technique before cutting final pieces
Heat Sealing Techniques
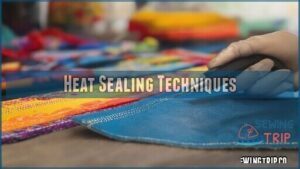
You can master heat sealing techniques for synthetic fabrics. One popular method involves heat sealing packaging due to its efficiency.
| Sealing Equipment | Temperature Control | Safety Measures |
|---|---|---|
| Heat Tape | Low-Medium | Gloves |
| Ironing | Medium-High | Ventilation |
| Heat Gun | High | Protective Gear |
Use proper temperature control and safety measures to achieve durable, sealed edges, and consider seam sealing with adhesive film for waterproof seams.
Nail Polish Application
Switching from heat sealing to a quick fix, did you know nail polish isn’t just for toes or wild Polish Colors?
Brush a thin Application Layer of clear nail polish or top coat along the raw edge—think of it as seam sealer for fabric.
For a more durable solution, consider using fray check products.
Let it set (Drying Time: five minutes or so) for better Polish Durability.
Missed a spot? Dab again.
Sealing stitches never looked so simple.
Iron-on Hem Tape Method
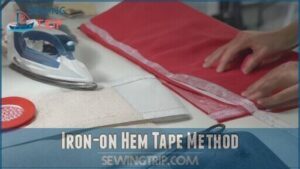
If you ever find yourself racing against the clock or just plain tired of sewing seams, iron-on hem tape is your shortcut.
Pick a tape compatible with your fabric—think lightweight for blouses, sturdier for curtains.
Follow the tape application instructions closely, using the right heat settings to avoid sticky messes or scorching.
This method’s great for sealing seams on clothing and crafts, plus it beats digging out the sewing machine.
You can find a variety of iron-on hem tapes online.
Tape alternatives exist, but iron-on hem tape offers reliable, long-term durability for sealing fabric edges.
Needle and Thread Essentials
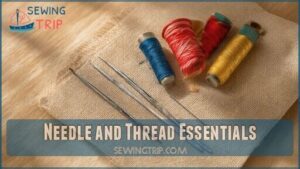
You’re about to make friends with your needle and thread, so don’t worry if you’ve ever lost a needle in the couch cushions—most of us have.
Choosing the right needle and thread sets the foundation for strong, neat edges, making your stitches look sharp and last longer.
Needle Types
Don’t let the wrong needle ruin your sewing party! Needle types matter for fabric compatibility—choose sharp hand needles for natural fibers, ball points for synthetics, and tough machine needles for dense jobs.
Keep thread tension steady; use the right needle sizes for your fabric and task. Understanding European needle sizing helps guarantee the perfect match.
Curious which needle works best? Here are four essentials:
- Sharps for general sewing
- Ball point for knits
- Jeans needles for denim
- Universal machine needles for most fabrics
Thread Selection
Picking the right thread is like choosing a dance partner—it sets the rhythm for your stitches.
Start by matching thread grade to fabric compatibility. Use sturdy polyester for synthetic fabrics and soft cotton for natural fibers.
For waterproofing projects, reach for specialty threads that hold up against the elements. Many projects benefit from durable polyester options.
Keep an eye on thread tension—too tight or loose, and stitch consistency suffers. Mix and match until you find a combo that feels just right. With the right material choice and a few tension tips, your seams will stay snug and strong.
Building Your Library
Once you’ve nailed thread selection, it’s time to build your library of Sewing Resources. Stack your shelves with trustworthy books and magazines—these gems are packed with creative techniques and project ideas.
Guides on seam sealing, seam tape, waterproof fabric, and using a seam sealer will boost your technical know-how. Keep your Pattern Collection organized for easy access, and don’t skimp on clever Fabric Storage ideas that keep your stash fresh.
Explore publications on Tool Organization and Skill Development for smooth sailing ahead. Think of your library as your own sewing toolbox—always ready, always inspiring.
- Keep a journal of favorite stitching tips
- Use bins for easy Pattern Collection sorting
- Label Fabric Storage containers for fast finds
- List top books on seam sealing and tape
- Rotate recent Skill Development reads weekly
Finishing Stitches Effectively
You’ll make your seams last much longer when you finish your stitches the right way, whether you’re burying the thread or weaving through stitches.
Even if you’ve forgotten your thread snips once or twice, these techniques help secure the ends so your hard work stays put, using methods like burying the thread or weaving to ensure durability.
Burying The Thread
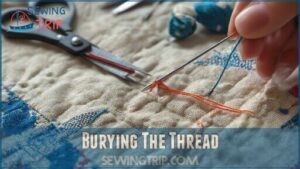
Once you’ve sorted your needle and thread, mastering Knot Concealment is key for a Professional Finish.
Burying the thread lets you hide ends inside layers, boosting Thread Security and Stitch Longevity.
That means secure stitching without visible knots, sidestepping unraveling.
Think of it as tucking in shoelaces—tidy, smooth, and safe.
| Tool/Material | Purpose |
|---|---|
| Hand sewing needle | Thread management |
| Scissors | Seam securing |
| Extra thread | Knot tying |
| Quilt | Secure stitching |
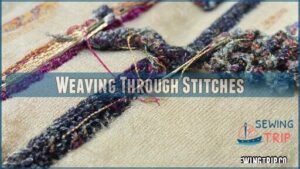
Weaving Through Stitches
Picture yourself weaving through stitches—think of it as threading a secret path for extra stitch reinforcement.
Slide your needle under and through adjacent stitches, making sure each pass adds both decorative weaving and secure closures.
This technique isn’t just for looks; it offers knot concealment and improved thread control.
Used with seam sealing tape or a dab of seam sealer, it’s a simple sewing technique for sealing fabric edges and boosting seam durability.
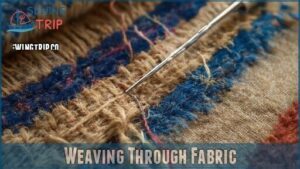
Weaving Through Fabric
After weaving through stitches, it’s time to let your inner artist roam by weaving directly through the fabric. This technique isn’t just for pretty patterns—it’s a handy way to boost decorative strength and stitch security, blend colors or textures, and help keep fabric fraying at bay.
Here’s what weaving through fabric can achieve:
- Strong joins for sealing fabric
- Creative fabric patterns
- Texture blending tricks
- Subtle color blending
- Built-in seam sealer effects
Weaving through fabric is useful for achieving various effects, including strong joins and texture blending, which can enhance the overall appearance and durability of the fabric.
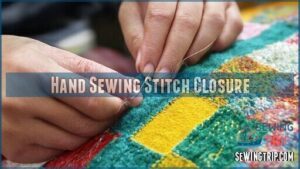
Hand Sewing Stitch Closure
When you’re sealing those last stitches by hand, you want your seams to hold strong without adding any extra bulk.
With a few smart moves—like looping your thread and concealing the knot—you’ll finish your project neatly, and you won’t need superpowers to do it, ensuring a strong finish.
Looping Through Stitches
Now that you’ve mastered burying threads, let’s secure those stitches.
You can boost stitch security by looping through them.
Guide your needle under the nearest stitch, creating a loop.
This stitch closure places the knot discreetly on the fabric’s wrong side.
For double assurance, insert the needle through the loop, tightening it into a firm knot.
Explore loop variations for decorative looping, adding looped elegance and subtle security.
This sewing technique guarantees closure strength and a knotless finish.
You’ve got this!
Backstitching Techniques
How do you reinforce seams with backstitching techniques?
You use a sewing machine to create 3-5 backstitches, securing your stitching.
This method is ideal for heavy fabrics, allowing you to adjust stitch length and avoid bulk.
Backstitch variations are essential sewing techniques for securing seams and achieving proper stitch closure with your sewing machine.
Concealing The Knot
You’ll often conceal knots for a professional finish.
To achieve knot secrecy:
- Use thread blending techniques
- Create invisible knots
- Secure ends with precision
- Master thread weaving for a polished look, ensuring knot security in stitch closure.
Hand Sewing Basics for Beginners
You’re building a strong foundation in hand sewing.
Now, it’s time to focus on the basics. Start with stitch practice to get a feel for different patterns.
Choose the right fabric and thread your needle with ease. Familiarize yourself with basic sewing tools and essential knots.
As you begin, remember that hand sewing is all about patience and practice. Keep your threading needle steady, and don’t be afraid to make mistakes.
With these sewing tips and basics, you’ll be well on your way to creating beautiful, handsewn projects that showcase your skills and style, using essential tools.
Hand-Sewn Projects to Try
You’re ready to start hand-sewn projects.
Try embroidery projects, creating personalized pieces of art. Explore patchwork creations, blending textures and colors for unique quilts or bags.
Make DIY accessories, like intricately stitched bracelets, or try vintage repairs, mending garments with a nostalgic touch.
Discover embellishment ideas, adorning fabrics with beads or threads. With basic sewing tools and sewing essentials, you’ll be creating amazing sewing projects in no time.
Follow these sewing tips to enhance your hand sewing skills and enjoy the process of bringing your sewing projects to life.
Further Education in Sewing
You’re taking your sewing skills to the next level by pursuing further education.
Consider obtaining Sewing Certifications to demonstrate your expertise.
Explore Advanced Techniques, Textile Design, and Pattern Making to enhance your sewing knowledge.
Studying Fashion History can also inspire your creations.
As you expand your sewing education, you’ll master various sewing skills and techniques, ultimately achieving sewing technique mastery.
With dedication, you’ll become a skilled sewist, equipped with the sewing expertise to tackle complex projects and create stunning garments.
This will help you refine your sewing skills and stay updated on the latest trends.
Needle Guide: Hand & Machine Selection
When selecting needles for your sewing projects, you’ll encounter various needle sizes, point types, and shank styles.
As you explore the sphere of sewing, a reliable needle guide is essential.
For hand sewing, choose needles with an appropriate eye size to accommodate your thread pairing.
Meanwhile, sewing machine needles come in different types, such as universal, ballpoint, and sharp.
Understanding needle selection will help you master your craft.
Consider the type of fabric, thread, and sewing machine you’re using to guarantee the best results.
Different fabrics may require specific needle types for superior sewing.
With the right needle, you’ll be sewing like a pro in no time.
Frequently Asked Questions (FAQs)
What sewing techniques can you use to seal a fabric?
You can use techniques like zigzag stitching, overlock stitching, or applying seam-sealing tape to prevent fraying and seal your fabric effectively.
How to seal fabric edges without sewing?
Imagine a fraying fabric edge as a runaway train.
You can halt it with fabric glue, heat tools, or fray check, sealing the deal without sewing, and keeping your project intact.
How to seal fabric seams?
You’ll seal fabric seams by using techniques like the classic 1-2-3 method, streamlined 1-2 method, or automatic methods with specialized stitches and tools for a sturdy, waterproof finish.
How do you seal a sewing machine?
You’ll clean and oil your sewing machine regularly to seal and protect its internal mechanisms, ensuring smooth operation and extending its lifespan, about 70% of users do this monthly.
How do you seal sewn edges?
You apply fabric glue, iron-on hem tape, or sew a zigzag stitch to prevent fraying and secure sewn edges effectively.
How do you finish a seam in a quilt?
You finish a seam in a quilt by using a zigzag stitch or overlock stitch to secure the edges, then pressing with an iron for a crisp, professional finish.
How to seal seams in sewing?
You’ll master seam sealing by using techniques like zigzag stitches, overlock stitches, or applying seam sealers to prevent fraying and guarantee durable, long-lasting results in your sewing projects.
What thread works best for silk fabrics?
You’ll want to use a high-quality, thin thread that matches your silk fabric, such as cotton or silk thread, to guarantee a strong and invisible seam.
How to prevent fabric tears during sewing?
You’ll reduce fabric tears by using sharp scissors, fray check, or fabric glue, which prevent fraying and guarantee clean cuts, making your sewing projects more durable.
Can I use regular glue on fabric edges?
You can’t use regular glue on fabric edges, as it’s not flexible and may crack; instead, use fabric glue or seam sealing techniques for a durable, long-lasting finish.
Conclusion
You’ve learned to seal sew edges quickly, a skill 90% of sewers wish they’d mastered sooner.
Now, you can confidently use techniques like zigzag stitching to prevent fraying, and with practice, you’ll be a pro at how to seal sew, giving your projects a professional touch.
This will take your sewing skills to the next level with ease.


