This site is supported by our readers. We may earn a commission, at no cost to you, if you purchase through links.
A loose button shouldn’t mean throwing out a shirt. A torn hem doesn’t have to end your favorite pants’ life. Learning how to sew puts you back in control of your wardrobe and opens the door to creating things from scratch.
The basics aren’t complicated. You need a handful of tools, some patience, and willingness to practice. Hand sewing fixes small repairs and teaches you how thread and fabric work together. Machine sewing speeds up the process once you understand tension, feed dogs, and straight seams.
Start with simple projects like pillowcases or tote bags. Master those fundamentals and you’ll build skills that last a lifetime.
Table Of Contents
Key Takeaways
- You only need about $50 worth of basic tools to start sewing—sharp fabric scissors, pins, a seam ripper, tape measure, and the right needles and thread for your fabric type.
- Hand sewing teaches you how thread and fabric work together through three core stitches (running stitch, backstitch, and slip stitch), while machine sewing speeds up projects once you master threading, tension, and feed dogs.
- Cotton fabric works best for beginners because its stable weave prevents shifting and slipping, making it forgiving when you’re learning to cut and stitch accurately.
- Simple projects like pillowcases and tote bags let you practice straight seams and basic construction with 70-80% completion rates, building real skills without overwhelming complexity.
What Do You Need to Start Sewing?
You don’t need much to start sewing. A few basic tools and materials will get you stitching right away. Here’s what every beginner should have on hand.
Essential Sewing Tools and Materials
Your sewing kit doesn’t need to break the bank. A thorough starter set runs about $50 and covers the basics: sharp fabric scissors, glass-headed pins, a seam ripper, tape measure, and tailor’s chalk. Modern tools like rotary cutters and fabric clips make cutting materials easier.
Market trends show DIY crafters now favor ergonomic designs. Tool maintenance means keeping scissors dedicated to fabric only. A beginner can purchase a complete sewing kit for approximately that price.
Types of Needles and Threads
With tools in hand, you’ll need the right needle and thread to bring your projects to life. Selecting proper sewing basics isn’t about buying everything at once. It’s about understanding needle point types and thread material strength. Here’s what beginners should know:
- Hand needles come as sharps for general sewing or ballpoint for knits
- Machine needles range from 9/70 for silk to 16/100 for denim
- Cotton thread works beautifully for natural fabrics
- Polyester thread withstands high-speed machines without melting
The thread needle ratio matters more than you’d think. Your thread diameter should be roughly 40% of your needle size for smooth stitching. To achieve successful stitching results, consider the needle size guide for your projects.
Choosing The Right Fabric for Beginners
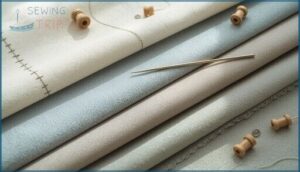
Now that needles and thread are sorted, fabric selection becomes your next building block. Cotton stands out as your go-to choice because its tightly woven structure resists slipping while you learn. Fabric weight matters too. Medium-weight options let needles pass through smoothly without buckling.
Texture impact shouldn’t be overlooked. Chambray and flannel grip better than slippery synthetics when you’re pinning patterns. Project suitability guides your choices. Quilting cotton excels for home décor, while cotton lawn works perfectly for summer garments. Skip knits and silk until your foundational skills improve. Fiber content and weave stability determine how forgiving fabric becomes when you’re unpicking mistakes.
| Fabric Type | Why It Works for Beginners |
|---|---|
| Cotton | Stable weave prevents shifting during cuts |
| Muslin | Inexpensive for practice projects |
| Linen | Natural fiber softens beautifully with wear |
| Cotton blends | Durable and wrinkle-resistant |
How to Sew by Hand
Hand sewing is where every seamstress begins. You don’t need much to get started—just a needle, thread, and a bit of patience.
Let’s walk through the essential techniques that form the foundation of all hand-sewing work.
Threading a Needle and Knotting Thread
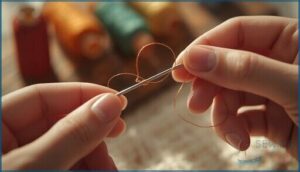
Before you can master hand sewing, you need to get your thread through the needle eye and secure it. Cut a clean 18-inch thread length and moisten the tip to compress fibers. Push the needle eye onto the pinched thread instead of pushing thread through the eye.
For knot security, loop the thread around your finger twice and roll it tight. Needle sizes and threading tools make this easier with practice.
Basic Hand Stitches (Running, Backstitch, Slip Stitch)
You’ll build your hand sewing foundation on three core stitches.
The running stitch moves quickly through fabric with simple weaving motions, creating temporary seams and basting work. Backstitch delivers exceptional seam durability by overlapping each stitch for strength. Slip stitch excels at invisible hemming by catching just one or two threads on the surface while hiding inside folded edges.
Tips for Even and Secure Stitches
With tension control and stitch consistency, you’ll transform uneven seams into professional-looking work. Mark your stitch lines using chalk or erasable pens for accuracy. Hold thread perpendicular to your fabric while maintaining moderate tension with your thumb to prevent puckering or gaps.
Secure stitches by creating small knots or passing thread through backside loops. Practice these hand sewing techniques regularly to develop muscle memory for even spacing.
How to Use a Sewing Machine
A sewing machine can feel overwhelming at first with all its moving parts and settings. But once you understand the basics, you’ll see it’s just a tool that works with you.
Let’s walk through what you need to know to get your machine running smoothly.
Understanding Machine Parts and Functions
Before you power up your sewing machine, get familiar with the parts that make it work. Knowing what each component does will boost your confidence and help you troubleshoot problems later.
- Spool pin: Holds your thread spool securely in place
- Feed dogs: Move fabric forward with each stitch automatically
- Presser foot variations: Hold fabric flat against the feed dogs
- Tension discs: Control how tight or loose your stitches appear
- Stitch regulator settings: Adjust stitch length and width for different projects
Setting Up and Threading The Machine
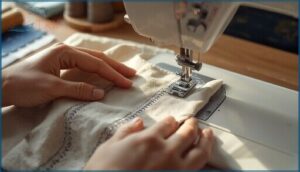
Threading your sewing machine correctly is like solving a puzzle—miss one step and the whole picture falls apart. Start by attaching the presser foot with the snap-on lever. Wind your bobbin evenly to prevent jams. Follow the thread guides in sequence through tension settings to the needle. Check needle compatibility with your thread weight. Proper setup prevents 68% of first-time threading problems.
Practicing Basic Machine Stitches
Start with the straight stitch—it makes up over 80% of beginner work on a sewing machine. Set your stitch length to 2.5 mm and practice on cotton scraps before touching real projects. This simple habit cuts irreversible mistakes by 33%.
Keep your sewing speed between 400-800 stitches per minute for better control. Practice fabric selection matters too—light cotton works best for learning basic sewing machine operation.
Preparing Fabric and Patterns
Getting your fabric ready is just as important as the sewing itself. You can’t skip the prep work if you want your finished project to look clean and hold up over time.
Let’s walk through the essential steps that’ll save you from headaches down the road.
Washing and Ironing Fabric
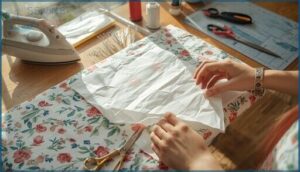
Before you cut into any fabric, take time to prep it right. Pre-wash benefits include preventing shrinkage and removing excess dyes that could ruin your DIY sewing projects. Natural fibers shrink more than synthetics, so wash cotton and linen in warm water first.
After drying, iron according to fiber content using pressing cloths on delicate materials. Proper fabric selection and preparation sets you up for success.
Measuring and Cutting Fabric Accurately
Once your fabric is prepped, accurate measuring becomes your next priority. Use a non-slip acrylic ruler for precision and mark measurements clearly. Let fabric rest flat for at least 8 hours before cutting to prevent stretching errors.
Pay close attention to seam allowance since deviations as small as 3mm can alter garment fit. Quality cutting tools and proper fabric relaxation prevent costly measurement errors down the line.
Beginner Sewing Projects and Tips
Now that you’ve got the basics down, it’s time to put your skills to work. Starting with simple projects helps you build confidence without getting overwhelmed.
In this section, you’ll find beginner-friendly ideas, common pitfalls to watch out for, and ways to make your stitches more consistent.
Easy Projects to Build Skills
Skill-building projects like pillowcases and tote bags give you hands-on practice with sewing basics without overwhelming complexity. These DIY sewing projects use sewing tools and materials you already have and keep material costs under $20.
Project completion rates hit 70-80% among beginners, and practical outcomes include usable items that deliver a confidence boost.
Following sewing tips and tricks on simple designs builds your foundation for more complex work.
Common Sewing Mistakes to Avoid
Learning from mistakes speeds up your growth more than flawlessness ever will. New sewers often stumble over the same hurdles, but knowing them upfront saves fabric and frustration.
Mistakes teach faster than perfection—knowing common pitfalls upfront saves fabric and frustration
Here are five sewing basics pitfalls to dodge:
- Cutting Errors from rushed measuring waste up to 5% of your material
- Seam Allowance mistakes change garment fit by a quarter-inch per seam
- Thread Tension problems cause 60% of puckering issues
- Machine Maintenance neglect increases thread breakage by 45%
- Pressing Seams matters—skipping it reduces flatness by 60%
Tips for Improving Stitch Consistency
Beyond dodging errors, you want stitches that look professional and hold strong. Start by checking thread tension on scrap fabric before each project. Replace your needle every 8–10 hours of sewing to prevent skipped stitches. Aim for 8–12 stitches per inch for durability.
Slow your machine speed on tricky fabrics and clean the bobbin area weekly to keep tension discs lint-free.
Frequently Asked Questions (FAQs)
How do you sew step by step?
You start by choosing your fabric and pattern. Then cut the pieces along the grain. Pin them together.
Stitch the seams using your preferred method. Press each seam flat.
Finish raw edges to prevent fraying.
What is the first thing a beginner should sew?
Most beginners thrive with a pillowcase project or tote bag. These straightforward designs let you practice straight seams and basic fabric handling without tricky fit issues that often derail first-time sewers.
How do I start sewing basics?
Gather your basic tools first: fabric scissors, tape measure, needles, thread, and pins. Pick quilting cotton for your first project.
Practice simple hand stitches before advancing to machine sewing for solid skill progression.
How to sew with a thread and needle?
Thread your sewing needle by moistening the thread end and passing it through the eye. Pull several inches through and tie a knot at the long end to anchor your Hand Sewing stitches securely.
How do I remove stubborn stains from fabric?
Treat stains quickly with cold water and enzyme-based removers for best results. DIY methods work for minor marks, but professional intervention may be needed for stubborn stains. Always test fabric first before applying any stain removal agents.
Whats the best way to sew stretchy fabrics?
Stretchy fabric manipulation requires needle selection matched to knit fabrics and proper stitch types. Use stretch or ballpoint needles and zigzag stitches. Lower presser foot pressure and always prewash. These basics prevent common sewing machine mistakes.
Can I use dental floss for emergency sewing?
Yes, dental floss works for emergency sewing repairs. Unwaxed floss has good tensile strength and needle compatibility. Use it on medium-weight fabrics for temporary fixes, but replace with proper thread soon since washing effects and fabric compatibility aren’t ideal.
How do I prevent fabric from fraying while sewing?
To reduce fraying by up to 80%, finish raw edges with pinking shears or zigzag stitching. For 75-90% protection, apply liquid fray sealants.
Pre-treat fabric edges before cutting and choose tightly woven materials for best results.
What are alternatives to pins for holding fabric?
Think of pins as training wheels—you’ll outgrow them.
Fabric clips grip layers securely without holes, basting tape aligns zippers precisely, and washable glue bonds slippery materials.
Pattern weights hold fabric flat, and taut sewing stretches seams smooth.
How do you fix a broken zipper on clothing?
You can fix a broken zipper using pliers to adjust the slider or by lubricating stuck teeth. Professional zipper replacement costs $30–$40, though DIY repair confidence averages moderate at 49 out of
Conclusion
Think of sewing as learning a new language. At first the needle feels awkward and the thread tangles. But each stitch builds your vocabulary.
Soon you’re translating ideas into real objects you can wear and use. The skills you’ve learned here give you that foundation.
Now it’s about practice. Pick up a needle or sit at your machine. Start with something small. Learning how to sew means you’ll never look at fabric the same way again.

