This site is supported by our readers. We may earn a commission, at no cost to you, if you purchase through links.
Learning how to sew a baby blanket is one of the most rewarding projects you’ll ever tackle, whether you’re preparing for your own little one or creating a heartfelt gift.
The beauty lies in its simplicity: with basic sewing skills and an afternoon, you can transform soft fabric into a cherished keepsake. No complicated patterns or sophisticated techniques required—just straight seams, careful pressing, and attention to the details that make a blanket truly special.
Table Of Contents
- Key Takeaways
- Essential Supplies for Sewing a Baby Blanket
- Choosing The Best Fabric for Baby Blankets
- How Much Fabric Do You Need?
- Preparing Your Fabric for Sewing
- Step-by-Step Guide to Sewing a Baby Blanket
- Finishing Touches for a Professional Look
- Caring for Your Handmade Baby Blanket
- Frequently Asked Questions (FAQs)
- Conclusion
Key Takeaways
- Baby blanket sewing requires basic supplies (fabric scissors, measuring tape, iron, sewing machine with 4-5mm stitch length) and straightforward techniques like straight seams and careful pressing, making it an accessible afternoon project for beginners.
- Natural fabrics like cotton, flannel, and bamboo outperform synthetics for baby blankets because they’re breathable, hypoallergenic, and gentler on sensitive skin—over 65% of quality blankets now carry hypoallergenic certifications like GOTS or OEKO-TEX.
- Pre-washing fabric before sewing is essential because it removes up to 100% of chemical residues like formaldehyde, prevents 2-7% shrinkage in the finished blanket, and reduces color bleeding by 75% in future washes.
- Standard baby blanket sizes range from 12×12 inch loveys to 45×60 inch crib blankets, but safety guidelines require keeping all blankets out of cribs for babies under 12 months to prevent SIDS—use them only for supervised cuddles, tummy time, or stroller rides.
Essential Supplies for Sewing a Baby Blanket
Before you get started, let’s gather everything you’ll need to make this project smooth and enjoyable. Having your supplies ready means you won’t need to pause mid-stitch to hunt for scissors or thread.
Here’s what belongs in your sewing basket for this blanket.
Sewing Tools and Equipment Needed
Your sewing machine anchors your workspace, but you’ll need a few more essentials to complete your blanket. Fabric scissors or a rotary cutter with a cutting mat guarantee precise cuts on soft fabrics. Keep measuring tape and a ruler nearby for accurate seam allowances.
An iron and ironing board press seams flat for that professional finish. Don’t forget thread matching your fabric, plus pins or clips to secure layers while you sew.
For a quick and easy project, consider using reversible sewing techniques to create a beautiful baby blanket.
Recommended Sewing Machine Settings
Once you’ve gathered your tools, adjusting your sewing machine settings makes all the difference. Start with a longer stitch length of 4–5 mm for sturdy seams that won’t pucker soft fabrics. Set tension between 4.0 and 5.0 for cotton flannel, lowering it slightly for delicate materials. A walking foot helps feed thick or slippery fabrics like minky evenly.
Begin at the slowest sewing speed, especially around corners, then gradually increase as you gain confidence. These simple adjustments transform your DIY baby blanket project from frustrating to satisfying. For a successful project, understanding baby blanket sewing is essential.
Best Thread and Needle Choices
Your thread and needle choices matter as much as the fabric you pick. Cotton thread works beautifully for baby blankets because it’s soft, strong, and withstands heat during washing and ironing. Pair it with a universal needle sized 80/12 or 90/14 for flannel and minky fabrics.
- Cotton thread offers durability and heat resistance for frequent washing
- Polyester thread provides flexibility for stretchy or synthetic-blend fabrics
- Universal needles (80/12 or 90/14) suit medium-weight baby blanket materials perfectly
- Ballpoint needles prevent snagging when working with knit or stretchy fabrics
Choosing The Best Fabric for Baby Blankets
Picking the right fabric isn’t just about what looks pretty—it’s about what feels safe and gentle against your baby’s skin. Natural fibers tend to breathe better and cause fewer reactions, while some synthetic options offer extra softness or durability.
Let’s look at what works best for different needs and preferences.
Natural Vs. Synthetic Fabrics
In Fabric Comparison, natural fibers like cotton and linen outshine synthetics in nearly every way. These Breathable Materials allow air to circulate freely, keeping your little one comfortable without overheating.
Natural options are also hypoallergenic and gentler on delicate skin, while synthetics can trap moisture and contain chemical treatments that may irritate.
For Skin Safety and Sustainable Textiles, choosing Eco Friendly fabrics like flannelette, minky, or fleece made from natural sources gives you peace of mind and a blanket that lasts.
Popular Fabric Types (Flannel, Minky, Cotton)
For your DIY baby blanket sewing project, three favorites stand out. Cotton Breathability makes it perfect year-round—46% of parents choose it for consistent comfort.
Flannel Warmth wraps babies in cozy softness, with brushed cotton flannelette lasting over 40 washes.
Minky Durability offers plush Fabric Softness that endures 100+ cycles, though it needs gentle care for Textile Safety.
Hypoallergenic and Baby-Safe Materials
Protecting Infant Skin Health matters deeply when choosing fabrics. Organic cotton, bamboo, and ultra-fine merino prevent Allergy Prevention issues—over 65% of blankets now carry hypoallergenic labels.
Look for Material Certifications like GOTS or OEKO-TEX, which limit Chemical Residues and Fabric Toxicity. Certified cotton, minky, and flannelette keep baby care safe, giving you peace of mind with every stitch.
How Much Fabric Do You Need?
Getting the fabric amount right makes your project run smoothly from start to finish. Baby blankets come in a few standard sizes, and each one requires a specific yardage to create that cozy double-layer design.
Let’s look at the measurements you’ll need so you can shop with confidence and avoid any mid-project trips to the fabric store.
Standard Baby Blanket Sizes
Baby blanket size charts can feel overwhelming at first, but once you know the basics, picking the right dimensions becomes second nature. The size you choose depends on how you’ll use the blanket—snuggling, swaddling, or covering a crib. Here are the most common baby blanket sizes to guide your sewing patterns:
- Lovey blankets: 12 x 12 inches, perfect for tiny hands and tactile comfort
- Receiving blankets: 30 x 40 inches, ideal for swaddling newborns and multipurpose use
- Stroller blankets: 30 x 36 inches, great for on-the-go coverage and travel
- Crib blankets: 36 x 45 to 45 x 60 inches, sized for full cribs with baby safety in mind
Cotton and other breathable blanket materials work beautifully across all these dimensions.
Fabric Amounts for Each Size
Once you know your baby blanket size, yardage estimation becomes straightforward. For lovey blankets (12 x 12 inches), you’ll need about 1/4 yard of cotton or flannelette. Standard receiving blankets (30 x 40 inches) require roughly 1 yard of fabric. Stroller blankets use similar material requirements—around 1 yard works perfectly.
Crib blankets are the fabric calculation outlier: you’ll need 1.5 to 2 yards depending on your sewing patterns and size charts. Always add a quarter yard extra for seam allowances.
Measuring and Cutting Tips
Get your fabric accuracy down before you make the first cut—using a transparent acrylic ruler with a self-healing cutting mat reduces measuring errors by up to 40%. Lay fabric completely flat, fold selvedge to selvedge, then mark all edges before cutting.
Fresh rotary cutter blades paired with straightedge precision techniques deliver clean cuts 98% of the time, eliminating ragged edge finishing problems that throw off your sewing patterns.
Preparing Your Fabric for Sewing
Before you start stitching, you’ll want to prep your fabric properly—it’s the foundation for a blanket that lasts. This step prevents surprises like shrinking or puckering after the first wash.
Let’s walk through the three key prep steps that’ll set you up for success.
Pre-Washing and Drying Fabric
Think of pre-washing as your blanket’s safety net—it removes up to 100% of chemicals like formaldehyde while preventing that heart-sinking moment when your finished sewing projects shrink.
Here’s how to prep your cotton or flannelette fabric:
- Wash in hot water (above 104°F) with mild, enzyme-free detergent to boost allergen removal
- Skip fabric softeners—they break down fibers and reduce softness by up to 42%
- Tumble dry on low heat or air dry to preserve fabric softness and control shrinkage
- Expect 2-7% shrinkage in cotton during this first wash—that’s normal for fabric shrinkage
- Pre-washing sets dyes, reducing color bleeding by 75% in future washes
This step ensures dye setting, color preservation, and eliminates irritants that cause reactions in 82% of textile-sensitive infants.
Ironing and Removing Wrinkles
Once your fabric’s clean and dry, proper ironing techniques make all the difference—wrinkles left behind can throw off your measurements by up to 15%. Set your iron to medium-high heat with steam for cotton and flannel, but always test on a scrap first to avoid scorching. Press firmly rather than dragging the iron across the fabric to prevent stretching.
A padded ironing board and steam settings work wonders for wrinkle removal, especially if you iron while the fabric’s still slightly damp. This fabric preparation step ensures accurate cutting and professional-looking seams in your sewing projects.
Accurate Fabric Cutting Techniques
With your wrinkle-free fabric laid flat, precision techniques like rotary cutters with 45mm blades give you smooth, accurate cuts. Align fabric edges along your cutting mat’s grid lines to follow the grain properly. Sharp scissors handle curves, while measuring tape and rulers keep dimensions exact—a 36×36-inch blanket needs careful marking.
Long, continuous strokes minimize waste, and stabilizing slippery fabrics between paper prevents shifting during cutting.
Step-by-Step Guide to Sewing a Baby Blanket
Now that your fabric is prepped and ready, it’s time to put it all together. The actual sewing process is straightforward and moves quickly once you understand the key steps.
Here’s how to transform your two pieces of fabric into a cozy, finished baby blanket.
Layering and Pinning Fabrics
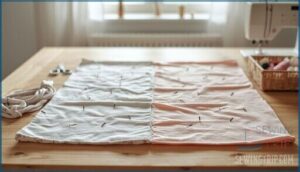
You’ll want to lay your two fabric pieces right sides together on a flat surface—this ensures proper fabric alignment along the selvage edges. Smooth out any wrinkles as you go, then start your pin placement at the corners first, working toward the center.
Space your pins about 1–2 inches apart, perpendicular to the edge for better seam control and layer management. This fabric stabilization technique prevents shifting when you move to your sewing machine, giving you clean, professional results.
Stitching Around The Edges
Once your pins are in place, it’s time to bring everything to your sewing machine. Set a standard seam allowance of 1/4 to 3/8 inch—this balances neatness with durability. Backstitch at the start, then guide your fabric steadily around all four edges:
- Use a straight stitch for clean, professional seams
- Keep consistent seam allowance for even edge stitching
- Slow down at corners for precise corner mitering
- Remove pins as you approach them to avoid needle strikes
- Maintain steady fabric tension without pulling or stretching
Topstitching and zigzag edging come later—for now, just focus on smooth, continuous stitching.
Leaving a Gap for Turning
Before you complete that final stitch, stop about six to eight inches from where you started—this gap is your lifeline for turning the blanket right-side out. Mark both ends with pins so you don’t accidentally sew over it.
Use a consistent seam allowance of 1/4 to 3/8 inch, and backstitch at each gap edge for corner reinforcement. This closure method makes finishing your baby blanket sewing project smooth and professional-looking.
Turning and Pressing The Blanket
After turning your blanket through the gap, reach inside to gently push out each corner. Using a blunt tool like a chopstick gives you crisper points every time. Before you even think about topstitching, trim corners at a 45-degree angle to reduce bulk, then press those edges flat with steam and a cotton cloth.
This fabric shaping step is where sewing tutorials often gloss over the details, but it’s essential for professional edge finishing in any baby blanket sewing project.
Finishing Touches for a Professional Look
Once you’ve sewn and turned your baby blanket, a few finishing details can transform it from homemade to handcrafted with care.
These final steps secure the edges, add a polished appearance, and help your blanket hold up beautifully through countless washes.
Here’s how to give your blanket that professional touch.
Topstitching The Edges
Topstitching around your baby blanket’s edges is like drawing a frame around a painting—it seals the turning gap while adding durability and a polished finish. Use a straight stitch with a slightly longer stitch length (about 3.0-3.5 mm) and sew approximately 3/8 inch from the edge.
When you reach corners, stop with your needle down, lift the presser foot, and pivot the fabric 90 degrees for crisp corner pivoting. Adjust your thread tension if puckering occurs, and backstitch at both ends to secure your topstitching.
This edge finishing technique increases durability by up to 40%, helping your sewing projects withstand countless washes while maintaining their shape.
Adding Decorative Binding or Trim
Decorative binding transforms a simple baby blanket into something truly special. Satin binding remains the most popular choice—it’s used on over 60% of commercial baby blankets for good reason. For a standard 30×40 inch blanket, you’ll need about 4-5 yards of pre-made satin binding (usually 2-2.5 inches wide).
Apply it using a zigzag stitch for extra durability, mitering corners at 45-degree angles to reduce bulk. These edge finishing and binding techniques from sewing tutorials and patterns enhance your sewing projects while keeping your baby blanket sewing patterns practical and beautiful.
Hand-Sewn Blanket Stitch Edges
A blanket stitch creates that charming hand-stitched look you see on heirloom handmade baby blankets. Thread selection matters—use 3–6 strands of embroidery floss with a size 22–26 needle for fabric compatibility with cotton or flannel. Space your stitches about 3–5 mm apart, keeping stitch tension even to prevent puckering.
This edge reinforcement technique appears in countless sewing tutorials and patterns because it works beautifully on baby blanket sewing patterns while adding durability for sewing for babies projects.
Caring for Your Handmade Baby Blanket
You’ve put your heart into making this beautiful blanket, and with the right care, it’ll stay soft and safe for years to come. How you wash, dry, and store it makes all the difference in keeping those cozy fibers intact.
Here’s what you need to know to protect your handmade gift.
Washing and Drying Recommendations
Keep your handmade baby blanket soft and safe by following gentle cleaning practices. Here’s what works best:
- Water Temperature: Wash in cold or lukewarm water (20-30°C) to prevent shrinkage and preserve cotton fibers without fading colors.
- Gentle Cleaning: Use fragrance-free, non-biological detergent on a delicate cycle to protect baby’s sensitive skin and maintain fabric softness.
- Fabric Softening: Skip fabric softeners—they reduce absorbency. Try white vinegar instead as a natural alternative.
- Drying Methods: Air dry flat when possible to prevent stretching, or tumble dry on low heat for quicker turnaround.
- Shrinkage Prevention: Always pre-wash before sewing, then wash every 3-4 days during regular use in your baby nursery.
These baby care basics keep your sewing tutorials creation looking fresh while supporting safe, lasting comfort.
Ensuring Blanket Safety for Babies
Your care routine matters, but safe use matters more. The American Academy of Pediatrics is clear: babies under 12 months shouldn’t sleep with blankets—SIDS prevention requires firm sleep surfaces with only fitted sheets.
Use your handmade baby blanket for supervised tummy time, stroller rides, or cuddles instead.
When choosing fabric, stick with hypoallergenic, chemical-free materials to avoid fabric toxicity concerns. Creating a safe sleep environment means keeping the baby care item you lovingly crafted out of the crib until your little one’s first birthday.
Tips for Long-Lasting Softness and Durability
Beyond safe use, your blanket’s longevity depends on gentle washing with mild, fragrance-free detergent and cold water to preserve fabric softness. Air dry when possible—cotton and fleece respond beautifully to this drying technique.
Spot clean between washes for better blanket maintenance, and store folded in a cool, dry spot. These sewing tips protect your handmade blankets, keeping soft fabrics plush through countless cuddles and stroller rides.
Frequently Asked Questions (FAQs)
What size blanket should I make for a baby shower gift?
For a baby shower gift, aim for 30 x 30 to 40 x 40 inches—perfect for swaddling safety and newborn comfort. This DIY baby blanket size works beautifully as infant bedding without overwhelming parents with something too large.
Can I use a serger machine instead of a sewing machine?
You can use a serger for baby blankets—it trims and finishes edges simultaneously, cutting project time nearly in half.
Sergers handle flannel and minky beautifully, preventing fraying while creating durable, stretchy seams that withstand countless washes.
How do I Sew mitered corners on a baby blanket?
Think of it like building a picture frame—each corner needs to meet perfectly, or the whole thing looks crooked.
To sew mitered corners on your baby blanket, fold the fabric at a 45-degree angle, press firmly, then stitch with 5–3 mm stitches for precision.
What kind of batting should I use for a baby blanket?
Cotton batting is your safest bet—it’s breathable, hypoallergenic, and naturally regulates temperature.
For extra warmth, consider bamboo or wool. Skip polyester if you can; natural fibers work better with baby’s delicate skin and keep them cozy without overheating.
How can I add applique or embroidery designs to a baby blanket?
Imagine transforming your handmade baby blanket into a treasured heirloom with custom applique techniques and embroidery designs.
Apply fusible web applique before final assembly, using a stitch density of 8-10 stitches per inch for secure attachment that withstands washing while following safety guidelines to prevent choking hazards.
Can you add embroidery or appliqué designs?
You can personalize your Baby Blanket with Embroidery or Appliqué Techniques. Choose soft Embroidery Threads like cotton or polyester, keep Stitch Density moderate, and use baby-safe fabrics.
Simple Design Patterns work beautifully on DIY Baby Blanket projects, transforming Sewing Patterns into cherished keepsakes through creative Sewing and Crafting.
Whats the best way to gift wrap?
What’s more meaningful than giving something you created with your own hands? For baby gifts like handmade baby blankets, try fabric wrapping with reusable bags or eco-friendly wraps—they’re sustainable packaging that becomes part of the gift itself, perfect for baby shower gifts or DIY baby gifts.
How do you fix sewing mistakes?
Fixing sewing mistakes starts with a seam ripper—hold your fabric taut and gently slide the blade between stitches to avoid tearing.
For puckering fixes, press seams carefully with an iron, lifting rather than sliding to smooth wrinkles.
Thread issues like skipped stitches often need a fresh needle or tension adjustment before re-stitching.
Can you make reversible blankets with patterns?
Yes, you can create reversible baby blankets with patterns by choosing designs like garter stitch or seed stitch that look great on both sides.
Focus on pattern symmetry and smooth finishes for a polished look that works beautifully for any sewing project.
What are popular color schemes for babies?
Soft pastels like powder pink and dusty rose continue to shine in nursery decor, but earth tones—sage green, beige, and olive—are the real stars right now.
Gender neutral palettes with muted shades appeal to modern parents, especially those choosing eco-friendly baby gifts.
Conclusion
Think of your first baby blanket like planting a garden—you prepare the soil, nurture each seed, and watch something beautiful grow from your care.
Now that you know how to sew a baby blanket, you hold more than fabric-working skills. You’ve gained the ability to wrap newborns in handmade love, to create heirlooms that soften with age, and to give gifts that carry your warmth long after you’ve tied off that final thread.


