This site is supported by our readers. We may earn a commission, at no cost to you, if you purchase through links.
 Learning how to unpick sewing doesn’t have to feel like performing surgery on your favorite garment.
Start by inserting your seam ripper’s pointed end under individual stitches, then slide it forward until the sharp blade cuts through the thread. Work slowly and deliberately – rushing leads to fabric tears and frustrated sighs.
Always cut from the bobbin side when possible, as it’s typically easier to access. Pull out loose threads in small sections rather than yanking entire seams at once.
Keep your seam ripper sharp for clean cuts that won’t snag delicate fabrics. The secret lies in understanding which threads to target first and mastering the gentle rocking motion that separates amateur unpickers from seasoned pros.
Table Of Contents
- Key Takeaways
- The Anatomy of a Seam Ripper
- How to Unpick a Seam
- Make Sure Your Seam Ripper is Sharp
- Take Your Time
- Start Where The Seam Isn’t Locked and Begin to Unpick
- If You Meet Resistance Use The Seam Ripper Some More
- Begin by Cutting The Bobbin Thread
- The Technique
- A Final Tip
- Frequently Asked Questions (FAQs)
- Conclusion
Key Takeaways
- Keep your seam ripper sharp – A dull blade snags and tears fabric instead of cutting cleanly through threads, so test sharpness regularly and replace or sharpen as needed.
- Work from the bobbin side when possible – Cut the bobbin thread first since it’s looser and easier to access, then gently pull the top thread to release tension.
- Cut every third or fourth stitch instead of each one – This saves time and reduces fabric damage while still allowing you to remove the seam effectively.
- Take your time and work in small sections – Rushing leads to torn fabric and mistakes, so use deliberate movements and remove loose threads as you go.
The Anatomy of a Seam Ripper
Understanding your seam ripper’s anatomy helps you unpick seams efficiently.
The pointed tip slides under stitches with precision, while the sharp blade cuts threads cleanly.
The safety ball prevents fabric damage during use.
An ergonomic handle provides comfortable control for extended unpicking sessions.
The metal composition guarantees durability and blade sharpness over time.
This unpicking tool’s design makes it superior to scissors for detailed seam work.
Each seam ripper part serves a specific purpose, transforming mistake correction from frustration into manageable repair work.
Many users prefer an ergonomic seam ripper for comfortable use, highlighting the importance of an ergonomic seam ripper for efficient and comfortable use.
How to Unpick a Seam
Now you’re ready to tackle those pesky stitches. Start by sliding your seam ripper’s sharp point under the thread, working in small sections to avoid fabric damage control issues.
Here’s your step-by-step approach:
- Position the pointed tip beneath individual stitches along the seam line
- Cut every fourth stitch instead of every single one for faster removal
- Lift and separate the fabric layers gently as threads loosen
- Remove bobbin threads from the underside using the ball-tipped end
- Clean residual bits with a lint roller for professional results
This unpicking tool technique works for most seam unpicking methods, whether you’re dealing with straight seams or need serged seam removal. Many sewers find a specialized seam ripper improves efficiency.
Make Sure Your Seam Ripper is Sharp
A dull blade transforms your trusty seam ripper into a fabric-tearing menace.
Sharp tools glide through threads cleanly, while dull ones snag and damage your precious projects.
| Sharpening Method | Best For | Technique |
|---|---|---|
| Steel wool | Light dulling | Gentle circular motions on blade |
| Bead reamer | Precision work | Carefully file cutting edge |
| Replacement | Cheap rippers | Buy new when sharpening costs more |
Test sharpness by cutting a single thread—it should slice cleanly without pulling.
Quality sewing tools like seam rippers need regular maintenance to unpick stitches effectively.
Consider using a dedicated sharpening tool to maintain your seam ripper.
Dull blade dangers include fabric tears and frustrating sewing sessions.
Replace your seam ripper every six months with heavy use, or sharpen high-quality models to extend their life.
A sharp sewing seam ripper makes removing stitches feel effortless.
Take Your Time
Against the backdrop of countless sewing mishaps, patience becomes your secret weapon when wielding a seam ripper.
A steady hand turns sewing mistakes into skillful practice sessions.
Rushing through the unpicking process often leads to torn fabric, damaged threads, or worse—starting over completely. Quality unpicking requires a steady hand and calm mind, transforming what feels like a setback into skillful practice.
Here’s why sewing patience matters when you remove stitches:
- Avoid Rushing – Moving too fast causes your seam ripper to slip and cut fabric instead of thread
- Prevent Mistakes – Taking time lets you see exactly where each stitch sits before cutting
- Fabric Protection – Slow, deliberate movements preserve delicate materials from accidental tears
- Quality Unpicking – Patient work means fewer thread bits left behind and cleaner seam lines
Remember, even experienced sewers make sewing mistakes. The difference lies in how you handle them. Your seam ripper works best when you let it do the work at its own pace, not yours.
Start Where The Seam Isn’t Locked and Begin to Unpick
You’ll find most seams have opened sections at the beginning or end where backstitching hasn’t reinforced the threads.
Start your unpicking work at these weaker points since the stitches come apart much easier than tackling heavily secured areas first.
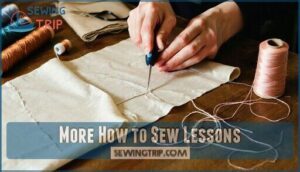
More How to Sew Lessons
Mastering seam ripper techniques opens doors to broader sewing skills.
Once you’ve conquered stitch removal, you’re ready to tackle Sewing Machine Basics and Hand Sewing Stitches with confidence.
Pattern Alterations become less intimidating when you know how to undo sewing mistakes easily.
Smart Fabric Selection paired with solid Project Planning means fewer errors requiring your seam ripper.
Each skill builds on the last – from removing stitches cleanly to creating professional finishes.
Your growing toolkit transforms sewing from guesswork into controlled craftsmanship.
Working With Different Fabrics
Different fabrics behave uniquely when you’re using a seam ripper. Delicate fabrics like silk need gentle handling—cut every third stitch to prevent fabric damage.
Knit fabrics stretch easily, so work slowly and avoid pulling. Thick fabrics like denim handle aggressive unpicking better.
Always check your thread tension first. Knowing how to unpick seams is essential for correcting errors.
- Cut fewer stitches on delicate materials to prevent tears
- Work methodically with knits to avoid stretching holes
- Use the red ball tip to protect fine fabric layers
- Check both seam sides for complete thread removal
- Keep your seam ripper sharp for clean cuts
If You Meet Resistance Use The Seam Ripper Some More
When your seam ripper hits a snag, don’t panic or resort to forceful unpicking.
Stay calm, work smart—your seam ripper works best when you let it lead the way.
Resistance causes usually stem from tightly locked stitches or blade dullness affecting your stitch removal progress.
Instead of yanking, which leads to fabric snagging, use your seam ripper more strategically.
Check if your blade needs sharpening.
A dull seam ripper creates more problems than it solves.
Sharp tools cut cleanly through stubborn threads without catching fabric fibers.
Work the resistant area from different angles.
Sometimes repositioning reveals hidden threads you missed.
Cut one or two stitches at a time rather than trying to slice through everything at once.
If standard seam removal techniques aren’t working, consider alternative tools like small embroidery scissors for precision work.
However, your trusty seam ripper usually handles the job when you’re patient.
Remember, this unpick tutorial isn’t about speed—it’s about preserving your fabric while defeating sewing resistance.
Take breaks if your hand gets tired.
Rushing leads to mistakes, and being patient is key to successful seam removal.
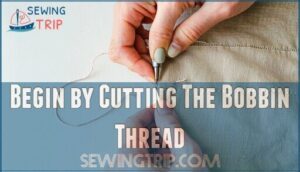
Begin by Cutting The Bobbin Thread
When you can’t pull threads apart easily, flip your fabric over to access the bobbin thread on the wrong side. This Hidden Thread Mastery approach gives you better control over stitch removal.
The bobbin thread sits looser than the top thread, making it your secret weapon for Underside Stitch Removal. Working from the fabric wrong side lets you target the exact thread causing problems. You’ll find Bobbin Thread Access much easier when you can see exactly where each stitch anchors.
Think of it like untying a knot – sometimes you need to approach from a different angle. Here’s your game plan for Loosening Seams First:
- Cut the bobbin thread every 4-5 stitches with your seam ripper’s pointed tip
- Gently pull the top thread from the right side to release tension
- Work in small sections to prevent fabric damage or thread tangling
- Keep your seam ripper sharp for clean cuts through stubborn threads
This method works especially well on thick fabrics or when dealing with a stubborn sewing error. The bobbin thread often holds everything together, so cutting it first makes unpicking seams much smoother.
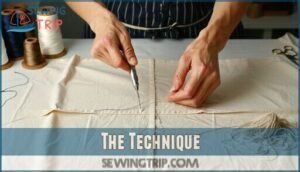
The Technique
Once you’ve cut the bobbinn thread, position your fabric flat with the seam facing up. This setup prevents accidental cuts and gives you clear visibility of your work area.
Start by identifying the needle thread versus the bobbinn thread – they often look different in tension or color. Use your seam ripper’s pointed tip to lift every third or fourth stitch rather than cutting each one individually. This gradual unpicking method saves time while protecting your fabric.
Keep the ball-tipped end facing down as you work. It acts like a tiny shield, preventing your seam ripper from slicing through delicate fabric fibers. When cutting stitches, apply gentle downward pressure only on the thread itself, not the fabric.
After removing a section of stitches, rotate your fabric to access stubborn threads from different angles. This fabric rotation technique helps you catch hidden bobbinn threads more easily. To guarantee a professional finish, consider employing various seam finish techniques after unpicking. Clean up loose thread bits every few inches using your fingers or a lint roller. This lint removal step keeps your workspace tidy and prevents threads from tangling around your seam ripper.
Work in small sections for best results when removing threads completely.
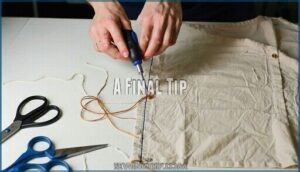
A Final Tip
Here’s your final tip that’ll make all the difference in your sewing unpicking journey. When you’re working with stubborn seams, try this game-changing approach: snip the needle threads close to the fabric surface first, then follow up with your seam ripper.
This technique works wonders on tightly woven materials. Patience Importance can’t be overstated – rushing leads to torn fabric and frustration.
Practice Makes perfect, so don’t expect mastery overnight. Fabric Matters too; delicate silks need gentler handling than sturdy cotton. Lighting Matters more than you’d think – good visibility prevents mistakes.
Stay Organized by keeping a small container nearby for thread scraps. Your seam ripper becomes an extension of your hand with experience.
Sewing seam ripper mastery comes from understanding that unpicking sewing isn’t failure – it’s problem-solving. This sewing technique transforms mistakes into learning opportunities, making you a better sewist overall.
Frequently Asked Questions (FAQs)
How do you unpick a sewing machine?
Use your seam ripper’s pointed tip to lift stitches every few intervals, then slide the sharp blade underneath to cut threads.
Work slowly from the wrong side, removing loose threads as you go, using your seam ripper.
Why is unpicking important in sewing?
Mistakes happen, threads tangle, seams go crooked. You’ll need unpicking skills to fix errors without damaging fabric. It saves projects, prevents frustration, and helps you achieve professional-looking results every time.
How do you unpick fabric?
Start by inserting your seam ripper’s pointed tip under the stitches you want to remove.
Slide it along to cut the threads, then gently pull out the loose pieces with your fingers, using your fingers.
How to unpick sewing stitches?
Practice makes perfect when unpicking stitches.
Use your seam ripper’s pointed tip to cut every few stitches, then gently pull threads away.
Work slowly from the wrong side to avoid fabric damage, using your seam ripper carefully.
How do you unpick a hem seam?
Insert your seam ripper’s pointed tip under hem stitches every few inches, then slide along to cut threads. Pull fabric apart gently to open the seam completely.
When should you unpick a seam?
Ninety percent of sewers will make mistakes requiring seam removal during projects.
You’ll need to unpick seams when stitches are crooked, tension’s wrong, measurements are off, or you’ve sewn wrong pieces together, which can be considered complete concepts for improvement.
Can you unpick stitching?
Yes, you can unpick stitching using a seam ripper or embroidery scissors.
Insert the pointed tip under stitches, cut every few threads, then gently pull them out to avoid fabric damage.
Can I unpick machine embroidery or decorative stitches?
Patience is a virtue, especially with decorative stitches.
You can unpick machine embroidery, but it’s tricky work.
Use your seam ripper’s pointed tip carefully around dense threads.
Work slowly to avoid fabric damage.
How do I remove serged or overlock seams?
Cut needle threads every few stitches, then pull the looper threads to unravel the entire serged seam. Work slowly to prevent fabric damage and remove loose threads afterward.
What should I do with leftover thread bits?
Clean sweep: use a lint roller to quickly remove scattered thread bits from your fabric and workspace. You can also use tape or a vacuum cleaner for stubborn pieces.
Conclusion
Ready to master how to unpick sewing like a pro? You’ve learned the essential techniques that separate frustrating rip-fests from smooth seam removal.
Remember to keep your seam ripper sharp, work from the bobbin side, and take your time with each stitch.
The gentle rocking motion becomes second nature with practice. These skills will save countless projects and boost your confidence at the sewing machine.
Happy unpicking!


