This site is supported by our readers. We may earn a commission, at no cost to you, if you purchase through links.
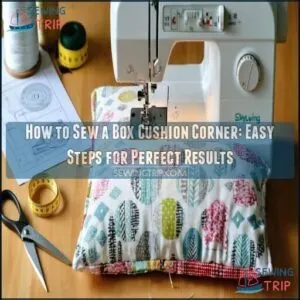
Measure twice, cut once!
Mark the corner squares on each fabric piece, then snip them out carefully.
Pin the edges together with the fabric’s right sides facing each other.
Sew along the edges with a straight stitch, stopping at the cut corners.
For crisp corners, fold the side seams together, lining them up perfectly, and sew straight across to form the box shape.
Trim excess fabric and press for a clean finish.
Ready to elevate your skills? Try adding piping for that fancy custom look!
Table Of Contents
- What Are Boxed Cushion Corners
- How to Sew a Box Cushion Corner
- Materials Needed for Sewing Boxed Corners
- Measuring and Cutting Fabric for Boxed Seams
- Sewing Boxed Corners – Method 1 (Easy Way)
- Sewing Boxed Corners – Method 2 (French Seams)
- Alternative Corner Techniques and Finishing
- Attaching Finished Cushion Cover to Cushion Form
- Troubleshooting and Tips for Boxed Cushion Corners
- Frequently Asked Questions (FAQs)
- Conclusion
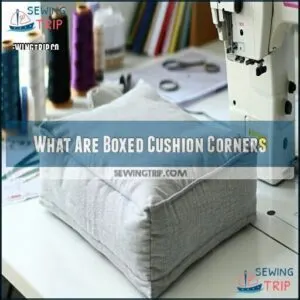
What Are Boxed Cushion Corners
Boxed cushion corners are the squared-off edges that give cushions a structured, refined look.
They’re designed to create clean lines and increase durability, making them perfect for everything from seat pads to decorative pillows.
Definition and Purpose
Boxed corners are a clever sewing technique that brings cushions to life by transforming flat fabric into a structured, three-dimensional design.
They’re perfect for cushions, throw pillows, and chair pads. Here’s why boxed corners matter:
- Add depth and structure with ease.
- Enhance cushion durability.
- Create professional-looking results fast.
- Versatile for various fabric choices and designs.
Mastering seam allowance techniques is essential for achieving crisp, professional corners.
It’s sewing mastery made simple!
Types of Boxed Corners
Great sewing projects start with smart corner styles. Box corner sewing offers various options, each adding a unique twist to your design.
Some popular choices include:
- Inward Folded Corners: Great for structured designs.
- Outward Extended Corners: Perfect for bold patterns.
- Diagonal Seam Corners: Ideal for sleek finishes.
- French Seam Box Corners: A polished option for seamless edges.
Experiment with these sewing techniques to match your fabric choices and nail every boxed seam.
Advantages and Applications
Beyond making corners more attractive, boxed cushion corners offer practical benefits you’ll appreciate.
They create depth and structure in your projects, saving fabric compared to traditional methods.
Sewing box corners transforms flat pieces into professional-looking 3D items perfect for seat cushions, throw pillows, and patio furniture.
This efficient technique gives your handmade items that store-bought quality while letting you customize sizes exactly to your needs.
How to Sew a Box Cushion Corner
You’ll transform your flat cushion into a professional three-dimensional piece with properly sewn box corners that sit perfectly on your furniture.
With the right tools and some careful measuring, you can create those crisp, squared-off edges that make your cushion look store-bought rather than homemade, which is achievable by following the right steps to ensure professional results.
Preparing Materials and Tools
Now that you understand what box cushion corners are, let’s gather everything you’ll need.
For sewing box cushion corners properly, you’ll need reliable measuring tools (tape measure, clear ruler), sharp fabric scissors or a rotary cutter with mat, straight pins or clips, and a sewing machine with appropriate thread.
Choose fabric weight suitable for your project and have chalk or fabric markers handy for marking. Don’t forget a seam ripper—even experienced sewers make mistakes sometimes!
To achieve professional results, understanding the correct sewing machine settings is essential for a successful project.
Measuring and Cutting Fabric
Now that your tools are ready, getting your fabric measurements right makes all the difference in box cushion corners.
Precision cutting requires:
- Accurate measurements of your item plus seam allowances
- Square cutouts from all four corners (size determines boxiness)
- Double-checking before making any cuts
For perfect corner squares, use sharp scissors or a rotary cutter on medium-weight fabrics that hold their shape well. To achieve professional results, mastering sewing techniques is essential for a polished finish.
Choosing The Right Sewing Method
Now that you’ve cut your fabric, it’s time to pick a sewing method that fits your project.
Box corner sewing techniques typically fall into two categories: the beginner-friendly easy method or the polished French seams approach.
Your choice depends on fabric selection, time available, and desired finish. Medium-weight fabrics work best for most corner styles.
Remember, slow stitching with appropriate stitch options guarantees perfect seam allowance and professional-looking boxed corners.
Materials Needed for Sewing Boxed Corners
You’ll need the right materials to create perfect boxed corners for your cushion project.
Having fabric scissors, pins, measuring tape, fabric, and a sewing machine ready before you start will save you time and frustration, as it ensures you have all the necessary tools to complete the task efficiently, with perfect boxed corners being the ultimate goal.
Fabric Selection and Requirements
Now that you’ve mastered the basics of box cushion corners, selecting the right fabric is your next essential step.
For sewing box corners that hold their shape and last, focus on these fabric qualities:
- Weight: Medium-weight fabrics like cotton canvas or upholstery material provide ideal structure
- Texture: Tightly woven fabrics create cleaner corners than loosely woven options
- Durability: Fabrics with some synthetic content resist wear better than pure naturals
Material costs vary, but investing in quality fabric saves headaches later when your corners maintain their crisp appearance.
When choosing fabrics, consider the benefits of cotton canvas for a durable and long-lasting result.
Essential Tools and Equipment
Seven essential tools make box cushion corner sewing a breeze.
You’ll need a reliable sewing machine for sturdy seams, sharp fabric scissors for clean cuts, and plenty of pins to secure fabric layers.
Don’t forget measuring tape for precise dimensions, rotary cutters with an acrylic ruler for straight lines, and tailor’s chalk for marking.
These precision cutting tools transform challenging corners into professional-looking results.
Optional Materials and Accessories
While basic tools get the job done, these optional extras elevate your box cushion sewing projects:
- Fabric stabilizers that prevent stretching and keep corners crisp
- Contrasting thread colors for decorative topstitching that pops
- Various batting options for customized cushion firmness
- Interfacing types suited to different fabric weights
Smart accessories like corner turning tools, piping feet, and washable fabric markers make sewing box corners easier and more precise. They’re worth adding to your toolkit for professional-looking results.
Having the right sewing machine accessories can greatly improve the overall quality of your sewing projects.
Measuring and Cutting Fabric for Boxed Seams
You’ll need to measure your fabric correctly to create professional-looking boxed seams that give your cushion that perfect three-dimensional shape.
Accurate cutting, especially when removing corner squares, makes all the difference between cushions that look handmade and those that look store-bought.
Calculating Seam Allowance and Size
To achieve perfect box corners, precise seam allowance calculation is essential.
Measure your cushion dimensions, then add 1/2 to 1 inch extra for flexibility. For cushions, measure from back seam to front seam, double that number, and add 1 inch for required fabric length.
Always measure twice, cut once for accuracy. A seam allowance tool can help maintain consistency.
When calculating corner size, consider your cushion’s width, height, and depth to determine proper fabric requirements. To guarantee accurate fabric calculation, understanding fabric width rules is also vital for a successful project.
Cutting Corner Squares for Symmetry
Now that you’ve calculated your measurements, it’s time for precision work.
Cut corner squares with perfect symmetry for professional-looking boxed corners. When cutting corner squares, make certain each one matches exactly in size.
Use sharp scissors or a rotary cutter for clean edges. For heavier fabrics, cut slightly larger squares to accommodate the extra bulk.
Mark your squares with chalk before cutting to maintain consistency. Remember, uneven corner squares will result in lopsided cushions—accuracy here determines your final product’s quality. Always ensure perfect symmetry for a professional look, and remember that clean edges are crucial for the final appearance.
Interfacing for Flimsy Fabric
Flimsy fabrics can transform into sturdy contenders with the right interfacing.
Stabilizing lightweight materials guarantees your box corners maintain their shape and structure.
- Choose fusible interfacing that matches your fabric weight (light, medium, or heavy)
- Cut interfacing slightly smaller than your fabric pieces, accounting for seam allowance
- Apply with an iron using medium heat and steady pressure
Fabric stabilizers are your secret weapon for professional, crisp corners that won’t sag or droop.
Sewing Boxed Corners – Method 1 (Easy Way)
You’ll love this easy method for creating boxed corners that transforms flat fabric into perfectly structured cushions.
With just a few simple folds and straight stitches, you can create professional-looking results even if you’re new to sewing.
Folding Fabric and Sewing Side Seam
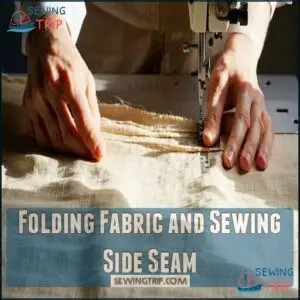
Consistently folding fabric properly is the foundation of perfect box cushion corners.
To start, align your fabric edges with right sides facing together, then pinch the corner to form a triangle, and pin layers securely.
Check that your corner alignment creates a 90-degree angle before sewing, and set your machine to a straight stitch.
Sew along the seam allowance line, backstitching at both ends, to ensure your corners are secure.
This simple technique guarantees your boxed corners will be tight, symmetrical, and professional-looking.
Finishing Raw Edges and Enclosing Lining
After securing your side seams, raw edges need proper finishing to prevent fraying and guarantee your box cushion corners look professional.
For clean, durable box cushion corners:
- Trim excess seam allowance to 1/4 inch for less bulk at corners
- Apply a zigzag stitch along raw edges or use a serger for fabric stabilization
- Press seams open or to one side depending on your corner reinforcement needs
When enclosing lining, place it wrong sides together with your main fabric before corner formation. This seam concealment technique keeps everything neat while maintaining the structure of your sewing corners tight and professional.
Edge finishing transforms your project from homemade to handcrafted.
Adding Contrast Piping for Professional Finish
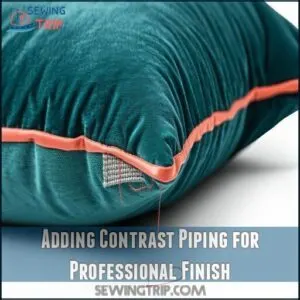
Now that your edges are finished, let’s add piping for that professional touch.
Select decorative welt cord and complementary fabric strips to create eye-catching details.
Position the piping between fabric layers along seam lines, securing with pins, and sew close to the cord using a zipper foot for precision.
This simple addition transforms basic box cushion corners into designer pieces with clean, defined edges.
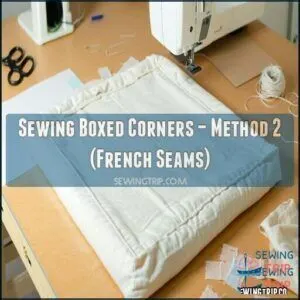
Sewing Boxed Corners – Method 2 (French Seams)
You’ll create professional-looking cushions when you master the French seam method for boxed corners.
This technique begins with wrong sides together and creates a fully enclosed seam that hides all raw edges for a cleaner, more polished finish.
Aligning Cut Edges and Sewing Wrong Sides Together
Now that you’ve mastered the basic method, let’s explore French seams for a truly professional finish.
This boxed corner technique creates professional looking items.
Start by placing your fabric with wrong sides together—opposite of traditional sewing. Match your cut edges precisely, keeping fabric tension even.
Pin at strategic points for stability.
Sew with a 1/4" seam allowance along each corner edge. This technique creates beautifully clean, boxed cushion corners that look store-bought rather than homemade.
Trimming Excess and Turning Right-Side Out
Precision makes perfect when turning your French seams right-side out.
After sewing, your cushion corners need careful attention to shine:
- Trim excess fabric to 1/8" from stitching line to reduce bulk
- Clip corners at 45° angles without cutting through stitches
- Turn carefully using a point turner or chopstick
- Press seams flat with an iron set to the appropriate fabric temperature
- Check seam allowance consistency around all corners
This attention to detail transforms your sewing project from homemade to professionally crafted.
Diagonal Box Corners Variation
Transform your cushions with the diagonal box corners variation after mastering basic French seams.
This technique creates sharper edges by cutting fabric on the bias and calculating corner seam allowances precisely. When matching diagonal corners, verify symmetry for professional results.
Press diagonal seams flat for that crisp finish professionals achieve. Unlike standard box corner types, diagonal seam corners distribute tension evenly, preventing puckering.
You’ll appreciate how this method elevates your sewing box corners with minimal effort. To achieve a polished look, understanding sewing tutorial for french seams is essential for a neat finish.
Alternative Corner Techniques and Finishing
You’ll discover several specialized techniques beyond basic methods that can elevate your cushion corners to professional quality.
Try mitered corners for a flat, polished finish or use safety pins to preview your box corners before committing to the final stitch.
Mitered Corners for Flat Finish
Many skilled crafters choose mitered corners for their stunning box cushion projects.
These corners create a flat, professional finish without bulk.
- Fabric Grain Alignment: Position your fabric with grain lines perpendicular to achieve perfect mitered corners
- Precise Angle Cutting: Cut fabric at exactly 45-degrees using a sharp rotary cutter
- Seam Pressing Techniques: Press each fold firmly before stitching to maintain crisp edges
- Finishing Mitered Edges: Topstitch 1/8" from the edge for durability and a polished look
You’ll love how these square corners elevate even simple sewing projects!
Previewing Box Corners With Safety Pins
Safety pins are your best friends when previewing box corners before permanent stitching.
When measuring your fabric, precision transforms ordinary cushions into professional home decor that lasts for years.
This simple technique helps you visualize the final result and catch alignment issues early.
Try these pinning techniques for perfect corner symmetry:
- Place pins at each corner intersection point, securing fabric layers
- Gently manipulate fabric to check for even tension across seams
- Test different pin placements to find ideal corner depth
This quick preview step saves frustration later and guarantees your box cushion corners will have professional-looking symmetry with minimal effort.
Additional Finishing Methods and Tips
Now that you’ve used safety pins for previewing, let’s elevate your cushion with these finishing touches:
Technique
Edge Binding
For truly polished box cushion corners, try decorative stitching along edges or add piping application for definition.
Cording insertion creates structure, while bias binding prevents fraying.
Attaching Finished Cushion Cover to Cushion Form
You’ll need to secure your beautifully sewn box cushion cover to the form to complete your project.
With several closure options available including zippers, buttons, Velcro, or decorative ties, you can choose the method that works best for your specific cushion needs.
Options for Closure (Zipper, Buttons, Velcro, Ties)
After perfecting your box cushion corners, you’ll need a way to close your cover. Your choice matters for both function and style.
You can find a variety of cushion cover zipper options online.
Here are three closure options that work beautifully with boxed corners:
- Invisible zippers: Hide along seams for a clean look
- Buttons or snaps: Add decorative elements while securing firmly
- Velcro or ties: Offer easy removal for washing
Match your closure technique to your fabric weight – heavier fabrics need stronger closures like zippers, while lighter materials work well with ties.
Hiding Velcro Closure for Professional Look
I’ll create an improved, detailed 75-word section on hiding Velcro closures for a professional look.
Velcro’s convenience often comes with a visual cost in your box cushion corner.
To create an invisible closure, position the Velcro strips ½-inch from the fabric edge, then fold and press a clean fabric overlap that completely conceals them.
Use precise topstitching along this folded edge for seam concealment.
For truly professional results, match thread color exactly to your fabric.
Consider adding decorative piping or trim nearby to draw the eye away from the closure area, transforming functional fasteners into a seamless design element with a professional look.
Securing Cover With Even Tension
With your Velcro closure hidden away, let’s focus on securing your cushion cover with even tension.
Start at the corners and work your way around, distributing fabric tension equally across all sides.
Smooth as you go, preventing cover slippage by gently tugging the fabric. For a consistent cover fit, check that each box cushion corner sits flush against the form.
This even tension technique guarantees your cushion maintains its crisp shape.
Troubleshooting and Tips for Boxed Cushion Corners
You’ll encounter a few bumps when sewing boxed cushion corners, but don’t worry—even seasoned crafters sometimes end up with uneven seams or wobbly corners.
With practice and the right techniques, you’ll transform those frustrating corner challenges into perfectly shaped, professional-looking cushions that you can proudly display in your home.
Common Mistakes and Solutions
After securing your cushion cover, you might still encounter a few hiccups.
Here are three common box cushion corner problems and their fixes:
- Uneven seams – Pin thoroughly before stitching and use consistent pressure on the foot pedal
- Fabric puckering – Iron seams before continuing and reduce presser foot pressure
- Misaligned corners – Measure twice, mark clearly, and match seam intersections perfectly
Don’t worry if your first attempt isn’t perfect—even experienced sewers troubleshoot these issues!
Optimizing Corner Size and Shape
Now that you’ve learned to fix common box cushion corner mistakes, let’s fine-tune your corner size and shape.
The perfect box cushion corner starts with proper measurement. For best results, cut square corners at half your cushion’s height.
Your fabric weight matters too—heavier fabrics need smaller corners, while lighter fabrics can handle larger cuts. Check your seam allowance carefully, as it directly affects your corner appearance. A 1-inch square creates a 2-inch boxed corner.
Frequently Asked Questions (FAQs)
What Kind of Fabric Should I Use for Boxed Cushion Corners?
Go for medium-weight fabrics like cotton or linen—they’re sturdy, easy to work with, and hold their shape well.
Avoid slippery or stretchy materials; they’ll frustrate you more than help.
Durable, structured fabric is your best friend, and going for medium-weight fabrics will make a significant difference in your work.
How Do I Attach the Finished Cushion Cover to the Cushion Form?
Think of slipping on a perfectly fitted jacket—align your cushion form with the cover, tuck it snugly inside, then zip or secure the closure.
Smooth edges gently, ensuring even distribution for that polished, cozy look.
How Can I Hide the Velcro Closure on My Cushion Cover?
Tuck the Velcro strip just inside the seam or overlap fabric edges to create a flap that hides it.
Adding matching fabric or trim on top can also disguise the closure for a polished look.
What Size Should I Cut the Squares for Method 2 Boxed Corners?
Precise preparation prevents problems.
Cut a square equal to your cushion’s desired corner height plus seam allowance.
For example, if you want a 2-inch corner, cut 5-inch squares, ensuring crisp, clean edges.
Are Boxed Corners Suitable for a Bag or Purse Project?
Boxed corners work great for bags or purses.
They create structure, adding depth and shape. Plus, they’re versatile for various fabrics.
A sturdy fabric and precise corners will elevate your design effortlessly. Happy sewing!
What is the formula for boxed corners?
Creating boxed corners is like folding paper for perfect origami.
Measure a square on your fabric’s corners, matching your desired finished size.
Double the square’s side length to calculate the final corner depth for precision.
How to sew square corners?
To sew square corners, fold the fabric at the corner to form a triangle, align the edges, and sew straight across.
Backstitch for strength, trim the excess, and voilà—perfectly squared corners!
How do you staple a cushion corner?
To staple a cushion corner, pull the fabric tightly, fold it neatly like wrapping a gift, and secure with staples.
Work symmetrically, adjusting folds as needed for smooth edges.
Trim excess fabric for a clean finish.
How to sew a corner edge?
Who knew corners could be so stubborn?
To sew one, fold the fabric edges together with right sides facing in, pin, and stitch along the seam line.
Trim, press, and turn it for crisp perfection.
How do you sew box corners?
Start by marking and cutting squares at each corner of the fabric.
Pinch the fabric to align seams, then sew along the edge with a seam allowance.
Conclusion
Picture yourself sitting on a freshly sewn box cushion, edges crisp, corners sharp, and perfectly snug.
You’ve taken the time to measure, cut, and sew with care, following each step to master how to sew a box cushion corner.
Whether you’re crafting for home decor or leveling up your DIY skills, these methods guarantee a professional finish.
Don’t be afraid to add piping or experiment with closures, with practice, flawless cushions are at your fingertips!
- https://www.wikihow.com/Sew-Box-Corners
- https://thehomesihavemade.com/how-to-sew-boxed-corners/
- https://thecraftyquilter.com/2023/02/how-to-box-the-corners-of-a-cushion-or-pillow/
- https://sewingtrip.com/how-to-sew-a-box-cushion-corner/
- https://www.housebythebaydesign.com/sew-perfect-fit-box-cushion-covers/

