This site is supported by our readers. We may earn a commission, at no cost to you, if you purchase through links.
Start by cutting fabric to match your clasp’s size, adding interfacing if the material needs extra stability.
Fold the fabric edges inward for a clean finish, then sew a zigzag stitch to secure each side.
Attach the hook side first by sliding it into the fabric loop and stitching it snugly, then repeat with the eye side.
Go slow to keep everything aligned—no one loves a wonky clasp!
For a pro touch, stitch around the edges for durability.
Ready for the next step?
Let’s talk finishing!
Table Of Contents
Key Takeaways
- You’ll need the right materials for durability – Choose woven fabrics like silk charmeuse or polyester satin with iron-on interfacing, plus polyester thread and hook-and-eye hardware from bra extenders or craft stores.
- Precision in measurements prevents headaches later – Follow industry standards with 3/4" spacing between hooks and 1/2" from the last hook to the clasp edge, cutting your back piece at 3.5" wide and eye strips at 1.5" wide.
- Master the zigzag stitch technique for secure attachment – Use zero stitch length with medium-high tension to attach hooks and eyes through their metal loops, working slowly to maintain proper alignment throughout the process.
- Professional finishing makes all the difference – Add interfacing to prevent stretching, use invisible mattress stitching along edges, and apply a finishing strip to cover raw edges for a store-bought appearance.
Bra Clasp Basics
You’ll discover that creating your own bra clasp isn’t just about saving money—it’s about achieving that perfect fabric match and custom fit that makes you feel like a lingerie designer.
Handmade clasps transform you from shopper to designer—one perfectly matched stitch at a time.
While this project demands patience and precision, the satisfaction of mastering this fiddly technique will have you wondering why you ever settled for store-bought hardware.
Expect to spend as much time on the clasp as the entire bra, but the outcome will be worth it, giving you a sense of accomplishment and a custom fit that is hard to find with mass-produced lingerie.
DIY Bra Clasp Construction
Creating your own bra clasp opens doors to complete clasp customization and perfect fabric matching that store-bought options can’t deliver.
You’ll push your sewing machine limits during this time-intensive project—expect several hours for your first attempt.
While the process tests your patience with fiddly work, the clasp durability and personalized fit make this challenging bra clasp sewing adventure worthwhile.
Materials and Tools Needed
The right sewing supplies make all the difference between a clasp that lasts and one that fails.
You’ll need woven fabric for stability, iron-on interfacing for structure, and polyester thread for strength.
Source hook and eye hardware from cheap bra extenders or bridal shops.
Essential tools include sharp scissors, pins, ruler, iron, sewing machine, and awl.
Industry Standards for Bra Clasps
Understanding industry standards helps you create professional-quality bra clasps that’ll last.
Standard hook spacing measures 3/4 inch between each hook, with 1/2 inch from the final hook to clasp edge.
Most bra clasp sizes follow HE standards—HE06 for 3×1 configurations measures 54mm x 19mm.
Quality closure strength depends on proper material regulations and hook spacing.
These bra clasp dimensions guarantee your homemade hardware rivals store-bought options.
Sewing a Bra Clasp
Now that you’ve got your materials ready, let’s get your hands dirty with the actual sewing process. Building a bra clasp isn’t rocket science, but it does require some patience – think of it like assembling a tiny puzzle that your future self will thank you for.
The key to clasp durability lies in your sewing precision and machine tension settings. Start by positioning your hook alignment carefully, measuring that industry-standard 3/4" spacing between each hook. When you sew bra closure components, eyelet spacing becomes critical for proper function.
Here’s your roadmap for bra clasp attachment success:
- Set your machine tension to medium-high for sturdy stitches
- Use a zigzag stitch with zero length for securing metal pieces
- Position hooks 1/2" from the clasp edge for ideal grip
- Double-check your bra clasp sewing steps before committing to fabric
- Test your how to attach clasp technique on scraps first
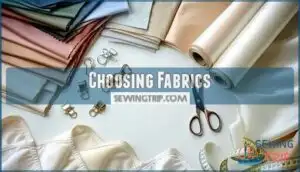
Choosing Fabrics
You’ll want to pick fabrics that won’t stretch out of shape under pressure, since your clasp needs to handle the constant pull and release of daily wear without turning into a floppy mess.
Think sturdy wovens like cotton, polyester satin, or silk that’ll maintain their structure, plus you’ll need interfacing to keep everything lying flat against your skin.
Instead of bunching up like a frustrated accordion, the right choice of fabric and addition of interfacing will ensure your clasp remains functional and comfortable, making daily wear a pleasant experience.
Woven Fabrics for Stability
Success in bra clasp attachment hinges on your fabric weave choice.
You’ll need woven fabrics like stretch silk charmeuse or polyester satin for structural integrity. Skip knits entirely—they’ll compromise your bra hardware installation.
Test stretch resistance by pulling fabric corners; minimal give means maximum durability testing results.
| Fabric Type | Fiber Content | Best Use |
|---|---|---|
| Silk Charmeuse | Silk + Spandex | Luxury bra back closure |
| Polyester Satin | 100% Polyester | Budget-friendly option |
| Stretch Silk | Silk blend | Premium stability |
| Bra Tulle | Nylon mesh | Reinforcement layer |
Interfacing for Flatness
Interfacing is your secret weapon for a flat, stable bra clasp that won’t bubble or wrinkle.
Choose fusible interfacing over sew-in for easier application and better layering techniques. Apply at medium heat to prevent bubbling, covering full pieces except seam allowances.
For flimsy fabrics like silk, add sheer cup lining as interlining for extra support during bra hardware installation.
Consider using specialized bra stabilizers for enhanced support.
Thread Selection for Strength
Once you’ve stabilized your fabric, choosing the right thread becomes your next power move.
Polyester thread beats nylon for bra clasp sewing—it’s stronger and won’t break down over time.
Match your thread thickness to your fabric weight, and don’t skimp on stitch density around stress points.
For the best results, consider using specialized sewing threads to ensure quality thread finishes that prevent fraying and guarantee your seam reinforcement holds up through countless washes.
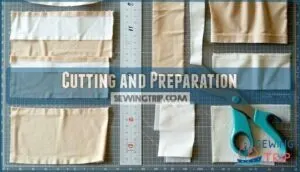
Cutting and Preparation
Before you start cutting fabric, you’ll need to calculate your clasp height using the industry standard of 3/4" spacing between each hook, plus an extra 1/2" from the last hook to the edge.
Once you’ve got your measurements down, cut your back piece at 3.5" by your calculated height plus 1", your eye strips at 1.5" by height plus 1", and your finishing strip at 2" by height plus 1".
Then apply interfacing to everything except the 1/2" seam allowances.
Determining Clasp Height
Now that you’ve chosen your fabrics, measuring your clasp height correctly sets the foundation for proper bra clasp fitting.
The magic number depends on your hook count and bra band length. Here’s your measurement blueprint:
- Hook Spacing: Follow industry standards with 3/4" between each hook for ideal bra clasp positioning
- Edge Distance: Keep 1/2" from your last hook to the clasp edge
- Hook Count: Factor in whether you’re using 2, 3, or 4 hooks for clasp customization
- Band Compatibility: Match your clasp height to your specific bra band length requirements
Cutting Fabric Pieces
Once you’ve calculated your clasp height, grab those sharp scissors and get ready to cut.
You’ll need three pieces: a back piece measuring 3.5" by your height plus 1", eye strips at 1.5" by height plus 1", and a finishing strip at 2" by height plus 1".
Accurate cuts depend on specialized cutting instruments.
Pay attention to fabric grain and maintain piece symmetry for professional results.
Interfacing and Folding Fabric
With your fabric pieces cut perfectly, it’s time to stabilize them for a professional finish.
Iron-on interfacing works best since it creates flatness against your body while preventing stretching during wear.
- Choose interfacing types that match your fabric weight – lightweight for silk, medium for polyester
- Follow fabric grain direction when applying interfacing to maintain proper drape and structure
- Master pressing techniques with steady heat and pressure for bubble-free adhesion
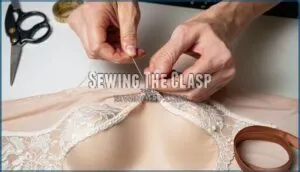
Sewing The Clasp
Now you’ll tackle the most pivotal part where precision meets patience—actually sewing your bra clasp together.
This step requires steady hands and careful attention since you’re working with tiny metal pieces that can easily slip, but don’t worry, even seasoned sewers find this part a bit tricky at first, as it demands precision.
Attaching Eyes to The Clasp
Before diving into the tricky business of securing bra eyes, position each eye 3/4" apart using your small ruler for proper eye spacing.
Use zigzag stitching with zero stitch length, securing eyes through their metal loops.
Apply your eye strip application carefully over the attached hardware, then finish with precise hand stitching along edges for your bra clasp tutorial success.
Sewing Hooks to The Clasp
Now you’ll tackle the hook side, which requires different finesse than the eye attachment. Securing hooks demands precision since they’ll bear the most stress when you’re fastening your bra.
Here’s your hook placement strategy:
- Position hooks 3/4" apart with 1/2" from clasp edge for proper hook alignment
- Use zigzag stitch through middle and base loops for reinforcement stitching
- Set stitch length to zero for maximum durability
- Slide fabric under hooks before final stitching
- Offset back edge 1/8" for easier bra attachment
Assembling The Clasp
Now comes the tricky part – bringing your hook and eye sides together like puzzle pieces.
Aligning the hook and eye sides feels like solving a tiny puzzle—precision is key to a seamless, professional finish.
Position your bra clasp with proper clasp alignment, ensuring hook direction points toward the eyelet spacing.
Check fabric tension remains even throughout assembly, and maintain stitch consistency as you carefully align both sides.
This step separates amateur attempts from professional-looking bra closures that’ll actually work smoothly, and is crucial for a well-made bra.
Bra Clasp Types
You’ll encounter three main clasp styles when creating your DIY bra, and choosing the right one can make or break your project’s success.
Whether you’re working with a single hook for lightweight bralettes or multiple hooks for fuller support, understanding each type’s construction quirks will save you from that "Why won’t this close properly?" moment we’ve all experienced with poorly fitted bras, which can be a result of poorly fitted design.
Single Hook and Eye Closures
Single hook and eye closures work perfectly for lightweight bras or garment applications where you need minimal bulk.
You’ll find these simple bra clasp options sewn directly onto fabric, often positioned above zippers for reinforcement stitching.
When sewing lingerie clasps, verify fabric compatibility by choosing stable materials, and consider the closure placement flexibility, making them ideal for delicate bra closures requiring precise positioning.
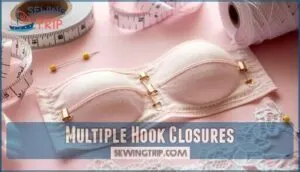
Multiple Hook Closures
When upgrading from single clasps, multiple hook closures become your go-to for added support and closure durability.
These bra clasp types feature two or three hooks spaced according to industry standards, making them perfect for fuller busts.
The strategic closure placement distributes tension evenly across your band, while custom closures let you match hook spacing to your specific needs for superior sewing lingerie clasps results.
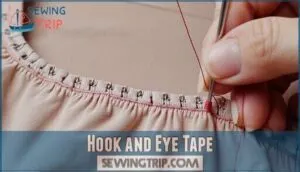
Hook and Eye Tape
Hook and eye tape brings continuous closures to your sewing arsenal.
This long fabric strip houses multiple hooks and eyes, making it perfect for historical garments and bulk applications.
You’ll find it invaluable for:
- Industrial uses in corsetry and costume design
- Closure alternatives for longline bras requiring extended support
- Bra clasp styles demanding seamless construction
It’s your go-to for professional-grade projects.
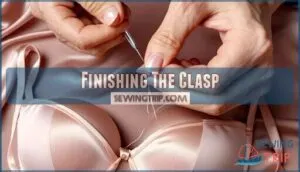
Finishing The Clasp
You’re almost at the finish line, but this final step separates amateur work from professional-quality results that’ll make your friends wonder if you secretly moonlight as a lingerie designer.
The finishing touches require patience and precision, but they’re what transform your handmade clasp from "clearly homemade" to "wait, did you actually buy this somewhere fancy?
Hand Stitching for Invisibility
Perfect invisibility requires mastering the mattress stitch for your bra clasp edges.
You’ll thread your needle with matching thread, maintaining consistent thread tension while working along the upper and lower seams.
Choose a sharp, fine needle for precise stitch placement between fabric layers.
This creates invisible seams that disappear completely against your skin, making your hook and eye closure look professionally finished.
Adding a Finishing Strip
Now you’ll add your finishing strip—the final layer that gives your hook and eye closure that polished, store-bought look.
Cut your strip width to match your clasp height plus seam allowances.
Your fabric choice here matters; use the same material as your bra for seamless integration.
Fold the strip with a 1/2" seam, then position it over your assembled clasp to cover all raw edges and stitching lines, achieving a professional finish.
Tips for a Professional Finish
Your finishing strip sets the stage for true craftsmanship.
Master invisible stitching by keeping your mattress stitch tension consistent—nobody wants lumpy edges against their skin.
Test your fabric choice on scraps first, because symmetry perfection demands practice.
Check clasp durability by gently tugging each connection point.
Remember, edge finishing separates amateur hour from professional-grade bra clasp replacement work.
Frequently Asked Questions (FAQs)
How to fix a clasp on a bra?
Picture the clasp hanging by a thread—don’t worry, it’s fixable!
Grab a needle, matching thread, and stitch firmly through the fabric loop and metal clasp, securing snugly.
What to use instead of a bra clip?
You could use tiny safety pins, snapping buttons, or sew elastic loops with hooks onto bra bands.
Even ribbon works in a pinch!
Just make certain it’s secure – no one likes a wardrobe malfunction!
How do you put on a bra strap clip?
Slide the clip onto the strap, positioning it in the middle of your back.
Gather both straps together, loop them through the clip, and adjust for comfort.
It’s a cinch—literally and figuratively!
How much fabric do I need to make a bra clasp?
You’ll need about 1/4 yard of fabric to make a bra clasp.
It’s a small piece, but choose sturdy fabric like polyester or silk with proper interfacing to stabilize it for durability and comfort.
How do I know if the clasp loop width is correct?
When the shoe fits, you’ll feel it—check the loop width by sliding your hooks through.
They should glide easily but stay secure.
If they’re squeezing in or wobbling, tweak the fit slightly!
What are some tips for making adjustable bra straps?
Use webbing tape or grosgrain ribbon for durability.
Add slider adjusters from old bras or hardware stores.
Position them 2-3 inches from shoulders.
Test elasticity—straps shouldn’t stretch more than 25% to maintain proper support and comfort.
Are there any alternatives to using a regular bra clasp?
Don’t put all your eggs in one basket—you’ve got options.
Try front closures between cups, elastic pull-on styles without clasps, or hook-and-eye tape for vintage looks.
Each offers unique benefits for different preferences.
Is it difficult to sew the bra clasp?
Sewing a bra clasp is definitely challenging and time-consuming.
You’ll spend hours on fiddly work that pushes your machine’s limits.
It’s slow, requires precision, and honestly takes as much time as the entire bra itself, which is a time-consuming process.
Can bra clasps accommodate adjustable strap attachments?
Think of bra clasps as the foundation’s backbone—they’re typically separate from adjustable strap attachments.
You’ll need to add D-rings or sliders to your bra’s shoulder straps independently for that adjustability feature.
How to repair a broken bra clasp hook?
Broken bra hook got you down?
Don’t toss that favorite bra yet!
You’ll need pliers to gently bend the hook back into shape, or replace it entirely with hooks from old bras or craft stores.
Conclusion
Congratulations, you’ve officially graduated from "bra clasp victim" to "clasp conqueror!"
Learning how to sew a bra clasp isn’t rocket science—it just takes patience and practice.
Remember, even professional seamstresses had their first wonky attempt, so don’t stress if yours isn’t perfect.
With your new skills, you’ll never again suffer the embarrassment of a broken clasp at the worst possible moment.
Now go forth and create bras that actually stay closed when you need them to, and become a true "bra clasp" expert with your new ability to sew a working clasp.

