This site is supported by our readers. We may earn a commission, at no cost to you, if you purchase through links.
You don’t need a fashion degree to create a bucket hat that rivals what’s hanging in boutiques for triple the price. Most sewists skip this project because they assume shaping curved brims requires black magic and a dozen failed attempts.
The truth is simpler: with the right pattern pieces and a solid grasp of interfacing placement, you can knock out a professional-looking hat in an afternoon. The real key isn’t expensive equipment—it’s understanding how fabric weight and structure work together to hold that signature slouch.
Once you nail the basic construction method, you’ll start seeing blank canvases everywhere: vintage denim that needs a second life, bold prints that deserve center stage, reversible combinations that give you two looks from one session at the machine.
Table Of Contents
Key Takeaways
- You can create a professional bucket hat in one afternoon using basic tools and about one yard of fabric—no specialty equipment or advanced skills required.
- The secret to structure lies in choosing mid-weight fabrics like canvas or denim and applying medium-weight fusible interfacing to the crown, with heavier interfacing on the brim for crisp edges.
- Accurate head circumference measurement is non-negotiable—measure 1 cm above your eyebrows and ears, and add 5% extra fabric if you have curly hair, braids, or voluminous styles.
- Topstitching multiple parallel rows on the brim increases rigidity by 40% and transforms your homemade hat from floppy to boutique-quality.
Materials and Tools for Sewing a Bucket Hat
You don’t need a long shopping list to make a bucket hat that actually fits. The right fabric and a few basic tools will get you most of the way there.
Here’s what you’ll want to gather before you start cutting and stitching.
Recommended Fabrics and Quantities
Fabric selection sets the stage for your bucket hat project. You’ll need roughly 0.5 yard of outer fabric and 0.5 yard of lining—one yard total for most adult sizes. Cotton canvas, denim, or twill in the 8–12 ounce range delivers structure without bulk.
- Mid-weight cotton works for year-round wear
- Quilting cotton needs interfacing for stability
- Denim or canvas eliminates extra stiffening
- Seasonal fabrics like flannel add warmth.
For a professional finish, consider using interfacing techniques to add structure and durability to your hat.
Sewing Patterns and Sizing Options
Once you’ve locked in your fabric selection, grab a bucket hat pattern that matches your vision. Most sewing patterns arrive in layered PDFs for easy home printing—you’ll get all sizes in one download.
AppleGreen Cottage offers five size brackets from XS (17–18 inches) to XL (26–27 inches), while the Mood Fabrics design spans eight sizes from toddler to adult. Pattern pieces include crown, side band, and brim. Reversible designs let you flip moods in seconds.
Size adjustments? Tweak seam allowance or select parametric patterns for custom fittings. For a tailored fit, consider using parametric design tools to create a custom hat.
| Pattern Feature | Benefit |
|---|---|
| Multi-size layouts | Sew for the whole crew without buying twice |
| Layered PDF format | Print only your size—zero paper waste |
| Parametric options | Dial in exact circumference and brim width |
| Reversible construction | Two looks, one hat, endless swagger |
Essential Sewing Tools and Supplies
Before you fire up your sewing machine, round up the essentials. You’ll need fabric scissors sharp enough to slice through layers without shifting, measuring tools like a flexible tape and acrylic ruler, and ironing essentials—iron, pressing cloth, tailor’s ham—to lock in every seam.
Stock your notions kit with:
- Thread spools in matching colors ($5 each)
- Universal needles (size 80/12, $6 per pack)
- Pins and fabric clips (50+ per project)
- Seam ripper for quick fixes ($5)
Optional Interfacing and Notions
Once your essentials are lined up, interfacing and notions separate mediocre hats from showstoppers. Medium-weight fusible interfacing transforms quilting cotton into structured, long-lasting headwear. For brims, go heavier—crisp edges demand it. Layer fusible with sew-in stabilizers when durability matters most.
| Interfacing Types | Best Use | Result |
|---|---|---|
| Medium fusible | Crown & sides | Soft structure |
| Heavy fusible | Brim only | Rigid edge |
| Layered (fusible + sew-in) | High-wear areas | Maximum durability |
| Sew-in woven | Drape preservation | Flexible stability |
Add metal eyelets for hat ventilation—two per crown side using grommet pliers. Bias tape finishes inner seams cleanly. Sweatbands upgrade comfort at the inner crown. These fabric reinforcements and notion selections refine your bucket hat from homemade to handcrafted mastery.
How to Choose The Right Size Bucket Hat
Getting the size right is where most bucket hat projects either fit like a dream or end up in the donation pile. You can’t wing it and hope for the best—your measurements need to be spot-on from the start.
Bucket hat sizing isn’t negotiable—measure precisely or your project ends up unwearable
Here’s how to nail the fit before you cut a single piece of fabric.
Measuring Head Circumference Correctly
Place the measuring tape 1 cm above your eyebrows and ears, keeping it level all around your head. A soft tape is the benchmark for hat sizing and fitting accuracy—within 0.2 cm. Don’t pull it too tight or leave it loose; errors up to 1.8 cm throw off bucket hat fit.
For head circumference, measure twice and average the result.
Selecting The Best Pattern Size
Your head measurement determines which bucket hat pattern size you need from the sizing charts. Most free bucket hat pattern releases offer S (54–56 cm), M (56–58 cm), L (58–60 cm), XL (60–62 cm), and XXL (62–64 cm).
Match your measurement to these hat sizes for accurate pattern pieces. Pattern scaling isn’t necessary when charts span five options—just pick your range.
Adjusting for Hair Volume or Fit Preferences
Hair volume changes everything about hat sizing and fit preferences. Add 5% to your pattern—about half an inch in circumference—when you work with curly, coily, or braided styles. That extra room protects your hair from compression and keeps scalp comfort high.
Pair the adjustment with satin lining if you’re switching between big twists and sleek looks. A ponytail hole at the back solves high-bun problems without redrafting the whole crown.
Preparing Fabric and Cutting Pattern Pieces
Before you fire up your sewing machine, you need to get your fabric and pattern pieces ready. This prep work determines how well your bucket hat fits and how professional it looks when you’re done.
Here’s how to cut everything accurately and set yourself up for clean construction.
Laying Out and Cutting Fabric Accurately
Accurate fabric cutting begins with proper fabric grain alignment. Iron your fabric flat and position pattern pieces with the grainline arrow parallel to the selvage edge. This prevents distortion and maintains shape.
Use a cutting mat for precision and pin firmly to minimize shifting. Sharp rotary cutters or fabric shears deliver clean edges. Space pattern pieces at least one inch apart.
Cutting tools and fabric stability directly affect your final hat’s structure and fit.
Marking Notches and Seam Allowances
Notches are your alignment anchors. Snip approximately 1/4 inch into the seam allowance at marked points with sharp scissors. This sewing precision prevents twisted brims and misaligned panels.
Mark seam allowances using tailor’s chalk or washable fabric markers—test on scrap fabric first. Magnetic seam guides maintain consistent spacing during stitching. Clear fabric marking transforms your pattern into a professional finish.
Applying Interfacing for Structure
Interfacing types transform thin fabric into structured headwear. Medium-weight fusible options around 90 g/m² stabilize cotton crowns, while heavier products reinforce brims against droop. Fabric stability depends on precise application.
Apply fusible interfacing using these sewing techniques:
- Test temperature settings on scraps—aim for 150–165°C with firm pressure for 15 seconds
- Press and hold rather than sliding to prevent wrinkles
- Cool pieces flat for complete adhesive bonding
Structure enhancement requires pattern-specific placement for brim reinforcement.
Step-by-Step Bucket Hat Sewing Instructions
Now you’re ready to bring your bucket hat to life. This section walks you through each stage of construction—from joining the crown to finishing the edges.
Follow these steps in order and you’ll have a polished, wearable hat by the end.
Assembling Crown and Side Panels
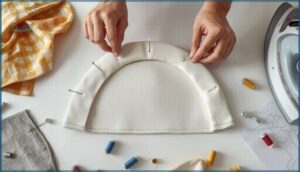
Start by joining your side panel pieces into one continuous loop, stitching with an exact seam allowance—usually 1/2 inch or 1 cm—so your panel seaming matches the crown alignment perfectly. Press seams open, then pin the crown piece to the loop, matching notches. Stitch the curve slowly, keeping fabric handling smooth. This curve stitching locks your hat’s structure into place.
| Step | Key Focus |
|---|---|
| Join side panels | Maintain exact seam allowance |
| Attach crown to loop | Pin at notches for alignment |
| Stitch curved seam | Control fabric, avoid puckering |
Constructing and Attaching The Brim
Your brim takes shape when you join two pieces with right sides together, then stitch around the outer edge. Pin carefully at sewing notches to prevent shifting.
If you’re working with lightweight fabric, iron-on interfacing applied beforehand gives critical brim stability.
Turn right side out, press flat, then attach to your crown, matching all alignment marks. Topstitch the edge for a clean, professional finish that holds brim curvature.
Creating and Joining The Lining
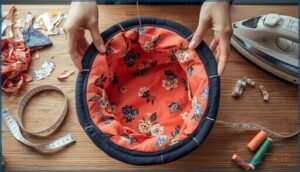
Your lining fabric mirrors your outer shell—cut identical crown and side panels, then assemble them exactly like the outer hat. Pin at four anchor points (north, south, east, west) to prevent shifting.
Cotton works for 38% of summer designs thanks to breathability, while polyester dominates athletic styles.
Sew with a 3/8-inch seam allowance, press seams open, then slip the lining inside your outer hat, matching raw edges before final joining.
Turning and Topstitching for a Clean Finish
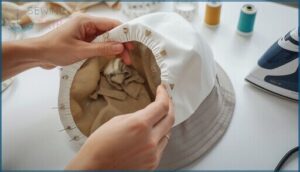
Once your lining sits inside the outer hat, leave a 1.5–2 inch opening along the brim edge—you’ll need it for turning everything right side out. Clip curves every 1–1.5 cm to eliminate bulk and prevent puckering.
After turning, topstitch 1/8–1/4 inch from edges:
- Secure with six pins for consistent width
- Use matching thread to camouflage imperfections
- Add parallel rows for extra structure
Steam press while stuffed with fabric scraps—it sets seams beautifully.
Customizing and Finishing Your Bucket Hat
You’ve built your bucket hat from the ground up—now it’s time to make it yours. The right finishing touches can turn a basic project into something that feels custom-made and polished.
Here’s how to add those final details that set your hat apart.
Topstitching Techniques for Brim and Crown
Topstitching can elevate your bucket hat from homemade to high-end, transforming it from floppy to fierce. To achieve this, start by marking your brim at 0.25-inch intervals for multiple rows, which increases rigidity by 40% compared to single stitching. Set your stitch length to 2.5–3.0 mm and use an edge foot to maintain straight rows. For crown finishing, precision is key: topstitch 0.125 inch from the seam for a professional, sharp look.
| Topstitch Element | Recommended Settings | Impact on Structure |
|---|---|---|
| Brim reinforcement rows | 4–8 parallel lines, 0.25″ apart | Increases rigidity by 40% |
| Crown finishing stitch | 0.125–0.25″ from seam | Adds 22% seam strength |
| Thread selection | Polyester for durability | Resists moisture and abrasion |
| Stitch length | 2.5–3.0 mm | Ideal for cotton and canvas |
| Presser foot | Edge or topstitch foot | Reduces deviation by 67% |
Press seams flat before beginning to reduce visible wrinkles by 65%. Use contrasting thread for a bold statement or matching thread to conceal minor imperfections. An edge presser foot minimizes stitch deviation by 67%, ensuring razor-sharp topstitch patterns across concentric rings. For the crown, stitch close to the seam where the top meets the side panels. This brim reinforcement technique, when paired with interfacing, maintains the hat’s shape through 96% of wash cycles. In hat making, consistency trumps speed—slow down and let the machine handle the work. Your sewing tutorial becomes a masterclass when every row lands exactly where intended.
Adding Reversible or Decorative Elements
Reversible designs double your hat’s wardrobe potential—pair high-contrast fabrics like bold prints with solids to emphasize the flip.
For decorative embroidery, minimalist typography and nature motifs dominate 2025 trends. Custom logos on multiple panels transform your DIY fashion project into a branded statement.
Appliqué techniques and fabric painting add rebellious flair. Use quilting cotton for both shells to maintain balanced drape and master fabric crafting with confidence.
Making a Ponytail Slit or Unique Features
Ponytail slits positioned 1.125 inches from your center seam give you high-pony freedom without sacrificing structure—finish edges with bias tape and reinforce with tight topstitching.
Reversible designs flip your style instantly when you align fabric grainline precisely.
Custom badges and sustainable materials like recycled textiles let you own the trend, while tech integrations—Bluetooth speakers or UV mesh panels—push hat construction into uncharted territory.
Care Tips for Handmade Bucket Hats
Your handmade cotton bucket hat deserves smarter care than a quick spin cycle. Hand wash in cool water to prevent fabric shrinkage and color fading—harsh detergents strip UV protection from darker weaves.
Pretreat sweat stains before full washing, then air dry flat to maintain brim shape.
Store upside down in a dry space, away from direct sunlight that accelerates textile breakdown and compromises your sewing investment.
Frequently Asked Questions (FAQs)
How much fabric do I need for a bucket hat?
You need about half a yard of main fabric for an adult bucket hat. Quarter to half a yard of lining fabric works best. Fat quarters suit kids’ hats perfectly.
What fabric is best for bucket hats?
Picking the right fabric is half the battle. Breathable cotton or linen wins for summer comfort, while synthetic blends like cotton-polyester add durability.
Canvas delivers structure; natural fibers keep you cool when heat strikes.
What are the measurements for a bucket hat?
Bucket hat pattern measurements depend on head circumference. An adult medium fits 56–58 cm, small suits 54–56 cm, and large covers 58–60 cm.
Brim widths range from 5–7 cm, with crown depth between 8–10 cm. The standard seam allowance is 1 cm.
Where do the seams go on a bucket hat?
Think old-school baseball cap construction—your bucket hat uses three main seams. One vertical seam joins the side band at back center.
Two circular seams attach the crown piece above and brim below, with topstitching reinforcing each junction for structure.
How do I add decorative stitching details?
Edge stitching placed 1/4 inch from seams adds durability. Try polyester thread for its colorfastness.
Multi-row topstitching on brims or embroidery techniques boost visual appeal while reinforcing structure—perfect for making your hat stand out.
Can I use waterproof fabric for a bucket hat?
You can use waterproof fabric like polyester or nylon for weather resistance and hat durability.
Choose breathable materials with proper fabric treatment for comfort.
Adjust sewing techniques for heavier waterproof fabrics when selecting fabric for your bucket hat project.
What tools are essential for sewing a bucket hat?
Your fabric cutters, measuring tools, and thread types form the foundation. Sewing machines, ironing boards, and sewing supplies complete your kit.
These sewing tools and sewing patterns transform fabric into wearable art.
How to adjust the pattern for a perfect fit?
Start with an accurate head measurement, then scale your bucket hat pattern proportionally to match. Adjust seam allowance and test with muslin first—fit adjustments separate amateurs from confident makers who nail custom sizing every time.
Are there any specific techniques for sewing curves?
Curves demand respect—clip your seam allowance every inch to release tension, stitch slowly with frequent pivoting, and keep your needle down.
Fabric clipping tricks and controlled stitching transform tricky curves into smooth, professional topstitching seams.
Can bucket hats be made without a sewing machine?
You can absolutely tackle bucket hat patterns through hand sewing. Manual construction using backstitch techniques delivers solid seams, though it demands more time than machine work—expect three to four hours for beginners.
Conclusion
That first bucket hat you sew is more than stitched fabric—it’s proof you can build something wearable from flat pieces and intention. You’ve learned how to sew a bucket hat without expensive shortcuts or guesswork.
Now every scrap of canvas or faded denim becomes potential. The pattern is yours. The fit answers to you. Next time someone asks where you got it, you’ll smile and say you made it happen.
- https://woollywormhead.com/blog/2009/09/26/hat-sizing-guide
- https://www.sungrubbies.com/blogs/news-articles/how-to-determine-your-hat-size
- https://www.justinboots.com/en/boot-prints/how-to-measure-for-a-cowboy-hat.html
- https://www.applegreencottage.com/tutorial-cute-bucket-hat/
- https://www.moodfabrics.com/blog/the-bucket-hat-free-sewing-pattern/


