This site is supported by our readers. We may earn a commission, at no cost to you, if you purchase through links.
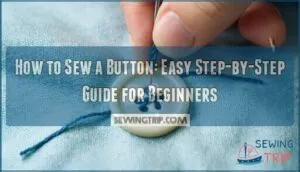
First, thread your needle with about 18 inches of thread and tie a knot at the end. Position your button on the fabric and push the needle up through one hole from underneath. Pull the thread through, then push the needle down through the opposite hole.
Repeat this process 4-6 times, creating an X-pattern for four-hole buttons or parallel lines for two-hole buttons.
Before finishing, wrap the thread around the stitches beneath the button to create a sturdy shank. Tie off with a secure knot on the fabric’s underside.
The secret lies in proper thread tension and creating that all-important shank space.
Table Of Contents
Key Takeaways
- You’ll need about 18 inches of thread, a medium-sized needle, and sharp scissors – choose cotton or polyester thread that matches your fabric color for the best results.
- Create proper spacing by placing a toothpick under the button while stitching, then remove it before securing your thread to ensure the button won’t feel too tight when fastened.
- Make 4-6 passes through the button holes, then wrap the thread around the base stitches to form a sturdy shank that prevents fabric bunching and extends your button’s lifespan.
- Secure your work by tying multiple knots on the fabric’s wrong side and trimming thread tails to 1/8 inch – this prevents the button from falling off and gives you a professional finish.
Sewing a Button
Sewing a button might seem like rocket science at first, but it’s actually straightforward once you know the basics. When you attach a button, you’re creating a secure connection between fabric and fastener that’ll extend your garment’s button lifespan substantially.
Start by threading your needle and positioning the button where it belongs. Push the needle up through the fabric and first buttonhole, then down through the opposite hole. Repeat this motion several times to create strong anchor points.
For proper button spacing, wrap thread around the base to form a small shank. This prevents the fabric from bunching when buttoned. Finish by securing your thread on the fabric’s wrong side with small stitches.
Hand sewing buttons becomes second nature with practice, and following these steps will help you achieve a secure and professional-looking result, ensuring your garment remains in good condition and the button stays securely in place.
What You Need to Sew a Button
Getting your hands on the right supplies makes all the difference when you’re ready to sew on a button.
You’ll need a needle with an eye large enough for your thread to pass through easily.
For needle selection, choose a medium-sized needle that won’t create oversized holes in your fabric.
Thread types matter too.
Cotton thread works best for most fabrics, while polyester thread offers extra strength for heavy-use items.
Pick a color that matches your garment or button closely.
Button materials vary from plastic to metal to wood, but your sewing technique stays the same.
Grab a pair of sharp scissors for clean cuts and marking tools like a fabric pen to mark placement accurately.
For securing options, consider fabric glue as backup reinforcement.
A toothpick helps create proper spacing when you attach the button.
These simple tools turn a potentially frustrating task into a quick fix that’ll keep your clothes looking sharp.
Prepare to Sew
Before you start stitching, proper preparation sets you up for success. Think of this step as laying your foundation—skip it, and your button might fall off next week.
Thread Selection matters more than you’d think. Choose thread that matches your fabric color or goes one shade darker. Cotton thread works well for most projects, while polyester handles heavy-duty garments better.
Needle Choice comes next. Pick a needle with an eye large enough for your thread to pass through easily. Universal needles work for most fabrics, but denim needles handle thick materials better.
Here’s your prep checklist:
- Cut 18 inches of thread and double it over
- Thread your needle, leaving equal lengths on both sides
- Tie a secure knot at the thread ends
Knot Tying keeps everything anchored. Make your knot bigger than the fabric weave to prevent pull-through. Consider using durable thread buttons for a longer-lasting hold.
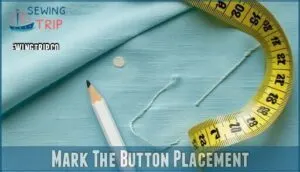
Mark The Button Placement
Once you’ve prepared your materials, accurate button placement makes the difference between professional-looking repair and amateur work. You’ll want to position your button exactly where the original sat or where it functions best with the corresponding buttonhole.
Use a fabric pen to mark the precise spot where you’ll attach button to your garment. This precise marking prevents crooked buttons that throw off your garment’s entire appearance. For replacement buttons, examine thread remnants or fabric indentations from the original. Consider using a specialized fabric marker for best results on delicate materials.
When sewing basics include proper placement accuracy, your finished work looks seamless. Button spacing should match existing buttons on your garment. Double-check alignment before you sew on button permanently, as repositioning wastes time and can damage fabric.
| Marking Method | Best For | Alignment Technique |
|---|---|---|
| Fabric pen dot | Single buttons | Center over buttonhole |
| Pin placement | Multiple buttons | Measure equal spacing |
| Thread remnants | Replacements | Follow original holes |
| Ruler guide | Button rows | Maintain straight lines |
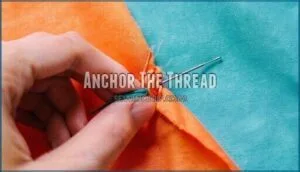
Anchor The Thread
Now that you’ve marked where your button goes, it’s time to anchor the thread properly. This step creates the foundation for a secure attachment that won’t come loose with wear.
Start by inserting your needle from the back of the fabric at your marked anchor point. Pull the thread until the knot sits snugly against the fabric’s wrong side. This guarantees your knot placement stays hidden and secure.
Here’s how to create a solid anchor:
- Insert needle from fabric’s back side at the exact anchor point you marked
- Pull thread completely through until the knot stops against the fabric
- Check knot security by gently tugging the thread
- Position knot flat against the fabric to avoid bulk
- Trim any excess thread tails that extend beyond the knot
Hidden knots and proper knot tying create the reinforcement stitches need for lasting durability. For specialized applications, consider using a dedicated thread anchor for enhanced security.
Attach The Button
Now you’ll attach your button using proper needle and thread technique. Thread your needle through the first hole from underneath the fabric, pulling until the knot catches. For two-hole buttons, create straight stitches by going down through the second hole and back up through the first.
Repeat this motion 4-5 times, maintaining consistent thread tension throughout each pass. This foundational step in learning how to sew button by hand determines your button’s durability and appearance.
Four-hole buttons require a different approach for button attachment. You can stitch in parallel lines or create an X-pattern by working diagonally across opposite holes. Make 3-4 passes through each hole pair, ensuring your stitch count remains even for balanced reinforcement stitches.
During this sewing tutorial, keep your button alignment straight and avoid pulling too tightly. Leave slight slack for shank creation later.
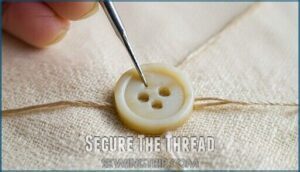
Secure The Thread
After you’ve stitched the button in place, you’ll need to secure the thread so your button won’t fall off later.
This step involves creating a strong knot under the button and tying off the thread on the fabric’s back side.
Stitching Under Button
With your button attached, you’ll need reinforcement stitches underneath for proper button security.
Thread wrapping around the base creates a sturdy foundation that prevents wobbling during use. Button stability depends on these final steps.
Here’s what makes strong button attachment:
- Wind thread 4-6 times around stitches beneath the button
- Pull snugly to create a neat, compact shank
- Check button movement – it should wiggle slightly but stay secure
- Add extra wraps for heavy-use garments like coats.
This shank creation technique guarantees your button sewing will last through countless wears and washes.
Tying Off
Your button’s security depends on proper knotting techniques to lock everything in place. After completing your final stitch, it’s time to create a bulletproof finish that won’t unravel.
- Hold thread taut and wrap around needle three times for maximum grip
- Pull the knot snug against fabric for ideal knot placement
- Add two reinforcement knots using small stitches through fabric layers
- Keep thread tails short but visible for quality control
- Test button firmness before trimming excess thread with sharp scissors
Master these securing stitches, and your button sewing will outlast store-bought alternatives, ensuring a long-lasting result.
Trim The Thread
Once you’ve secured your knot, proper thread trimming guarantees a professional finish.
Sharp scissors are your best friend here – they create clean cuts that prevent fraying.
Position your scissors close to the knot but leave about 1/8 inch of thread tail.
This small allowance prevents the knot from loosening while keeping excess thread from showing.
Thread length management starts during preparation, but trimming completes the process.
Cut both the working thread and any loose ends from your initial knot.
Fray prevention begins with quality scissors – dull blades create rough edges that weaken over time.
Always trim on the fabric’s wrong side to hide any imperfections.
| Tool | Purpose | Best Practice |
|---|---|---|
| Sharp Scissors | Clean cuts | Cut at 45-degree angle |
| Thread Length | Proper tail size | Leave 1/8 inch past knot |
| Knot Proximity | Secure trimming | Don’t cut too close |
To ensure a clean finish, it’s essential to follow best practices for thread trimming and management.
By doing so, you can achieve a professional finish and prevent common issues like fraying.
Remember to always use sharp scissors and trim carefully to avoid damaging the fabric.
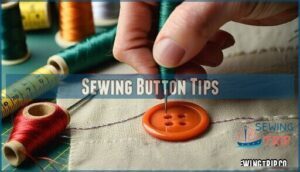
Sewing Button Tips
You’ll sew buttons more easily when you follow these proven techniques that prevent common mistakes.
These tips help you avoid finger pricks, create proper spacing, and secure your thread correctly for long-lasting results.
Avoid Finger Pricks
Sharp needles can turn your sewing project into a painful experience.
A dull needle fights you at every stitch, but a sharp one glides through fabric like butter.
Finger protection starts with proper needle grips and controlled movements.
A thimble provides excellent protection when pushing the needle through thick fabric.
Keep your non-sewing hand away from the needle’s path.
Work slowly and maintain focus on each stitch.
Good lighting prevents eye strain that leads to accidents.
These safe practices and sewing techniques help beginners avoid painful pricks while mastering button attachment skills.
Leave a Shank Space
Why do buttons feel too tight or loose after sewing?
Create proper shank length by placing a toothpick or extra needle under the button while stitching. This spacing accounts for fabric thickness and allows natural button movement.
Remove the spacer before securing thread.
The right shank prevents thread tension issues and avoiding looseness, ensuring your button tutorial results work perfectly.
Knot Around Finger
Managing thread tension while you sew a button becomes easier with a simple finger technique.
Master your thread like a pro with this simple finger trick that prevents tangles and keeps stitching smooth.
This method helps control your thread and prevents tangles during stitching.
Here’s how to master the finger knot method:
- Wrap thread around your index finger – Create one loose loop before starting your first stitch
- Control knot tightness – Keep the loop snug but not cutting off circulation for finger safety
- Use knotting alternatives – Try wrapping around a pencil if finger knot feels uncomfortable
- Test knot durability – Pull gently to confirm your finger knot purpose holds without breaking
This finger knot technique gives you better control when you sew a button. Your needle and thread stay manageable, and the knot prevents slipping during stitching.
Frequently Asked Questions (FAQs)
How to sew a button step by step?
Thread becomes your lifeline connecting fabric and function.
Mark the spot, thread your needle with doubled thread, push up through fabric, stitch through button holes repeatedly.
Create a shank, then knot securely underneath.
What type of thread should I use to sew buttons?
Choose cotton or polyester thread that matches your fabric’s color or the button itself.
You’ll need about 18-24 inches of thread.
For heavy-duty garments, consider using embroidery floss or upholstery thread instead.
How do I choose the right size needle for sewing buttons?
Select a needle size that matches your thread weight and fabric thickness.
For lightweight fabrics, use size 9-11 needles. Medium fabrics need size 14- Heavy materials require size 18-
The needle should pierce cleanly without struggling, ensuring a smooth sewing process with the right needle size.
How many stitches should I make when attaching a button?
Getting the perfect button attachment isn’t rocket science, but it’s vital.
You’ll need 4-5 stitches for two-hole buttons and 3-4 passes for four-hole buttons.
This makes certain your button won’t pop off unexpectedly.
What’s the best way to knot the thread when sewing on buttons?
Start from the fabric’s back side, bringing your needle through to hide the initial knot.
After completing your stitches, create several small anchor knots on the wrong side before trimming excess thread.
How can I avoid poking my fingers with the needle when sewing buttons?
My grandmother always used a metal thimble after pricking herself countless times.
You’ll want to wear a thimble on your middle finger, push the needle with your fingertip, and keep fingers away from the needle’s path.
How often should buttons be replaced?
You should replace buttons when they’re loose, cracked, missing, or mismatched.
Regularly check high-use garments like coats or shirts.
If a button feels wobbly or looks worn, it’s time for a quick fix.
Can buttons be sewn without a needle?
While possible, sewing buttons without needles is impractical and unreliable.
You’d need alternatives like awls, safety pins, or fabric glue, but these methods lack durability.
Needles remain essential for secure, long-lasting button attachment, making them a crucial tool for reliable results.
What causes buttons to fall off repeatedly?
Buttons fall off repeatedly when you don’t create a proper thread shank, use insufficient stitches, or choose weak thread.
Poor knot security and fabric stress from tight garments also cause frequent button loss.
How to sew buttons on leather garments?
Leather requires a leather needle and heavy-duty thread.
Pierce holes carefully using an awl or sharp tool first.
Use a thimble for protection.
Sew through pre-made holes, creating secure knots underneath.
Conclusion
Mastering how to sew a button is like learning to ride a bike—once you’ve got it, you’ll never forget.
You’ve now learned the essential steps from threading your needle to creating that vital shank space.
Remember to maintain proper thread tension and take your time with each stitch.
With practice, you’ll handle loose buttons confidently instead of rushing to the tailor, and you’ll be able to tackle any button emergency that comes your way, keeping your sewing kit handy.


