This site is supported by our readers. We may earn a commission, at no cost to you, if you purchase through links.
You’ll need organic cotton or canvas fabric, polyester fiberfill stuffing, 10-20 grams of catnip, and basic sewing supplies.
Cut two fabric rectangles about 12 inches long, sew three sides with strong seams, stuff firmly with fiberfill and catnip, then close the final seam.
Your cat will go absolutely bonkers for this handmade treasure that satisfies their hunting instincts while saving your furniture from those midnight attacks.
The secret lies in proper fabric choice and strategic catnip placement for maximum feline satisfaction.
Table Of Contents
Key Takeaways
- You’ll create a durable wrestling toy using organic cotton or canvas fabric, polyester stuffing, and 10-20 grams of catnip that can withstand aggressive play sessions.
- Proper construction involves sewing three sides with reinforced seams, stuffing firmly with layered filling, and hand-stitching the final closure for maximum durability.
- You’ll save money while providing better entertainment than store-bought toys, as your homemade kicker satisfies your cat’s hunting instincts and prevents furniture damage.
- You can customize size, texture, and firmness based on your cat’s preferences, plus refresh the toy’s appeal by rotating multiple versions or adding catnip spray when scent fades.
DIY Cat Kicker Toy Supplies
Before you start sewing, you’ll need the right supplies to create a safe and engaging kicker toy your cat will love.
Getting quality materials upfront means your homemade toy will survive even the most enthusiastic play sessions, ensuring a safe and enjoyable experience for your pet.
Choosing Safe and Durable Fabrics
Choosing the right fabric makes or breaks your cat kicker toy’s success. You’ll want materials that can handle serious paw action while keeping your furry friend safe from harmful chemicals or allergens.
- Organic cotton or canvas – Heavy-duty weave strength withstands aggressive play
- OEKO-TEX certified fabrics – Pass washability tests and allergen avoidance standards
- Pre-shrunk materials – Prevent warping during cleaning cycles
- Double-layer construction – Increases durability by 50% over single layers
- Avoid polyester blends – Higher chemical residue risks for sensitive cats
Consider using durable cotton materials for added safety. Focus on fabric safety and fiber content when selecting cat toy materials for your sewing project.
Selecting Stuffing and Catnip Options
Your stuffing choice sets the foundation for a durable cat kicker toy.
Polyester fiberfill offers ideal stuffing firmness while staying washable and safe.
Blend it with 10-20 grams of organic catnip for maximum catnip potency.
Consider aromatic herbs like silvervine for cats unresponsive to traditional catnip filling.
For added fun, you can explore different DIY catnip toy designs.
This combination creates an irresistible sewing project your feline will adore, making it a great DIY activity.
Essential Sewing Tools and Equipment
You’ll need the right tools to make your cat kicker toy sturdy and professional-looking. A basic sewing machine makes quick work of seams, while hand-sewing works too. Sharp fabric scissors and heavy-duty thread prevent frustrating snags during construction.
You can find a suitable sewing machine online for this project.
- Sewing machine or needle – Machine stitching creates stronger seams for aggressive play
- Fabric scissors – Clean cuts prevent fraying and guarantee precise measurements
- Heavy-duty thread – Prevents seams from splitting when cats attack their new toy
- Seam ripper – Fixes mistakes quickly without damaging your fabric pieces
Upcycling Materials for Eco-Friendly Toys
Often, your best cat kicker toy materials are hiding in plain sight around your house.
Transform old socks into sock toys, stuff them with fabric scraps and catnip for instant entertainment.
Give old socks a second life as purr-worthy playthings your cat can’t resist!
Cardboard creations from toilet paper tubes make excellent crinkly cores, while upcycled cotton shirts provide soft outer layers.
Save crinkly packaging from deliveries – cats go absolutely bonkers for that satisfying sound!
This DIY cat toy approach keeps waste out of landfills while creating purr-fect playthings.
Consider using fabric scraps to fill the toys for an even more sustainable option.
How to Sew a Cat Kicker Toy
Now you’re ready to transform your fabric into a toy that’ll have your cat doing backflips with joy.
The key is getting your measurements right and preparing everything properly before you start stitching.
Measuring and Cutting Fabric to Size
Once you’ve got your fabric ready, it’s time to measure and cut with precision. For a standard cat kicker toy, measure 40cm long by 15cm wide on your fabric.
Remember to add seam allowances when cutting—about ½ inch works perfectly. Pay attention to grain direction for durability.
Use sharp fabric scissors and cut in one smooth motion. Double-check your fabric dimensions before cutting, because there’s no "undo" button on fabric scraps!
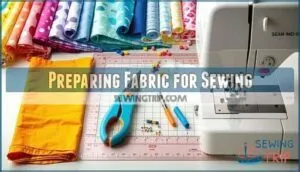
Preparing Fabric for Sewing
Before your fabric hits the sewing machine, it needs proper prep work to guarantee your cat toy sewing project succeeds.
Start with Fabric Pre-washing to remove chemicals and prevent future shrinkage. Use Edge Finishing techniques like zigzag stitches on raw edges to prevent fraying during washing.
After drying, master basic Ironing Techniques to create smooth, flat surfaces for accurate cutting. Proper ironing helps remove wrinkles and prepares the surface, and grain line stability is also vital for preventing distortion.
This beginner sewing step prevents wonky seams and guarantees Material Safety for your feline friend.
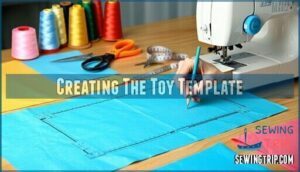
Creating The Toy Template
Before diving into pattern creation, you’ll want to decide on your cat kicker toy’s final dimensions since template shapes directly impact your feline friend’s play experience.
- Rectangle templates work best for classic kicker toys (typically 5×14 inches for average cats)
- Custom designs let you adjust cat toy sizes based on your pet’s preferences and play style
- Printable templates save time and guarantee consistent cat toy shapes across multiple projects
Most cat toy patterns use simple rectangular templates, but you can create size variations for kittens versus adult cats.
Pattern adjustments are straightforward—just scale your template up or down while maintaining proportions that encourage proper kicking behavior.
Step-by-Step Cat Kicker Toy Assembly
Now that you’ve prepared your fabric and created the perfect template, it’s time to bring your cat kicker toy to life through careful assembly.
You’ll transform flat pieces of fabric into a durable, catnip-filled treasure that’ll have your feline friend kicking with joy.
Sewing The Toy Shape and Seams
Precision matters when creating your DIY cat toy. Start your sewing tutorial by placing fabric pieces together, right sides facing. Using your sewing machine, select a 1.2 stitch length for maximum durability.
Practice corner pivoting techniques and focus on seam reinforcement for your kick toy.
| Sewing Step | Machine Setting |
|---|---|
| Initial seam | 1.2 stitch length |
| Corner pivoting | Needle down position |
| Seam reinforcement | Double-stitch method |
| Edge finishing | Zigzag or serge |
Remember proper fabric folding before stitching – it’s like wrapping a present that’ll get the zoomies treatment! Your sewing for cats project needs those reinforced seams to survive enthusiastic bunny kicks.
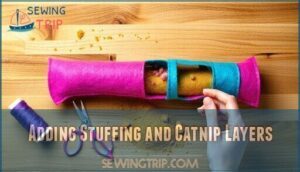
Adding Stuffing and Catnip Layers
Now it’s time to breathe life into your cat kicker toy with the perfect stuffing and catnip combination. Smart layering techniques make all the difference in creating a toy that’ll have your kitty going crazy.
- Start with light stuffing density at the bottom for flexibility
- Sprinkle catnip throughout layers for even scent distribution
- Add firmer stuffing toward the top for that satisfying kick resistance
- Consider alternative fillings like crinkly material for extra sensory appeal
This layering approach guarantees maximum scent longevity while giving your sewing tutorial the professional touch that transforms basic materials into an irresistible catnip toy.
Many crafters also explore felt crafting ideas for a variety of DIY projects.
Securing The Final Seam by Hand or Machine
With your catnip toy stuffed and ready, it’s time to close the deal.
Fold the raw edges of your opening inward about half an inch.
For hand sewing, use a ladder stitch or whip stitch with heavy-duty thread – these stitches create invisible, secure closures.
Machine stitching works too, but hand-sewing gives you better control over thread choice and seam reinforcement for this final step.
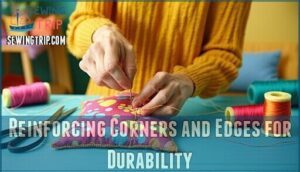
Reinforcing Corners and Edges for Durability
With your final seam secured, it’s time to bulletproof those stress points where your cat’s enthusiastic bunny kicks will test your handiwork.
Think of corner stitching as armor for your homemade cat toy.
- Double-stitch all corners using a tight zigzag pattern for maximum seam strength
- Trim excess fabric at corners to reduce bulk while maintaining stitch density
- Reinforce edges with overlapping straight stitches along high-stress areas
- Check fabric choice holds up under tension before final edge finishing
- Test pull strength gently to confirm your catnip toy survives aggressive play
Tips for Safe and Engaging Cat Toys
You’ve created your perfect cat kicker toy, but now you need to make sure it’s both safe and irresistible to your feline friend.
The right finishing touches and safety measures will transform your handmade creation into a beloved plaything that keeps your cat entertained while giving you peace of mind.
Ensuring Firmness and Preventing Catnip Leakage
Your cat toy’s success hinges on proper stuffing density and bulletproof seam strength.
Pack that filling tight—loose stuffing means a floppy disappointment that’ll get ignored faster than Monday morning emails.
For leakage prevention, double-stitch those seams and choose sturdy cotton over flimsy materials.
| Firmness Factor | Pro Tip |
|---|---|
| Stuffing density | Pack tight as a burrito—cats love resistance |
| Seam strength | Double-stitch critical areas for rough play |
| Material choice | Cotton canvas beats thin fabric every time |
| Stitch types | Straight stitch for seams, zigzag for edges |
| Catnip distribution | Layer evenly to prevent clumping and weak spots |
Avoiding Choking Hazards and Unsafe Embellishments
Beyond stuffing your toy firmly, you’ll want to skip decorative elements that could become midnight snacks for your furry friend. Small plastic beads, bells, and buttons easily detach during vigorous play sessions, creating serious choking risks.
Here’s your cat toy safety checklist:
- Skip hard decorations – Avoid plastic eyes, sequins, and glued-on accessories that can break free
- Choose secure embellishments – Use embroidered details or tightly appliquéd fabric shapes instead
- Test before play – Pull firmly on all seams and edges to confirm nothing comes loose
Focus on seam reinforcement with heavy-duty thread and safe stuffing materials. Dense zigzag stitching prevents loose fibers, while proper thread length guarantees durability. To prevent issues, consider the importance of pre-washing the fabric before construction.
Regular toy inspection catches wear before it becomes dangerous. Remember, secure embellishments mean safer playtime for your cat.
Cleaning and Maintaining Homemade Toys
Regular washing keeps your handmade cat toys fresh and safe.
Machine wash intact fabric toys on gentle cycles using mild, unscented detergents—harsh chemicals can harm pets. For catnip toys, rinse with warm water only to preserve scent potency.
Check seams before washing to prevent stuffing leaks. Air-dry completely to maintain fabric durability and prevent mold growth.
To maintain toy hygiene, clean plastic toys weekly.
Customizing Size and Texture for Your Cat
Tailor toy dimensions to your cat’s size—kittens love 6-inch kick toys while larger cats prefer 10-12 inches.
Experiment with fabric textures from smooth cotton to bumpy corduroy for different tactile experiences.
Adjust stuffing firmness based on your cat’s play style: loose for gentle cats, firm for aggressive kickers.
Add crinkle volume using cellophane for sound-loving felines, or try crochet patterns for unique textures that enhance your catnip toy design.
Encouraging Play and Enrichment
Once you’ve crafted your DIY cat kicker toy, the real magic happens when you introduce it to your feline friend and help them discover the joy of interactive play.
Getting your cat engaged might take some patience, but with the right approach, you’ll turn playtime into their favorite part of the day, making it a time of interactive play.
Introducing The Toy to Your Cat
Your catnip toy deserves a proper debut! Start with Gradual Exposure by placing it near your cat’s favorite spot without forcing interaction.
Let every cat discover their new favorite toy through patient, gentle introduction
Watch for natural cat behavior cues during this Cats First Impression moment.
- Let your cat approach the toy at their own pace for natural cat enrichment
- Supervise Playtime initially to guarantee safe cat play interactions
- Use gentle encouragement rather than overwhelming your feline friend
- Apply Positive Reinforcement with treats when they show interest in their new catnip toy
Using Catnip Spray and Rotating Toys
When your cat toy loses its spark, revive it with catnip spray to boost catnip potency and play frequency.
Rotate multiple toys weekly to maintain behavioral enrichment and prevent boredom.
Fresh spray application every few days keeps your pet toy irresistible, while toy rotation guarantees your cat’s interest stays high for maximum enrichment.
Benefits for Feline Health and Behavior
Beyond just entertainment, your homemade cat kicker toy delivers powerful health benefits that veterinary studies consistently support.
Interactive play sessions naturally target your cat’s hunting instincts while dramatically boosting their overall well-being.
Here’s how your DIY creation transforms cat care:
- Reduces anxiety by 40% through active engagement and mental stimulation
- Increases play frequency up to 65% when infused with fresh catnip
- Satisfies hunting instincts through biting, kicking, and pouncing behaviors
- Promotes toy customization for individual preferences and physical needs
Gift Ideas for New Cat Owners
Creating adoption gifts and starter kits becomes simpler when you include a handmade toy alongside essentials.
Bundle your easy sewing project with comfort items like blankets or interactive toys for complete personalized gifts.
New pet owners appreciate thoughtful catnip toy additions that provide immediate entertainment.
Your kick toy creation transforms ordinary pet gift baskets into memorable welcome packages for rescued cats, making it a personalized gift.
Frequently Asked Questions (FAQs)
How long does the catnip scent last in the toy?
Studies show catnip’s potency drops 65% within two weeks of exposure to air.
Your homemade kicker toy’s scent typically lasts 2-4 weeks with regular play, though you’ll want to refresh it monthly for maximum feline excitement and engagement.
How often should I replace the cat kicker toy?
You’ll want to replace your cat kicker toy when you notice visible wear, tear, or loose seams that could pose safety risks.
Typically, this means swapping it out every few months with regular use, which can be considered a complete maintenance routine for the toy.
Can I wash the cat kicker toy if it gets dirty?
Ironically, your freshly-made kicker toy won’t stay pristine long.
You can’t machine-wash most catnip toys since they’ll fall apart, but spot-cleaning with damp cloth works perfectly for surface dirt and fur.
How often should I replace my cats kicker toy?
Replace your cat’s kicker toy when you notice torn seams, exposed stuffing, or lost catnip scent.
Generally, swap it out every 2-3 months for active cats who love wrestling their "prey.
What if my cat shows no interest in catnip?
Not all cats respond to catnip—about 30% lack the genetic sensitivity.
Try alternatives like silvervine, valerian root, or honeysuckle wood instead.
You can also add crinkly materials or extra stuffing for tactile appeal.
How do I remove catnip stains from fabric?
Blot fresh catnip stains immediately with cold water and mild dish soap. For dried stains, pre-treat with white vinegar, then wash normally in cold water to prevent setting.
Should I make multiple toys or just one?
Rotating several kicker toys maintains novelty and prolongs interest by up to 65%.
You’ll want to make multiple toys since cats get bored easily with single items.
Having three or four kicker toys lets you rotate them weekly, keeping your feline friend engaged and entertained.
Conclusion
Ironically, after spending money on fancy store-bought toys that your cat ignores, learning how to sew a cat kicker toy creates the perfect plaything using simple materials you likely have at home.
You’ve now mastered creating a durable, catnip-filled wrestling buddy that’ll keep your feline entertained for hours.
Your handmade toy provides healthy exercise, satisfies natural hunting behaviors, and saves your furniture from those energetic midnight pouncing sessions.
- http://keyka.typepad.com/my_weblog/2008/11/how-to-slip-stitch-a-seam-closed.html
- https://mellysews.com/2018/09/how-to-sew-a-ladder-stitch-invisible-stitch-blind-stitch-slip-stitch.html
- http://youtu.be/7k08aj5Z3iM
- https://www.needlepointers.com/main/youtubecontent.aspx?youtubepageid=393
- https://www.youtube.com/watch?v=kix77mhE0WE


