This site is supported by our readers. We may earn a commission, at no cost to you, if you purchase through links.
Your first dress won’t be perfect, and that’s the point. Most sewists remember their initial attempt with a mix of pride and laughter—maybe the zipper puckered, or the hemline wandered like it had somewhere else to be. But here’s what matters: you finished it, wore it, and learned more from those crooked seams than any tutorial could teach.
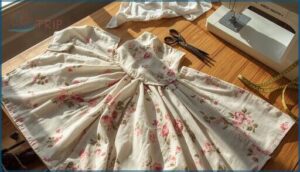
Learning how to sew a dress gives you control over fit, style, and quality in ways store-bought garments never will. The process starts with choosing fabric that forgives beginner mistakes, understanding your measurements, and following a pattern designed for new sewists.
With the right approach, your first handmade dress becomes a wearable lesson in technique, patience, and the satisfaction of creating something from flat yardage and a vision.
Table Of Contents
- Key Takeaways
- Choosing The Best Fabric for Your Dress
- Must-Have Tools and Materials for Dressmaking
- Taking Accurate Measurements for Dressmaking
- Selecting and Preparing Your Dress Pattern
- Cutting Fabric and Marking Pattern Pieces
- Assembling The Dress: Step-by-Step Construction
- Installing Zippers, Closures, and Fastenings
- Fitting and Adjusting The Dress During Construction
- Professional Finishing Techniques for Dresses
- Troubleshooting and Dressmaking Tips for Beginners
- Frequently Asked Questions (FAQs)
- Conclusion
Key Takeaways
- Your first dress won’t be perfect, but choosing forgiving fabrics like cotton or cotton blends, following beginner-friendly patterns with 5–10 pieces, and making a test muslin will teach you more than any tutorial ever could.
- Accurate body measurements and pattern adjustments matter more than the size on the envelope—most sewists alter bust, waist, or hip areas, and pre-washing natural fibers prevents the 10–14% shrinkage that can ruin a perfect fit.
- Professional finishing techniques like proper pressing after every seam, clean hem methods matched to your fabric weight, and enclosed raw edges transform a homemade dress into one that rivals store-bought quality.
- Thread tension issues and puckering cause about 80% of common sewing problems, so checking your needle size, tension balance, and stitch length before continuing saves you from redoing entire sections later.
Choosing The Best Fabric for Your Dress
Your fabric choice can make or break your first dress project, so it’s worth taking a few minutes to understand what works best. Different fabrics behave in completely different ways under your needle, and some are much more forgiving than others when you’re still learning.
Let’s look at the key factors that’ll help you pick the right material for your skill level and dress style.
Types of Fabrics for Beginners
Cotton stability makes it the ideal choice for beginners—quilting cotton and poplin offer predictable handling and minimal slippage. When you’re starting out, fabric selection shapes your entire experience, so consider these beginner-friendly options:
- Cotton blends: Blend benefits include less shrinkage and easier pressing than pure cotton
- Linen or linen-blends: Beautiful structure, though linen wrinkling requires confident ironing
- Viscose rayon: Viscose drape creates fluid silhouettes with soft, forgiving behavior
- Woven fabrics: Easy handling compared to stretchy knits for dress fabric projects
For ease of ironing, natural fibers work best.
Fabric Weight and Drape Considerations
Once you’ve chosen your fabric type, understanding weight and drape becomes your next priority. GSM (grams per square meter) tells you how heavy fabric is—lightweight options like challis measure 100–170 GSM, while medium-weight linens sit around 170–230 GSM. Understanding GSM measurements helps classify fabrics by weight.
The drape coefficient shows how fluid or stiff your chosen material acts: lower percentages mean softer, body-skimming movement, perfect for beginners mastering dress construction.
Selecting Fabric for Dress Style
Your dress style dictates fabric selection more than you might think. Structured shift and A-line dresses work beautifully with stable wovens like cotton or polyester blends, which hold crisp seams without added bulk.
Body-con or casual jersey styles need knit fabrics—their stretch moves with you while maintaining shape.
For summer maxi or wrap dresses, rayon offers breathable drape at moderate cost, while polyester crepes balance wrinkle resistance with elegant flow for office wear.
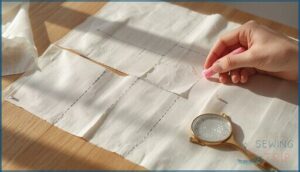
Fabric Pre-washing and Care
Once you’ve made your fabric selection, pre-washing becomes your insurance policy against disaster. Natural fibers—cotton, linen, rayon—can shrink 10% to 14% in their first wash, turning a perfect fit into a costume mishap.
Pre-washing natural fibers is your insurance policy against 10–14% shrinkage that can ruin a perfect fit
Before cutting pattern pieces, follow these fabric preparation steps:
- Wash cotton and rayon in cold water to minimize shrinkage factors while setting dye
- Test colorfastness by soaking dark fabrics separately with vinegar to prevent bleeding
- Use gentle washing methods for delicate weaves, protecting fabric structure
- Consider fiber considerations: synthetics shrink less but still need cleaning
- Skip fabric softener—detergent impact on microfiber release matters less than proper preshrinking fabric
Must-Have Tools and Materials for Dressmaking
Before you cut a single piece of fabric, you need the right tools in your workspace. A reliable sewing machine sits at the heart of your setup, but it’s only part of the picture.
Let’s walk through the essential equipment that will turn your dressmaking vision into reality.
Essential Sewing Machine Features
Your sewing machine is the workhorse of every dress project, so you want one that won’t slow you down. Look for a model offering at least 20 built-in stitches—including straight stitching and zigzag—plus speed control to help you master sewing techniques without rushing.
A top-loading bobbin system, automatic needle threading, and bright LED lighting options reduce common sewing machine issues and make sewing machine use far smoother for beginners tackling their first garment.
Scissors, Pins, and Measuring Tools
Sharp ergonomic scissors—around eight inches long—cut fabric cleanly without snagging, and you’ll need at least two pairs: one for fabric, another for paper patterns.
Medium-length straight pins, commonly 1 to 1.5 inches, hold pieces securely during assembly, while a flexible tape measure marked in both inches and centimeters ensures accurate body measurements and seam allowances every single time.
Matching Thread and Notions
Beyond fiber compatibility—cotton thread for cotton, polyester for synthetics—color matching makes your stitching disappear: lay a single thread strand on fabric, then choose the darker option if you’re torn between two.
For zippers and interfacing weight, match your fabric’s body so structure doesn’t overpower drape, and stock neutral thread colors to cover most dressmaking projects without buying a spool each time.
Importance of an Iron and Pressing Tools
Pressing techniques shape your seams just as much as your stitching does—steam presses relax fibers more deeply than dry heat, locking darts and hems in place while you build the dress.
A reliable iron, pressing cloth, and tailor’s ham smooth seam allowances, fuse interfacing without puckers, and prepare fabric before you cut, turning home sewing into garments that rival ready-made quality.
Taking Accurate Measurements for Dressmaking
Getting the right measurements is the difference between a dress that fits beautifully and one that hangs awkwardly, so this step really matters. You’ll need to measure yourself carefully, understand which numbers actually count for your dress style, and know how to adjust when things don’t line up perfectly.
Here’s what you need to focus on to get measurements that work.
Key Body Measurements Needed
You can’t build a dress that fits if you start with the wrong numbers, so taking accurate body measurements is the foundation of everything. Commercial patterns rely on specific measurements to determine size and guide fitting adjustments when measuring and drafting your dress.
Here are the key measurements you’ll need:
- Bust circumference – Measure around the fullest part of your chest, commonly 97 cm for a size 12
- Waist circumference – Your natural waistline, where your torso bends, usually about 80 cm in mid-range sizes
- Hip circumference – Around the fullest part of your seat, roughly 6–8% larger than your bust
- Torso length and shoulder breadth – Vertical measurements from neck to waist and across your shoulders guarantee proper bodice proportions
How to Measure Yourself Correctly
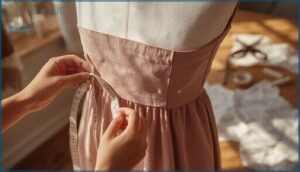
Taking accurate body measurements yourself can be tricky, but with careful attention to posture impact and tape handling, you’ll get readings within about 0.5–1 cm of professional standards. Stand upright with weight evenly distributed, keep the tape parallel to the floor for circumference accuracy, and avoid thick clothing that can add 2.5–5 cm.
For vertical measurements from neck to waist, mark reference points first, then measure—repeating each twice ensures fitting adjustments that actually work.
Using a Dress Form or Dummy
Once you’ve measured yourself, a dress form can hold your work-in-progress and speed up fitting adjustments. Choose a form sizing that covers your bust, waist, and hip numbers—most adjustable models span two to three clothing sizes.
Be aware of adjustability limits: padding systems let you add thickness at key spots, but dressmaking for beginners works best when you still fit garments on your own body for final checks.
Adjusting for Different Dress Styles
Different dress styles demand specific fitting decisions, and research shows that roughly half of women encounter bust, waist, or hip fit challenges in ready-to-wear garments. Here’s how to plan adjustments for a basic pattern:
- Bust adjustments: Most bodice blocks assume a B-cup, yet 60–70% of women wear C or larger, so add or remove fullness at the fullest point for fitted styles.
- Waist adjustments: Sheath and pencil dresses need close waist ease (1–1.5 inches), while A-line styles allow more.
- Hip adjustments: Rectangle and pear shapes—covering about two-thirds of body types—require reshaping side seams or adding flare.
For dressmaking for beginners, woven dress patterns generally include 2.5–3 inches of bust ease and 2–3 inches at the hip. However, knit fabric selection for dresses often uses zero or negative ease because stretch compensates.
Style lines such as empire or drop-waist also shift dart and seam locations vertically. Mark your high hip (4 inches below waist) and full hip (8 inches below waist) to guide fitting adjustments for dresses that follow your silhouette.
Selecting and Preparing Your Dress Pattern
Your pattern is the blueprint that turns flat fabric into a three-dimensional dress, and choosing the right one makes all the difference between frustration and success.
Before you cut a single piece of fabric, you need to understand what all those symbols mean, how sizing really works, and whether your pattern needs adjustments.
Here’s what you need to know to select and prepare a pattern that actually fits your body.
Finding Beginner-Friendly Patterns
Your first pattern selection shapes everything that follows, so look for dress patterns labeled “Very Easy,” “Beginner,” or “Simple.” Major brands use skill-level labels on the envelope front to guide you toward designs with fewer pieces and straightforward construction. Aim for patterns with roughly five to ten pieces rather than multi-view garments exceeding twenty pieces—every extra piece adds another seam you’ll need to master.
| Pattern Feature | Beginner Choice |
|---|---|
| Skill-level labels | “Very Easy” or “Beginner” |
| Pattern complexity | 5–10 pieces maximum |
| Instruction clarity | Photo-heavy guides or sewalongs |
Many indie pattern companies provide expanded, illustration-rich instructions that walk you through each step with more detail than legacy commercial patterns. Check whether the pattern you’re considering offers online tutorials, video sewalongs, or blog posts searchable by pattern number—these visual demonstrations clear up confusion fast. Patterns backed by strong support materials drastically reduce misinterpretation and help you complete your first dress with confidence.
Pattern format matters, too. Individual paper patterns and downloadable PDFs separate each size and piece clearly, while pattern magazines often consolidate multiple designs on one large sheet, making tracing trickier for newcomers. E-book patterns give you instant access, let you reprint pieces if you make a mistake, and some even include projector files to skip paper altogether.
Understanding Pattern Symbols and Sizing
Once you’ve chosen a basic pattern, decoding its symbols is your next win. Grainline arrows show fabric alignment parallel to the selvedge, preventing twisted hems. Notch meanings help you match pieces—single notches mark fronts, double notches mark backs. Fold lines appear as bent arrows. Pattern pieces include sizing charts listing bust, waist, and hip measurements, plus ease values showing how loosely your dress will fit. Pattern markings like dots and darts guide shaping.
Here’s what pattern selection teaches you:
- Single notches whisper “front piece,” double notches signal “back piece”—your cheat sheet for perfect seam alignment
- Grainline arrows stop fabric from twisting into a funhouse-mirror version of your dress
- Fold lines save you fabric by placing one edge exactly on the fold instead of cutting two separate pieces
- Sizing charts reveal your measurements matter more than the number you wear shopping
- Ease values tell you whether you’re sewing a body-hugging sheath or a breezy A-line with room to breathe
Pattern markings transform flat paper into three-dimensional garments when you transfer them accurately to fabric.
Adjusting Patterns to Fit Your Measurements
After comparing your measurements to the pattern chart, you’ll often need adjustments—over 80% of home sewists alter bust, waist, or hip areas. Slash-and-spread techniques add width where needed, while overlap methods remove excess.
Height alterations distribute length changes across bodice and skirt pieces. Grading between sizes at side seams solves proportion mismatches, keeping your basic pattern pieces aligned before cutting.
Making a Test Garment (Muslin)
Before cutting your fashion fabric, you’ll want to sew a muslin—a test garment made from inexpensive cotton that reveals fitting issues basic pattern sizing can’t predict. Use long basting stitch techniques to assemble bodice and skirt pieces quickly, then mark alteration transfer points directly on the fabric.
A wearable muslin benefits your next project by documenting exactly where your body needs extra room or shaping adjustments.
Cutting Fabric and Marking Pattern Pieces
Cutting fabric is where your careful planning meets sharp scissors, and there’s no room for guessing. This step determines whether your dress pieces fit together smoothly or leave you wrestling with mismatched seams.
Let’s walk through the essential techniques that’ll help you cut accurately and mark every important detail your pattern needs.
Laying Out Fabric and Pattern Correctly
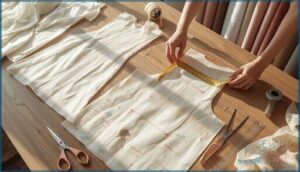
Grainline alignment separates a well-fitted dress from one that twists on your body. Lay your pattern pieces on folded fabric, making sure the grainline arrow sits parallel to the selvage along its entire length—measure at both ends to check.
Nap direction matters for velvet or one-way prints, so orient all pattern pieces the same way. Secure patterns with pins around edges before cutting layout begins.
Using Cutting Tools for Accuracy
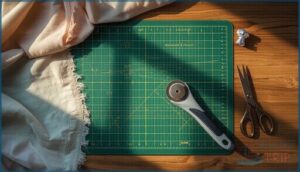
Sharp tools aren’t optional—they’re the difference between clean edges and frayed disasters. A cutting mat protects your table and keeps blades sharper longer, while rotary cutter safety means always cutting away from your body. Aim within 1–2 millimeters of your pattern line, because small errors multiply across seams.
- Use rotary cutters with clear acrylic rulers for straight seams that won’t need trimming later
- Replace dull blades after big projects—they cause ragged edges and require dangerous extra force
- Choose pattern weights over pins for thick fabrics to prevent shifting during cuts
- Stand while cutting for better control and leverage through multiple layers
- Maintain cutting mats by soaking in cool vinegar water to restore grip and accuracy
Marking Notches, Darts, and Seam Allowances
You can’t stitch invisible lines—every notch, dart, and seam allowance needs a visible mark before you remove that pattern. Use pattern marking tools like tailor’s chalk or tracing wheels to transfer these guides onto your fabric’s wrong side.
Accurate grainlines keep darts pointing where they should, while consistent seam allowance width—usually 5/8 inch—prevents fit disasters during dress construction.
Mark before cutting fabric separates your pattern pieces.
Tips for Cutting Stretchy or Slippery Fabrics
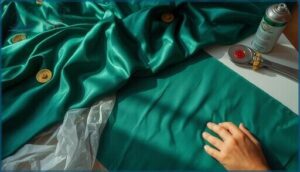
Slippery satins and jersey knits don’t play fair—they shift, stretch, and distort the moment your scissors touch them. Stabilizing fabrics with spray starch or tissue backing before cutting prevents pattern distortion, especially on bias-cut woven fabrics.
Use rotary cutters with pattern weights instead of shears to reduce lifting and stretching.
For knit fabrics, cut single layers flat on your table, supporting every inch to stop gravity from warping your shapes.
Assembling The Dress: Step-by-Step Construction
Once your fabric is cut and marked, it’s time to put the pieces together. This is where your dress starts to take shape, seam by seam, as you connect each component with precision.
Here’s how to construct your dress from the ground up, starting with the structural seams and working through each attachment.
Sewing Shoulder and Side Seams
Once you’ve prepped your fabric pieces, you’re ready to join the dress together. Start with shoulder seams, pinning right sides together and sewing with a 1.5 cm seam allowance and 2.5 mm stitch length. These seams carry weight, so use a straight stitch and press them open afterward.
Next, tackle side seams using the same techniques for clean, stable dress construction.
Constructing Darts and Pleats
After your seams are secure, darts and pleats shape the fabric to follow your body’s curves. Darts taper excess cloth into small folds, especially around the bust, waist, and back. Position bust darts 27–30 cm below the shoulder and end them 2.5–5.0 cm before the bust point to avoid a pointed look.
For pleats, remember fabric consumption:
- Knife pleats need twice the visible depth
- Box pleats require three times the finished width
- Stitch length should stay 2.5–3.0 mm for medium fabrics
- Press over a ham to match body curves and set shape permanently
Attaching Bodice, Skirt, and Sleeves
Once your darts are pressed, garment construction moves to joining major pieces. Assembly order matters: sew shoulder seams first, finish the neckline, then attach sleeves before closing side seams. Finally, join the skirt to your completed bodice at the waist seam.
| Component | Seam Allowances | Key Technique |
|---|---|---|
| Waist seam | 1.5 cm (5/8 in) | Gathering ratios 1.5–1.75:1 |
| Sleeve ease | 1.9–5.0 cm extra | Two basting rows |
| Side seams | 1.5 cm standard | Stitch sleeve-to-hem |
| Skirt attachment | Trim 2–3 mm after | Press toward bodice |
| Finishing seams | 6 mm second pass | Clean raw edges |
For gathered skirts, cut fabric 1.5 to 1.75 times your bodice waist measurement. Run two basting rows within the seam allowance, pull threads to distribute gathers evenly, then stitch permanently at 2.5–3.0 mm length.
Sleeve ease between 1.9 and 5 cm allows the cap to curve smoothly into the armhole without puckering. Baste between notches, ease fullness gently, and press each joining seam to set stitches and smooth transitions for a polished finish.
Methods for Joining Linings and Facings
After you attach the bodice, skirt, and sleeves, it’s time to enclose raw edges with facings and lining. The burrito method lets you stitch neckline facing and armholes in one pass by rolling your bodice tightly between layers, then turning everything right side out.
For lined dresses, bagging out joins the lining to facings without handsewing—leave one side seam open to flip the garment, press flat, then understitching the neckline facing keeps edges crisp and prevents rolling.
Installing Zippers, Closures, and Fastenings
Installing closures might feel like the trickiest part of sewing a dress, but it’s really just about taking your time and following a clear process. Zippers, buttons, snaps, and hooks each have their own technique, and once you know the basics, you’ll be able to choose the right fastening for any dress style.
Let’s walk through each type of closure so you can finish your dress with confidence and precision.
Sewing Zippers Neatly
A zipper foot is your best friend when installing closures and zippers—it lets you stitch within 1–2 mm of the teeth, so your seams look sharp and straight.
Set your stitch length to about 2.5–3.0 mm for most fabrics, and always measure your zipper against the opening first.
Test on scrap fabric to check tension and avoid common installation defects like puckering or misalignment.
Adding Buttons, Snaps, or Hooks
Before adding buttons, snaps, or hooks, stabilize closure edges with fusible interfacing. This reinforcement prevents stretching and tearing, especially on lightweight fabrics.
Button placement should match your pattern markings precisely, spacing them 2–3 inches apart for shirts or closer for fitted bodices. Snap placement works well for overlapping edges, while hook security depends on stitching through both fabric and reinforcement layers for dressmaking that lasts.
Tips for Invisible and Exposed Zippers
For invisible zippers, an invisible zipper foot keeps stitching tight against the coil without catching it, creating an unnoticeable look. Exposed zippers need a standard zipper foot and a small gap from the teeth so the slider glides smoothly.
Basting technique stabilizes both types before final stitching, and careful pressing methods flatten seam allowance for clean zipper installation every time.
Troubleshooting Closure Issues
When closures fail, it’s often fabric stress or misalignment causing the trouble. Here are proven fixes:
- Zipper repair costs run $30–$80, so prevent gapping by checking seam allowances near the tape and restitching loose areas immediately.
- Snap attachment strength under ASTM D4846 testing ensures secure fastening, especially on children’s garments where safety standards matter.
- Seam slippage control requires 1.5 cm allowances and lock stitching at high-stress points to stabilize zipper installation.
- Closure material durability improves when you pair metal snaps with interfacing on lightweight fabrics, reducing common problems and solutions needs.
- Fastener safety standards guide troubleshooting sewing fitting issues before they require professional help.
Fitting and Adjusting The Dress During Construction
Fitting your dress as you sew it is just as important as cutting the pattern correctly. This is your chance to catch any issues before you stitch the final seams, which makes adjustments much easier.
Here are the key steps to get a fit that looks custom-made for your body.
Pinning and Basting for Initial Fit
Before you sew permanent seams, you need to check that everything fits. Pinning and basting are your safety net. Commercial patterns generally include 2.5–4 cm of ease allowance at the bust and hips, but every body is different. Use a long stitch length—around 4–5 mm—for basting stitches, which lets you pull them out quickly if fitting adjustments are needed.
| Tool | Purpose | Why It Matters |
|---|---|---|
| Safety pins | Hold seams during fitting | Won’t prick you or fall out |
| Long basting stitches | Create temporary seams | Easy to remove in one pull |
| Muslin or toile | Test garment before final fabric | Saves your good fabric from mistakes |
| Seam allowance guide | Guarantee consistent 1.5 cm seams | Accurate fit assessment |
| Fabric markers | Mark adjustment points | Shows where changes are needed |
When you pin the muslin on your body, start at the center front or back, then work outward to the side seams. Don’t backstitch basting stitches—leave thread tails loose so you can yank the entire seam out with one pull. If a seam feels tight, open it and repin closer to the fabric edge. For areas that feel too loose, pin out small wedges along the basted seams. These pinning strategy markers show you exactly where to adjust your pattern. Safety pins work better than straight pins because they stay put when you take the garment off, preserving your fitting issues notes between sessions.
Identifying and Fixing Common Fit Problems
Wrinkles and drag lines tell you exactly what’s wrong. Horizontal lines across your bust signal that you need more ease distribution or deeper bust darts. Diagonal lines from the armhole mean your shoulder slope needs pattern adjustments. Here’s what to watch for:
- Gaping necklines—remove width at the upper bodice
- Tight chest pulls—add bust shaping or ease
- Back wrinkles—increase back width for psychological comfort
- Seat bagginess—reduce volume to match anthropometric variation
Keep your seam ripper handy for quick fitting adjustments.
Making Adjustments Before Final Seams
Once you’ve spotted fit issues, planned alterations come next. Home sewing patterns include seam allowances of 1.5 to 2 cm on side seams, giving you up to 4 cm total adjustment room.
That’s why you check your muslin fitting first—pattern pieces reveal where you need changes. Mark closure placement, pin fabric selection fixes, and complete fitting adjustments before cutting fabric for your final seams.
Final Fitting Tips for a Tailored Look
Your last fitting happens two to three weeks before you wear the dress—that timing lets your body settle while leaving room for handsewn touchups.
Check hem length in your event shoes, since heel height shifts the floor clearance you need.
Sleeve refinements and seam allowance tweaks cost around $20 to $35 each, so plan your fitting adjustments now to keep professional finishing techniques within budget.
Professional Finishing Techniques for Dresses
The difference between a homemade dress and a professional-looking one often comes down to the finishing techniques you use. These final steps transform your garment from “almost there” to truly polished, covering everything from clean hems to crisp seams.
Let’s walk through the essential finishing methods that’ll give your dress that store-bought quality.
Hemming Methods for Various Fabrics
With the right hemming techniques, you’ll transform your dress from homemade to handmade. Narrow hems work beautifully on lightweight wovens, keeping bulk minimal at 6 to 13 millimeters. Rolled hems suit delicate sheers, finishing at just 3 to 5 millimeters for that wispy edge.
Blind hems shine on medium-weight fabrics like wool, with hem depth between 38 and 64 millimeters supporting proper drape and professional appearance.
Finishing Seams and Raw Edges
Once your hem looks crisp, raw edges inside demand attention to prevent unraveling. Pinking shears offer quick fraying prevention on stable wovens, while zigzag stitching adds more seam finish durability. French seams enclose raw edges beautifully on lightweight fabrics, and overlock alternatives like faux serging work when you don’t own a serger.
Fabric considerations matter—loosely woven materials need strong finishes, proper allowance widths provide a buffer, and professional finishing techniques keep your dress strong through countless wears and washes.
Adding Facings, Bindings, and Linings
Facings stabilize your neckline and armholes, concealing raw edges with narrow fabric pieces cut from the same material. Apply interfacing support for durability, then sew with 1/4-inch seam allowances on curves.
Bias binding offers a lighter alternative on sleeveless styles, while dress liners add structure and comfort. Proper facing techniques and lining fabrics transform openings into polished details that withstand wear.
Pressing for a Polished Appearance
Before assembling your next seam, press each dart and stitched line—this critical step prevents ridges and blends stitches into the fabric.
Set your iron to match fabric temperatures: cotton needs high heat around 400°F, silk requires low settings near 275°F. Use steam techniques with a pressing cloth on delicate materials, and select proper tools like tailor’s hams to shape curves without crushing details during dress construction.
Troubleshooting and Dressmaking Tips for Beginners
Even experienced sewists hit snags during dressmaking, and knowing how to fix common problems saves you time and frustration. You’ll face challenges with fabric behavior, tension issues, and finishing touches that don’t look quite right.
Let’s walk through practical solutions to the most frequent problems beginners encounter, plus tips to keep your finished dress looking great for years.
Preventing and Fixing Sewing Mistakes
Mistakes happen to everyone, but catching them early saves time. Thread-related issues—breaking, bunching, or looping—cause about 80% of common sewing machine problems, so check your tension adjustment and needle selection first.
If you spot puckering or skipped stitches, pause and troubleshoot before continuing. Seam ripping feels frustrating, but fixing fabric-related problems now beats redoing entire sections later.
Keep your stitch quality sharp through careful fabric handling.
Handling Fabric Puckering and Stretch
Puckered seams rank among the top three fabric-related problems in garment construction. You can prevent most puckering by adjusting needle size to match your fabric weight, balancing thread tension carefully, and setting stitch length around 3 mm for knit fabrics.
Fabric stability improves dramatically with proper fabric preparation, including preshrinking fabric and applying fusible interfacing where needed. Differential feed settings also help control stretch.
Tips for Working With Difficult Fabrics
Slippery satin and stretchy knits challenge beginners with fabric-related problems that stable cotton weaves don’t create. Working with special fabrics demands needle selection matched to weight: 90/14 stretch needles prevent skipped stitches on knits, while walking feet tame fabric slipperiness.
You’ll conquer special fabrics by choosing dress fabric wisely—start with medium-friction materials before tackling low-friction silks. Add French seams or overlocking as seam finishes, and remember that machine aids like lowered presser-foot pressure keep floaty layers aligned.
Dress Care and Maintenance After Sewing
Your finished dress deserves careful washing techniques and storage solutions that match the fabric selection you chose. Hand-sewn touchups address loose seams before washing, while professional finishing techniques like zigzagged edges prevent fraying.
For drying methods, lay cotton blends flat or hang them away from direct heat—this simple step can extend garment life by months. Proper stain removal and repair strategies keep your creation wearable far longer than store-bought alternatives.
Frequently Asked Questions (FAQs)
Can a beginner sew a dress?
Yes, you absolutely can sew a dress as a beginner—if you pick the right pattern difficulty and fabric choice. With realistic expectations and basic sewing tutorial guidance, simple dressmaking becomes achievable.
How do you sew a dress from a rectangle?
Rectangle dress styles simplify beginner dressmaking by cutting fabric into measured panels—usually two to four rectangles—then joining them with straight seams.
Fabric width options, neckline opening size, and adding ease allowance determine the final fit of your dress sewing project.
How do I start sewing a dress?
Every journey begins with a single stitch. Start your first project by choosing a beginner-friendly dress pattern, gathering essential tools like your sewing machine and fabric selection, then practicing on scrap material before cutting.
How do I sew a dress that requires intricate stitching?
Intricate stitching demands precise needle selection—size 60/8 for silk, 90/14 for heavier fabrics—and careful tension balance to prevent puckering.
Practice decorative seams on scraps first, adjusting your machine settings to maintain consistent stitch quality.
What Type of Thread Should I Use for Sewing Dresses?
Polyester all-purpose thread works best for most dresses, offering strength and durability across cotton, synthetic, and knit fabrics.
Match thread fiber to fabric type when possible, and choose medium weight for reliable seams.
How Can I Hem My Dress if I Don’t Have a Sewing Machine?
You can hand-sew a professional blind hem stitch, use fusible hem tape with an iron, or apply fabric glue for a no-sew finish—each method works well when you select the right needle and thread.
What’s the Best Way to Cut Out My Dress Pieces Accurately?
Why do small cutting errors matter so much? Align grainlines precisely, stabilize fabric before cutting, secure pattern pieces firmly, and use sharp tools—rotary cutters for straight edges, shears for curves—to achieve professional tolerance outcomes.
How to sew a dress step by step?
Start by sewing shoulder seams, then side seams from armhole to hem. Construct darts for shaping, attach sleeves to armholes, and add facings to finish necklines.
Install closures like zippers, then complete with hemming techniques.
Is it easy to sew your own dress?
Sewing a dress isn’t simple, with beginner dressmaking success rates below 50% for first projects.
Time investment matters—around six to nine months of practice generally yields consistently good-looking results, though fabric selection and sewing machine comfort help reduce physical demands.
Can I sew a dress with no experience?
Yes, you can sew a dress without prior experience. Beginners usually complete their first wearable garment within one month of regular practice, especially when choosing simple patterns and forgiving fabrics like cotton.
Conclusion
Think of your sewing machine as a bridge between imagining and owning exactly what you want to wear. Learning how to sew a dress isn’t about perfect execution on the first try, it’s about building skills one seam at a time.
Each stitch teaches you something new about fabric, fit, and your own creative instincts. Start simple, stay patient, and trust the process. Your wardrobe will never look the same again.
- https://www.uniformmarket.com/statistics/fast-fashion-statistics
- https://davidsuzuki.org/living-green/the-environmental-cost-of-fast-fashion/
- https://www.wri.org/insights/numbers-economic-social-and-environmental-impacts-fast-fashion
- https://www.marketgrowthreports.com/market-reports/home-sewing-machines-market-112738
- https://zipdo.co/sewing-industry-statistics/

