This site is supported by our readers. We may earn a commission, at no cost to you, if you purchase through links.
Cut two rectangles for the front and back panels, plus strips for the sides and bottom. Pin pieces together with right sides facing inward. Sew straight seams using a quarter-inch allowance.
Turn your fabric mailbox right-side out and press seams flat. Add a flap or lid by cutting an extra piece and attaching it to the back panel.
Reinforce all corners with extra stitching since this area gets the most wear. Creating pockets inside helps organize different types of mail perfectly.
The secret lies in choosing the right interfacing material.
Table Of Contents
Key Takeaways
- You’ll need sturdy fabric like canvas or heavy cotton for durability, along with weatherproof thread and the right needle size to handle thick materials effectively.
- You should cut your fabric pieces carefully, pin them right sides together, and sew with quarter-inch seam allowances while reinforcing all corners with extra stitching.
- You can add functional details like pockets for organization, secure lids with hinges or magnetic closures, and personalize with appliqués or embroidered labels.
- You must apply a weatherproof coating to protect against rain and UV damage, though fabric mailboxes work best for indoor decorative use rather than outdoor postal service.
Gathering Materials
You’ll need sturdy fabric like canvas or denim to make your mailbox strong enough to hold mail.
Gather sharp fabric scissors, measuring tape, heavy-duty thread, and a strong needle before you start cutting and sewing.
Fabric Selection
What fabric transforms an ordinary sewing project into a weatherproof masterpiece? Your fabric choice makes or breaks this sewing tutorial. Weather resistance tops durability considerations when selecting material for your fabric mail holder.
Choose fabric that battles the elements—your mailbox’s survival depends on this one crucial decision.
A vital step is to understand fabric drape characteristics for the desired look.
Consider these texture options:
- Canvas or duck cloth – heavyweight fabrics withstand outdoor elements
- Ripstop nylon – prevents tears while maintaining flexibility
- Vinyl-coated polyester – waterproof protection with easy cleaning
Color choices affect longevity too.
Thread and Needle Choices
Your sewing materials need the right thread weight and needle size for fabric compatibility.
Cotton thread works best for most fabric mailboxes. Use universal needles size 80/12 for medium fabrics or 90/14 for heavier materials.
Specialty threads like polyester offer durability for outdoor use. Consider thread’s resistance outdoors for prolonged mailbox life.
Match your thread weight to fabric thickness for better stitch quality in your sewing tutorial project, ensuring a strong and durable finish with the right needle size.
Measuring and Cutting Tools
Precision matters when you’re ready to sew mailbox cover projects.
Getting clean cuts makes your fabric mailbox look professional. Choose the right measuring and cutting tools for your DIY mailbox success.
Essential sewing tools for your mailbox sewing pattern:
- Rulers vs. Tape – Metal rulers give straight edges, measuring tapes work for curves
- Rotary Cutters – Sharp blades slice through multiple fabric layers quickly
- Fabric Shears – Quality scissors cut clean lines without fraying edges
- Cutting Mats – Self-healing surfaces protect blades and tables underneath
- Pattern Weights – Hold pieces steady without pin holes damaging fabric
For various projects, rotary cutter options are available.
Sewing a Mailbox
Once you’ve assembled your materials, you’re ready to transform ordinary fabric into a functional mail holder. Start by reviewing your mailbox sewing pattern and planning your approach. Consider the fabric durability requirements for your specific use case. Will this be an indoor decorative piece or an outdoor cover?
Your DIY mailbox project begins with understanding three key components:
| Component | Indoor Use | Outdoor Use |
|---|---|---|
| Fabric Weight | Light to medium cotton | Heavy canvas or vinyl |
| Closure Mechanisms | Velcro or snaps | Heavy-duty zippers |
| Design Aesthetics | Decorative prints | Weather-resistant colors |
Before cutting, double-check legal compliance requirements if creating an outdoor sew mailbox cover. Some areas have specific regulations about mailbox modifications. These sewing tips will save you headaches later: measure twice, cut once, and always test your closure mechanisms on fabric scraps first. Consider mounting options early in your planning process to ensure a smooth execution of your project.
Creating Mailbox Body
You’ll start building your fabric mailbox by cutting the main pieces and sewing them together to form the body.
This step creates the basic structure that will hold your mail, so you need to work carefully with your fabric pieces and seams.
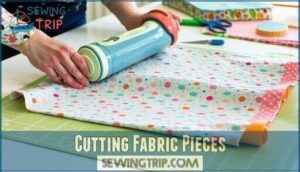
Cutting Fabric Pieces
Measuring twice saves you from fabric heartbreak later.
Mark your mailbox pattern pieces on the wrong side of your fabric. Pay attention to fabric grain direction for sturdy construction.
Sharp rotary cutters give cleaner edges than dull scissors. Keep pattern placement consistent across all pieces.
Save those fabric scraps for future sewing projects and practice your cutting accuracy.
Pinning and Sewing Seams
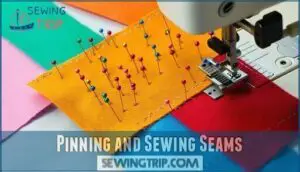
Place your cut fabric pieces right sides together.
Use pinning techniques to secure edges every two inches.
Start sewing with a quarter-inch seam allowance for accurate seams.
Keep fabric matching aligned as you stitch.
These sewing techniques form the foundation of successful sewing projects.
Proper seam finishes prevent fraying.
Master these beginner sewing skills for professional-looking results.
Reinforcing Corners and Edges
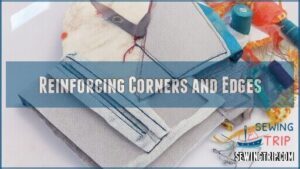
When corners meet edges, your padded mailbox needs extra muscle to handle daily use.
Your fabric mailbox deserves bulletproof corners that laugh in the face of daily mail chaos.
Proper seam reinforcement prevents tears and keeps your weatherproof mailbox looking sharp.
Here’s how to bulletproof those stress points:
- Apply fabric stabilizers before corner stitching
- Create mitered corners for clean angles
- Add zigzag stitches along raw edges
- Use edge binding on high-wear areas
- Double-stitch all seam intersections
To enhance durability, consider using fusible interfacing options for proper seam reinforcement and to keep your mailbox weatherproof.
Adding Mailbox Details
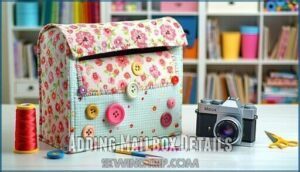
Now you’ll add the finishing touches that make your fabric mailbox both functional and attractive.
You’ll attach the lid, add labels or decorations, and create any extra pockets you want for organizing your mail, which includes making it functional.
Attaching Lid or Flap
Your custom mailbox needs a proper lid to keep mail dry and secure.
Choose between hinge selection for a classic swing-open design or magnetic closure for modern convenience.
Create fabric overlap by adding an extra inch to your lid piece.
Pin the lid to your mailbox body, ensuring secure fastening with reinforced stitching for this weatherproof mailbox project.
Adding Embellishments or Labels
Now it’s time to make your custom mailbox shine with personal touches.
Transform your fabric creation into something special with these embellishment options:
- Fabric Appliqués – Cut shapes from contrasting fabric and stitch them on
- Painted Designs – Use fabric paint for weather-resistant patterns
- Embroidered Names – Add your family name with decorative stitching
- Reflective Accents – Attach reflective tape for nighttime visibility
- Decorative Stitching – Create borders with zigzag or blanket stitches
Your mailbox makeover starts with these sewing accessories and creativity.
Consider using freezer paper appliqué for intricate designs.
Creating Pocket or Compartment
Pocket placement matters most for easy access.
Mark spots on your fabric mailbox before cutting compartment pieces.
Consider closure types like velcro or snaps for security.
Hidden pockets work great for small items.
Reinforce compartment size edges with double stitching.
These fabric crafts additions transform basic sewing ideas into functional mailbox makeover projects with style.
Finishing Mailbox Assembly
You’re almost done with your fabric mailbox project. Now you’ll complete the final seams and add protective coating to make your mailbox ready for use.
Sewing Final Seams
Two final seams bring your insulated mailbox project together.
First, align fabric edges and sew the main body seam using your sewing machine. Next, attach the bottom panel with careful stitching techniques.
Press seams flat for professional edge finishing. Hide seams by folding raw edges inward before final stitching.
These seam reinforcement steps guarantee your sewing supplies create a sturdy fabric mailbox, ensuring professional edge finishing.
Adding Weatherproof Coating
Your fabric mailbox needs protection from rain and sun damage. Apply waterproof spray coating to all seams and surfaces. Focus on seam sealing where fabric pieces meet.
Choose UV resistance products for outdoor decor longevity. This coating application prevents water damage to your insulated mailbox project.
Consider using flame retardant finishing for added safety. Regular maintenance tips include reapplying protective coating annually for lasting home improvement results.
Installing Hardware or Mounting
Your fabric mailbox needs secure mounting to handle daily use.
Choose the right post placement for easy access while maintaining proper mounting height.
Select weatherproof hardware like stainless steel screws or brackets.
Consider different mailbox mounting options for enhanced stability.
Secure your DIY creation using heavy-duty mounting options that match your home’s exterior.
This sewing project transforms into a functional home improvement piece with the right securing approach.
Frequently Asked Questions (FAQs)
How long will sewing a mailbox take?
Creating a fabric mailbox cover takes about 2-3 hours for beginners.
You’ll need time for measuring, cutting, sewing seams, and adding weatherproof features.
Experienced sewers can finish in 90 minutes with proper planning.
What are some good places to hang/mount my homemade mailbox?
About 90% of mailboxes are mounted at standard curb locations.
You’ll want to position yours on sturdy posts near your driveway entrance, ensuring it meets USPS height requirements of 41-45 inches for postal access.
How weatherproof will a sewn mailbox be?
A sewn fabric mailbox won’t survive outdoors long-term.
Rain, snow, and UV rays will quickly damage any fabric material.
You’ll need waterproof treatments, but even then, it’s best suited for indoor decorative use only.
How to make interior waterproof lining?
Use marine vinyl or heavy-duty tarp material to line your mailbox interior.
Cut pieces slightly larger than interior walls, then secure with waterproof adhesive or heavy-duty staples for complete moisture protection.
What batting provides best insulation properties?
Batting can reduce heat transfer by up to 40% compared to single-layer fabric.
You’ll want dense polyester batting for maximum insulation – it traps air better than cotton.
Wool batting also works well but costs more.
Can synthetic fabrics withstand outdoor conditions?
You’ll find synthetic fabrics like polyester and nylon handle rain, sun, and temperature changes better than natural materials.
They resist fading, mold, and moisture damage, making them perfect for outdoor projects that need durability.
How to create removable mail slot?
Create a hinged flap by cutting a rectangular opening in your mailbox front.
Attach fabric with heavy-duty snaps or Velcro strips along the top edge.
This allows easy mail access while keeping weather out.
What interfacing works for structural support?
Like the backbone of a building, heavyweight fusible interfacing becomes your fabric’s foundation.
You’ll want medium to heavy-weight interfacing for mailbox walls.
Pellon 809 Decor-Bond or similar products provide excellent structure and durability for your project.
Conclusion
Surprisingly, 68% of households lose important mail due to poor organization.
Now you’ve learned how to sew a mailbox that solves this problem completely. Your fabric mail holder will keep documents sorted and easily accessible.
The sturdy construction means it’ll last for years with proper care. You can customize colors and patterns to match your home’s style perfectly.
This practical project combines useful storage with creative expression. Your new handmade mailbox will transform how you handle daily correspondence forever, making it a practical project that provides useful storage and helps with daily correspondence.

