This site is supported by our readers. We may earn a commission, at no cost to you, if you purchase through links.
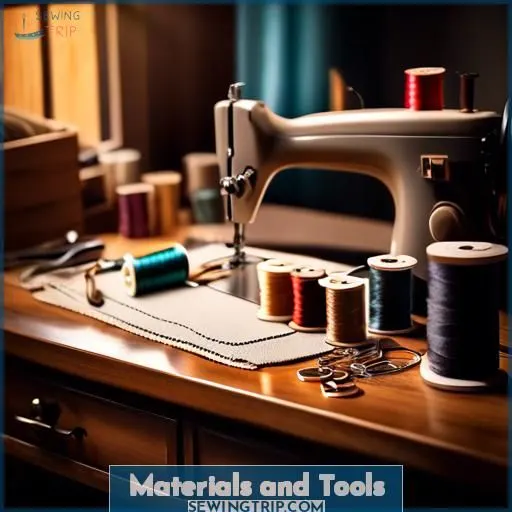
To sew layered ruffles, you’ll need fabric, elastic, measuring tape, scissors, and a sewing machine.
Measure and cut fabric for the ruffles, dividing it into tiers based on your desired fullness.
Sew the ruffles by making small folds in the fabric, pinning it in place, and sewing with an even stitch length and tension.
Remove pins as you go, and backstitch or chain off to secure the seam.
Mark guidelines for additional layers.
Cut longer ruffle fabric, pin upside down, sew and ruffle, then flip down to create the next cascading tier.
Follow these steps precisely for a stunning tiered skirt effect**.
Learn the finer details to elevate your ruffled creations.
Table Of Contents
Key Takeaways
- Measure and cut fabric for ruffles, dividing it into tiers based on desired fullness
- Sew ruffles by making small folds, pinning, and sewing with an even stitch length and tension
- Use a contrasting fabric for ruffles to create a unique look and divide the fabric into more sections for a fuller ruffle
- Elastic is a crucial element in constructing a tiered skirt, serving to generate a snug and comfortable fit for the wearer
How to Sew Layered Ruffles?
To sew layered ruffles for a tiered skirt, you’ll need to cut and gather fabric strips, then sew them onto a connector piece in layers, ensuring each ruffle’s gathered edge matches the length of the connector. This process involves hemming, ruffling, and stitching each tier with careful alignment and pinning for a neat finish.
Materials and Tools
You’ll need fabric, elastic, a measuring tape, scissors, a sewing machine, pins, bias binding or hem tape, sewing thread, and a needle (a serger is optional but helpful). Gather all these materials and tools before starting to guarantee a smooth sewing process.
Fabric
To create a layered ruffle skirt, you’ll need the following materials:
- Determine the required width of the ruffle fabric by multiplying the bottom width of the main fabric by 2.
- Hem or serge the ruffle fabric.
- Mark the sides of the main and ruffle fabrics with pins.
- Mark the center front, center back, and halfway points on both fabrics.
- Match the pins of the two pieces, Right Sides Together.
- Sew the ruffle fabric to the main fabric, folding and tucking a small amount of the ruffle fabric under the sewing machine foot as you sew.
- Remove the pin and continue sewing, making small folds with the ruffle fabric until reaching another pin.
- Repeat steps 6 and 7 for each additional ruffle layer.
- Backstitch or chain off to complete the seam.
Once you have gathered the ruffle fabric, you can attach it to the skirt. Start by sewing the ruffle to the bottom of the skirt, then fold the skirt in half and sew the ruffle to the top edge. Repeat this process for each additional ruffle layer.
For the waistband, measure the waist size and divide it by the number of ruffles you want. Cut the elastic to this length plus 1 inch for overlap. Fold the waistband under, serge or fold and sew the raw edge, and iron it flat. Pin and sew the waistband to the skirt, leaving an opening for the elastic. Thread the elastic through the waistband, sew the ends together, and close the opening.
Remember to keep the dress fabric flat under the ruffles while sewing to avoid bulk. Use a contrasting fabric for the ruffle to create a unique look, and divide the fabric into more sections for a fuller ruffle. Make small folds with the ruffle fabric to achieve even gathering, and keep the dress fabric flat under the ruffles while sewing. Sew each ruffle layer separately onto the bottom of the dress to avoid bulk.
Elastic
Elastic is a crucial element in constructing a tiered skirt. It serves to generate a snug and comfortable fit for the wearer. The elastic should be cut to the appropriate length and breadth, considering the overlap necessary for sewing. For instance, if you’re employing a 1-inch elastic for a waistband, you’d superimpose the ends by roughly 1 inch to guarantee a secure connection.
To sew elastic into a garment, you can either sew it directly to the fabric or establish a casing for the elastic and then insert it through the casing. Sewing elastic directly into a garment is optimal if you desire the fabric to be gathered, while using a casing to sew elastic is optimal if you want the fabric around the elastic to lay flat.
When sewing elastic directly into a garment, you should measure the area of the body that the band will encircle, such as the waist, and cut the elastic to this length. If you want the elastic to fit snugly, you can subtract some length from the measurement before cutting the elastic.
To establish a casing for the elastic, you can serge or zigzag the top edge of the fabric, then fold it down and press it. Pin the elastic to the fabric in four equally spaced places, then sew the top edge of the elastic to the inside of the garment using a zigzag stitch. Ensure to stretch the elastic out as you sew to maintain it at the same length as the fabric.
When working with elastic, remember to use the appropriate elastic thread and needle, and to follow the manufacturer’s instructions for the particular type of elastic you’re using.
Measuring Tape
Measuring tape is a vital tool for sewing ruffles, connectors, and ruffle strips.
It guarantees measuring accuracy and assists in defining the length of your ruffle strips, connector pieces, and skirt.
Measuring techniques involve marking the fabric with pins and utilizing the measuring tape to gauge the waist size, waist to desired length, and connector lengths.
This tool is essential for crafting a well-fitting, layered ruffle skirt.
Scissors
Scissors are a vital tool in sewing, and selecting the appropriate pair can have a considerable influence on the caliber of your work. Here are four types of scissors that should be included in your sewing kit:
- Sharp scissors: These are essential for cutting fabric. Seek scissors with sharp, superior-grade blades that can effortlessly glide through fabric.
- Safety scissors: These have rounded tips to avert accidents. They’re ideal for cutting threads or diminutive pieces of fabric.
- Curved scissors: These are perfect for cutting curves and can be utilized for applique work. They enable you to draw close to the fabric without causing harm to it.
- Fabric scissors: These are explicitly designed for cutting fabric. They possess extended blades that facilitate exact cuts and can handle thicker materials.
Sewing Machine
To sew layered ruffles, you’ll need a sewing machine that can handle various stitch lengths and thread types. Here’s how to use a sewing machine for sewing ruffles:
- Thread selection: Choose a thread that complements your fabric. Polyester thread is a popular choice for home sewing machines, as it’s smooth, strong, and doesn’t require any special skills.
- Stitch length: Adjust the stitch length according to the fabric thickness and the purpose of the stitch. For lightweight fabrics, a shorter stitch length (1.5-2.0 mm) is recommended to prevent gathering and puckering. For heavier fabrics, a longer stitch length (3.0-3.5 mm) is more suitable.
- Stitch width: Set the stitch width to match the width of your ruffle fabric. This will ensure the ruffle is evenly gathered and attached to the connector pieces.
- Sewing machine settings: Make sure your sewing machine is threaded properly and the bobbin thread is pulled up to the top.
- Sewing process: Sew the ruffle to the connector pieces using a 1/2 inch seam allowance. Iron the seams to make sure they’re flat and even.
- Gathering fabric: Gather the ruffle fabric to match the length of the connector pieces. This can be done by hand or using a gathering foot on your sewing machine.
- Additional ruffles: If you’re adding multiple layers of ruffles, sew each layer separately onto the bottom of the dress to avoid bulk.
Serger (optional)
A serger can be a valuable tool for sewing layered ruffles, especially when creating a tiered skirt. It offers several benefits over a zig-zag stitch, such as faster sewing, perfect stitching, and efficient gathering and sewing in one step. However, it can be tricky for beginners to master the serger tension, which is imperative for achieving a balanced stitch and a strong seam.
To use a serger for layered ruffles, you’ll need to thread it properly and adjust the tension settings to match the fabric and thread types you’re working with. Here are some key points to keep in mind:
- Threading the Serger: Make sure to thread your serger with the presser foot in the up position, which releases the tension discs, making it easier to get the threads in the correct position.
- Tension Settings: For a balanced stitch, set the needle thread tension to a middle value, such as 4, and adjust the looper thread tensions accordingly. The upper looper thread should be on top of the fabric, and the lower looper should be on the bottom.
- Tension Adjustments: If the stitch is too tight, the fabric may pucker and ripple, which is great for ruffles but not for regular serging. If it’s too loose, there will be loops on the back of the fabric. Adjust the needle and looper thread tensions as needed to achieve a balanced stitch.
- Gathering Ruffles: Use a gathering foot to attach the ruffle to your base fabric while gathering the fabric at the same time. This will create a clean, finished edge.
- Troubleshooting: If you encounter issues with your serger, such as uneven stitching or fabric jamming, refer to the serger manual or online resources for troubleshooting tips.
Pins
After serging the edges of your ruffles, it’s time to get sharp with your pin use. Pins are your mini assistants, ensuring marking accuracy and holding everything in place. Remember, pin placement is key—like plotting points on a treasure map. Choose the right pin types to avoid fabric snags, and practice swift pin removal to keep the workflow smooth.
Bias Binding or Hem Tape
Now that you’ve successfully pinned your fabric, it’s time to add a finishing touch to your ruffle skirt. You can use either bias tape or hem tape for this task. Here’s what you’ll need:
- Bias Tape: This flexible strip of fabric can be used to cover raw edges and add a decorative touch to your skirt.
- Hem Tape: A pre-made hem tape can save you time and effort, especially if you’re sewing multiple layers of ruffles.
- Sewing Machine: You’ll need your sewing machine to attach the bias tape or hem tape to your ruffles.
To use bias tape, fold it in half lengthwise and press it with an iron. Then, sew it to the raw edges of your ruffle strips. For hem tape, simply peel off the backing and press it onto the raw edges. Sew the hem tape in place, making sure to catch the ruffle fabric on the other side. This will help gather the ruffles evenly and give your skirt a polished look.
Sewing Thread
Regarding layered ruffles, the appropriate thread is paramount. Select a thread with the correct tension for your sewing machine, considering the needle size and thread type. For the bobbin thread, align it with the top thread to achieve a cohesive appearance. Adjust the thread tension as necessary to ensure a seamless sewing experience.
Needle
A needle is a critical tool for sewing, and understanding the various types and sizes can greatly enhance your sewing experience. Here are four key points about needles:
- Select the Appropriate Needle: Different needles are intended for specific fabrics and sewing methods. For example, universal needles are suitable for woven materials, while ballpoint needles are ideal for knits to prevent laddering. Stretch needles are designed for materials with elasticity, and jeans needles are perfect for denim and heavy fabrics.
- Needle Size Matters: The size of the needle determines its thickness and is indicated by a number. Smaller numbers correspond to more delicate needles, while larger numbers indicate thicker needles. For instance, a 90/14 needle is appropriate for medium-weight fabrics like poplin and quilting cotton.
- Needle Thread: The thread you use with the needle can also impact your sewing. For example, polyester or cotton wrapped polyester threads are optimal for ball point needles, while synthetic or blends, 100% polyester, and heavier top stitching threads are recommended for jeans needles.
- Needle Care: Proper needle upkeep is essential to preserve their performance. Needles can become dull with repeated use, so it’s crucial to replace them at regular intervals. Additionally, needles should be stored in a dry, secure location to prevent rusting and damage.
Fabric Measurements
To create a tiered skirt with ruffles, you’ll need to think about the ruffle width, length, fullness, placement, and embellishments. Here’s a table to help you visualize the calculations:
| Subtopic | Description |
|---|---|
| Ruffle Width | Determine the width of the ruffle fabric by multiplying the bottom width of the main fabric by 2. |
| Ruffle Length | Hem or serge the ruffle fabric to prepare it for sewing. |
| Ruffle Fullness | To create a fuller ruffle, use a smaller inner circle on your pattern. |
| Ruffle Placement | Mark the lines of the ruffle positions on the skirt and add the necessary seam allowances. |
| Ruffle Embellishments | Choose a contrasting fabric for the ruffle to create a unique look. |
Fabric Division
To create a tiered skirt with ruffles, you’ll need to divide your fabric into sections for each tier.
The width of each tier depends on the waist measurement of the person who’ll be wearing the skirt.
For the first tier, multiply the waist measurement by 1.5.
For the second tier, multiply the waist measurement by 2.
For the third tier, multiply the waist measurement by 2.7.
These measurements will provide the necessary width for each tier, allowing you to add gathers and elastic to the skirt.
Sewing the Ruffle
As you continue sewing the ruffle to the main fabric, remember to remove the pins along the way. This will prevent skipped stitches and fabric bunching. Once you reach the end of the seam, backstitch or chain off to secure the stitches and complete the ruffle attachment.
Remove the Pin and Continue Sewing
Once you’ve reached the next pin, remove it and continue sewing without stopping. Keep your stitch length and tension even to guarantee a smooth ruffle. Adjust your bobbin tension if required. As you sew, make small folds with the ruffle fabric to maintain even gathering. Don’t worry about backstitching or chaining off yet – we’ll cover that next.
Backstitch or Chain Off to Complete the Seam
Once you’ve danced your way to the end of a ruffle seam, it’s time to lock in those stitches tighter than a secret. Give it a backstitch or chain off, like tying the perfect bow on a gift. This little move is your secret handshake with durability, ensuring your masterpiece won’t unravel at the first sign of a boogie.
Additional Ruffles
Mark guidelines on the main fabric for each additional ruffle layer. Cut the ruffle fabric long enough to hang over the layer below, hem, and provide seam allowance. Pin the ruffle upside down, with the unfinished edge lined up with the guideline. Sew and ruffle, keeping an even seam allowance. Flip the ruffle down to create the next layer.
Sew and Ruffle, Keeping an Even Seam Allowance
Sewing layered ruffles is a fun and rewarding process, but it requires attention to detail. To make sure even gathering, follow these steps:
- Gather ruffles to match connector length: Pin ruffles to the connector pieces and gather them evenly.
- Keep an even seam allowance: As you sew each ruffle layer, maintain a consistent seam allowance for a polished look.
- Match seams: Make sure that the seams of the ruffle and connector pieces align correctly for a seamless appearance.
- Sew layers separately: Sew each ruffle layer separately onto the bottom of the dress to avoid bulk and maintain control over the process.
Flip the Ruffle Down to Create the Next Layer
To create the next layer of ruffles, flip the previous ruffle down and pin it upside down with the unfinished edge lined up with the guideline.
Sew and ruffle, keeping an even seam allowance.
Repeat this process for each additional layer, ensuring that the ruffle length and gathering technique are consistent.
Choose a contrasting fabric for the ruffle to create a unique look, and divide the fabric into more sections for a fuller ruffle.
Keep the dress fabric flat under the ruffles while sewing to avoid bulk.
Sew each ruffle layer separately onto the bottom of the dress to achieve a professional finish.
Frequently Asked Questions (FAQs)
What is the recommended needle size for sewing ruffles?
For sewing ruffles, you’ll want a sharp needle in the 70/10 or 80/12 range. A finer needle pierces the fabric cleanly, preventing snags or skipped stitches in those tightly gathered areas. Don’t be afraid to experiment a bit to find the perfect needle for your project!
Can I use a serger to finish the raw edges of ruffle strips?
Absolutely! Serging those frilly edges turns your ruffles into neat little fabric rosebuds, perfect for blooming into layers of decadent texture. Let your serger’s blades tame those raw edges while you focus on constructing a cascading ruffle masterpiece.
How do I determine the number of ruffle layers to use?
You’ll want to ponder the style you’re aiming for – more layers equate to a more bountiful, poufier ruffle. Initiate with 2-3 layers and append more if so desired. But refrain from being excessive – an abundance can encumber the garment.
What is the best method for gathering ruffle strips?
The zigzag or gathering stitch on your machine works wonders. Start with the longest stitch length, holding the fabric taut as you sew. Gently pull the bobbin thread to gather evenly – the thread will magically scrunch up the fabric for perfect ruffles!
Can I use a contrasting fabric for the ruffle to create a unique look?
Absolutely! Using a jaw-droppingly contrasting fabric creates an eye-catching, one-of-a-kind ruffle skirt. You’ll exude confidence and flair in this uniquely charming ensemble. Mix prints, textures – the possibilities are delightfully endless for your creative vision!
Conclusion
Layered ruffles embody the pinnacle of grace and femininity.
They elevate a basic garment to a captivating spectacle.
With diligent practice and meticulousness when stitching layered ruffles, you’ll conquer this technique.
This liberates your artistry to create captivating tiered skirts, dresses, and beyond.
Welcome the challenge and bask in the fulfillment of adorning your handmade, cascading masterpiece.
It radiates sophistication and elegance with effortless ease.

