This site is supported by our readers. We may earn a commission, at no cost to you, if you purchase through links.

Start by selecting a patch that matches your fabric’s weight and style. Pin it in place, keeping the tension even to avoid those pesky wrinkles.
Use small, even stitches around the edges, working your way around like you’re connecting the dots.
For everyday wear, cotton blends are your best friend, while denim patches need a bit more muscle. And here’s a secret: mixing stitch patterns can turn a simple repair into wearable art.
Table Of Contents
- Key Takeaways
- Sewing Patches Basics
- How to Sew a Patch
- Choosing Patch Materials
- Preparing Fabric for Patches
- Hand Sewing Patch Techniques
- Machine Sewing Patch Methods
- Tips for Successful Patching
- Common Patching Mistakes
- Caring for Patches and Fabric
- Advanced Patching Techniques
- Frequently Asked Questions (FAQs)
- Conclusion
Key Takeaways
- Choose a patch that matches the fabric’s weight and style, and pin it securely for even tension to avoid wrinkles.
- Use small, even stitches like a running stitch or zigzag stitch to attach the patch, ensuring durability and clean edges.
- Prep your fabric by trimming loose threads, addressing fraying with sealants or stitches, and matching fabric weight and color for a seamless look.
- Pay attention to thread and needle selection, using lightweight needles for delicate fabrics and durable thread for heavier materials like denim.
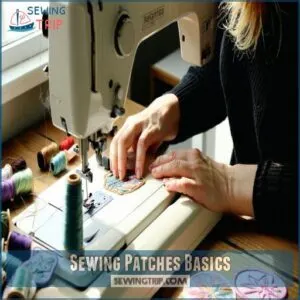
Sewing Patches Basics
Sewing a patch might seem simple, but it’s all about getting the basics right—like choosing the right patch and figuring out where to stick it.
Whether you’re fixing a hole or showing off your personality, a little planning goes a long way (and saves you from redoing it later).
Types of Patches
Patches come in all shapes and styles, from functional to decorative.
Explore these patch types:
- Embroidered patches: Classic with vibrant threadwork—perfect for showing off achievements.
- Iron-on patches: Quick fix with heat-activated adhesive—no needle required, but durability may vary.
- DIY fabric patches: Scrap fabric magic for repairs or unique designs—grab your creativity and sew a patch!
Mix and match for fun results!
Fabric Selection
When diving into textile crafts, selecting the right fabric can make or break your patch project. You’ll want to bear in mind both the fabric weight and fiber content to guarantee your patches stay put.
Here’s a handy guide to help you match different fabric types with your patches:
| Fabric Type | Best For | Watch Out For |
|---|---|---|
| Cotton blends | Everyday wear | Stretching |
| Heavy denim | Work clothes | Needle breakage |
| Light cotton | Decorative pieces | Puckering |
| Wool | Winter gear | Felting issues |
These fabric weights and textile patterns will influence how well your patches hold up over time. Remember, thread colors should complement both your patch and base fabric.
Patch Placement
Now that you’ve got your materials ready, let’s nail that patch placement.
Visual balance is key – you’ll want to position your patch where it naturally draws the eye.
For clothing repairs, align the patch’s center with the damaged area.
If you’re adding decorative patches, symmetry matters more than you’d think.
Keep fabric tension even while pinning to avoid awkward bunching or wrinkles.
How to Sew a Patch
Ready to sew your first patch? Grab your sewing kit and let’s turn that tear into a trendy statement piece!
Before you start patch sewing, here’s what you’ll need:
- A patch that matches your fabric scraps or a decorative design
- Basic sewing tools: needles, pins, and scissors
- Thread colors that complement your patch
- A clean, well-lit workspace
- An iron for smoothing fabric (optional)
Position your patch over the area you’re fixing, pin it securely, and thread your needle with doubled-up thread.
Work your way around using small, even stitches. Think of it like connecting dots – each stitch should be about 1/4 inch apart.
Choosing Patch Materials
You’ll need to become a patch-picking pro before you start sewing, and trust me, it’s not rocket science.
Whether you’re going for an embroidered scout badge that’ll make your troop leader proud or a woven patch that’ll jazz up your tired denim jacket, you’ve got plenty of cool options to choose from.
Embroidered Patches
After mastering the basics, let’s explore embroidered patches – those beautiful, textured designs that add personality to any garment. Here’s a quick rundown of what you’ll need to sew a patch with style:
When selecting a fabric for your embroidered patch, consider visiting the best fabric options to guarantee a smooth and durable finish. Remember, the right thread choice and backing materials can make or break your embroidery techniques. Premium fabric is your best friend here – it’ll help your patch design stay put through countless washes.
| Material | Best For | Avoid | Pro Tip |
|---|---|---|---|
| Cotton | Daily wear | Stretchy fabrics | Pre-wash to prevent shrinkage |
| Polyester | Durability | Thin materials | Use stabilizer underneath |
| Silk | Formal wear | Heavy thread | Test tension first |
| Wool | Outerwear | Light backing | Double-stitch edges |
Woven Patches
Woven patches are your best bet for a long-lasting patch. They offer better durability than other options, are lightweight, and come in endless designs. These patches pack more detail than traditional embroidery.
You’ll find them perfect for everything from work uniforms to your favorite denim jacket. They’re easy to attach with needle and thread, gentle on your fabric, and make a bold statement.
For more information on sewing patches, you can explore various techniques to achieve a professional finish.
Iron-on Patches
Iron-on patches offer a quick fix with style, unlike woven patches that require careful stitching. These adhesive-backed beauties are heat activated, making patch application a breeze.
Here’s what you’ll need for successful ironing:
- Check fabric compatibility – not all materials play nice with heat
- Set your iron’s heat settings correctly
- Position your patch just right
- Apply even pressure while ironing
A wide variety of embroidered patches are available to suit your needs. Find these time-savers at Target or online shops like Strange Ways.
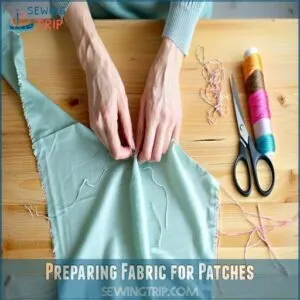
Preparing Fabric for Patches
You’ll want to prep your fabric like you’re setting up for a first date – clean, neat, and ready to impress.
Before you start playing matchmaker with your patch and fabric, you’ll need to trim any loose threads and make sure the edges aren’t fraying like a teenager’s jean shorts on purpose.
Fray Prevention
Working with fraying fabric is like trying to wrangle an unruly cat – frustrating and messy.
Start your fray prevention journey by applying fray sealant along raw edges before you even think about sewing. For extra protection, try anti-fraying techniques like pinking shears or a quick zigzag stitch. You can also learn more about preventing fraying using stop fraying methods.
When you’re ready to begin seam finishing, grab your needle and thread to secure those edges with a tight running stitch.
Edge Finishing
Now that you’ve got those pesky frays under control, let’s make your patch edges look sharp as a tack. Edge stitching isn’t just about keeping things neat – it’s your chance to add some flair to your patch work.
Mastering patch edge stitching techniques is essential for a professional finish.
Here are three edge finishing techniques that’ll make your patches pop:
- Run a tight blanket stitch for a classic, durable finish
- Try a whip stitch for a sleek, professional look
- Add a merrow edge for that clean, machine-made vibe
Fabric Matching
Let’s explore fabric matching – it’s like playing matchmaker for your patches! Your patch’s success depends on finding its perfect fabric partner. Think about color blending, texture matching, and pattern coordination to create a seamless look.
To achieve ideal results, understanding fabric matching techniques is essential for a professional finish.
| Fabric Type | Weight Considerations | Best Matching Tips |
|---|---|---|
| Denim | Heavy-duty | Match wash color |
| Cotton | Medium-weight | Blend patterns |
| Wool | Thick | Match fiber content |
| Synthetic | Light to medium | Consider stretch |
| Canvas | Heavy | Focus on durability |
Hand Sewing Patch Techniques
You’ll love how hand sewing gives you total control over your patch game, letting you create those perfect tiny stitches that’ll make your Scout leader proud.
Whether you’re fixing up your favorite jeans or adding some personality to your backpack, these tried-and-true techniques will help you nail that professional-looking finish every time.
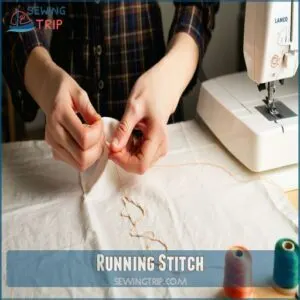
Running Stitch
Master the running stitch quickly by following these key steps for hand-sewing patches:
- Thread your needle with 18-20 inches for single thread or 38-40 inches for double
- Space stitches evenly, about 1/8 inch apart
- Keep thread tension consistent – not too tight or loose
- Use a thimble to protect your fingers
- Double back at the start and end to secure stitches
Using sewing patches techniques can greatly improve the overall appearance of your garment.
Hand sewing gives you precise control and keeps pockets from getting sewn shut.
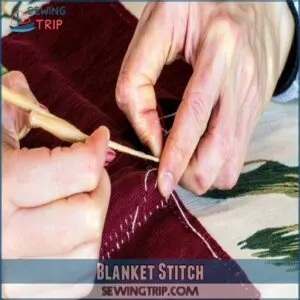
Blanket Stitch
The blanket stitch transforms your patch edges from basic to beautiful while securing them firmly in place. Here’s a handy guide to master this versatile technique:
| Stitch Type | Best For |
|---|---|
| Traditional | Wool patches |
| Decorative | Visible edges |
| Corner | Reinforcement |
| Spaced | Light fabrics |
| Doubled | Heavy-duty |
When you’re sewing patches, keep your stitches evenly spaced and maintain consistent tension to avoid puckering.
For extra flair, try mixing thread colors or varying stitch lengths to create eye-catching borders that’ll make your patches pop.
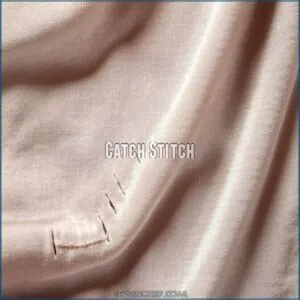
Catch Stitch
Ready to level up from the basic blind stitch? Catch stitching gives your patches that extra-secure hold while preventing puckering around the edges. Unlike other sewing techniques, this stitch creates a flexible cross-pattern that’s perfect for heavy fabrics.
Understanding sewing patch techniques is essential for achieving professional results.
To sew a patch with catch stitch, work from left to right, catching small bits of fabric in an X pattern. It’s slower than regular stitching but worth the effort for durability.
Machine Sewing Patch Methods
You’ll love how your sewing machine can turn that patch-sewing job from a hand-cramping chore into a speedy victory lap.
Whether you’re fixing your favorite jeans or adding some flair to your denim jacket, your trusty machine’s straight and zigzag stitches will have that patch secured faster than you can say "threading the needle.
Zigzag Stitch
While hand sewing gives you control, a zigzag stitch on your machine can secure patches in half the time.
Set your zigzag width to medium and keep your stitch length short – about 1.5mm works great for most fabric types.
Understanding the zigzag stitch basics is essential for achieving professional results.
Just remember to adjust your thread tension slightly looser than normal, and always test your sewing stitches on a scrap piece first.
Straight Stitch
How does a straight stitch become your secret weapon for sewing patches? This classic stitch creates a clean, professional look that’ll make your patch feel right at home.
Here’s what you’ll need to nail it:
- Set your stitch length to 1.5-2mm for secure hold
- Adjust thread tension to medium-high
- Choose a universal needle for most patches
Keep your stitching line about 1/8 inch from the patch edge for that pro finish.
Backstitching
Backstitching gives your patch that extra-secure grip it needs to stay put.
When you reach the end of your straight stitches, hit reverse and sew back over them about 4-5 stitches. Then go forward again. This creates a super-strong hold that won’t unravel.
Pro tip: Keep your backstitch tension even – too tight and you’ll pucker the fabric, too loose and the patch might wiggle free.
Tips for Successful Patching
You’re about to become the patch-sewing wizard you never knew you wanted to be, and trust me, it’s easier than trying to fold a fitted sheet.
Whether you’re fixing up your favorite jeans or adding some flair to your backpack, these tried-and-true tips will help you nail that perfect patch every time.
Thread Selection
Now that you’ve mastered machine stitching, let’s talk thread – it’s like picking the right shoes for your outfit.
When choosing the best thread options for your project, consider the type of fabric and the desired appearance of the patch.
For everyday patches, polyester or cotton thread types work like a charm. They’re durable and play nice with most fabrics.
Want to add some sparkle? Try metallic thread for decorative flair. Just remember to match your thread color to your patch’s edge or go slightly darker.
Needle Choice
Your needle choice makes all the difference in how your patch sits.
Match your needle type to your fabric weight and thread compatibility. Lightweight fabrics require smaller needles (sizes 60-70), while heavier materials need sturdier ones (sizes 90-100).
Universal needles work for most patches, but denim needles are best for tough fabrics like jeans.
Stitch Length
Once you’ve got the right needle, getting your stitch length just right is like finding the sweet spot on your favorite guitar.
For patches, short stitches (around 1.5-2mm) create stronger holds than long stitches. Adjust your length shorter for edges and corners if you’re using a straight stitch pattern.
You’ll want slightly longer stitches (2.5-3mm) in the middle for flexibility and durability.
Common Patching Mistakes
You’ve probably made that dreaded rookie mistake of using wobbly stitches that make your patch look like it survived a tornado, or maybe you’ve picked a thread color that screams "I did this in the dark."
Even the most experienced sewers can trip up with common patching blunders.
But don’t worry – we’ll show you how to avoid these fashion faux pas and get your patches looking professional.
Uneven Stitches
You know those patches that look like they’ve been through a roller coaster ride? Let’s fix that. Uneven stitches can turn your patch job from pro to oh-no faster than you can thread a needle.
Here’s what usually causes those wonky lines:
- Your sewing speed’s doing the cha-cha – fast, slow, fast, slow
- You’re wrestling with incorrect tension adjustments on your machine
- Your fabric’s dancing around without proper stabilization
- The needle size doesn’t match your thread weight
- Your hands are trying to rush through hand sewing basics
Loose Threads
Just like those pesky flyaways on a bad hair day, loose sewing threads can turn your patch job into a mess.
When you sew a patch, preventing unraveling starts with proper thread trimming and securing ends.
Don’t skip burying tails or basic knotting techniques – these small steps make the difference between a patch that stays put and one that’s hanging by a thread.
Incorrect Fabric
While loose threads might be annoying, picking the wrong fabric can turn your patch project into a real head-scratcher. Fabric incompatibility isn’t just about looks – it affects how well your patch stays put.
Here’s what happens when fabrics don’t play nice:
- Weight differences make heavy patches pull on light fabrics
- Texture mismatch causes puckering and bubbling
- Color clashing ruins your item’s overall look
- Drape issues create awkward folds around the patch
Caring for Patches and Fabric
Proper care keeps those stitches from throwing a temper tantrum, so you’ll want to treat your newly patched items with the same love you’d give your favorite concert t-shirt.
You’ll need to know the right washing, drying, and ironing techniques that’ll make your handiwork last longer than your latest Netflix binge if you’re aiming to keep your patches from playing hide-and-seek with your fabric.
Washing Instructions
Looking after your patched garments doesn’t have to be a headache. To guarantee the longevity of your patches, follow proper patch care instructions for the best results.
Turn your items inside out and wash them in cold water on a gentle cycle. For delicate patches, stick to hand washing with lukewarm water and mild detergent.
Regarding drying methods, skip the tumble dryer for leather patches. Before ironing, place a thin towel between the iron and patch to protect those precious threads.
Dry Cleaning
Taking your patched garments to the dry cleaner? Let them know about any newly sewn patches.
Professional cleaning can help maintain both your patches and garments, but some patches don’t play nice with harsh chemicals.
Your best bet? Choose a dry cleaner experienced with patch care and tell them what type of patches you’ve got – especially if they’re vintage or decorative. They’ll know just how to handle them.
Ironing Precautions
While dry cleaning professionals handle delicate garments with care, you’ll need to master proper ironing techniques at home.
When pressing patches and fabric, remember these heat-savvy tips:
- Always check the fabric’s heat settings to avoid scorching your precious garments
- Test iron-on patches on a scrap piece first – trust me, melted adhesive is no fun
- Use steam sparingly – too much moisture can weaken temporary adhesive
- Place a pressing cloth between your iron and patch for extra protection
- Start with lower ironing temperatures and gradually increase if needed
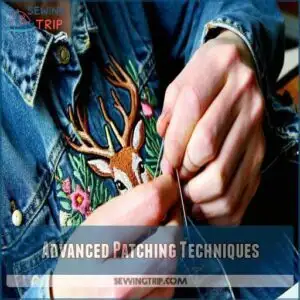
Advanced Patching Techniques
You’ll love stepping up your patch game with these fancy techniques that’ll turn heads faster than a bedazzled jean jacket at a craft fair.
Whether you’re ready to tackle appliqué designs, set-in patches, or decorative stitching patterns that’ll make your grandma proud, these advanced methods will help you create patches that look absolutely professional.
Applique Patches
Ready to level up your patch game? Appliqué patches let you create layered designs that’ll make your projects pop.
Start by drawing your design on lightweight fusible interfacing, then pin it to cotton or linen fabric scraps. Machine-stitch the shape, make careful snips toward the stitching, and turn it inside out for crisp edges.
For more details on sewing techniques, you can explore various methods to enhance your appliqué skills.
Steam-baste with an iron, and you’ve got a pro-looking patch that’s uniquely yours.
Set-in Patches
Unlike applique patches that sit on top, set-in patches blend seamlessly with your fabric.
When patching clothes, cut your patch slightly larger than the damaged area, matching the fabric grain.
Place the patch behind the hole, pin carefully, and fold under your seam allowance. You’ll want to sew a patch in a way that creates smooth patch layers, making the repair nearly invisible.
Decorative Stitching
Your patch’s personality really shines through decorative stitching. Try mixing different stitch patterns around the edges – a blanket stitch in metallic thread can add sparkle, while chain stitches create flowing lines.
For personalized designs, combine embroidery techniques and varied thread colors.
When sewing by hand, take your time with artistic stitching to enhance patches. Small French knots or feather stitches become eye-catching embellishments.
Frequently Asked Questions (FAQs)
What is a sewing patch?
A patch is a piece of fabric that you’ll sew onto clothing or accessories.
Whether it’s covering a hole or showing off your favorite band, patches blend style with function to personalize your stuff.
How to sew a regular 9 patch together?
Cut nine equal-sized fabric squares.
Arrange them in a 3×3 grid pattern.
Pin adjacent squares together.
Sew with a quarter-inch seam allowance, joining rows horizontally first, then vertically.
Press seams flat.
Why should you sew on a patch?
Patches add personality while fixing worn spots, like a blank canvas waiting for your signature.
By sewing on patches instead of buying replacements, you’ll extend your clothes’ life, save money, and express yourself creatively.
Who can sew a patch on?
With basic sewing skills, you can sew patches yourself. Alternatively, you can have a professional seamstress, tailor, or dry cleaner do it for you.
It’s a simple task that anyone with patience can tackle.
How do you sew a patch for beginners?
Position your patch and secure it with pins. Thread your needle.
Sew around the edges using small, even stitches.
Don’t worry about perfection – practice makes better patches every time!
What is the best stitch to attach a patch?
For the ultimate hold that’ll outlast a zombie apocalypse, you’ll want to use a tight zigzag stitch. A straight stitch works too, but double-stitch the edges for extra durability.
How do you thread a needle to sew a patch?
Cut your thread at an angle.
Moisten and twist the end.
Hold your needle up to the light and slide the thread through. Double your thread and tie a secure knot.
How to sew a patch to fix a hole?
Like mending a favorite jacket, start by turning the garment inside out.
Place your patch underneath the hole, extending 1 inch beyond its edges.
Pin it down, then stitch around using small, tight stitches.
What kind of fabric should I use for the patch?
Choose a fabric patch that matches the weight and texture of your garment. You’ll want something similar in color too, unless you’re going for a funky, visible repair.
Lightweight patches work great for tees.
How much thread do I need?
You’ll need about 18-24 inches of thread, give or take, depending on the patch size.
Too much thread tangles like holiday lights, so start modestly—better to add more than wrestle a knotty mess!
Conclusion
Think of sewing a patch like putting a Band-Aid on your favorite fabric—it’s a quick fix that can look amazing if done right.
Whether you’re hand stitching a running stitch or zigzagging with a machine, the key is patience, precision, and practice.
So grab your fabric, thread, and needle, and start mastering how to sew a patch today! Now you’ve got the know-how to tackle everything from patching jeans to turning a repair into DIY art.

