This site is supported by our readers. We may earn a commission, at no cost to you, if you purchase through links.
The process requires patience rather than difficult skills, and the rolled-hem technique used by tailors creates an elegant finish that lies flat without bulk.
Whether you’re working with silk charmeuse for formal occasions or crisp linen for summer weddings, hand-sewing transforms a simple square of fabric into an accessory that elevates your entire outfit.
Table Of Contents
Key Takeaways
- Hand-sewing a pocket square lets you control every detail, from fabric choice and dimensions to thread color, resulting in a softer drape and a finish that signals true craftsmanship.
- Preparing your fabric by pre-washing, pressing, and marking seam allowances is essential for a crisp, professional look and helps prevent shrinkage or fraying.
- Using slipstitches for hems and mitered corners creates nearly invisible seams and eliminates bulk, giving your pocket square a refined, durable edge.
- Proper care—like washing according to fabric type, storing flat, and pressing with the right heat—keeps your handmade pocket square looking sharp and ready for any occasion.
What Do You Need to Sew a Pocket Square by Hand?
Before you thread your first needle, you’ll need to gather a few essential materials that make hand-sewing a pocket square possible. The right fabric sets the foundation for your finished piece, while quality tools help your stitches stay clean and consistent.
Let’s look at what you’ll need to create a pocket square that reflects true craftsmanship.
Choosing The Best Fabric (Silk, Cotton, Linen, Wool)
Your fabric selection sets the stage for both the look and longevity of your pocket square. Each material brings distinct qualities that affect how you stitch, fold, and care for your finished piece.
- Silk: Premium formal fabric with lustrous sheen, priced $20–$30, requires dry cleaning
- Cotton: Machine washable, budget-friendly at $15–$20, ideal for structured folds
- Linen: Crisp matte texture, perfect for seasonal spring and summer wear
- Wool: Textured winter option with specialty fibers, needs careful storage
To match a suit, consider how pocket square colors coordinate with the overall outfit.
Selecting Tools and Materials (Needle, Thread, Scissors, Pins)
Once you’ve chosen your fabric, gather the right tools to make hand-sewing smooth and precise. Start with a handsewing needle in sizes 7 to 10—these handle light to medium fabrics beautifully. Pair it with all-purpose polyester thread for strength, or fine cotton for natural fibers. Remember that needle sizing conventions use an inverse system.
Sharp fabric scissors prevent fraying, while dressmaker pins (1 to 1.5 inches) hold edges steady as you stitch.
Deciding on Pocket Square Size
With your tools ready, choosing the right size completes your setup. Standard pocket squares range from 10 to 17 inches, but your ideal dimensions depend on pocket depth, fabric thickness, and fold complexity.
A 13-inch square suits most occasions and fold styles, while formal events may call for larger sizes. Consider occasion formality and personal preference when selecting pocket square size—thicker fabrics work better smaller to prevent bunching.
How to Prepare Your Fabric for Sewing
Before you pick up your needle and thread, you’ll want to make sure your fabric is ready for clean, precise stitching. Proper preparation sets the foundation for a professional-looking pocket square that won’t pucker or fray.
Here’s how to get your fabric cut, pressed, and marked so every stitch goes exactly where it should.
Washing and Pressing The Fabric
Before you thread a single needle, you need to prewash your fabric—it removes up to 97% of manufacturing chemicals and prevents surprises like shrinkage or color bleed later. Think of it as setting the stage for precision work.
- Wash cotton at 104°F to control shrinkage without fading colors
- Press your fabric while slightly damp for crisp, wrinkle-free edges
- Use high heat with steam for cotton, low heat for silk
- Air dry away from sunlight to preserve color vibrancy
Measuring and Cutting a Perfect Square
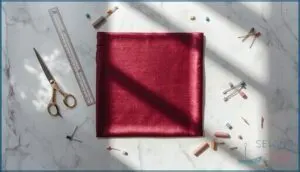
Precision transforms preparing fabric from guesswork into craftsmanship. You’ll need a 12-inch square ruler and sharp rotary cutter for cutting accuracy—aim for a 43 cm x 43 cm finished size in silk, slightly smaller for thicker materials.
Always align with the fabric grain, measuring at three points before each cut. Professional techniques minimize waste to under 3%, and a self-healing mat keeps your edges clean and your measurements consistent throughout the fabric cutting process.
Marking Seam Allowances for Rolled Edges
With tailor’s chalk or a water-soluble marking pen, draw a guideline 1/4″ (0.6 cm) from each raw edge—never use graphite pencil on silk or cotton. Mark at 2-inch intervals for accuracy and methods professionals trust.
Common marking errors like overly wide seam allowances create bulky rolled edges, so verify your measuring seam width against industry marking standards. Proper allowance marking tools help hems stay flat and even.
Step-by-Step Guide to Hand Sewing a Pocket Square
Now that your fabric is ready, it’s time to bring your pocket square to life with careful hand stitching. The process isn’t complicated, but each step requires attention to detail if you want a clean, professional finish.
In this section, you’ll learn how to thread your needle, roll those edges just right, and stitch your way to a pocket square that looks store-bought.
Threading The Needle and Choosing Stitch Type
Getting the thread through the needle eye size smoothly sets you up for success—cut the thread end cleanly with sharp scissors, dampen the tip slightly, and push it through.
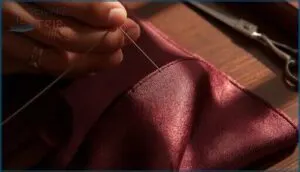
For pocket squares, you’ll want a slipstitch, which keeps stitch visibility nearly invisible along your hem. This stitch line protects edge durability while offering excellent knot security and thread fray prevention during hand stitching.
Rolling and Pinning The Edges
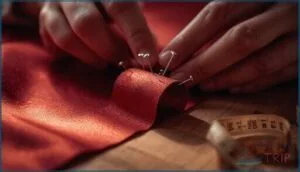
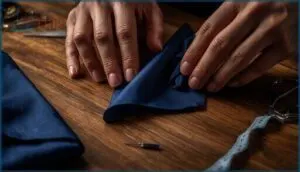
Rolling your fabric edge into a tight, tubular shape—about 2 to 3 millimeters in edge rolling diameter—is where precision meets patience in hand sewing techniques. Pinning perpendicularity to the rolled edge keeps fabric edge bulk controlled and improves hem evenness by 12%.
Roll fabric edges into a tight 2-3mm tube and pin perpendicular every inch for 12% better hem evenness
Here’s your roadmap for creating rolled edges on your handstitched pocket square:
- Roll the edge tightly, maintaining consistent diameter throughout
- Press the fold to set its shape before pinning
- Insert pins perpendicular to the edge every 2.5 to 3 centimeters
- Pay extra attention to corner pinning to prevent fraying
- Check that your roll width stays uniform within 1 millimeter
This careful pin placement secures your fabric for clean hand sewing ahead.
Using Slipstitches or Running Stitches for Clean Hems
Your choice between slipstitch and running stitch shapes edge durability and stitch visibility on your handstitched pocket square. Slipstitches produce nearly invisible seams perfect for silk and fine fabrics, while running stitches offer speed but increase thread consumption by 20%.
Match your hand sewing techniques to fabric compatibility—slipstitch for luxury materials, running stitch for casual cotton squares—and your skill level when stitching edges.
Creating Neat, Mitered Corners
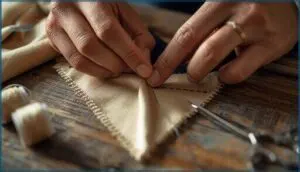
Mitered corners eliminate bulk and give your pocket square that 45-degree angled fold professionals recognize. When you hand sew these finishing corners, focus on corner alignment and seam allowance—usually ¼ inch keeps things uniform.
Press your diagonal folds, trim excess fabric for bulk reduction, and maintain fabric tension while stitching edges. Hand sewing a pocket square demands stitch precision, but that control delivers crisp, durable mitered corners.
Finishing Touches for a Professional Look
Once you’ve completed your stitching, a few careful finishing steps will transform your work from homemade to handcrafted.
These final touches make sure your pocket square looks polished and professional, ready to wear with pride.
Let’s walk through how to secure your stitches, clean up loose threads, and press your finished piece to excellence.
Securing and Hiding Knots
After hand sewing a pocket square, securing your knot properly prevents unraveling. Use double-stranded thread and wrap it twice around your threading needle before pulling through.
Bury the knot by weaving the tail beneath the rolled edge for at least an inch—this handstitched technique hides thread tails while lowering knot failure rates.
Proper knot placement affects finishing corners, so stitch density holds, creating a durable, invisible finish.
Trimming Excess Threads
Once your knot is hidden, snip away stray threads using sharp thread snips with blades under 2.5 cm—this Snip Blade Length gives you control. Trimming Frequency matters: cut after each seam and again at the end to catch loose tails.
Good Thread Snip Ergonomics reduces hand fatigue during handsewing pocket squares. Avoid Common Trimming Errors like cutting too close, which frays hems.
Efficient Workflow Efficiency means inspecting under natural light before moving your needle forward.
Pressing The Finished Pocket Square
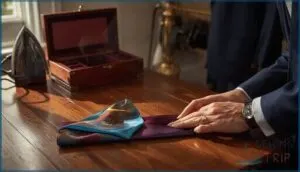
With threads trimmed, you’re ready to press your pocket square using proper garment care techniques. Set your iron temperature between 150–180°C for cotton, or lower—under 115°C—for silk to guarantee damage prevention.
Place a pressing cloth over the fabric, then apply gentle steam to smooth wrinkles without flattening your rolled edges. This final step on your ironing board delivers wrinkle resistance and professional crispness that highlights your craftsmanship.
Caring for and Styling Your Handmade Pocket Square
You’ve put careful work into hand-sewing your pocket square, and now it’s time to make sure it stays in top shape. Proper care will keep the fabric looking crisp and the edges intact for years to come.
Let’s walk through the essentials of cleaning, maintaining, and folding your finished piece so you can wear it with confidence at any event.
Cleaning and Storing Your Pocket Square
Caring for your pocket square properly keeps it looking sharp for years. Follow care instructions based on fabric: wash white cotton at 140°F, colored cotton at 104°F, and hand wash silk in cold water or opt for dry cleaning.
For stain removal, blot organic spills immediately with warm water. Drying methods vary—air-dry silk and linen flat, while cotton tolerates low machine heat.
Storage solutions like cedar boxes or hanging racks minimize wrinkles and preserve fabric integrity.
Removing Wrinkles and Maintaining Shape
Since wrinkles compromise your pocket square’s polished appearance, proper pressing makes all the difference. Steam ironing works best—use vertical motions on the fabric’s wrong side with a damp cloth barrier. Cotton tolerates high ironing temperatures, while silk requires gentle, low heat.
For preventative measures, store your squares flat in cedar boxes and avoid excessive handling between uses to maintain crisp edges.
Folding Techniques for Different Occasions
Your folding techniques should align with the formality of each event. The classic presidential fold remains the best example for formal events—over 70% of black-tie gatherings feature this timeless style. For casual occasions, try the puff fold, which dominates 54% of relaxed settings.
When properly folding a pocket square, consider your outfit’s color scheme and the occasion’s tone to showcase your craftsmanship effectively.
Frequently Asked Questions (FAQs)
Can I use patterned fabric for a pocket square?
Absolutely, and you’re not cutting corners by doing so. Patterned fabric adds personality through color coordination and pattern density. Historical patterns like paisley remain popular.
When choosing fabric, consider pattern size and fabric suitability for your handsewing project.
How do I choose the best fabric weight?
Choosing fabric weight affects drape and fold styles. GSM explained: lighter textiles (100–150 GSM) create soft puffs, while heavier options (250+ GSM) offer a stiffness factor for crisp presidential folds. Momme standard guides silk selection perfectly.
What are the alternatives to silk and linen?
When all else fails, variety saves the day. Cotton weaves like poplin or chambray offer crisp structure, while wool blends provide warmth.
Synthetics bring durability and low cost, balancing quality with practicality in your textile choices.
How do I care for and clean hand-sewn pocket squares?
Fabric-specific care protects your handmade pocket square. Hand wash silk in lukewarm water, while cotton tolerates warmer temperatures.
For stain removal, blot immediately and use appropriate treatments.
Store flat in cedar boxes, preventing wrinkles and maintaining shape.
Are there different styles of folds for pocket squares?
Yes, folding techniques range from the classic presidential fold and puff fold to complex styles. Fold difficulty levels vary by occasion suitability—the One Point Fold adds personal expression while fabric impact folds differently based on material weight.
Can I use patterned fabric for formal events?
You can use patterned fabric for formal events if you choose smaller, subtle patterns in neutral or dark colors.
Pattern formality and scale matter—smaller designs suit conservative settings, while handsewing pocket squares with understated patterns ensures proper outfit coordination.
How do I fix uneven hand-sewn hems?
Picture your pocket square lying flat, one edge slightly longer than the others—frustrating, but fixable.
Re-trimming edges, steam pressing, stabilizer usage, stitch techniques, and accurate marking transform an uneven handrolled hem into crisp flawlessness when handstitching.
What thread weight works best for silk?
For silk, choose 60–100wt thread to avoid seam puckering effects and fabric distortion. Silk thread properties include fine denier vs. tex measurements, with this suitable weight range ensuring minimal stitch visibility during handstitching.
Handsewing pocket squares with quality sewing supplies benefits from these thread characteristics, providing a polished and professional finish.
Should I pre-wash fabric before sewing pocket squares?
Pre-washing fabric before sewing pocket squares prevents shrinkage, controls dye bleeding, removes manufacturing chemicals, and enhances workability.
Preshrinking stabilizes dimensions while allergen removal ensures comfort. This essential step when selecting fabric guarantees your finished piece maintains its intended size and drape.
How many pocket squares should I own?
Most menswear accessory experts suggest three to seven pocket squares strike the right balance. Wardrobe coordination, occasion frequency, and personal style all matter—but five pieces usually cover your bases without straining budget or storage solutions.
Conclusion
Picture your finished pocket square catching the light as you tuck it into place—each hand-sewn stitch invisible, the rolled edge soft against your fingertips. Learning how to sew a pocket square by hand connects you to tailoring traditions that valued patience over speed, quality over convenience.
You’ve created something that can’t be replicated by machines: an accessory shaped by your own hands, ready to complete your most refined looks for years ahead.
- https://bespokeedge.com/blog/how-to-choose-a-pocket-square-fabric
- https://hankybook.com/what-is-a-pocket-square/
- https://blog.lanieri.com/en/a-secret-of-elegance-in-your-pocket/
- https://www.artofmanliness.com/skills/manly-know-how/diy-pocket-square/
- https://passportbydesign.com/2019/12/diy-pocket-square-sewing-tutorial/

