This site is supported by our readers. We may earn a commission, at no cost to you, if you purchase through links.

Wash and iron your fabric first, then trace a tank top pattern or use an old favorite as a guide.
Cut out the front and back pieces, pin them together, and sew the side seams.
Hem the bottom edge, finish the armholes and neckline with knit bands, and give everything a final press.
It’s a simple process, but you’ll feel like you’ve built something from scratch.
Ready to master the details that turn a basic tank into your own signature style?
Table Of Contents
- Key Takeaways
- DIY Tank Top Supplies
- How to Make a Tank Top: Step-by-Step Instructions
- Tips for Sewing and Construction
- Adding Knit Bands to The Tank Top
- Adjusting The Fit: Taking in or Letting Out Darts
- Assembling The Tank Top: Joining The Front and Back Pieces
- Trying on The Tank Top for Fit and Making Adjustments
- Finishing The Raw Edges: Hemming, Binding, or Serging
- Creating The Back Opening and Finishing The Armholes
- Sewing The Hem: Creating a Clean and Neat Edge
- Finalizing The DIY Tank Top: Finished Dimensions and Variations
- Where to Shop for Sewing Supplies
- Check Out More Sewing Tutorials for Women
- Pin The Tutorial for Future Reference
- Frequently Asked Questions (FAQs)
- Conclusion
Key Takeaways
- Choose the right fabric – You’ll want soft, ribbed knit fabric, like cotton jersey, that stretches and moves with your body for maximum comfort.
- Prep your materials properly – You must wash, dry, and iron your fabric first to prevent shrinkage and ensure clean, accurate cutting lines.
- Use stretch-friendly stitches – You’ll get better results with zigzag or stretch stitches instead of straight seams, since they won’t break when the fabric moves.
- Focus on fit adjustments – You can customize the tank by taking in or letting out darts, adjusting strap width, and hemming to your preferred length for a perfect fit.
DIY Tank Top Supplies
Starting your DIY tank top is all about having the right sewing supplies. Choose knit fabric types like cotton jersey for comfort and stretch. Use a sharp needle—ballpoint is best for knit fabric sewing—and match your thread for a clean look.
Elastic options can help shape the armholes or neckline. Grab measuring tools to get the fit right. A sewing machine makes things easier, but hand sewing works too.
Consider sourcing necessary materials for your project. With careful prep, your tank top sewing project will feel like second nature and require the right materials and proper tools.
How to Make a Tank Top: Step-by-Step Instructions
You’ll start by preparing your fabric and creating an accurate pattern to guarantee your tank top fits perfectly.
These initial steps set the foundation for a professional-looking garment that you’ll love wearing.
Preparation: Washing and Ironing
Before cutting your fabric, you need proper preparation. Start by preshrinking fabric through washing and drying to eliminate future shrinkage issues. This process also removes chemicals from manufacturing, making the material softer for easier sewing.
Next, iron both your template and fabric pieces:
- Use appropriate temperature settings for your fabric type
- Apply steam for cotton or blends to smooth wrinkles completely
- Allow fabric to cool before handling to prevent distortion
- Make certain all pieces lie completely flat for accurate cutting
Proper fabric softening and ironing techniques create the foundation for successful tank top sewing. This beginner sewing step prevents alignment problems during construction. To guarantee a smooth process, consider preshrinking your fabric before cutting, which is a crucial step for beginner sewing and ensures a good sewing experience.
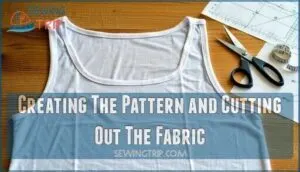
Creating The Pattern and Cutting Out The Fabric
Pattern drafting transforms your vision into reality when you sew wife beater tank tops.
Measure your chest width and add seam allowance for proper sizing. Use an existing tank top as your sewing pattern template or draft custom dimensions.
Many options exist for a sewing pattern template.
Focus on fabric alignment with grain direction when cutting material. Sharp cutting tools guarantee clean edges.
Double-check measurements before cutting your fabric selection to ensure accuracy and avoid mistakes, which is crucial for a successful sewing project with proper sizing.
Pinning The Fabric and Hemming The Bottom
Now you’ll align your fabric pieces and secure them for precise sewing.
Place front and back pieces together with right sides facing, matching side seams perfectly.
Pin along edges using proper pinning techniques to prevent fabric slippage during construction.
Create a clean hem by folding the bottom edge twice, ensuring accurate measurements for professional results.
This hemming foundation sets up your basic sewing skills for success.
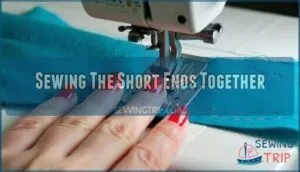
Sewing The Short Ends Together
Now position your fabric pieces right sides together and pin along the side seams.
Set your sewing machine to a stretch stitch or zigzag to accommodate the fabric’s natural give.
Check your thread tension before starting – proper tension prevents puckering in your mens tank top.
Sew each seam with consistent seam allowances, keeping fabric matching precise for a professional sleeveless shirt finish.
Tips for Sewing and Construction
When you’re sewing your own mens tank top or sleeveless shirt, mastering a few sewing techniques makes all the difference. Always secure your fabric with pins before sewing seams—this keeps everything from shifting and helps prevent puckering.
For knit fabrics, like those you’d use for a classic wife beater, choose a zigzag or stretch stitch. This lets your seams move with the fabric, so nothing feels tight or rips easily.
Throughout your sewing tutorial, remember to:
- Test the fit often, making Pattern Adjustments as needed.
- Use the right Stitch Types for your chosen fabric.
- Finish raw edges with clean Seam Finishes.
Hemming is key. For light knits, trim close and topstitch. Medium weights work well with a rolled hem. Fit Testing confirms your tank fits just right.
Adding Knit Bands to The Tank Top
Knit bands give your DIY tank top a professional finish that’ll make you look like a sewing pro. You’ve got Band Width Options ranging from half-inch strips for delicate edges to two-inch bands for bold statements.
Choose from various Knit Fabric Types like ribbing, jersey, or even contrasting colors that complement your tank top fabric. For Band Attachment Methods, fold your band in half lengthwise and pin it to the neckline or armholes with raw edges aligned.
Stretch the band slightly as you sew to create that snug, comfortable fit. Try Decorative Band Stitches like twin needle topstitching or coverstitch for extra flair.
When Securing Band Ends, overlap them by half an inch and backstitch firmly. This sewing tutorial technique prevents unraveling and maintains your tank top’s shape through countless washes.
Your knit bands transform a basic garment into something store-worthy.
Adjusting The Fit: Taking in or Letting Out Darts
Perfect fit transforms a basic tank top into a flattering garment.
Darts create shape by removing excess fabric and contouring to your body’s curves.
For a tighter fit, you’ll take in darts by making them deeper at the widest point.
Pin along your desired line, then sew the new seam.
This reduces garment width by twice the dart depth increase.
For a looser fit, let out existing darts by unpicking seams and resewing them shallower.
Always position dart tips 1-1.5 inches from your bust apex to avoid pointy effects.
Achieving a good fit relies on correct dart placement for comfort and aesthetic appeal.
Test adjustments with muslin fitting before committing to your final fabric.
Maintain symmetry between both sides for professional results when adjusting seams and shaping curves in your DIY tank top.
Assembling The Tank Top: Joining The Front and Back Pieces
Now you’ll align your tank top pieces for assembly. Place the front and back pieces with right sides together, ensuring proper seam alignment along the shoulder and side seams.
Pinning carefully is crucial to prevent shifting during sewing. Select a stretch stitch or narrow zigzag for knit fabrics to maintain fabric tension without breaking threads.
Match patterns if using printed fabric, taking time to align designs at seam intersections. Start with shoulder seams, backstitching at the beginning and end for durability.
When sewing side seams, maintain consistent seam allowances to prevent puckering. Keep fabric flat and avoid stretching while guiding it through your machine, checking alignment frequently as you sew.
Adjusting tension settings if needed is important to ensure a smooth process. The neckline and armholes will remain open at this stage, ready for finishing touches in the next steps, requiring careful handling to achieve a professional finish with proper seam alignment.
Trying on The Tank Top for Fit and Making Adjustments
Now you can try on your DIY tank top to check the fit. Put it on carefully and look in the mirror to see how it sits on your body.
Check if the shoulder slope matches your natural shoulder line. The straps shouldn’t dig into your shoulders or slide off. Look at the torso length – it should hit where you want it to end.
For bust adjustments, make sure there’s enough room without being too loose. If you did muslin fitting earlier, this step will be smoother. Mark any areas that need changes with pins.
Common fit adjustments include taking in the sides, shortening straps, or adjusting the neckline. Remember that bodice pattern adjustments are essential for a perfect fit.
Your custom fit workout shirt should feel comfortable when you move your arms. Don’t skip this step – proper fitting makes your tank top look professional and feel great to wear.
Finishing The Raw Edges: Hemming, Binding, or Serging
Raw edge finishing prevents fraying and creates professional-looking tank tops.
You’ll choose between three main edge finishes based on your fabric type and desired appearance. Jersey knits work well with simple hemming techniques, while woven fabrics need binding options or serging alternatives for durability.
Here are your three finishing methods:
- Hemming – Double-fold hems using twin needle stitching provide flexible, clean edges that withstand repeated washing
- Binding – Knit binding strips at 85-90% stretch ratio create smooth finishes for armholes and necklines without gaping
- Serging – Four-thread overlock seams finish edges while constructing seams simultaneously, lasting over 100 wash cycles
Decorative edges add visual interest while securing raw fabric. Choose hemming for lightweight jerseys, binding for curved openings, or serging for maximum durability and speed.
Creating The Back Opening and Finishing The Armholes
Back opening styles require careful planning before you start cutting.
Mark the center back line and measure 4-6 inches down from the neckline for your opening depth.
Cut a rounded or keyhole shape using sharp fabric scissors, then add lightweight fusible interfacing to prevent stretching during wear.
Professional armholes demand precision in both cutting and finishing.
Stay-stitch your armhole edges at ⅛ inch from the raw edge to stabilize the fabric.
Clip curves every ½ inch to reduce bulk when you’re ready for binding.
For armhole binding methods, cut knit bands at 85-90% of the armhole circumference and 1.5 inches wide.
Fold the binding in half and attach with a ¼ inch seam, stretching slightly as you sew.
This prevents gaping and creates clean finishes.
Self-fabric binding works beautifully for racerback styles, while elastic insertion adds shape retention for athletic wear.
This technique ensures a professional look and prevents stretching during wear, creating a comfortable and durable garment with proper binding and stretching slightly as you sew.
Sewing The Hem: Creating a Clean and Neat Edge
Once your armholes are finished, it’s time to give your tank top a neat hem.
Start by folding the bottom edge up about half an inch, then press it flat. Pin or clip the fold in place.
For a simple finish, use a straight stitch or zigzag. If you want a pro look, try a blind hem or a coverstitch hem—both add polish and stretch.
If you like a softer, wavy look, a lettuce edge works well with jersey. For a narrow finish, a rolled hem is a good option. Facing application is another way to keep the edge tidy.
Remember, basic sewing skills and steady hands help here. Hemming well boosts your sewing skills and gives your tank top a clean, finished look.
Finalizing The DIY Tank Top: Finished Dimensions and Variations
A finished handmade tank top is all about details.
Measure your tank top’s length from shoulder to hem—standard Hem Lengths hit the waist, but you can go cropped or tunic-long.
Neckline Styles set the mood: scoop, V-neck, or even a bold racerback for a sportier look.
Play with Strap Options—wide, skinny, or adjustable straps make a big difference in comfort and style.
If the fit isn’t perfect, use Fit Adjustments like darts or side seams to tailor your custommade tank top.
Add personality with Embellishment Ideas: lace trims, buttons, or fabric paint.
Essential sewing techniques are vital for a durable garment.
Every choice, from fabric to finishing touches, shapes your tank top into something unique.
Sewing gives you the power to create a piece that truly fits you.
Where to Shop for Sewing Supplies
Where should you hunt for the best fabric store options and sewing resources? The right supplies make all the difference.
Local shopping lets you touch fabrics, compare notions, and get advice from knowledgeable staff. Online retailers like WAWAK offer a huge selection of sewing notions, discount fabrics, and tools, often with free shipping and quick delivery.
Thrift stores can surprise you with unique fabrics at low prices. Specialty sewing machine dealers and notions suppliers such as Dritz and Prym provide quality tools and threads.
Mixing these sources gives you access to both classic and trendy fabric choices. A wide variety of sewing accessories are available from online stores.
Explore, compare, and don’t be afraid to try something new—your perfect DIY tank top is just a supply run away.
- Discover new textures and patterns that inspire your creativity.
Check Out More Sewing Tutorials for Women
Now that you’ve stocked up on supplies, it’s time to expand your sewing horizons. The sewing community offers countless sewing tutorials that’ll take your skills from basic tank tops to stunning womens clothing pieces.
You’ll find beginner-friendly projects covering different Sewing Skill Levels, from simple straight seams to complex Pattern Alterations. YouTube channels and sewing blogs showcase diverse Garment Styles and Fabric Choices.
Look for tutorials on blouses, skirts, and dresses that match your style preferences. Many creators share Sewing Machine Tips that’ll help you tackle tricky techniques like buttonholes and zippers.
Join online sewing groups where members share their latest sewing projects and offer practical sewing tips. These communities provide support when you’re stuck on a challenging step or need advice on fabric selection.
Each new tutorial builds your confidence and expands your wardrobe possibilities. Soon you’ll be creating custom-fit pieces that reflect your personal style perfectly.
Pin The Tutorial for Future Reference
Just finished exploring more sewing tutorials for women? Don’t let this tank top guide slip through your fingers.
Pinning this tutorial is like adding a handy tool to your digital resource library. Use Pinterest organization and board curation to keep all your favorite sewing tips in one spot.
Visual bookmarking makes it simple to revisit these steps whenever you’re ready to sew another wife beater or try a new variation. Here’s how you can keep inspiration close:
- Save this post to your favorite sewing tutorials board.
- Create a dedicated board for tank top projects.
- Share your board with friends for sharing inspiration.
- Add notes for each pin—track fabric choices or pattern tweaks.
Stay organized and make your next project even smoother.
Frequently Asked Questions (FAQs)
What is the hardest clothing to sew?
Custom suits are absolutely torture to master! You’ll wrestle with precise measurements, multiple fittings, complex construction techniques, and unforgiving fabrics that show every mistake you make.
Is it hard to sew a tank top?
Sewing a tank top isn’t particularly hard if you’ve got basic sewing skills. You’ll cut fabric pieces, sew shoulder and side seams, then hem the edges for a clean finish.
What’s the easiest thing to sew for a beginner?
Straight seams are your friend when starting out. You’ll master basic stitches quickly with simple projects like pillowcases, tote bags, or cloth napkins that don’t require complex shaping or fitting.
Can you use recycled fabric for tank tops?
Yes, you can absolutely use recycled fabric for tank tops.
Old t-shirts, bedsheets, or cotton garments work perfectly.
Just make certain the fabric has good stretch and isn’t too worn or thin for durability.
How much fabric needed for different sizes?
You’ll need about 1 yard for small/medium sizes and 25-5 yards for large/extra-large. Cotton jersey works best since it stretches and drapes nicely for comfort.
Whats the best stitch for stretch fabrics?
Use a zigzag stitch or stretch stitch when working with stretchy fabrics. These stitches move with the fabric’s natural give, preventing broken threads and puckered seams that straight stitches create.
How to prevent neckline from stretching out?
Like a safety net for your neckline, add clear elastic or twill tape to the seam as you sew.
This keeps the shape snug, prevents stretching, and guarantees your tank looks crisp wash after wash.
Can you make sleeveless shirts without patterns?
You can absolutely craft sleeveless shirts without patterns—just grab a favorite tank, trace its outline onto your fabric, and cut.
Double-check measurements, allow for seam allowance, and tweak the fit as you sew for best results, ensuring a favorite tank is used as a reference to achieve the desired seam allowance.
Conclusion
Learning how to sew a wife beater is like mastering a simple recipe that becomes a kitchen staple.
You’ve covered all the essential steps from choosing the right ribbed knit fabric to finishing those clean hems.
With practice, you’ll develop your own rhythm and shortcuts.
Remember to take your time with the fit adjustments—they make all the difference.
Your homemade tank top will feel more comfortable than any store-bought version.
- https://mellysews.com/sew-tank-top/
- https://www.chalkandnotch.com/sewing-with-knit-fabrics-tips-and-recommendations/
- https://www.youtube.com/watch?v=N_HxTuKV3R8
- https://www.farmhouseonboone.com/how-to-sew-a-tank-top-sewing-tutorial-for-beginners/
- https://sewpomona.com/reversible-tank-top-sewing-tutorial/


