This site is supported by our readers. We may earn a commission, at no cost to you, if you purchase through links.
Binding turns a quilt from a pile of fabric into something that’s truly yours. Those tiny, stitched edges do more than look pretty—they stop frays in their tracks and make sure everything holds together, even after years of snuggles and spins through the wash.
Choosing how to sew binding on a quilt can feel like a big decision, with details like bias versus straight grain and perfect corners waiting around the bend. But when you spot that fresh, finished edge? It all clicks.
With a little guidance, your next quilt can wear its new binding like a badge of honor.
Table Of Contents
- Key Takeaways
- What is Quilt Binding and Why Use It?
- Essential Tools and Materials for Quilt Binding
- Calculating and Cutting Quilt Binding Strips
- Preparing and Joining Binding Strips
- Step-by-Step Guide to Sewing Binding on a Quilt
- Finishing Techniques and Pro Tips for Binding
- Frequently Asked Questions (FAQs)
- Conclusion
Key Takeaways
- Binding protects your quilt’s edges from fraying and gives it a polished, long-lasting finish.
- Bias binding is best for curves due to its flexibility, while straight grain works well for straight edges.
- Proper measuring, cutting, and joining of binding strips ensure smooth installation and professional-looking results.
- Attaching binding with either machine or hand techniques, and mastering mitered corners, leads to a strong and neat final edge.
What is Quilt Binding and Why Use It?
Quilt binding is that final touch that brings your whole project together. It keeps the edges neat and holds everything in place for years to come.
Before you get started, let’s look at the different ways you can finish off your quilt’s sides.
Purpose and Benefits of Binding
Think of quilt binding as your quilt’s protective armor and finishing touch rolled into one. It wraps those vulnerable quilt edges, preventing fraying and unraveling during everyday use and washing.
Quilt binding is your quilt’s protective armor, sealing the edges and keeping it safe from fraying and wear
Beyond edge protection, binding locks your quilt layers together, giving structural integrity that maintains shape over time. This process often requires calculating how much binding is needed for the quilt size.
The binding process transforms raw edges into a polished visual finish while extending your quilt’s longevity for generations of functional use.
Types of Quilt Binding (Straight Grain Vs. Bias)
You’ll encounter two main types of quilt binding: straight grain and bias. Straight grain binding is cut parallel to the fabric’s selvage, offering excellent cutting efficiency and minimal fabric consumption. Bias binding, cut at a 45-degree angle, provides greater grain durability and flexibility for curved edge application.
A key advantage of bias binding is that it’s cut on a 45-degree angle, making it stretchier and more pliable. Usage trends show straight grain dominates for straight-edged quilts, while bias excels on curves.
Choosing The Right Binding Material
Now that you know the difference between straight and bias grain, let’s talk fabric. Your binding material matters more than you might think. The right fabric strips will frame your work beautifully and stand up to years of use.
Here’s what to weigh when choosing binding fabric:
- Fabric compatibility – Match your binding fabric to your quilt top (cotton with cotton, flannel with flannel)
- Color considerations – Light bindings create soft frames; dark ones add bold contrast
- Specialty materials – Try cork, vinyl, or waxed canvas for heavy-use quilts
- Practical selection – Pre-wash fabric to prevent shrinkage after binding
- Binding durability – Bias-cut binding strips offer greater strength on curved edges
Most quilters stick with quilting cotton for binding strips. It’s durable, easy to sew, and washes beautifully alongside your quilt.
Essential Tools and Materials for Quilt Binding
Before you start sewing your binding, you’ll want to gather a few key supplies to make the process smooth and enjoyable.
Having the right tools on hand means less frustration and better results. Let’s look at what you’ll need to get your binding looking crisp and professional.
Fabric Selection for Binding
Cotton durability makes quilting cotton your best friend for binding—it won’t fray or lose its grip after washing. Pre-washing importance can’t be overstated; it prevents shrinkage surprises later. Bias flexibility matters for curved edges, while straight-grain fabric strips work beautifully on straight quilts. Pattern considerations affect your quilt’s final look, so choose wisely!
Emerging trends include sustainable fabrics and metallic cotton for modern flair. Proper fabric preparation ensures your binding fabric performs beautifully through years of use and washing.
| Fabric Type | Best For | Key Benefit |
|---|---|---|
| Quilting Cotton | Standard quilts | Strong weave, easy handling |
| Bias-Cut Cotton | Curved edges | Flexibility without puckering |
| Coated Fabrics | Outdoor quilts | Water resistance, durability |
| Pieced Binding | Coordinated look | Uses leftover quilt fabrics |
| Grosgrain Ribbon | Quick finishes | No cutting needed |
Required Cutting and Sewing Tools
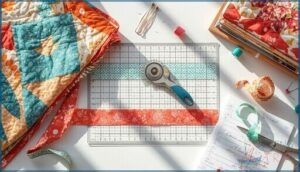
Your sewing toolkit lays the foundation for binding success. You’ll want sharp fabric scissors (not paper scissors!), a rotary cutter with a 45mm blade, a self-healing cutting mat, and a clear quilting ruler for measurement accuracy. Don’t forget your trusty sewing machine—regular maintenance keeps stitches consistent.
Essential cutting and sewing tools include:
- Rotary cutter types with titanium-coated blades for durability
- Ruler (20″x23″ or strip-cutting ruler) for precision
- Cutting mat (self-healing, 12″x18″ minimum size)
- Binding preparation tools like pressing mats and clips
Recommended Threads and Notions
You’ll need the right thread to make your binding last. Reach for 40 wt or 50 wt cotton thread—brands like Aurifil hold up beautifully. Match your thread color to your binding fabric for invisible stitches.
Don’t forget binding clips or pins to keep edges secure, and grab an iron for crisp folds. These simple notions make the whole process smoother.
Calculating and Cutting Quilt Binding Strips
Getting your binding strips just right makes all the difference in how your quilt edges turn out. You’ll need to figure out how much fabric to cut and the best way to slice those strips so everything lines up perfectly.
Let’s walk through the measuring, calculating, and cutting steps that’ll set you up for success.
Measuring Quilt Perimeter
Getting your quilt’s perimeter right is the foundation for calculating binding needs—mess this up, and you’ll end up short on fabric halfway around. Use the perimeter calculation formula: multiply length plus width by two, then add 24 inches for seams and corners.
- Measure after trimming and pressing for accuracy
- Use a flexible tape for standard quilt sizes or curved edges
- Prevent measurement errors by checking all four sides individually
Determining Binding Strip Width and Length
Think of binding strip width like Goldilocks—you want it just right. A 2 1/4-inch ideal strip width works beautifully for most quilts, balancing fabric yardage with a clean finish.
For binding length, add your perimeter measurement accuracy plus 24 inches—this mitered corner allowance and binding overlap length make certain you won’t run short.
A Quilt Binding Calculator simplifies calculating quilt binding when fabric width efficiency matters.
Cutting Binding Strips Accurately
A sharp rotary cutter is your best friend when cutting fabric for binding—precision here prevents mitered corner headaches later. Pre-washing impact on fabric width matters, so stabilize your ruler and watch that fabric grain direction.
- Use a long quilting ruler paired with your rotary cutter for straight, even binding strips
- Fold fabric selvedge to selvedge before making binding strips to maintain grain consistency
- Apply light pressure on your ruler—ruler stabilization methods prevent shifting during fabric cutting
- Cut slowly and deliberately; rushing creates uneven strips that complicate mitering challenges
Preparing and Joining Binding Strips
Now that you’ve cut your binding strips, it’s time to join them into one long piece that’ll wrap all the way around your quilt. This step is easier than it looks, and doing it right means your binding will lie flat without adding bulk.
Let’s walk through how to connect those strips, press them properly, and get your binding ready to attach.
Sewing Binding Strips Together
Once you’ve cut your WOF strips to create the binding length you need, it’s time to sew strips together. You’ll join them end to end to form one continuous piece.
Here’s a quick comparison to keep things straight:
| Method | Best For |
|---|---|
| Straight seam | Speed and simplicity |
| Diagonal seam | Reducing bulk, professional finish |
| Strip alignment tips | Ensuring accuracy |
| Pressing seam open | Minimizing thickness |
Most quilters prefer diagonal seams—they distribute fabric evenly and prevent lumpy corners. Position two binding strips at right angles, sew across that imaginary line, then trim the seam allowance and press the seam open. This approach cuts down on bulk beautifully.
Diagonal Seam Method
The diagonal seam method sets binding strips at a right angle, overlapping ends like an “X.” Mark a corner-to-corner line, stitch directly on it, trim the seam to ¼ inch, then press open.
This technique offers key advantages:
- Seam Bulk Reduction: Spreads thickness evenly
- Fabric Waste Minimization: Uses about 2.5 inches per join
- Joining Angle Precision: Ensures smooth alignment
- Seam Durability: Stronger than straight joins
You’ll avoid lumpy binding ends beautifully.
Pressing and Folding Binding
Once your diagonal seams are trimmed and pressed open, fold the binding strip in half lengthwise with wrong sides together. Press firmly with your iron set to cotton temperature—no side-to-side ironing! That causes fabric distortion.
A shot of starch helps stabilize the fold accuracy and reduces seam bulk. Work on a smooth ironing board surface, pressing straight down to create that crisp folded edge you need.
Step-by-Step Guide to Sewing Binding on a Quilt
Now that your binding strips are ready, it’s time to attach them to your quilt.
This step-by-step process will guide you through sewing the binding to the front, creating sharp mitered corners, and joining the ends smoothly.
Let’s walk through each part so your quilt gets the clean, professional finish it deserves.
Attaching Binding to The Quilt Front
Now you’re ready to attach your binding to the quilt front—the moment all your prep work pays off! Most quilters attach binding to the front first because it gives you better control over that visible seam line.
Here’s your step-by-step process:
- Align raw edges of your folded binding with the quilt’s raw edge, matching them perfectly for clean edge alignment.
- Leave a 6-8 inch binding tail unsewn at the start—you’ll need this later for joining the ends.
- Begin sewing at the midpoint of one side, at least 12 inches from any corner to avoid bulk during corner preparation.
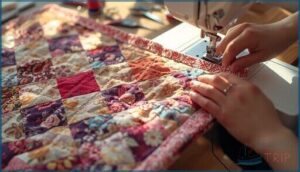
- Use a ¼-inch seam allowance with your sewing machine, keeping your stitches consistent at 2.0–2.5 mm length for secure machine stitching.
Start attaching binding to your quilt with confidence, and you’ll see how straightforward sewing binding on a quilt can be!
Creating Mitered Corners
You’re at the corner—pause and let’s get that mitered shape just right. Fold the binding up at a 45° angle, then back down along the next quilt edge for a crisp miter.
Keep your Seam Allowance steady, trim excess for Bulk Reduction, and secure with Hand-Stitching. Neat mitered corners meet Judging Standards and improve your quilt binding instantly.
Joining Binding Ends Seamlessly
When you reach the final stretch, smooth joining binding ends sets the stage for a perfect finish. Use this sequence for neat results:
- Trim binding tails for a snug fit.
- Overlap ends at a right angle.
- Sew a Diagonal Seam to disperse bulk.
- Maintain a steady Seam Allowance.
- Pressing Folds open ensures the join disappears—no lumps or bumps to spoil your hard work.
Finishing Techniques and Pro Tips for Binding
Now that your binding is stitched in place, let’s talk about how to finish it off with confidence. There are a few different ways to secure those edges and give your quilt a polished look.
Here’s what you’ll want to think about as you choose your finishing touch.
Machine Vs. Hand Binding Methods
Ever wondered why some quilters swear by machine binding a quilt while others won’t give up hand stitching? Machine binding wins the Speed Comparison—think finishing in hours, not days. Hand binding a quilt offers invisible stitches and heirloom beauty.
Both quilt binding methods shine in different ways, factoring in Aesthetic Differences, Durability Factors, Physical Demands, and even creative Hybrid Techniques.
Pressing for a Professional Finish
With your binding strips joined, move to the ironing board and grab your iron and Best Press clear starch spray. Set your iron temperature for cotton—between 270 and 320°F.
Firm, vertical pressure and pressing boards help keep seam bulk down and alignment sharp. Avoid too much steam, since fabric distortion can sneak in. These pressing techniques hit true professional standards every time.
Decorative Stitch Options and Safety Tips
Why settle for plain when your quilt’s edge can dazzle and last? Decorative stitches aren’t just pretty—they boost stitch durability and help prevent fraying. Pick strong thread choices, and double-check your stitch length and tension.
Stay mindful: practice injury prevention with ergonomic setups and regular machine maintenance. Modern trends mix bold colors with decorative stitches for show-stopping, professional results.
- Bright zigzags lock down edges and fight fraying
- Contrasting threads highlight creative stitch patterns
- Maintain steady tension for beautiful, secure binding
- Regularly check needle sharpness and ergonomic comfort
Frequently Asked Questions (FAQs)
What is sewing binding on a quilt?
Think of a quilt’s binding like a sturdy fence, protecting your garden from stray weeds.
Quilt binding is a strip of fabric that wraps the raw edges, securing layers, hiding seams, and giving your hard work a polished finish.
How do you bind a quilt?
To bind a quilt, cut binding strips and join them diagonally, then sew around the quilt’s edge. Use small, even stitches, reinforce the corners, and hide binding knots for a tidy finish and lasting durability.
How do you sew a quilt with a binding strip?
Much like tucking in the last edge of a treasured tapestry, sewing a quilt with a binding strip means careful Binding Preparation, keeping a precise Seam Allowance, making crisp Mitered Corners, Joining Ends smoothly, and confidently Securing Binding for the finish.
How do you bind a quilt with a bobbin?
Using your sewing machine, set bobbin thread tension to medium and pair a 90/14 needle with a stitch length of 5–5mm.
Add a walking foot, secure thread tails, and attach quilt binding for neat, lasting results.
How do you sew a binding?
To sew a binding, align the raw edges and use a steady seam allowance. Master fabric manipulation for mitered accuracy, ensuring binding tension and stitch consistency remain even.
Attaching binding to a quilt transforms it with a strong, polished edge.
How do you sew a quilt?
Ever wondered how much planning truly goes into making a quilt shine? Quilt assembly order, fabric directionality, seam allowance consistency, and battling bulk all shape the process.
Meanwhile, quilting design choices, binding, and finishing steps pull everything together, step by step.
Do you sew quilt binding on the front or back first?
You’ll find most quilters attach quilt binding to the front first for greater “aesthetic control” if hand finishing matters, but machine-speed enthusiasts go back-first for efficient binding order.
Both methods pass durability tests for attaching binding to quilt edges.
What is the easiest quilt binding method?
The easiest quilt binding method for most beginners is machine sewing continuous binding strips using a binding foot. This approach creates a neat, durable finish and—compared to hand-stitching—saves time, especially with pre-made binding or beginner methods.
How do you sew the end of a quilt binding?
Like the last piece in a puzzle, securing quilt binding ends calls for a smooth join—overlap the ends, trim, and use diagonal seams for a neat, invisible finish.
Final stitching keeps everything snug and prevents unraveling.
What foot do you use to sew binding on a quilt?
For machine sewing binding, the walking foot ensures even feeding through bulky layers, while the binding foot or quarter-inch foot gives crisp seam allowance.
Lowering presser foot pressure and using a ditch foot can create tidy, professional results.
Conclusion
They say “the devil’s in the details,” and binding is proof. By learning how to sew binding on a quilt, you’ve added that final, glorious touch—one that guards your handiwork and sets it apart.
Each edge you finish is like shaking hands with the future, promising many years of warmth and wear.
Now, every quilt you make will bring not just comfort, but also that unmistakable mark of care and craftsmanship. Your journey is stitched to last.
- https://www.youtube.com/watch?v=U72wuTjzceE
- https://www.superiorthreads.com/binding-thread
- https://scissortailquilting.com/tutorials-instruction/how-to-hand-sew-binding-on-quilt/
- https://www.jozmakesquilts.com/blog-and-tutorials/how-to-bind-a-quilt
- https://www.facebook.com/groups/291023511046957/posts/1677462712403023/

