This site is supported by our readers. We may earn a commission, at no cost to you, if you purchase through links.
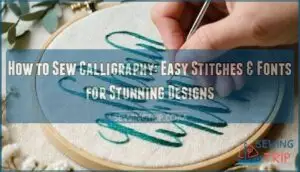
Use fabric that’s firm yet smooth, like cotton or linen, and choose embroidery floss for bold, clean lines. Start with basic stitches: backstitch for outlines and satin stitch to fill letters.
For details, the stem stitch adds flow to curves. Trace your design onto fabric with a washable pen, then stitch slowly, keeping tension even.
Mistakes? No biggie—just snip and redo. The secret’s in patience and steady hands. Ready for a twist? Next, we’ll master padded satin for stunning depth.
Table Of Contents
Key Takeaways
- Pick smooth fabric like cotton or linen, and trace your design with a washable pen for clean, accurate results.
- Use basic stitches like backstitch for outlines and satin stitch for filling letters, keeping steady tension and short lengths on curves.
- Add dimension with padded satin stitch or blend colors by overlapping lighter and darker shades for a unique effect.
- Keep thread from tangling by cutting shorter lengths, separating floss strands, and using beeswax for smooth stitching.
Sewing Calligraphy Basics
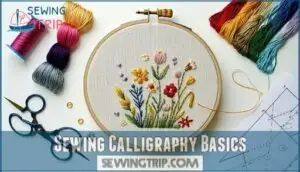
Learning to sew calligraphy is easier than it looks when you start with a few simple stitches and the right tools.
Sewing calligraphy transforms simple stitches into elegant art, blending creativity and precision for stunning, hand-crafted lettering masterpieces.
With a bit of practice and patience, you’ll be stitching elegant letters onto fabric in no time.
Essential Stitches for Calligraphy
To master calligraphy embroidery, start with versatile stitches like the back stitch, stem stitch, and split stitch.
Master the art of calligraphy embroidery with simple stitches that bring elegance and creativity to every fabric letter you sew.
These Line Stitch Variety staples suit curves, straight lines, and textured details.
For thick letters, explore Filling Stitch Options like satin stitch.
Combining stitches adds flair, while Thread Weight Effects and Fabric Stitch Interaction shape your embroidered script.
Practice turns technique into hand embroidery success!
Choosing The Right Fabric
To sew calligraphy, picking the right fabric is key. Lightweight cotton or linen works well for embroidery beginners, offering a smooth surface for stitching.
Fabric weave matters—tighter weaves may challenge dense designs, while looser weaves are forgiving. Consider fiber content and fabric weight for stability.
Adding a stabilizer prevents puckering, ensuring your embroidery fabric supports elegant, hand-stitched letters beautifully. Fabric properties matter when selecting your base material.
Selecting Thread and Needles
Choosing the right thread and needle is like pairing perfect dance partners—they’ve got to move smoothly together.
Think about:
- Thread Weight and Fabric Compatibility: Use lighter thread for tight weaves, heavier threads for bold looks.
- Needle Size: Bigger needles for thicker threads, smaller for delicate work.
- Colorfast and Specialty Threads: Pick durable embroidery floss or shiny silk for standout results.
Consider the available floss varieties for different textures.
How to Sew Calligraphy
Getting started with sewing calligraphy is easier than it looks.
Focus on these steps to create stunning designs:
- Design Transfer: Trace your calligraphy font onto the fabric using transfer paper for accurate letter spacing.
- Stitch Direction: Follow a logical path, ensuring smooth, consistent strokes when stitch writing curves or corners.
- Thread Weight and Fabric Texture: Match thin thread with fine fabrics and thicker thread for textured materials to enhance clarity.
Take your time, practice stitches, and enjoy the magic of hand embroidery.
Beginners should familiarize themselves with essential sewing materials for best results.
Calligraphy Font Selection
Choosing the right font for your embroidered calligraphy can make or break your design, so it’s worth giving it some thought.
From bold, eye-catching styles to simple, readable options, there’s a perfect font for every project and purpose, considering the importance of readable designs.
Simple Readable Fonts
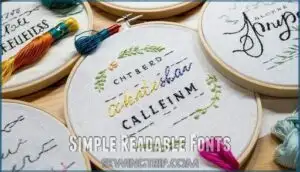
When picking simple readable fonts, focus on font legibility for small lettering and longer word counts.
These fonts are perfect for beginner projects, ensuring your hand embroidery stays clear and aligned with your project’s suitability.
Styles like Nickainley keep stitches clean and easy to follow, making your lettering shine with crisp lines, smoother curves, and less stitching stress!
Serif and Cursive Fonts
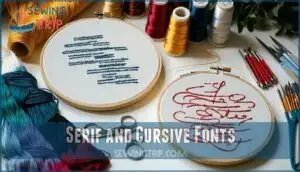
Serif and cursive fonts bring character to hand embroidery.
Serif fonts, with strong strokes and subtle variation, shine in formal projects, adding timeless elegance.
Cursive fonts, flowing and graceful, are perfect for informal projects or when you want your lettering to dance.
Focus on letter spacing and font weight to balance legibility and charm as you sew calligraphy.
Script and Handwriting Fonts
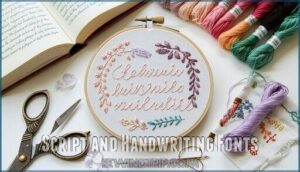
Script and handwriting fonts bring personality to your embroidery, mimicking a human touch. They work great for projects needing flair, like names or quotes.
Prioritize font legibility while considering letter connections and flourishes. Here’s what to look for:
- Smooth, flowing designs.
- Fonts with swashes for elegance.
- Balanced font pairings.
- Ready-to-digitize options.
- Stitches that highlight calligraphy effortlessly.
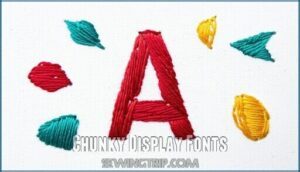
Chunky Display Fonts
For bold, eye-catching designs, chunky display fonts work wonders in embroidery lettering.
Larger letter size and fewer words make these fonts stand out beautifully.
Think bold monograms, fun project ideas, or striking hand lettering quotes.
Color choices matter—play with contrasts!
Use filling techniques like satin or long and short stitch for depth.
These embroidery fonts scream personality!
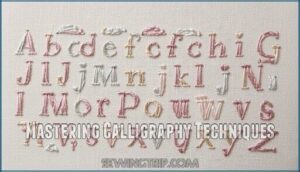
Mastering Calligraphy Techniques
You can master calligraphy stitches by focusing on precision, knowing when to adjust techniques for corners, curves, and thick letters.
With a bit of patience, practice, and creativity, your embroidered letters will stand out beautifully.
Back Stitch and Stem Stitch
Back stitch and stem stitch are the dynamic duo of lettering embroidery.
For smooth lines, keep your stitch direction steady and adjust thread tension for curve accuracy. Back stitch is great for defining line thickness, while stem stitch shines on loops and curves.
For a professional look, remember to maintain consistent stitch length. Use their combined power to create clean, flowing embroidery stitches—perfect for elegant lettering that stands out.
Satin Stitch and Long and Short Stitch
If you mastered the back and stem stitches, let’s finesse your lettering embroidery with the satin stitch and long and short stitch.
These hand embroidery techniques add smoothness and shading to your designs.
- Use satin stitch angles for even coverage and shine.
- Practice long-short blending for natural gradients.
- Maintain consistent stitch direction for clean, polished lettering.
Many artists use specialized threads for satin stitch to enhance their work, utilizing specialized threads and techniques for smoothness and shading.
Navigating Curves and Corners
Tackling curved calligraphy? Small stitch length is your best friend, especially for tight curves in cursive embroidery.
Adjust thread tension and use a stable fabric to avoid wobbling lines. Planning your stitch direction keeps curves smooth, and the right needle size handles curve complexity beautifully.
Here’s a handy guide:
| Aspect | Recommendation | Why It Works |
|---|---|---|
| Stitch Length | Small | Smooth, precise lines |
| Thread Tension | Slightly Adjusted | Prevents puckering |
| Fabric Stability | Tight-weave Cotton | Helps neat embroidery |
The key to success lies in small stitch length, stable fabric, and proper thread tension, which together ensure smooth, precise lines and prevent issues like puckering, making your embroidery look professional and neat.
Adding Dimension With Padded Satin Stitch
A padded satin stitch brings your calligraphy patterns to life by adding depth and texture.
Start with extra padding materials like layers of thread or felt under your stitch. Keep consistent stitch direction for smooth coverage and adjust thread tension for flawless texture.
Choosing the right fabric helps balance your design.
- Use felt or floss for padding.
- Verify even stitch layering.
- Practice on scrap fabric first.
Advanced Calligraphy Tips
When you’re ready to take your embroidered calligraphy to the next level, a few advanced tricks can make a big difference.
From mastering tight curves to adding pops of color or texture, these tips will keep your designs polished and eye-catching.
Adjusting Stitch Length for Curves
When sewing curves, short stitches give you better control and curve accuracy.
They prevent awkward angles and keep your calligraphy tutorial work clean.
Tight curves thrive with reduced stitch length.
Adjusting fabric tension and matching thread thickness also help.
For smooth embroidery stitches for lettering, consistent stitch density is key.
Treat each cornering technique with patience—it’s worth it!
Consistency for French Knots
Keeping your French knots consistent can be a game-changer for polished embroidery!
Focus on these steps:
- Knot Size: Wrap the thread evenly around the needle.
- Thread Tension: Keep it snug but not too tight.
- Knot Placement: Use a guideline for even spacing.
- Securing Knots: Finish firmly to avoid unraveling.
Practice makes perfect!
Changing Color Pattern
Switching thread colors mid-letter can make your embroidery pop.
Gradient effects or ombre lettering add flow, while color blocking introduces bold contrast.
Variegated thread naturally blends shades, offering easy shading techniques.
Consider various thread options for unique effects.
Pick stitches and font choices carefully, as they affect how colors shift.
Experiment on scrap fabric first—embracing creative mixes leads to stunning, personalized embroidery designs worthy of showing off, with a beautiful gradient effects or variegated thread.
Using Knots to Accent Points
Add charm to your modern calligraphy by incorporating decorative knots. Use French knots for dotting “i’s” or accents, adjusting knot size for balance.
Carefully plan knot placement in your needle art to enhance the design without overcrowding. Experiment with knot variations for unique effects, like thread painting.
Securing knots properly guarantees durability, making your stitches polished and professional.
Personalizing Embroidery With Calligraphy
Decorating with calligraphy makes projects personal, and it’s easier than you’d think! Whether it’s gift monograms, unique quotes, or quilt labels, adding heartfelt fabric lettering transforms everything from home decor to clothing embellishments.
A good starting point involves mastering basic stitches for clean lines.
Try modern calligraphy with:
- Hand embroidery on soft fabrics.
- Creative stitches like backstitch or split stitch.
- A playful mix of fonts for standout designs.
Frequently Asked Questions (FAQs)
What types of embroidery stitches are best for calligraphy lettering?
Embroidery stitches for calligraphy lettering, like stem stitch and backstitch, create smooth, elegant lines—think pen strokes with thread.
They’re perfect for curves and details, while satin stitch adds boldness for those thicker, dramatic elements, utilizing satin stitch for emphasis.
What factors should I consider when selecting the right stitch for my lettering?
Choose a stitch based on your design’s curves, thickness, and detail.
For smooth lines, use stem stitch. Split stitch handles curves well.
Satin stitch fills bold areas beautifully, and backstitch is great for crisp outlines.
Are there any resources that can help me learn more about calligraphy embroidery?
You can explore free patterns, video tutorials, and beginner guides online.
Websites focusing on embroidery offer step-by-step techniques.
Try searching for PDFs or joining embroidery communities for tips, inspiration, and feedback on your progress.
What are some creative ways to personalize my calligraphy embroidery?
Did you know 85% of people cherish personalized gifts more deeply?
Add meaning using favorite quotes, initials, or dates.
Mix stitches, thread colors, or add tiny embellishments like beads or sequins for creative flair!
How can I ensure evenly spaced lettering?
Start by drawing guidelines with a fabric-safe marker—straight lines keep letters evenly spaced.
Use a ruler or template for consistency.
Practicing on scrap fabric first helps avoid mishaps and boosts confidence for the final design.
What tools help transfer designs effectively?
Picture your design glowing on fabric like magic—tools like transfer paper, heat pens, or water-soluble stabilizers do the trick.
They simplify the process, letting you neatly transfer intricate details without losing accuracy or charm. Transfer paper, heat pens do the trick.
How do I prevent thread from tangling?
Keep your thread from tangling by cutting shorter lengths, around 18-24 inches.
Separate floss strands before stitching, and keep tension consistent.
A little beeswax or conditioner works wonders to smooth stubborn, twisty threads, making the process easier with consistent tension.
Can embroidery stabilizers improve stitching precision?
It’s true—embroidery stabilizers can work magic! They keep your fabric steady, preventing puckering or distortion, especially on stretchy materials.
You’ll notice cleaner lines, smoother stitches, and feel more confident tackling intricate designs.
What techniques work for blending thread colors?
Blend thread colors by switching strands midway, using two shades within the same needle.
Gradually overlap stitches with lighter and darker shades for a smooth progression.
Practice patience—it’s like painting, but with thread!
Conclusion
Rome wasn’t built in a day, and your journey to sew calligraphy will take practice too!
By choosing the right fonts, stitches, and fabric, you’ll create designs that truly stand out.
Focus on steady stitching, even tension, and don’t stress over mistakes—they’re just part of learning.
Whether it’s a dreamy script or bold, chunky letters, you’ll soon master how to sew calligraphy.
So grab your needle, stay patient, and watch your creative vision come to life!

