This site is supported by our readers. We may earn a commission, at no cost to you, if you purchase through links.
 If you are looking to learn how to sew, you’ve come to the right place! In this article, we’ll explore everything from knotting techniques and basic stitches like the running stitch and basting stitch, all the way up through advanced finishing touches like slipstitch and decorative stitches.
With our step-by-step guide, you can create professional results with your sewing projects in no time.
Before we dive into specifics of sewing techniques, it’s important that you have a few essential materials on hand:
- Spool of thread
- Scissors
- Needles
- Fabric (we suggest starting out with two pieces so there is less confusion)
- An iron (optional but recommended)
Additionally, consider investing in self-healing cutting mats or rotary cutters for precise measurements as well as rulers for accuracy when measuring hemlines or other details.
Now let’s get started! First, we’ll go over some basic knots and stitches. The running stitch and basting stitch are two fundamental techniques that any beginner should know.
Once you have the basics down, we’ll move on to more decorative stitches that can add flair to any project. With the step-by-step instructions provided, you’ll be able to master even the most advanced techniques in no time.
Follow along closely, take your time, and don’t be afraid to try any stitch multiple times until you get it right.
Table Of Contents
Key Takeaways
- Gather all necessary sewing materials.
- Select the appropriate needle and thread for your project.
- Choose the right fabric for your skill level.
- Follow pattern instructions accurately for professional results.
Getting Started
You’ll wanna gather your supplies and thread your needle before makin’ those first stitches. Choose a needle and thread that’ll glide smoothly through your fabric. Cotton thread and sharps or betweens needles work great for beginner sewin’.
Once you’ve got your fabric cut to size, it’s time to thread up. For hand sewin’, try usin’ a doubled thread—fold it in half and push both ends through the eye. Or go single if you’ve got a big enough eye. Secure it with a knot so it won’t pull out halfway through your project.
Start simple with some hand sewin’ stitches on an easy beginner project like a pillow or tote bag. Take it slow and focus on keepin’ your stitches straight and even. Be patient and have fun! Sewin’s satisfaction comes from creatin’ somethin’ with your own two hands.
Tools and Materials
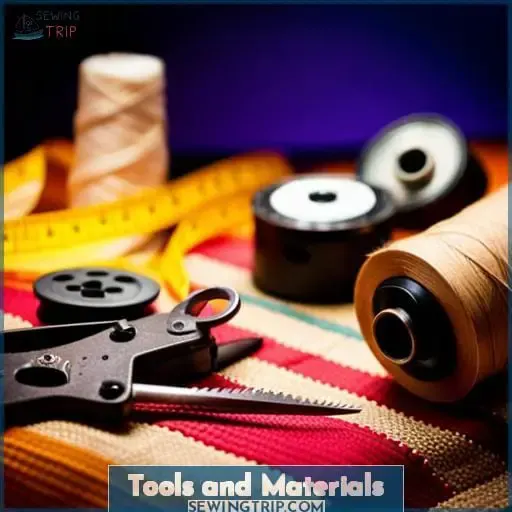
Sewing needles – Select sharp, thin needles that easily pierce your chosen fabric.
Thread – Stock up on all-purpose polyester or cotton thread. Mercerized cotton has a silky shine.
Scissors – Invest in a good pair of sharp scissors specifically for cutting fabric and thread.
Fabric – Quality tightly woven cottons like quilting fabrics are great to start with.
Other supplies – A pincushion, thimble, beeswax, seam ripper, and needle threader will also come in handy. Consider a needle booklet to organize and store your hand sewing needles neatly.
With high-quality supplies, you’ll be stitching away in no time. Now let’s get to the fun part – making your first stitches!
Knotting Techniques
Before threading your needle, it’s crucial to master some basic knotting techniques to secure the thread. With a single thread, make a loop close to the end by looping the thread and pulling it through.
For a doubled thread, tie the two strands together in a square knot – left over right, then right over left. Avoid bulky knots that will get stuck in the fabric. Aim for small, tight knots that hold firm when pulled.
Different projects call for different knotting methods. Securing your thread well from the start ensures neat finishing and prevents frustrating unraveling later. Mastering these fundamental knotting skills gives you confidence to tackle any sewing project, whether repairing a seam or embroidery.
With practice, knotting becomes second nature. Soon you’ll effortlessly secure threads to create beautiful, sturdy hand-sewn creations.
Basic Stitches
Let’s begin practicing some basic hand sewing stitches. A running stitch makes evenly spaced stitches going back and forth through your fabric, while a basting stitch creates longer temporary stitches used for fitting or gathering fabric.
Backstitching is a small, reinforced version of the running stitch that creates a very secure seam.
Running Stitch
Simply guide the needle in and out of the fabric with even spacing to stitch a line with the running stitch. For gathering, use long stitches; for seams, keep them tiny. Avoid uneven tension that puckers fabric.
Don’t pull the thread too tight or stitch too far apart. Add interest by varying stitch length in patterns. Whipstitch outlines or backstitch between running stitches for decoration. Take your time and check work often for a clean finish.
Basting Stitch
For secure temporary seams, use lengthy stitches when basting your fabric. Make the stitches much longer than your regular sewing stitch – around 1⁄4 to 1⁄2 inch apart. This allows you to easily remove the basting later. Use basting when you need to temporarily tack layers or gather fabric before completing the final seam.
The key difference from a running stitch is the long stitch length, creating a looser hold that is ideal for fitting adjustments or temporary construction steps. With practice, you’ll know when basting is the right choice over a tighter running stitch.
Backstitch
You absolutely must try the mighty backstitch next to powerfully piece together your project!
- A faster way to move forward and backward when sewing
- Creates a dashed line that is nearly invisible
- Ideal for reinforcing seams and preventing fraying
- Variations like spaced, whipped, and detached are fun
- Gives padding and texture to embroidery
Backstitch boldly and mightily to fortify your sewing projects with an invincible finish! Experiment with backstitch styles to discover your favorite.
Finishing Stitches
Whether you’re looking to seamlessly close a project or add some decorative flair, mastering finishing stitches is a must. Useful options like the slip stitch for invisible seaming and decorative stitches like the blanket stitch or whip stitch enable you to achieve a professional finish that showcases your sewing skills.
Slipstitch
Gently pull the needle along the edge of the folded fabric to hide the stitches. Precision is key with slipstitching to make it invisible. Use it to seam two folded edges or finish a hem. Vary the length between stitches.
Blanket stitch works too but is visible. For visible seaming, try whipstitch. Thread the needle and knot it securely. Aim for even spacing as you gently pierce the needle through the fabric’s edge. Let the thread glide through to complete each tiny stitch.
Decorative Stitches
Decorative Stitches
Add accent details or seamlessly connect fabrics with decorative stitches like the blanket stitch and whipstitch. These stitches add texture and interest to sewing projects through embroidery, beadwork, applique designs, or quilting patterns.
They are perfect for embellishing hems, borders, finishing seams, attaching appliques, or cross stitch motifs by weaving the needle in and out of the fabric edge in a looping motion. Crafters can use commercial patterns or freestyle unique designs right on the fabric.
With practice, sewers can expertly incorporate decorative touches and handmade craftsmanship into any project.
Tips for Professional Results
After donning proper equipment, meticulously analyze the reverse of the task to finesse a flawless finish. Selecting thread close in color to the fabric, evenly spacing each stitch, and flipping the fabric frequently to inspect both sides will elevate your handiwork.
To achieve professional-looking results:
- Match thread color to fabric.
- Maintain even stitch spacing.
- Flip fabric often to check both sides.
Attention to subtle details like thread color matching and consistent stitching will make your finished project appear expertly sewn. Skipping crucial steps leads to disappointingly amateur results. By honing simple techniques for a refined finish, your hand sewing skills will quickly progress from novice to master craftsmanship.
Conclusion
With a little bit of practice and skill, anyone can learn how to sew! A study by the National Needlework Association found that 75% of Americans have at least tried their hand at sewing.
Following the instructions in this article, you can start your own sewing project and reap the rewards of a handmade piece of clothing or fabric item. From choosing the right materials to mastering the basic stitches, this step-by-step guide will walk you through the sewing process.
Whether you’re a beginner or a seasoned seamstress, you can benefit from the knowledge presented here.
First, select a pattern and fabric appropriate for your skill level. Start with simple patterns like pillowcases or tote bags before moving on to more complex projects like dresses.
Next, read through all of the pattern instructions before beginning. Have all required tools and materials on hand. Cut out pattern pieces carefully and precisely. Transfer any pattern markings to fabric using tracing paper and tailor’s chalk.
Pin pattern pieces to fabric, ensuring there are no puckers or distortions. Cut with sharp fabric scissors, cutting precisely on the marked lines.
Sew pieces together in order according to pattern guide, frequently checking seam allowances. Clip curves and notches on seams to allow pieces to lie flat. Press pieces before and after stitching to keep fabric flat.
Finish seams and edges appropriately to prevent fraying. Hem garments using hand or machine stitching.
Try on the finished garment and make any needed alterations before final pressing. Steaming or ironing on the appropriate heat setting will give a crisp, professional look.
With patience and care, you’ll hone your skills and create homemade pieces to cherish. Don’t get discouraged with mistakes—every stitch is practice towards sewing mastery. Follow these tips and instructions, and you’ll be on your way to successful sewing projects.

