This site is supported by our readers. We may earn a commission, at no cost to you, if you purchase through links.
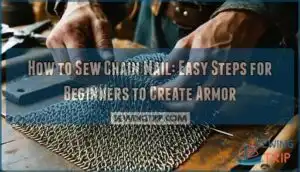
You’ll need pliers, wire cutters, and metal wire (typically aluminum, steel, or brass).
First, wrap wire around a dowel to create rings, cut them open, then close them one by one in patterns.
The basic European 4-in-1 weave connects each ring to four others.
Work row by row, opening rings, threading them through existing ones, then closing them securely.
Your hands will get tired, so take breaks!
Patience is key—knights didn’t build their armor in a day.
The right ring size makes all the difference between flexible armor and metal spaghetti.
Table Of Contents
Key Takeaways
- You’ll need specific tools to make chainmail including pliers, wire cutters, and metal wire (aluminum, steel, or brass), plus proper safety gear like cut-resistant gloves to protect your hands from sharp wire ends.
- Your choice of wire thickness (gauge) directly affects your project—thicker wire (14-16 gauge) creates stronger armor but adds weight, while thinner wire (18-20 gauge) works better for decorative pieces.
- You’ll create chainmail using the European 4-in-1 weave as a foundation, where each ring connects to four others, giving you a flexible yet strong structure that works for both armor and decorative projects.
- You can expect a significant time investment—a standard chainmail shirt requires approximately 24,000 rings and can take weeks or months to complete, requiring considerable patience and consistent work.
Chainmail Basics
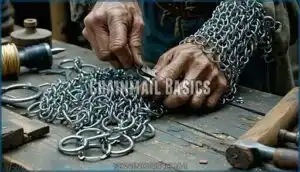
To start sewing chainmail, you’ll need the right materials, tools, and a basic understanding of how it all fits together.
It’s simpler than it sounds, but a little patience and the right setup go a long way.
Materials and Tools Needed
To start sewing chainmail, you’ll need steel wire (16-18 wire gauge works well), a dowel for coiling, and sturdy wire cutters or ring cutters.
Grab two types of pliers—needle-nose and flat-nose—for handling chainmail rings. Dowel sizes affect ring diameter, so choose carefully.
Don’t forget safety gear like gloves to avoid blisters. Selecting the right wire requires understanding specific gauge requirements.
With these tools, crafting metal rings becomes manageable!
Safety Precautions and Gloves
Before handling any chainmail supplies, always wear cut resistance gloves to protect your hands from sharp wire ends and puncture hazards.
Metal allergies can cause skin reactions, so consider wearing nitrile gloves underneath if you’re sensitive.
Keep your work area organized to prevent ring entanglement and tool handling accidents.
When following any chain mail tutorial, remember that protective mesh can catch on jewelry or clothing, so secure loose items before sewing chainmail.
Remember to take breaks to avoid eye strain and fatigue, which can be prevented by following eye strain and fatigue guidelines, and always prioritize your sewing safety and overall well-being.
Wire Thickness and Gauge
The backbone of any chainmail project lies in your wire thickness. Choose your gauge carefully—thicker wire (14-16 gauge) creates stronger armor but adds weight, while thinner wire (18-20 gauge) works better for decorative pieces.
Steel wire offers durability, while aluminum provides lightweight flexibility. Your material selection directly impacts the difficulty of winding the rings and the tools needed—heavier gauges require stronger wire cutters and sturdier pliers, which is crucial for the backbone of your project.
Sewing Chain Mail
You’ll create chain mail by linking metal rings together using pliers to open and close each connection.
With practice, your fingers will develop muscle memory for the weaving patterns, making the process faster as you build your armor piece by piece, using pliers to ensure secure connections.
Creating Rings and Patterns
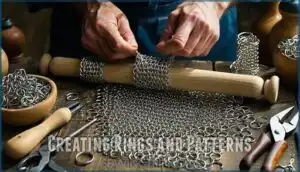
To create rings for chainmail patterns, start with the right materials. Simply wrap your wire around the dowel in tight coils, then cut along one side to produce individual rings.
Different ring materials affect your weave complexity and overall strength. For mail armor DIY, consistency matters – your rings should be uniform in size.
Creating custom sewing patterns can also benefit from consistent measurements. Once you’ve made enough rings, you’ll be ready for pattern design and chainmail construction.
Joining Techniques and Weaving
There are three primary ring joining methods for chainmail weaving: butting, riveting, and welding.
Butting is quickest, where you simply overlap and close the ends together.
Riveting adds strength by punching holes and inserting rivets through overlapped ends.
Welding delivers maximum durability by fusing ring ends together.
Exploring different joining products can help refine your technique.
When interwoven rings form your pattern, each method affects both the overall strength and the decorative appearance of your historical or contemporary chainmail project.
European 4 in 1 Weave and Variations
The European 4 in 1 weave serves as the foundation for most chainmail projects.
The European 4 in 1 weave is a timeless pattern, combining strength and flexibility for both historical armor and modern designs.
This classic pattern creates flexible yet strong armor by connecting each ring to four others.
- Close one ring and thread it through four open rings
- Close each open ring individually
- Continue the pattern, maintaining consistent weave strength
- Add new rows by connecting rings to the previous section
You’ll notice the distinctive rippled texture that’s historically accurate yet suitable for modern applications.
Many artisans create mail with these rings for various chainmail projects using the European 4 in 1 weave.
Making Chainmail Rings
You’ll need to wrap wire around a cylindrical rod to form the rings that become your chainmail, with the rod’s diameter determining how big your rings will be.
Once you’ve created a coil of wire by winding it carefully around the rod, you’ll cut along one side to produce individual rings ready for joining.
Rod Diameter and Ring Size
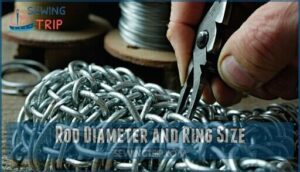
When selecting rod diameter for chainmail links, you’re actually determining your final ring size. The ratio between your wire thickness and rod diameter (known as the aspect ratio) affects your weave’s flexibility and strength.
For armor, a 3/8-inch rod works well with 16-gauge wire, creating rings sturdy enough for protection yet flexible for movement. Smaller diameters produce tighter weaves with higher density, while larger ones yield looser chainmail with more drape.
Remember that material considerations matter too—steel requires different sizing than aluminum or copper. Selecting the right rod diameter is similar to choosing appropriate needle sizes for different fabric weights in sewing.
Measure your diameter consistently when sewing chainmail to maintain uniform ring sizes throughout your chainmail shirt or costume.
Winding Stands and Automated Winding
After choosing your rod diameter, you’ll want to make the winding process faster and more consistent.
A simple winding stand DIY project can save your hands from fatigue and improve your ring quality.
Mount your dowel horizontally between two supports, then add a handle for easy rotation.
For even better results, consider automated winding speed with a low-RPM motor attached to your stand.
Motorized winding systems maintain consistent wire tension control, creating perfect coils every time.
Custom winding jigs can hold various rod sizes for different projects.
When working with spring steel wire, good tension is key—too loose and your coil won’t hold shape, too tight and you’ll strain the motor.
Constructing Chainmail Shirt
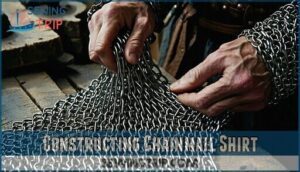
You’ll transform your rings into a wearable shirt by starting with the front half and then creating a matching back piece.
Once you’ve made both sections using the 4-in-1 European weave pattern, you’ll join them at the shoulders and sides to complete your chainmail armor.
Front and Back Halves Construction
After creating your rings, start constructing the front half of your chainmail shirt first.
Begin with a long chain that extends 4 inches past your desired sleeve ends.
Mark the middle, then build upward 20 rows to form the neck hole.
For the back half, mirror the front’s row count but create a shallower neck depth (6-8 rows) to prevent shifting.
Both halves should match in chest width, leaving 1-2 inches of breathing room.
Sleeve and Body Proportions
Balance your chainmail shirt’s sleeve length and torso fit for both functionality and comfort.
When crafting your suit of chainmail armor, consider these proportions:
- Too-tight sleeves can restrict movement during sword practice
- Overly long sleeves add unnecessary weight that drags your arms down
- Improper chest measurement creates an ill-fitting piece that shifts in battle
Aim for sleeves extending to mid-forearm and body length reaching mid-thigh for ideal mobility impact and aesthetic balance.
Neck Hole and Shoulder Pieces
The success of your chainmail shirt hinges on proper neckhole construction. Create a shallower neckhole (6-8 rows) for the back compared to the front (20 rows) to prevent shifting during movement.
Connect front and back halves with two 3-4 inch wide pieces under the sleeves. Join shoulder pieces last, making certain they’re strong enough to support the shirt’s weight.
Proper construction requires selecting the right fabric to guarantee durability. Fill any armpit gaps by weaving rings between sleeve and underarm pieces for improved mobility and comfort.
Advanced Chainmail Techniques
You’ll find that advanced chainmail techniques open up new possibilities for your projects, from lightweight fabric alternatives to film-inspired methods.
Once you’ve mastered the basics, you can try specialized weaves or experiment with alternative materials like PVC pipe rings used in movies.
Faux-Chainmail Fabric Alternatives
Fatigue and sore fingers often lead crafters to explore fauxchainmail options.
Mesh fabrics offer a lightweight alternative with metallic sheen. You’ll find that knitted chainmail made from thrift store sweaters can be glued and painted for realistic effects.
Pop tab armor creates unique patterns, while plastic netting doubled up and spray-painted mimics traditional weaves.
For budget-friendly LARP armor, try aluminum wire or electrical fencing—both affordable alternatives for cosplay enthusiasts.
Chainmail in Media and Film
Film production teams use clever chainmail shortcuts you can learn from. Looking at famous medieval armor portrayals can inspire your DIY projects!
- Monty Python used knitted string with metallic paint for lightweight chainmail
- LOTR chainmail featured 12 million PVC pipe rings (from 7 miles of pipe!)
- Actors often wear faux-chainmail to avoid medieval armor’s exhausting weight
- Film costumers prefer ABS plastic rings for authentic movement
- Historical accuracy sometimes takes a backseat to practical cosplay armor solutions
Historical accuracy is not always the priority in film production, as the focus is often on creating a visually appealing and functional costume.
Practical Considerations and Solutions
Three practical solutions can make your chainmail journey easier.
For better weight distribution, wear a military belt that supports the mail from your hips.
Consider mesh alternatives like plastic netting or knitted fabric for affordable materials that won’t weigh you down.
You can sew your faux-chainmail onto an underdress for support and realistic appearance.
Remember, chainmail tools don’t have to be expensive—many tutorials show how to achieve great results with basic items.
Frequently Asked Questions (FAQs)
Is chainmail difficult to make?
Ever wondered about the patience required for medieval crafts?
Yes, chainmail is challenging to make.
It requires thousands of metal rings, specialized tools, and weeks or months of consistent work to complete a single garment, which demands a lot of patience.
What is the best wire for chain mail?
For chainmail, you’ll want galvanized steel (16-14 gauge) for armor or stainless steel for durability.
Aluminum’s lightweight but weaker.
Copper or brass work great for decorative pieces.
Choose based on your project’s purpose.
Is chain mail legal?
Like medieval knights of old, you’re free to own and wear chainmail in the US.
It’s completely legal for law-abiding citizens to sport this historic armor in public, with no federal restrictions limiting your metallic fashion statement.
How many rings to make chainmail?
You’ll need approximately 24,000 rings for a standard chainmail shirt. The exact number varies based on your size and design, with each ring typically measuring 1/4 inch in diameter using 16 gauge wire.
What tools do I need to make chain mail?
You’ll need two pairs of needle-nose pliers, wire cutters or bolt cutters, a dowel rod for winding rings, and gloves to protect your hands.
For welded or riveted designs, you’ll need additional specialized tools.
How long does it take to make chain mail?
Making chainmail demands patience.
You’ll spend weeks or months on a shirt, using approximately 24,000 rings.
Small projects like bracelets take hours, while full armor suits can consume years of your spare time.
What is the best way to store chain mail?
To store your chain mail properly, hang it on a padded hanger or lay it flat in a dry place.
You’ll prevent rust by keeping it away from moisture and applying light oil occasionally.
How do I maintain chain mail?
Your armor’s life hangs in the balance.
Clean chainmail with a gentle brush and mild soap, rinse thoroughly, dry completely to prevent rust.
Oil steel rings regularly.
Store in a dry place.
Is chain mail comfortable to wear?
Chainmail isn’t particularly comfortable – it’s heavy (15-30 pounds) and can pinch your skin. You’ll want padding underneath for protection and comfort. Many wearers compare it to wearing weighted clothing.
How to clean and maintain chainmail?
To clean chainmail, soak it in warm soapy water, gently scrub with a soft brush, and rinse thoroughly.
Dry completely to prevent rust, then apply a light oil coating for protection.
Regular maintenance extends your chainmail’s lifespan.
Conclusion
Building your own chainmail is an absolutely life-changing adventure that connects you to thousands of years of armorer tradition.
Now that you know how to sew chain mail properly, you’ll find endless creative possibilities—from costume pieces to functional armor.
Remember to maintain your tools, work at a comfortable pace, and celebrate small victories along the way.
Your fingers might be sore today, but soon they’ll be nimble experts weaving metal masterpieces that would make medieval craftsmen proud.

