This site is supported by our readers. We may earn a commission, at no cost to you, if you purchase through links.
The process requires patience and precision, but the payoff is window treatments that match your exact specifications—from fabric weight to hem length—without compromising on quality or style.
Table Of Contents
- Key Takeaways
- Is Sewing Curtains Cost-Effective?
- What Supplies Are Needed to Sew Curtains?
- How to Measure Windows for DIY Curtains
- Calculating Fabric Yardage for Curtains
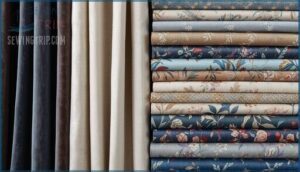
- Choosing The Best Fabrics for Sewing Curtains
- Sew Side Hems and Bottom Hems
- Create The Curtain Lining
- Insert Interfacing at Top of Curtains
- Attach Lining to Curtains
- Add Rod Pocket and Hang New Curtains
- Frequently Asked Questions (FAQs)
- Conclusion
Key Takeaways
- Sewing your own curtains saves $40 to $100 per window compared to custom orders while giving you complete control over fabric choice, dimensions, and design quality.
- Accurate measurements are critical—mount your rod 6–10 inches above the frame, extend it 6–15 inches beyond each side, and multiply window width by 1.5× to 2.5× for proper fullness when calculating fabric needs.
- The construction sequence matters: start with side and bottom hems, add lining cut 5–10 cm smaller than main fabric, insert interfacing at the header for structure, then create your rod pocket or attachment method.
- Choosing mid-weight fabrics (4–8 ounces per square yard) with proper lining improves insulation by 15–25% annually while polyester thread and fusible interfacing ensure durability through repeated washing and use.
Is Sewing Curtains Cost-Effective?
Why gamble on generic curtains when you can tailor every detail to your space? Sewing your own curtains delivers real DIY savings—generally $40 to $100 per window using mid-range fabrics—compared to custom options that run $200 to $1,500 or more. Material expenses stay manageable when you shop smart, with most drapery fabrics costing $10 to $20 per yard.
While your DIY curtain project demands time (expect 5 to 10 hours for beginners), the labor value you’re investing pays off through individual fabric selection and custom durability that outlasts many store-bought alternatives. You’ll avoid the 30 to 50 percent markup from professional labor while creating curtains that fit your windows precisely.
DIY projects, however, require a significant time and skill investment. Though long-term costs factor in—like tool investments and occasional fabric waste—the control you gain over quality and design makes this one of the most rewarding DIY home projects for your space.
What Supplies Are Needed to Sew Curtains?
Before you start cutting and stitching, you’ll need to gather a few essential supplies. The right materials make the difference between curtains that look homemade and ones that rival store-bought quality.
Here’s what you should have on hand.
Fabric
Your fabric selection for curtains determines not just the look, but also the performance and longevity of your window treatments. You’ll need main drapery fabric and lining fabric—both chosen for their specific roles.
Consider these key factors when choosing curtain fabric:
- Fabric weight between 4 and 8 ounces per square yard balances structure and drape
- Drape characteristics like natural fall and flow affect the overall appearance
- Durability factors including fiber strength and resistance to fading
- Thermal properties that improve insulation and energy efficiency
- Sustainable fabrics using organic or recycled materials for eco-conscious design
Linen, cotton-polyester blends, and rayon combinations are reliable fabric types for most projects. Using heavier upholstery fabric ensures a more luxurious and thick curtain, and it’s important to think about fabric’s stain resistance for easy maintenance.
Hardware
Once you’ve picked your fabric, hardware brings your vision to life. You’ll need curtain rods or track systems—rod diameter generally ranges from 1/2 inch to 3 inches depending on your curtain weight. Brackets secure the rod to your wall, while curtain rings or curtain hooks attach panels to the hardware. Finial styles add decorative polish at each end.
Motorized options offer convenience through smart home integration, though they increase installation costs. Budget around $248 to $462 per window for complete curtain hardware and installation, depending on complexity.
Sewing Tools
With hardware chosen, now you need the right sewing tools to bring it all together. A reliable sewing machine forms the foundation of efficient curtain construction. Here’s your essential toolkit:
- Measuring tape for accurate window and fabric dimensions
- Hard ruler (36 inches or longer) for precise cutting lines
- Ergonomic scissors or fabric shears for clean, straight cuts
- Pressing mats and a steam iron for crisp seams and professional hems
- Stick pins (glass-head versions withstand iron heat up to 120°C)
- Thread types matched to your fabric weight
- Seam ripper for correcting mistakes without damaging fabric
Machine maintenance and following safety guidelines guarantee smooth operation and prevent injury during your project.
How to Measure Windows for DIY Curtains
Where should your curtain rod sit, and how much fabric will you actually need? Getting window measurements right means the difference between curtains that improve your space and ones that look just a bit off.
Here’s how to measure windows for curtains accurately:
- Mount your rod 6–10 inches above the window frame. This creates visual height and reduces light gaps.
- Extend the rod 6–15 inches beyond each side of the frame. This allows proper stacking when curtains are open.
- Measure from the rod position to your desired drop style—sill, apron, or floor. Add 5 inches for hems.
- Calculate panel quantity by multiplying window width by your chosen fullness ratio (1.5× for moderate drape, 2.5× for luxurious folds).
Account for casing dimensions when measuring window dimensions—they add roughly 1–1.5 inches per side. Record everything carefully.
You’re now ready to calculate exact fabric yardage.
Calculating Fabric Yardage for Curtains
Your measurements are just the starting point—now you need to translate them into actual fabric yardage. Start by adding seam allowances (about 6–8 inches total) to your finished length for hems and casings.
Next, multiply your window width by your fullness ratio—usually 1.5× for relaxed drapes or 2.5× for luxurious pleats. Divide this total by your fabric width (usually 54–137 cm) to find how many panels you’ll need.
For patterned fabrics, factor in pattern matching by adding one full repeat per panel—this prevents awkward design breaks.
Digital calculators from retailers like Sailrite simplify this process and reduce waste by up to 12%, but understanding the math gives you control when measuring window dimensions and calculating fabric needed for any project.
Choosing The Best Fabrics for Sewing Curtains
Picking the right fabric is where your curtains go from basic to beautiful. You’ll need to think about how much material to buy, what patterns work in your space, and whether you’ll need to stitch panels together for wider windows.
Let’s walk through each decision so you can choose fabrics that look great and fit perfectly.
Calculating Fabric Requirements
Before you hit the fabric store, you’ll want to nail down your fabric yardage to avoid shortages or waste. Start by measuring your window width and height, then factor in fullness—usually 1.5 to 2 times the window width for gathered curtains.
Next, calculate fabric measurements with these steps:
- Add 7–10 inches to your height for hems and headers.
- Multiply window width by your fullness factor for total width needed.
- Account for seam allowances and pattern matching if your fabric has repeating designs.
- Divide total square inches by fabric bolt width to determine final yardage, adding 10% for waste minimization.
Width considerations and proper calculating fabric needed make sure you’re covered without overbuying.
Selecting Pleasing Patterns
Think of pattern selection like setting the visual volume for your space—too loud, and everything competes for attention. You’ll want to choose patterned fabric that complements your room’s existing color harmony without overwhelming the eye. Pay attention to pattern scale—large repeats work best in spacious rooms, while smaller prints suit compact areas. Always check fabric repeat measurements before cutting, and consider print direction to ensure motifs flow correctly when hung.
For busy spaces with bold furnishings, opt for solid fabrics or subtle textures that add visual weight without clutter. Texture pairing matters too; mix smooth and nubby weaves for depth without chaos. The right fabric selection and preparation guarantees your window treatments uplift rather than distract from your design vision.
Joining Fabric Panels
When panels come up short, joining fabric widths becomes your blueprint for full-coverage curtains. Place your panels right sides together, aligning pattern matching carefully at the selvage edges. Sew with a ½-inch seam allowance, then press seams open flat to eliminate bulk.
This step in sewing curtain panels ensures your fabric width spans generously across wide windows without puckering or distortion. Always check panel alignment before stitching—mismatched seams telegraph amateur work instantly.
Sew Side Hems and Bottom Hems
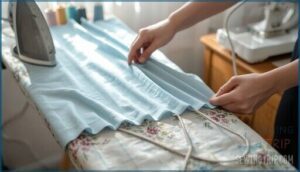
Your side and bottom hems set the stage for everything else, so take your time here. Start by folding the bottom edge first—a double fold hem at 4 inches gives you the weight and structure you need for a professional drape. Press each fold with your iron to lock in crisp, flat creases before you touch the sewing machine.
For the sides, fold under 1.5 inches and press again. Pin everything in place, then run a straight stitch along each hem, keeping your lines even. If you’re working with heavier fabric, consider mitered corners at a 45-degree angle to avoid bulk where the side and bottom hems meet. You can also add hem weights in the corners to prevent billowing.
For an invisible finish, try blind stitching by hand or machine. This fabric preparation step makes all the difference between curtains that hang beautifully and ones that just hang there.
Create The Curtain Lining
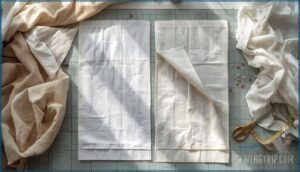
Once your hems are pressed and stitched, you’re ready to work on the lining fabric that transforms basic panels into polished window treatments. Cut your lining 5–10 cm narrower and shorter than your main fabric—this prevents any peek-a-boo edges and keeps the curtain hanging smoothly.
Lining fabric types matter more than you’d think. Cotton linings offer breathability and a natural finish, while poly-cotton blends resist wrinkles and hold up better over time. If you want thermal performance improvements, consider foam or flannel layers that can cut your heating costs by 15–25% annually. Blackout linings block light completely when paired with dense fabric, and eco-friendly options made from recycled polyester help you sew curtains that don’t cost the planet.
When attaching lining, techniques come into play, think about these practical steps:
- Hem the bottom edge with a double fold of 2.5 cm each for weight balance and a clean finish
- Use 8–10 stitches per inch when sewing to maintain durability without stiffening the drape
- Hand-tack the top edge first before machine stitching to keep alignment tight
Lining finish treatments like Teflon coatings extend lifespan by 20% in humid spaces, while environmental considerations point toward recycled polyester that keeps 30–50 plastic bottles per curtain pair out of landfills.
Insert Interfacing at Top of Curtains
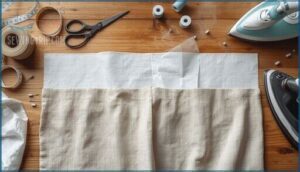
Your lining work has set the stage for what comes next—a step that adds professional structure to the header where all the visual action happens. Fusible interfacing enhances curtain headers by increasing thickness and rigidity, ensuring your fabric can support pleats and grommets effectively.
Cut heavyweight fusible interfacing 2–5 cm shorter than your curtain length to avoid visible overlap at the panel ends. Position it along the reverse side of your header, just below where hooks or grommets will sit, then press firmly for 10–15 seconds per section using moderate heat. Let the material cool completely before handling—this ensures adhesion holds strong.
If you prefer sew-in buckram for sewing curtains, pin it 1.3 cm from the top edge and stitch along all four sides for maximum tear resistance. Polyester interfacing retains adhesion through five machine wash cycles at 30°C with minimal shrinkage, and properly applied interfacing sustains pleat definition after 300 open-close cycles.
This curtain construction technique transforms a simple panel into a durable, structured treatment.
Attach Lining to Curtains
With your interfacing locked in place, you’re ready to marry the lining to your curtain panels—the step that separates amateur attempts from polished, showroom-worthy windows.
Start by laying your curtain face down, then position the lining fabric on top with right sides together, aligning edges carefully. Pin along one side seam first, maintaining a 1 to 2.5 cm seam allowance depending on your fabric weight. Sew straight down that pinned edge, then repeat on the opposite side. Turn the panel right side out and adjust the fabric so the lining sits 1.5 to 2 inches narrower on each side—this inward roll conceals seams beautifully when hung. Press those edges flat with medium heat, holding for 10 seconds per section.
Here’s what makes this attachment work:
- Pre-shrinking lining fabric prevents post-installation shrinkage of up to 5%
- Accurate seam allowance ensures durability under hanging weight
- Proper hemming techniques reduce light leakage to less than 5%
- Offset bottom hems create a neater drape and hide lining edges
- Pressed seams compress bulk by 10%, improving overall drape
Pin the bottom hem, ensuring the lining stays straight and wrinkle-free throughout.
Add Rod Pocket and Hang New Curtains
Your curtain panels are complete—now it’s time to form the rod pocket and hang them properly. Measure your curtain rod diameter first, since pocket size should be 2–2.5 times that width for smooth gathering and movement. For a 1-inch rod, you’ll need about a 1.5-inch pocket.
Fold the top edge inward 0.5 inches, press it flat, then fold again to match your pocket measurement plus 3 inches for a header. Pin and sew straight along the bottom fold edge, about ¼ inch from the crease. Add a second stitch line 1–1.5 inches below the top edge to define the rod pocket channel.
Position your curtain rod ½ to ⅔ of the distance between window trim and ceiling—this hanging height makes rooms feel taller and frames windows beautifully. Thread the rod through your new pocket, distribute gathers evenly, and admire how your custom curtains transform the space.
Frequently Asked Questions (FAQs)
What are some tips for sewing even hems?
Getting your fabric perfectly straight at the cutting table makes all the difference later.
Press each fold firmly before sewing, use plenty of pins to secure the double-fold hem, and let the curtain hang as you stitch—gravity naturally evens out the bottom hem allowance and keeps your straight stitches true.
How do I make pleated curtains?
Start by choosing your pleat style—pinch pleats offer timeless elegance, while goblet or box pleats add drama.
Multiply your window width by 2 to 5x for proper fullness, then mark pleat locations every 5 to 4 inches.
Attach pleater tape to the curtain back, spacing hooks to match your marks, then press and secure each pleat with stitching. This creates structured, professional-looking folds that hang beautifully and control light effectively.
What kind of thread works best for sewing curtains?
Choose polyester thread for its outstanding seam durability and UV resistance—it maintains 85-90% colorfastness under sunlight.
Match thread weight to your fabric: lightweight threads for sheers, heavier options for drapery.
What’s the easiest way to hang curtains on the rod after sewing them?
The simplest approach is sliding your rod through the rod pocket you created—done in seconds.
For more versatility, hook clip rings evenly along the top edge, which makes adjusting height or removing panels for cleaning incredibly easy and holds heavier fabrics up to several pounds per ring.
How can I reduce wrinkles when ironing the finished curtains?
A smooth drape starts with the right ironing preparation—think of it as setting the stage for your sewing project’s final act.
Iron fabric on the wrong side using a press cloth, work through pleats and hems methodically, and let surface considerations guide your technique.
This careful approach transforms your weaving into polished, professional curtains.
How do you finish the top edge without a rod pocket?
You can skip the rod pocket and use alternative finishes like grommet application, tab top options, or pinch pleating instead.
Back tab curtains, pencil pleat curtains with curtain header tape, and pleater tape offer adaptable curtain header styles for modern looks.
What are the best curtain styles for beginners?
Start with simple panel curtains or rod pocket styles—they’re your best bet for beginner sewing projects.
These easy curtain types need only straight seams and basic sewing techniques, making them quick project ideas that use beginner fabric choices like linen or cotton.
How do you prevent fabric from fraying?
Raw fabric edges unravel faster than you’d think—but you can stop it. Use edge finishing techniques like serging or zigzag stitching on the selvage before cutting.
Pre-sewing prep such as starching stiffens fibers, while anti-fray products seal edges. Sharp cutting techniques and understanding fabric characteristics help too.
Can you make curtains without a sewing machine?
Yes, you can make curtains without sewing skills using fabric glue, iron-on hemming tape, or clip rings. No-sew methods offer beginner accessibility and time efficiency, generally taking 20-30 minutes.
Cost comparison shows adhesive bond strength varies, but fusible webbing provides no-sew durability comparable to sewing techniques.
How do you create pleats in curtains?
You create pleats by attaching pleater tape to your curtain’s top edge, then pulling the cords to gather fabric into folds. Pinch pleat curtains need 5 times fullness ratio.
Training curtain pleats with clips for several days helps them hold their shape beautifully.
Conclusion
Think of fabric like a blank canvas—once you master how to sew curtains, every window becomes an opportunity to blend function with personal style.
The steps may feel methodical at first, but repetition builds confidence. Your measurements dictate fit, your fabric choices shape ambiance, and your finishing touches determine longevity.
Skip the markup, trust your hands, and create window treatments that work exactly as you envisioned them—no compromises, no settling for “close enough.
- https://www.maakhome.co.nz/blogs/news/top-7-best-fabrics-for-curtains-in-2025-your-guide
- https://www.archivemarketresearch.com/reports/curtain-fabric-244843
- https://www.grandviewresearch.com/horizon/outlook/curtains-market-size/global
- https://www.marketgrowthreports.com/market-reports/home-sewing-machines-market-112738
- https://www.cpsc.gov/s3fs-public/ManufacturingCostAnalysis.pdf


