This site is supported by our readers. We may earn a commission, at no cost to you, if you purchase through links.
Same two words, three completely different crafts. Say "slip stitch" to a crocheter, and she’ll picture joining a round with barely a bump. Say it to your grandmother hemming a skirt, and she’ll picture stitches so invisible you’d swear the fabric grew that way.
That’s the beauty of this humble technique. It doesn’t add height, doesn’t show up in the finished piece, and still holds everything together.
Grab your hook, needle, or knitting needles. You’re about to learn three versions of one skill that quietly makes good handmade work look great.
Table Of Contents
Key Takeaways
- The slip stitch means something different in each craft: it joins rounds invisibly in crochet, moves a stitch between needles without knitting or purling it in knitting, and creates a hidden seam in sewing.
- In crochet, you insert your hook under both loops, yarn over, and pull through both loops in one motion, keeping tension loose for a compact, bulk-free join.
- In sewing, an invisible slip stitch hides the knot inside the fold and catches just one thread from each edge, creating a ladder-like seam that stays hidden from the outside.
- Most slip stitch problems come from tension that’s too tight, mismatched thread color, or uneven spacing, so using stitch markers, testing on scrap fabric, and practicing with bulky yarn or fine needles can fix these issues.
What is a Slip Stitch?
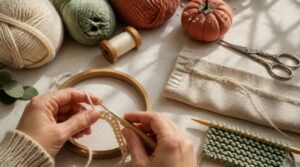
One little stitch, three different crafts, three different jobs. The name "slip stitch" shows up in crochet, sewing, and knitting, and it means something a bit different each time. Let’s break down what it actually is in each one, plus when you’ll reach for it.
In sewing, it’s the go-to hemming trick, and mastering the slip stitch hem for an invisible finish can make store-bought garments look homemade in the best way.
One stitch, three crafts, three jobs: the slip stitch means something different in crochet, sewing, and knitting
Crochet Slip Stitch Meaning
Ever wonder how crocheters change yarn colors without a bump showing? That’s the slip stitch at work. Abbreviated sl st (US) or ss (UK), it adds zero stitch height, so rounds stay flat.
It’s perfect for working position movement across a row or joining rounds seamlessly. Think of it as crochet’s quiet connector—small, but essential in every crochet stitches tutorial. This technique is recognized as one of the six basic crochet stitches.
Sewing Slip Stitch Meaning
Now hop over to sewing, where the slip stitch means something different: an invisible seam hidden inside a fold. Also called ladder stitch or blind stitch, it catches just a thread or two from each edge.
You’ll use it to join two folded edges, hem garments, or finish linings—giving that clean, professional hem look with no visible stitches on top.
Knitting Slip Stitch Meaning
Knitting takes a completely different approach. Here, a slip stitch simply moves a stitch from your left needle to your right needle without knitting or purling it.
Try these:
- Purlwise vs Knitwise slipping changes the twist
- Yarn position (front or back) affects texture
- Slipping controls fabric density
- It creates decorative patterns naturally
Common Abbreviations
Sl st is the short form you’ll spot most in crochet patterns, especially in the US style of crochet terminology. The UK abbreviation is simply ss. Both save space in written instructions without confusing beginners.
It’s a small acronym, but knowing it helps you follow any crochet tutorial without stumbling over long stitch names.
When to Use It
When should you actually reach for this stitch? Two main jobs: keeping seams invisible and adding structure without bulk.
In crochet, use it for joining rounds in amigurumi, finishing off neatly, or attaching borders. It also shines in smooth motif assembly, connecting squares edge-to-edge.
In sewing, it closes delicate openings and creates invisible garment hemming where stitches simply disappear.
Mastering this technique takes practice, but these best sewing practices for a perfect blind hem can help you get seamless results every time.
Crochet Slip Stitch Tutorial
Ready to try the slip stitch yourself? This simple tutorial breaks it down into five easy steps. Grab your hook and yarn, and let’s get started.
Insert The Crochet Hook
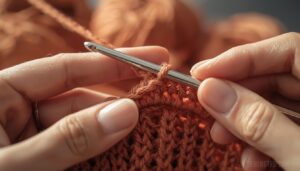
Every stitch has a little V shape sitting at the top, and that V is your target.
Grab your hook and slide it right under both loops of that V, from front to back. This basic move is the heart of crochet basics. Keep your insertion point centered for uniform height, and watch how fiber type changes the feel — cotton shows each dip clearly, while acrylic forgives a little.
Yarn Over Once
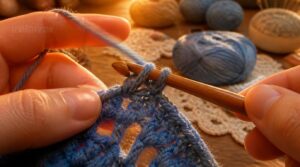
Two loops sit on your hook now: the one from before, and the fresh loop you’re about to make. To yarn over, wrap your working yarn over the hook from back to front, then hold that tension steady.
This same wrap builds:
- lace eyelet holes
- buttonhole openings
- openwork borders
- stitch count increases
- decorative motifs
Pull Through Both Loops
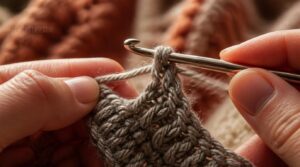
This is where the magic happens. Draw your yarn over through both loops on your hook in one smooth pull, and watch them merge into a single loop.
That’s the heart of a crochet slip stitch: quick, snag-free, and it creates a compact seam instead of a bulky one. Keep your pull steady so the loops slide off together, aligning neatly with the fabric.
Keep Tension Loose
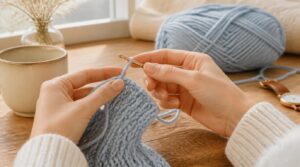
Your grip says everything about your stitching tension. Hold the hook gently between your thumb and index finger, keep your wrist neutral, and let your shoulders relax.
Avoid squeezing! A light touch keeps loops moving smoothly and stitches even. If things feel tight, pause, breathe, and loosen your fingers before continuing your crochet slip stitch practice.
Practice With Bulky Yarn
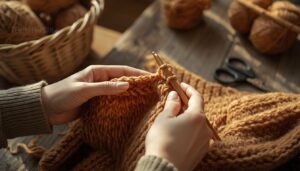
Ready to size up? Bulky yarn is forgiving, which makes it perfect for practicing your crochet slip stitch.
Grab a large hook and a loose tension, since thick fibers crowd fast. Work a few rows, watching how each stitch sits open and even.
Pick a durable, multi-ply yarn that holds its shape. This step-by-step, beginner-friendly guide sets you up for confident crochet stitches ahead.
Sewing an Invisible Slip Stitch
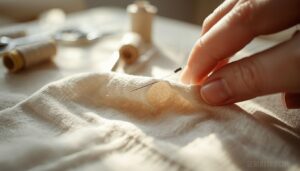
Now let’s switch gears from crochet to sewing. This slip stitch works like magic for closing openings without a visible seam. Here are the five steps to get that clean, invisible finish.
Fold and Press Edges
Grab your two fabric edges and get ready to make them disappear into one smooth line.
Fold each edge under by the same amount, then press firmly with an iron. Crease depth matters here, thicker fabric needs a deeper fold. A bone folder or fingernail helps set stubborn creases before pressing. Keep folds aligned with the grain line, then join two folded edges evenly for your invisible stitch.
Hide The Starting Knot
Once your folds are pressed, tuck your knot inside the seam allowance so it never faces the fabric front. Thread your tail through the fold’s tunnel, like weaving an embroidery tail into stitches. This trick works for quilt knots, plushie stops, and locking stitch closures.
Buried knots mean invisible seams — no bumps, just clean, beginner-friendly results.
Catch One Fabric Thread
Now for the small stuff: your knot’s tucked away, so it’s time to catch just one thread of fabric with your needle tip.
Slide it through a single strand along the fold, not both layers. This keeps your invisible stitch nearly see-through from the outside.
Match your thread color closely, use a fine needle, and keep tension gentle. That’s the heirloom sewing secret to flat, stable folds!
Stitch Through The Fold
Now move your needle along inside the fold, entering and exiting at regular gaps. Keep each pass short, this keeps your invisible stitch neat and prevents puckering.
Regular spacing matters more than speed here. A steady rhythm keeps your fabric flat, flush, and undisturbed, exactly what this sewing slip stitch method is built for.
Pull Gently to Close
Ease your thread through the last few stitches, then pull gently to close the gap. Check edge alignment first, nudge with a finger if needed, so both sides sit flush.
Loosen tension slightly to avoid puckering, especially on delicate fabrics. Let it rest a second, then finish with a small knot to secure your invisible sewing slip stitch.
Slip Stitch Uses in Projects
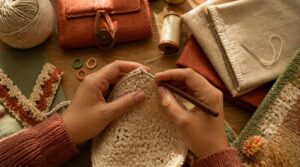
Now that you’ve got the basic slip stitch down, let’s put it to work. This one small stitch shows up in more places than you’d think, from crochet to sewing. Here are four handy ways you’ll use it in real projects.
Joining Crochet Rounds
Ever wonder how amigurumi rounds close so neatly you can’t spot where they started? That’s the slip stitch join at work.
- Insert your hook into the first stitch of the round
- Yarn over once, pull through both loops
- Keep tension control loose and even
- Try invisible join methods for color changes
- Block your project for a flat, tidy seam
Practice this step-by-step guide, and joining rounds becomes second nature!
Seaming Folded Fabric Edges
Grab two fabric pieces, pin them wrong sides together, and let’s seam pieces together invisibly.
Press folds flat with a hot iron first, following the fabric grain to stop skewing. Insert your needle through both folds, catching just one thread each side. Keep stitches short and even to prevent puckering. This hand sewing technique grips bulk nicely, even on heavier seams that need extra reinforcement.
Hemming Garments Neatly
A neat hem can make a garment look store-bought. Prepress your fold line first, then fold twice and pin for a double fold hem.
Match thread color to the fabric, then work a blind stitched hem, catching just one or two threads each pass. Press again from the right side to finish, and inspect for even, secure stitches!
Adding Crochet Borders
Once your project is finished, a crochet slip stitch border gives it a clean, polished edge. Work a foundation chain along the border, then crochet into the edge stitches using slip stitch or single crochet for a flat, beginner-friendly guide finish.
For decorative flair, try picot styles or shell stitches at the corners. Use corner increase techniques to keep curves smooth, then block the edges for a crisp, professional look.
Slip Stitch Troubleshooting Tips
Even careful stitchers hit a few snags along the way. The good news is that most slip stitch problems come down to a handful of common fixes. Here’s what to check when things aren’t turning out right.
Avoid Tight Crochet Stitches
Tight stitches turn a smooth slip stitch into a stiff, tiring mess. Keep loose tension, check your gauge often, and let yarn flow steady from the ball to your hook.
- Use a larger hook if stitches feel cramped
- Try an ergonomic hook to ease hand fatigue
- Practice swatches to build consistent tension
Match Thread Color Carefully
Thread color can make or break your seam. Hold thread against fabric in natural light, not lamp light, to see true color. For patterned fabric, match the dominant undertone instead of one exact shade. No perfect match? Choose slightly darker thread; it hides better than lighter shades. Also match thread weight to your fabric for smooth, even sewing thread results.
Use a Fine Needle
Getting your hand sewing slip stitch right starts with the right tool. Pick a fine, short needle made for delicate work, not a thick one meant for heavy fabric. A short needle gives you better control and precision for tiny, even stitches.
Match needle size to material thickness too. Thin fabrics need thinner needles to avoid snags or visible holes.
Keep Stitches Evenly Spaced
Even spacing makes your slip stitch line look clean, whether you’re joining crochet rounds or hemming fabric.
- Use stitch markers at regular intervals
- Check crochet tension for uniform loops
- Practice on scrap fabric first
- Compare stitches against a ruler
Consistent spacing comes from steady hand sewing techniques and mindful gauge checks. Small adjustments now save headaches later!
Check Fabric Before Finishing
Before you pick up your needle, give your fabric a once-over. Inspecting seam integrity now saves you from redoing your slip stitch later.
| Check | Why It Matters |
|---|---|
| Tears or holes | Weakens stitches |
| Color consistency | Prevents shade mismatch |
| Fiber content | Confirms compatible thread |
| Dimensions | Avoids fitting issues |
| Surface defects | Stops visible flaws |
A quick check keeps your hand sewing techniques solid and your finish perfect!
Frequently Asked Questions (FAQs)
How do you do a slip stitch in sewing?
Funny how the "invisible" stitch is the one everyone notices when it’s messy. Fold your edge, hide the knot inside, catch tiny threads, and stitch through the fold with gentle tension for a clean, ladder-free seam.
What is a slip stitch?
It’s a stitch that moves yarn without adding height — one loop pulled through another. In crochet, it joins rounds; in knitting, it shifts stitches; in sewing, it hides seams invisibly. Same name, different crafts, same quiet purpose.
How to do an easy slip stitch?
Ready to try it yourself? Here’s the secret: insert your hook, yarn over, and pull through both loops in one smooth motion. Keep tension loose, grab worsted weight yarn, and this beginner-friendly guide will have you stitching confidently in minutes!
Is slip stitch knitwise or purlwise?
Unless your pattern says otherwise, go purlwise—it keeps stitch orientation intact. Knitwise slipping twists the stitch, which can distort your fabric. Purlwise stays the safe default, preserving smooth, even results across your project.
What is a slip stitch when sewing?
In sewing, this creates an invisible ladder stitch that hides your fold and thread. You’ll catch tiny threads on each side, giving smooth garment closures for hemming, textile repair, and finishing projects with real needlework skills.
Is slip stitch the same as single crochet?
Think of them as cousins, not twins. One lies flat, one builds height—stitch height comparison matters here.
In US crochet terms, SL ST joins with zero bulk, while SC creates real fabric density, making them totally different tools.
How to make a slip hemming stitch?
Press a sharp fold, hide your knot inside it, then catch one thread from the fabric and slip back through the fold. Space stitches evenly, keep tension gentle for flat folds, and use slip tacking first on curved edges.
How to do upholstery slip stitch?
A stitch in time saves nine—especially with thick fabric. Use a curved upholstery needle, heavy-duty thread, and small bites through one layer.
Keep even tension, catch folds neatly, and secure padding firmly for a clean, nearly invisible seam.
What size hook should I use for slip stitches?
Match your hook to yarn weight: 5–0 mm for light yarn, 0–5 mm for medium, 0–5 mm for bulky. Test a swatch first, then adjust size until tension looks relaxed and even.
How do I keep my slip stitches from being too tight?
Slow and steady wins the race, and that’s true here too. Keep a light touch, relaxed yarn, and gentle pulls. Test tension on a bulky yarn swatch first, building muscle memory before moving to your project.
Conclusion
Small stitches, steady hands, and a little patience turn rough edges into refined ones. Whether you’re joining crochet rounds or hemming a hem by hand, the slip stitch stays the same quiet hero: invisible, dependable, strong. Practice it slowly. Watch your loops. Soon your hands will move without thinking, and your finished work will look like it was never touched by a needle at all. That’s true mastery.