This site is supported by our readers. We may earn a commission, at no cost to you, if you purchase through links.
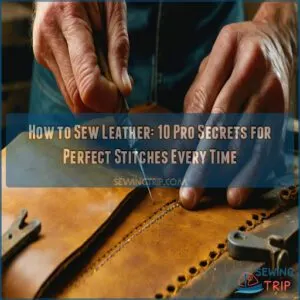 You’ll be surprised how straightforward it is to sew leather once you’ve got the right tools. Start with a stitching awl and harness needles – they’re your best friends for piercing through thick materials.
Choose your leather wisely: full-grain for durability, top-grain for easier stitching. Before you start, prepare edges with rubber cement and use binder clips to hold pieces in perfect alignment.
Create uniform stitch lines with a grooving tool, then punch holes with consistent spacing using your awl. Like many crafters discover, the secret to professional results lies in the preparation.
There’s a whole world of specialized techniques waiting in your leather-working journey.
Table Of Contents
Key Takeaways
- You’ll need specialized tools like a stitching awl, harness needles, and waxed thread – regular sewing supplies won’t cut it for leather work.
- Before you start stitching, prepare your edges with rubber cement and use binder clips to hold pieces in perfect alignment while marking uniform stitch lines with a grooving tool.
- You can choose between one-needle or two-needle saddle stitching – the two-needle method gives you stronger seams but requires more practice to master.
- You’ll get professional results by maintaining consistent thread tension, smoothing your stitches with a leather conditioning tool, and securing your work with proper backstitching.
Gathering Materials
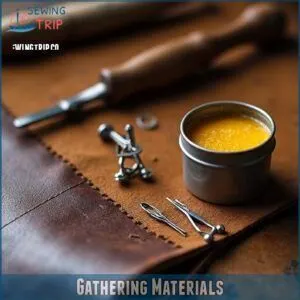
You’ll need specialized leather tools, including a stitching groover, needles, and waxed thread, to start your leather sewing project.
Before you rush to your local craft store, check what’s in your sewing kit since common items like binder clips and a white ink pen will work just fine for marking and holding your leather pieces, using tools you may already have like binder clips.
Selecting Leather
Every successful leather project starts with smart hide selection. When choosing leather types, focus on full-grain for maximum durability or top-grain for easier stitching.
Check skin thickness carefully—thinner pieces (2-3oz) work well for wallets, while thicker grades (6-8oz) suit bags. Consider leather finishes too; lighter shades showcase your stitching, while darker ones mask minor imperfections.
Saddle stitching is a durable hand sewing method. Match leather grades to your project’s style and purpose.
Learn more about basic leather stitching to improve your skills in leather crafting with the right leather types.
Choosing Tools
Through careful selection of leather sewing tools, you’ll set yourself up for success. Start with a sharp stitching awl – it’s essential for creating clean, precise holes without tearing. Pair this with quality leather stitching needles, specifically harness needles, which power through thick materials while maintaining their shape.
Don’t forget waxed thread; its durability makes it perfect for lasting stitches. For safety and comfort, invest in thimbles to protect your fingers during long sessions. Keep cutting tools sharp and within reach – you’ll need them for trimming thread and preparing leather pieces.
A leather punch ensures consistent hole spacing, while a groover creates clean channels for your stitches to rest in. Consider adding leathercraft tools like a stitching pony to hold work steady. Remember, quality tools aren’t just purchases – they’re investments in your craftsmanship.
Keep them maintained, and they’ll serve you faithfully. To achieve professional results, mastering hand stitching stitches is essential for any leather project.
Preparing Leather Edges
You’ll need clean, properly trimmed edges to create professional-looking leather pieces that’ll last for years.
Before you start stitching, you’ll want to prepare your leather edges with rubber cement and careful alignment, just like a master craftsman lining up the perfect shot.
Applying Rubber Cement
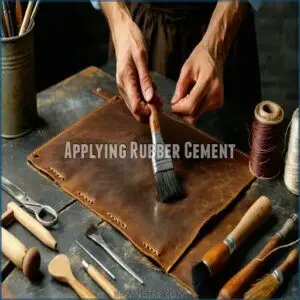
Now that you’ve gathered your supplies, let’s start with rubber cement application – your secret weapon for perfect leather seams.
Brush a thin, even layer of leather adhesive onto both surfaces you’ll join. You’ll want to work quickly but methodically, treating each edge with care.
Wait about 60 seconds until the cement becomes tacky, then press the pieces together firmly.
Gently rub away any excess adhesive with your fingertip to keep edges clean and ready for stitching.
Aligning Pieces
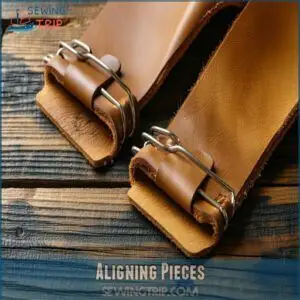
With your rubber cement set, it’s time for precise leather alignment that’ll make or break your project.
Let your pieces rest flat on your work surface, then:
- Match edges perfectly, using binder clips to hold pieces steady while checking your pattern tracing
- Press firmly from center outward, removing air bubbles for clean seam preparation
- Double-check edge matching before moving forward – even pros do this twice
Now you’re ready for the next step with a properly aligned leather piece, ensuring a clean seam.
Marking Stitch Lines
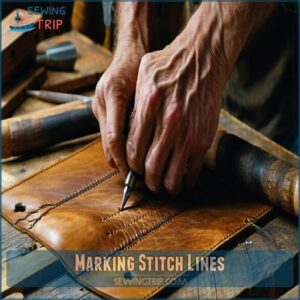
You’ll need to mark precise stitch lines to create those enviably straight seams that set professional leather work apart from amateur attempts.
Your stitching groover will be your best friend here, as it’ll help you create clean, uniform lines that are set just the right distance from the edge, making your stitching clean and professional.
Using Grooving Tools
A sharp stitching groover glides through leather like a hot knife through butter, creating perfect channels for your stitches.
You can find a variety of leather grooving tool options online.
Set your groove depth precisely – about 1/3 the leather’s thickness works best. Keep steady pressure as you follow your marked lines, letting the tool do the work.
Regular tool maintenance produces clean cuts every time. Remember, these grooves protect your stitches while giving your work that professional edge finish, with a sharp stitching groover and perfect channels, and it is essential for a professional edge and to have clean cuts.
Setting Stitch Width
Setting stitch width properly transforms your leather project from amateur to professional.
Your stitch density needs to complement both leather thickness and thread size for that perfect balance.
Here’s how to nail it:
- Select your stitch length based on leather thickness – thicker leather needs wider spacing
- Match thread tension to maintain even stitches across your work
- Use a leather stitching width guide for consistent machine settings
Remember: balanced spacing creates those eye-catching seams that’ll make other crafters ask for your secrets, and it’s all about achieving a professional look with perfect balance.
Punching Stitch Holes
You’ll need to punch stitch holes through your leather with precise spacing to create professional-looking seams that’ll last for years.
Whether you’re using an awl or a pricking iron, you’ll want to maintain consistent pressure and spacing while punching straight through both layers of leather in one smooth motion to create professional-looking seams.
Handling The Awl
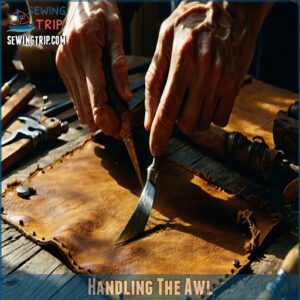
Through proper handling, your stitching awl becomes an extension of your hands during leather piercing.
You can find a variety of leather stitching awl products online.
Hold the awl like a pencil at a 90-degree angle, applying steady pressure to create clean holes without tearing.
Regular awl maintenance keeps the point sharp for precise leather stitching techniques.
For safety, always pierce away from your body and keep your free hand clear of the blade’s path.
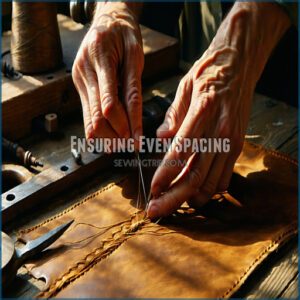
Ensuring Even Spacing
Now that you’ve mastered the awl, let’s get your stitch spacing perfect.
Your leather sewing guide spacing starts with a ruler or wing dividers for precise edge marking. Apply gentle, steady pressure when using your spacing tools or leather guides – they’re your best friends for stitch alignment.
An overstitch wheel creates perfect stitch templates every time, while specialized leather seams require careful measuring.
Remember, consistent pressure is your secret weapon for professional-looking stitches to sew leather that’ll make other crafters jealous, and using the right tools like an overstitch wheel will help you achieve that.
Prepping Needle and Thread
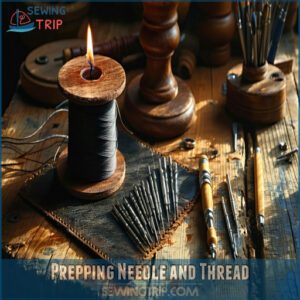
Now that you’ve punched your stitch holes, let’s get your needle and thread in top shape. You’ll want to measure your seam and multiply that length by 2.5 to cut the perfect amount of leather thread for hand sewing.
Proper needle selection is important for leather, so consider consulting a guide on choosing the right needle. Thread selection matters – waxed thread is your best friend for leather work.
The wax coating reduces friction and strengthens your stitches. If you’re using unwaxed thread, run it through beeswax a few times until it’s evenly coated.
Choose a needle size for sewing leather that matches your thread gauge – think of it like matching your socks, they just work better as a pair. Thread your leather needle by pulling a few inches through the eye.
While some folks tie a knot at the end, many pros skip this step for cleaner seams. Keep your thread tension consistent throughout – tight enough to hold, but not so tight it warps the leather.
Starting The Stitch
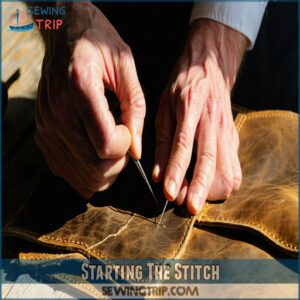
You’ll master leather stitching faster than you can say "hand-sewn wallet" by starting with the basics of needle locking and initial stitch placement.
Now that you’ve got your leather pieces prepped and your thread ready, you’re about to learn the most important part of leather sewing: getting those first few stitches just right, which involves initial stitch placement.
Locking The Needle
Through careful preparation, locking your leather needle creates the foundation for flawless stitching.
Start by threading your needle with waxed thread, leaving enough length for your project.
Create a secure double knot at the end, ensuring it’s large enough to prevent slipping through your pre-punched holes.
Test the thread tension with a gentle tug – you’ll want resistance, but not strain.
This simple step prevents frustrating thread pulls during your leather projects and ensures a smooth process, allowing for careful preparation.
Initial Stitches
With your needle locked and ready, let’s start your leather stitching journey. Take your first puncture through the pre-marked hole, pulling the thread until both sides are perfectly even – like balancing a seesaw.
When hand sewing leather, thread tension makes or breaks your project. Pull firmly but don’t overdo it – you want the leather to lie flat, not pucker like a worried forehead.
Keep your stitch length consistent by maintaining steady pressure as you work. For that professional saddle stitch look, angle your needle at 45 degrees.
Each movement should be smooth and deliberate, like threading a pearl onto a necklace. Remember: rushed stitches make messy finishes, so take your time with each pass.
Saddle Stitching Technique
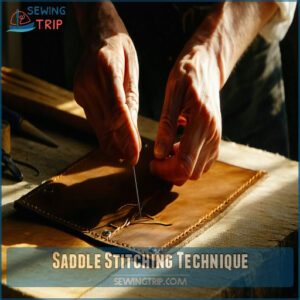
You’ll master the saddle stitch by learning both the one-needle and two-needle methods, creating strong, professional-looking seams that’ll last for years.
Whether you’re making a wallet or crafting a bag, this double-sided stitching technique produces a clean, symmetrical pattern that’s twice as durable as machine stitching, providing a professional-looking result.
One Needle Method
Now that you’ve marked your stitch lines, let’s explore the one needle saddle stitch – a reliable technique for hand sewing leather that’ll give you professional results.
Thread tension makes all the difference in creating clean, consistent stitches.
Here’s your path to perfect hand stitching leather:
- Cut your thread to four times the seam length for smooth handling
- Thread your needle and create a secure anchor point
- Maintain steady pressure as you guide the needle through each hole
- Pull the thread snug after each stitch, keeping tension even
Remember: your thread thickness should match your leather thickness for the strongest hold.
Two Needle Method
While a single needle gets the job done, the two-needle saddle stitch elevates your leatherwork to professional status.
You’ll work with two threads, each sporting its own needle, passing through pre-punched holes in a consistent left-then-right pattern.
Stitch alignment becomes second nature as you maintain even thread tension throughout, and for effective needle control, keep both threads at equal lengths and pass through each hole cleanly without catching previous stitches.
This method excels in tight spaces and around corners, making it ideal for detailed work like wallets or bags, and remember: smooth, steady movements yield the cleanest results.
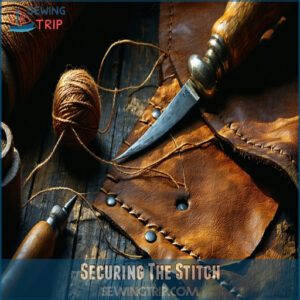
Securing The Stitch
You’re almost at the finish line, but don’t let those final stitches unravel all your hard work.
A properly secured stitch will keep your leather project intact for years, so let’s lock those threads down like a pro.
Backstitching for Strength
Backstitching transforms your leather project from fragile to fortress-strong. When hand sewing leather, reinforcing your final stitches prevents dreaded seam failures and makes sure long-lasting durability.
Start by working backwards through the last three stitch holes, maintaining consistent thread tension as you go. For maximum seam security, weave your needle through each hole twice, creating a robust backstitch pattern that locks everything in place.
You’ll know you’ve nailed the technique when the stitches lay flat without puckering the leather. This leather stitching technique for beginners might take extra time, but it’s worth it – your seams will hold strong through years of use, providing long-lasting durability and ensuring seam security.
Trimming Excess Thread
Thread cutting mastery marks the final frontier between good and exceptional leather work. For professional-looking seams, trim excess leather sewing thread precisely 1/8 inch from your reinforced knots.
Use sharp scissors designed for thread removal – ordinary scissors can fray your carefully placed stitches. Proper jump stitch removal techniques are essential for a polished finish.
A clean edge finishing technique involves angling your cuts slightly inward, preventing loose ends from catching on clothing or accessories.
- Heat-seal stubborn thread ends with a lighter, holding it just close enough to melt without scorching the leather
- Double-check seam security before trimming – you can’t add length back to shortened threads
- Keep dedicated thread snips in your toolkit – they’ll give you the control needed for precise cuts
- Create a trimming routine: work systematically around your project to make sure no excess threads escape notice
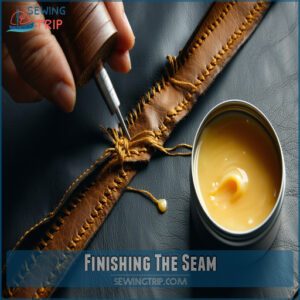
Finishing The Seam
You’ll want to gently smooth your stitches with a leather conditioning tool to make sure they lie flat and look professional.
Once you’ve smoothed the stitches, you can apply a thin layer of leather conditioner to protect your work and keep the leather supple for years to come.
Smoothing Stitches
Smoothing your leather stitches transforms basic seams into professional masterpieces.
Using a wood slicker, apply firm pressure along dampened seams to compress the stitches into the leather.
A straight stitch seam finish can create a clean, professional look.
Work in small sections, maintaining consistent pressure for even results.
| Technique | Tool | Result |
|---|---|---|
| Light burnishing | Wood slicker | Basic smoothing |
| Medium pressure | Glass burnisher | Professional finish |
| Heavy compression | Metal burnisher | Premium look |
| Steam pressing | Heated tool | Advanced finishing |
| Cold setting | Bone folder | Natural appearance |
For stubborn areas, consider using a leather press tool to guarantee perfect stitch alignment and seamless integration with the leather surface.
Conditioning Leather
After you’ve perfected those stitches, proper leather conditioning becomes your secret weapon for lasting durability.
Regular care with quality leather oils or waxes prevents cracking and maintains flexibility around your seams.
- Apply leather protection products in thin layers using circular motions, focusing on stitched areas
- Choose between natural beeswax, neatsfoot oil, or specialty leather restoration creams
- Schedule leather maintenance quarterly, or whenever the material feels dry to ensure lasting durability.
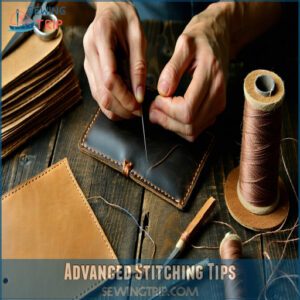
Advanced Stitching Tips
You’ll take your leather crafting to the next level once you’ve mastered these advanced stitching techniques for corners and pockets.
Whether you’re creating a custom wallet or adding decorative elements to a bag, these expert tips will help you handle tricky areas with confidence.
Corner Stitches
Mastering mitered corners in leathercraft requires precision and the right technique.
When approaching seam intersections, bevel the corners first to reduce bulk. For clean corner stitching, mark your holes carefully with an awl at 90-degree angles.
Double-needle hanging stitches work well for reinforcing leather corners – just maintain even tension to prevent puckering.
Start slow with simple corner folds before attempting complex variations. You’ll get smoother results with each project, and mastering these techniques will improve your overall leathercraft skills.
Attaching Pockets
A well-placed pocket transforms your leather project from basic to brilliant.
For secure attachment, start with double-sided tape to position your pocket, then apply Barge cement thinly with a brush to both surfaces.
You’ll want to reinforce heavy-use areas with double stitching.
For belt pouches, thread through existing strap loops or use grommets for added strength.
Consider built-in straps with D-rings for smaller bags – they’ll give you a clean, professional finish.
Frequently Asked Questions (FAQs)
Can I sew leather with a regular sewing machine?
You can sew thin leather on a regular sewing machine with proper adjustments – install a leather needle, loosen thread tension, and use heavy-duty thread.
For thick leather, you’ll need an industrial machine.
What stitch is best for leather?
Like a strong handshake, the saddle stitch stands as your best choice for leather work.
You’ll want to use this double-threaded stitch pattern because it’s remarkably durable and won’t unravel if one thread breaks.
Is leather difficult to sew?
You can sew leather, but you’ll need specific tools and patience.
It’s not a beginner-friendly material since it requires specialized needles, thread, and techniques.
With practice and proper equipment, you’ll succeed.
Do you need a special needle to sew leather by hand?
Traditional needles break 80% more often on leather projects. You’ll need specialized leather needles with triangular points for hand sewing – they’re stronger and pierce leather cleanly without tearing the material.
Can you sew leather with a regular sewing machine?
You can use a regular sewing machine for thin leather, but you’ll need a leather needle and walking foot.
For thicker leather, you’ll want an industrial machine to handle the job properly.
How difficult is it to sew leather?
You’ll find leather sewing challenging at first, but it’s manageable with proper tools and practice.
Start with thin leather pieces, and you’ll gradually build confidence for tackling complex projects with thicker materials.
Is it better to sew leather by hand or machine?
Much like choosing between a handcrafted quilt or machine-made blanket, both methods work well.
You’ll want a machine for speed and thin leather, while hand-sewing offers better control for thick pieces.
How do I choose the right type of leather for my project?
Select your leather based on your project’s needs: soft, thin leather works for clothing and wallets, while thick, sturdy leather’s ideal for belts and bags.
Consider grain quality and stretch characteristics.
Can I repair overstretched or misshapen leather items?
You’d think leather’s a lost cause when stretched, but it’s not.
Dampen the area with water, blow-dry on low heat, then gently reshape.
Let it dry naturally while maintaining the desired form.
How do I repair torn leather seams?
Remove old stitches carefully, clean the area with leather cleaner, and reposition torn edges.
You’ll need to restitch using strong waxed thread and leather needles through existing holes for a seamless repair.
Conclusion
Mastering how to sew leather might seem intimidating at first, but you’ll be amazed at how quickly your skills develop.
With the right tools and techniques, you’re ready to tackle everything from simple wallets to sophisticated bags.
Remember, patience is your greatest asset – rushing through projects only leads to uneven stitches.
Keep practicing, and soon you’ll find yourself creating professional-quality pieces that’ll last for generations.
Your leather-working journey is just beginning, and the possibilities are endless.
- https://littlestitchstudionorfolk.com/blog/2019/10/7/Everything%20you%20need%20to%20know%20to%20begin%20sewing%20with%20leather
- https://www.marthastewart.com/1125947/how-sew-leather-hand
- https://leatherworker.net/forum/topic/33007-sewing-on-soft-leather/
- https://www.wikihow.com/Hand-Sew-Leather
- https://www.reddit.com/r/Leatherworking/comments/17apx88/hand_stitching_thin_leather_for_complete_beginner/

