This site is supported by our readers. We may earn a commission, at no cost to you, if you purchase through links.
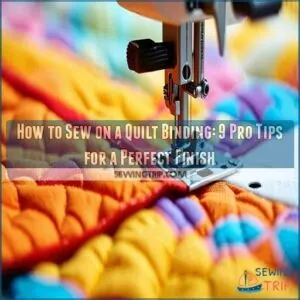
First, choose between straight grain or bias binding, while considering single or double folds.
Gather your tools—don’t forget those trusty clips!
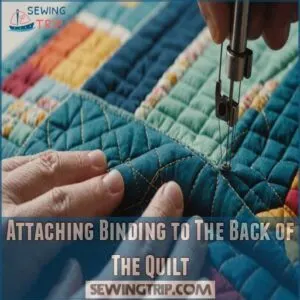
Start by ensuring the backing fabric extends 2-3 inches beyond the quilt top on all sides for adequate coverage, which is especially important when binding a quilt with backing fabric. Attaching the binding to the quilt’s back, aligning it neatly with the edge.
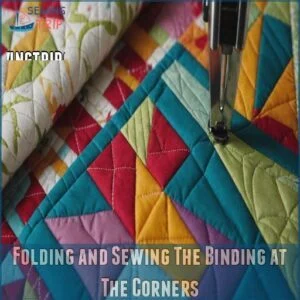
As you turn each corner, fold the binding over the seam like tucking in a snug bed corner.
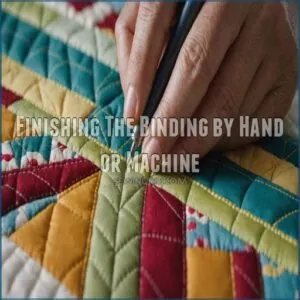
Whether you hand-stitch or use a machine, make sure those stitches are smooth and even.
Ready for more tips? Just wait until you try using a walking foot!
Table Of Contents
- Key Takeaways
- Choosing The Right Binding Type
- Essential Tools and Materials for Quilt Binding
- Calculating Quilt Binding Requirements
- Preparing The Quilt for Binding
- Attaching Binding to The Back of The Quilt
- Folding and Sewing The Binding at The Corners
- Marking and Connecting The Binding Ends
- Finishing The Binding by Hand or Machine
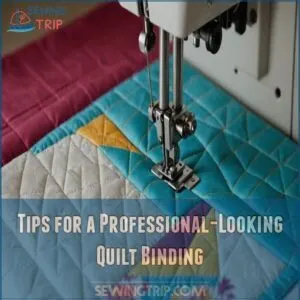
- Tips for a Professional-Looking Quilt Binding
- Frequently Asked Questions (FAQs)
- Conclusion
Key Takeaways
- Choose the right binding type for your quilt’s needs, like straight grain for stability or bias for flexibility, ensuring the best fit for your design.
- Prep your quilt with precision by ironing out wrinkles and trimming edges for a smooth, clean finish before attaching the binding.
- Use tools like a walking foot to keep your stitches even and avoid fabric shifting, making your quilting process smoother.
- Handle corners and binding endings carefully by folding, pressing, and pinning for professional mitered corners and seamless joins.
Choosing The Right Binding Type
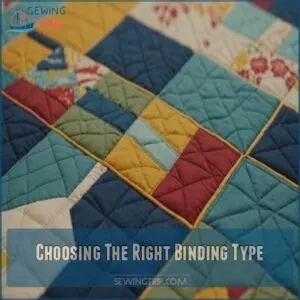
You’re about to become a quilt binding wizard, and choosing the right type is your first spell.
Whether you go for straight grain, bias, single fold, or double fold, each binding type has its own magic touch that can make or break your quilt’s final look.
Straight Grain Binding
When you’re looking for a solid, no-fuss binding option, straight grain binding‘s got your back.
Cut along the fabric’s grain, it’s perfect for rectangular quilts and offers:
- Stability for straight edges
- Easy cutting and handling
- Less stretch than bias binding
- Great for beginners
While it mightn’t be as flexible as its bias cousin, straight grain binding shines in its simplicity.
It’s like the dependable friend of the quilting world – always there when you need it.
Bias Binding
Bias binding is your go-to for quilts with curves or scalloped edges.
Cut at a 45-degree angle to the fabric grain, it’s got more stretch and flexibility than straight grain binding.
You’ll love how smoothly it hugs those tricky corners and rounded edges.
Plus, it’s a champ at handling wear and tear, perfect for quilts that’ll see lots of love and laundering.
Single Fold Binding
Single fold binding is your go-to for smaller projects or when you’re looking to keep things light.
It’s a breeze to work with – just cut a strip of fabric and you’re ready to roll.
Perfect for table runners or mini quilts, this method saves you time and fabric.
But heads up: it’s not as durable as its double-fold cousin, so choose wisely based on your project’s needs.
Double Fold Binding
Double fold binding is your quilt’s best friend.
It’s like wrapping your creation in a cozy, durable hug.
You’ll start with a strip twice as wide as you want your finished binding, then fold it in half lengthwise.
This double layer adds strength and longevity to your quilt’s edges.
It’s perfect for everyday use and washing, keeping your masterpiece looking sharp for years to come.
Essential Tools and Materials for Quilt Binding
Picking the right fabric for your quilt binding is just the start, but you’ll need a trusty lineup of tools too.
First, make sure you’ve got a sewing machine that handles layers smoothly, and for best results, adjust the stitch length to match your quilting stitch length, typically around 3.5mm as detailed in the sew binding on a quilt process.
The walking foot can be your best friend here, stopping that annoying fabric shift.
Next, grab some all-purpose polyester thread—think of it as the unsung hero in your quilting saga.
For clean edges, a rotary cutter is your sharp partner, cutting precisely through layers.
And when it’s time to press your seams, don’t skip a high-quality iron—it doesn’t just smooth out wrinkles but sets your work.
Calculating Quilt Binding Requirements
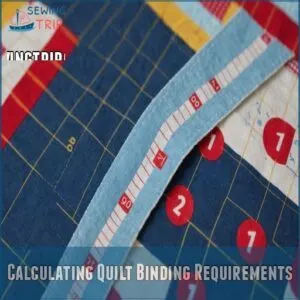
Before you begin sewing, you’ll want to nail down how much quilt binding you’ll need—trust me, there’s nothing worse than running short mid-project!
Whether you’re a math whiz with a calculator in hand or prefer the ease of using an app or a handy chart to determine the ideal binding width, figuring out how wide to cut quilt binding, such as a delicate double-fold binding, is your first step toward quilt perfection.
Manual Calculation Method
Ever wondered how to calculate quilt binding with flair?
Grab a measuring tape and work that math mojo!
Start by measuring your quilt perimeter, which is typically calculated by adding the length of the quilt twice and the width twice, then adding 15-20 inches for seams and corners as explained in the quilt binding guide, then choose a cozy binding width like 2 ½ inches.
Multiply your perimeter plus 10-12 inches of wiggle room, then divide by fabric width.
Using The Quilt Geek App
When you’re knee-deep in quilt binding calculations, the Quilt Geek App swoops in like a superhero.
With just a few taps, this handy app features a powerful binding calculator to handle quilt size and binding width with ease.
Just enter your quilt dimensions, and voilà, the app spits out exactly what you need—no more math headaches!
Quilt Binding Size Chart
Now that you know the Quilt Geek App, let’s talk about the trusty quilt binding size chart.
Like a GPS for your sewing, this chart keeps you from guesstimating fabric yardage.
It maps out quilt sizes, binding widths, and more.
With chart accuracy as your guide, you’ll have fabric for even the trickiest projects, sparing you surprise detours!
Preparing The Quilt for Binding
Before you even think about attaching that gorgeous binding, let’s get your quilt ready!
That means a good pressing to smooth out any wrinkles and a quick trim of those edges to make sure a crisp, clean finish – you wouldn’t want any wonky bits peeking out from under your beautiful work, would you?
Ironing The Quilt
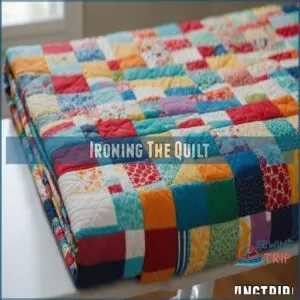
Imagine your quilt as a diva getting prepped for the red carpet—she needs to look flawless!
Set your iron to the right temperature for your fabric type, and use steam to smooth out any wrinkles.
Press gently, don’t iron, to avoid stretching.
Think of it like a magic wand, transforming fabric from frumpy to fabulous!
Trimming The Quilt Edges
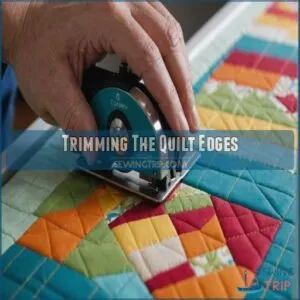
Before you jump in with binding, check those edges like a sculptor eyeing a block of marble.
Grab your rotary cutter and create straight vs. uneven edges for a perfect edge finish.
You can also use a dedicated binding tool to help you achieve a professional finish.
It’s your line of defense against fabric fraying.
Remember, a well-trimmed quilt is the backbone of a flawless binding.
Don’t rush; precision here sets you free.
Attaching Binding to The Back of The Quilt
You’ve got your quilt prepped, and now it’s time for the exciting step of attaching the binding to its back!
Align the binding with the quilt edge, and let’s get stitching—your quilt is about to get its beautiful finishing touch.
Aligning The Binding With The Quilt Edge
Tackling quilt edge prep starts with properly aligning your binding.
Lay the binding flat, ensuring binding tension is just right—not too tight, not too loose.
Use trusty pinning techniques to secure it, spacing pins every few inches.
Remember, the seam allowance should be consistent.
Edge stitching here sets the stage for a professional finish, so take your time.
Sewing The Binding in Place
So, you’ve got your quilt sitting there, ready for its grand finale.
Here’s the scoop: align the binding with the edge, and sew with a quarter-inch seam allowance.
You can find the perfect binding sewing machine for this task at a binding sewing machine.
Feeling like a pro yet? Keep that fabric matching tight and watch your binding tension.
Adjust your sewing machine settings and stitch direction for smooth sailing.
It’s all about precision!
Folding and Sewing The Binding at The Corners
Mastering those tricky quilt corners might feel like a tango with fabric, but with the right steps, you’ll glide through smoothly.
By folding the binding over the seam just right and sewing the next side, you’ll achieve sharp, professional mitered corners that’ll have you grinning like a proud quilt-making pro.
Folding The Binding Over The Seam
Now that your binding’s sewn to the back, it’s corner time.
Stop sewing ¼ inch from the edge.
Using tools for binding mitered corners can also make this process easier.
Gently fold the binding over the seam, creating a neat little package.
Press the fold firmly to create a crisp mitered corner.
This simple tip helps create a professional finish.
See? It’s easier than you think! A little seam allowance magic goes a long way.
Sewing The Next Side of The Quilt
Once you fold the binding, it’s time to stitch the next side, making sure to press the binding toward the quilt edges to shape and flatten the binding to perfection, as explained in the extra wide quilt binding tutorial steps for mitering corners.
Keep your seam allowance precise and your stitching even.
Avoid bulk by trimming excess fabric.
Corner mitering is key—fold neatly for sharp angles.
Maintain even binding tension to achieve a smooth finish.
Keep these in mind:
- Seam allowance
- Stitching evenness
- Avoiding bulk
- Corner mitering
- Binding tension
Marking and Connecting The Binding Ends
You’re almost at the finish line, but connecting those binding ends can feel like solving a puzzle!
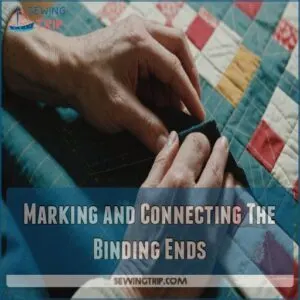
Start by stopping your sewing about 10 inches before the starting point and folding the ends;
soon enough, you’ll have them pinned and stitched together like a pro.
Stopping Sewing Before The Starting Point
When sewing your quilt binding, you’ll want to make sure to leave enough excess binding to wrap around the quilt edges, especially when using a double fold binding technique, which offers better protection and a more professional look. You’ll want to stop 10 inches before returning to your starting point.
Why stop early?
It gives you room to adjust and overlap your binding ends.
Think of it like getting a head start on a dance routine—you need that space to nail your final flourish smoothly.
Keep an eye on that seam allowance!
Folding and Pressing The Ends
You’re nearing the finish line!
Fold those binding ends over the quilt like you’re tucking a snug bed corner.
Give it a firm press—your iron is your trusty sidekick here.
This step locks in those pesky raw edges.
To achieve a professional-looking quilt finish, start by carefully marking corner points with chalk or a fabric marker and drawing sewing lines for seam allowances, as shown in this mitered corner guide. Remember, your seam allowance should play nice with your binding width for that perfect corner mitering.
It’s like quilting magic!
Pinning and Sewing The Ends Together
You’ve pressed the ends, and now it’s showtime!
Pin them together snugly, aiming for accurate stitching.
It’s like pairing socks—they should fit just right!
Make sure your seam allowance allows for smooth ends-to-end joining.
Remember, control the binding tension so it doesn’t gap.
Think of mitered corners as sprinkles on top—perfectly aligned for that polished finish!
Finishing The Binding by Hand or Machine
You’ve reached the final stretch of your quilting journey: finishing the binding by hand or machine.
Whether you’re all about speed with a machine or prefer the zen-like quality of hand stitching, these methods will help you wrap up your quilt like a pro.
Machine Sewing Method
Finishing your quilt with machine sewing is a breeze!
Pressing the binding is key; it makes all the difference.
Then, wrap it neatly around the quilt’s edge.
Here’s what to remember:
- Adjust your machine sewing tension for a smooth finish.
- A consistent stitch length prevents puckering.
- Perfect mitered corners show off your skills! Enjoy that satisfying feeling of control.
Hand Sewing Method
While machines get the job done fast, hand sewing adds that personal touch your quilt deserves.
Pick the right needle—sharp but comfy.
To make sure you have a professional finish, consider learning more about mastering mitered corners.
Keep an eye on thread tension; don’t let it too loose or too tight.
Use tiny stitches for durability.
And remember, finishing touches are like icing on a cake—satisfying and oh-so-worth it!
Tips for a Professional-Looking Quilt Binding
You’ve put in the hard work on your quilt, and the last thing you want is a wonky binding to take away from its beauty.
By using a walking foot, pinning or clipping the binding, and sewing slowly and carefully, you’ll achieve that smooth, professional finish everyone will admire.
Using a Walking Foot
Using a walking foot can transform your quilting game.
It’s like inviting a trusty sidekick that smooths out the toughest fabric battles.
With even foot pressure, it handles tricky layers and prevents uneven feed.
If your quilt’s wonkier than a shopping cart, this foot’s your hero.
Not into gadgets? Well, alternatives exist, but this one rocks!
Pinning or Clipping The Binding
Think of pinning or clipping your quilt binding like securing the sails on a ship.
It’s about keeping everything taut and steady.
Whether you use clips or pins, it’s all about binding tension.
Clipping makes adjustments a breeze, while pinning gives precision.
Secure those corners tight, and you’ll sail smoothly through any binding type with confidence.
Sewing Slowly and Accurately
Once you’ve pinned or clipped the binding, stitching slowly is key.
Think of your sewing machine as a gentle horse—steady pace wins the race.
Keeping a consistent seam allowance helps, so don’t rush.
Adjust machine speed and tension control as needed.
Practice patience; quilting’s like cooking a stew—more love and attention yields better results.
Frequently Asked Questions (FAQs)
How do you sew a quilt binding?
Over 60% of quilters favor double-fold binding for durability.
Start by sewing it onto your quilt’s back, miter the corners, then fold it over to the front.
Secure with neat hand or machine stitches, ensuring a polished finish.
How to sew the binding to the quilt edge?
Align the binding’s raw edge with your quilt edge, leaving eight inches free at the start.
Sew with a ¼-inch seam allowance.
Stop before corners, fold, and continue.
Attach ends, and finish your masterpiece with style.
How do you cut bias binding on a quilt?
To cut bias binding, fold your fabric diagonally to find the 45-degree angle, then slice along this angle using a rotary cutter.
This creates flexible strips, perfect for curves and corners, adding a polished finish to your quilt.
How long should a quilt binding be?
Quilt binding should be long enough to cover the quilt’s perimeter plus an extra 10-12 inches.
This makes sure you have enough binding to finish and connect the ends smoothly.
It’s like giving your quilt a cozy hug!
How to sew on quilt binding?
Start by sewing the binding to the back, leave an 8-inch tail.
Fold corners neatly, sew edges carefully, and connect the ends seamlessly.
Flip it over to the front and sew again for a polished finish.
Should quilt binding be sewn on the front or back?
Did you know 90% of quilters prefer attaching the binding to the back first for a polished look?
It’s like setting up an epic plot twist—the quilt’s front gets its grand finish last, ensuring a neat appearance.
What foot do you use to sew binding on a quilt?
A walking foot’s your best friend! It prevents puckering and keeps everything nice and even. Seriously, it’s a game-changer for neat binding. You’ll love the results!
How to attach quilt binding ends?
To join quilt binding ends, first, calculate the binding strip quantity by adding the length and width of the quilt and then multiply it by 2, adding 10 inches for seam allowances as explained in this diagonal seam guide. To join quilt binding ends, stop 10 inches from the start.
Overlap ends, and fold at a 45-degree angle.
Sew diagonally, trim the excess, then stitch the remaining binding for a seamless finish.
How to choose the right binding fabric?
Choosing binding fabric is like picking the perfect border for a masterpiece.
Balance durability and beauty by matching or contrasting with your quilt.
Stick to cotton for ease, or try silk for a touch of luxury.
What thread weight is best for binding?
For binding, 50-weight all-purpose polyester thread is your go-to choice.
It’s strong yet flexible enough to handle the tension during sewing.
Picture it as your trusty sidekick, keeping your quilt’s edges neat and durable.
Can I use a different seam allowance?
When life gives you fabric, why stick to the standard?
You can absolutely use a different seam allowance in quilt binding.
Experiment with wider seams for a sturdier edge or narrower ones for a delicate finish.
How to prevent binding from stretching?
To stop your quilt binding from stretching, use bias tape sparingly.
Avoid pulling it too tightly.
When sewing, especially for straight lines and gentle curves, a walking foot is particularly useful due to its ability to handle multiple layers of fabric, ensuring even feed during sewing, which is particularly useful for free-motion quilting tips. Employ a walking foot when sewing.
This helps manage fabric tension and keeps edges neat and tidy.
Should I pre-wash my binding fabric?
Treating your binding fabric like it’s preparing for a first date, pre-washing can help avoid that dreaded shrinkage later.
It helps maintain your quilt’s shape, but it’s not a must; personal preference reigns supreme.
Conclusion
So, there you have it! You’ve conquered the seemingly impossible—mastering how to sew on a quilt binding!
Remember, practice makes perfect, and don’t be afraid to experiment.
You’ll be whipping up perfectly bound quilts faster than you can say "walking foot."
Next time you’re tackling a new quilt, you’ll breeze through the binding process.
Seriously, this skill is a game-changer!
Share your newly acquired how to sew on a quilt binding expertise—we’d love to see your creations!

