This site is supported by our readers. We may earn a commission, at no cost to you, if you purchase through links.
 Stand before the endless expanse of your quilt top, binding strips in hand.
Feel the softness of the fabric, visualizing the journey ahead.
With each stitch, you’ll transform scattered pieces into a cohesive whole, binding them together into a creation greater than its parts.
Let the rhythm of the machine soothe as you confidently guide the binding along the edges.
Experience the satisfaction of watching threads intertwine, sealing and securing, making connections where once was separation.
You have the power to bring unity and completion through this simple act of binding.
Begin.
Table Of Contents
- Key Takeaways
- Basics of Binding and Fabric Grain
- Double Fold Bias Binding
- Single Fold Bias Tape
- Double Fold Bias Tape
- Applications and Variations
- Why Machine Bind a Quilt?
- Machine Binding Tutorial in Steps
- How to Miter a Corner on the Quilt Front
- What Does the Back Look Like?
- Quilt Binding Tutorial Tips Round Up
- Frequently Asked Questions (FAQs)
- Conclusion
Key Takeaways
- Machine binding provides a secure and durable finish for sewing projects, especially quilts.
- Double-fold bias binding offers color coordination, time-saving, and pattern integration, while single-fold bias tape is ideal for clean finishes on necklines and armholes.
- Double-fold bias tape creates a clean finish visible from both sides of the project, providing a professional look.
- Machine binding a quilt offers increased speed, efficiency, and a professional finish compared to hand binding.
Basics of Binding and Fabric Grain
Binding serves the purpose of securing or holding raw edges on sewing projects with you.
Basics of binding involve understanding fabric grain – the lengthwise grain runs parallel to the selvage edges, while crosswise grain runs perpendicular.
For flexibility and durability, bias binding made from bias-cut strips at a 45-degree angle is ideal. Bias binding neatly finishes curved edges and seam allowances on quilts and other crafts.
Key steps when machine binding a quilt include:
- Preparing bias strips
- Attaching to the quilt back using a 1⁄4” seam allowance
- Mitering corners
- Joining strips carefully
- Stitching precision lines on the quilt front
Mastery comes through practice binding different projects and consulting tutorials when needed for new techniques like mitered corners.
With proper preparation and stitching, binding gives a polished finish.
Double Fold Bias Binding
Here, we’ll explore double fold bias binding, a popular technique for finishing raw edges in sewing projects.
To create it, bias-cut strips are pressed with the outer edges folded in, then folded over again to encase the raw edge.
A walking foot prevents shifting when attaching double fold binding, allowing for a clean finish with mitered corners and edges secured neatly on the back.
Benefits and Versatility
Now that you’ve learned the basics of binding and fabric grain, let’s delve into number two: the benefits and versatility of double-fold bias binding.
It offers color coordination, time savings, and pattern integration. Experiment with stitch length and alternative fabrics to achieve your desired look.
Unlock mastery over machine quilt binding and conquer your creative vision.
Creation Process and Use of Walking Foot
You’ll create the double fold bias binding by cutting strips of fabric on the bias and pressing them twice.
Employ the walking foot to conquer the challenge of binding curves and corners with precision.
The walking foot’s even feed mechanism prevents puckering or stretching of fabric, ensuring a flawless finish.
Master the art of machine binding with this trusty tool, leaving you feeling empowered and in control.
Mitered Corners and Securing on the Back
When you reach a corner, pin the binding at a 45-degree angle, creating a triangle flap.
Fold the strip at the angle to create a precise miter.
Continue pinning and mitering all corners around the quilt, ensuring quilt neatness.
For backing security, press ends to make creases and trim excess to about ¼”.
Finally, sew the ends together on the pressed crease, ensuring seam alignment and a seamless finish.
Single Fold Bias Tape
Now, let’s talk about single fold bias tape.
You’ll use it for clean finishes on garment necklines and armholes.
First, attach it to the right side with raw edges together.
Then, stitch using a Reverse pattern foot.
Ideal for Garment Finishes
Continuing with a single fold bias tape, you’ll find it ideal for creating clean finishes on necklines and armholes in garments.
This technique adds a professional touch to your handmade clothing, giving you the satisfaction of mastering a new skill.
Experiment with different colors and patterns to create decorative edges that enhance the overall design of your garments.
Attachment Process and Stitching Technique
To attach the single fold bias tape:
- Connect it to the right side with raw edges together.
- Use a Reverse pattern foot to ensure stitching precision.
Fold the stitched edge to the wrong side, press, and top stitch for a clean finish.
The backside appearance should have a neat and professional look, with no visible raw edges.
Master the art of mitering corners to achieve a polished and seamless finish.
If you encounter puckering or uneven stitching, adjust your stitch length or tension for optimal results.
Finishing Steps
Fold the stitched edge to the wrong side, press it flat, and top stitch for a polished finish.
Experiment with pressing techniques to achieve crisp folds and a professional look.
Consider creative finishes like decorative top stitching or adding contrasting bias strips for a pop of color.
For a unique touch, explore alternative materials like velvet or silk bias tape.
Ensure the bias strip is cut accurately and the stitching is even throughout.
Design considerations:
Choose a bias tape that complements the fabric and overall design of your project.
Double Fold Bias Tape
Now that you understand single-fold bias tape, let’s explore its double-fold counterpart.
Double-fold bias tape creates a clean finish visible from both sides of your project. You can attach it using a walking foot or machine Binder attachment, then top-stitch close to the folded-over edge for a polished look.
Clean Finish Visible From Both Sides
With double-fold bias tape, you’ll achieve a clean finish that’s visible from both sides of your project.
This dual-sided elegance lends a reversible beauty, a two-faced chic that’s perfect for circular placemats or other projects where both sides are on display.
The double vision of this technique creates a symmetrical appeal that’s sure to impress.
Attachment Methods and Top Stitching
Attach your double-fold bias tape with either a walking foot or a machine binder attachment for a smooth, even finish.
Top-stitch close to the folded-over edge for a polished look.
Experiment with:
- Binding techniques
- Stitching innovations
- Attachment styles
- Topstitching tricks
- Decorative variations
To create unique and eye-catching finishes that enhance your projects.
Applications and Variations
You’ll find double fold binding in crafts like zipper pouches.
Erica Bunker demonstrates its professional use in facings.
Single fold bias tape provides a clean finish not visible from the front.
Double fold bias tape creates a clean finish visible from both sides of your project.
Double Fold Binding Applications and Erica Bunker’s Demonstration
Let’s explore double fold binding applications.
Erica Bunker’s demonstration will show you professional facing techniques.
Unleash your creativity with double fold binding in zipper pouches, adding a polished touch to your handmade treasures.
Discover the art of quilting with contrasting bias, creating striking visuals that captivate the eye.
Master double fold techniques, learning from Erica Bunker’s expertise in achieving impeccable facings.
Embark on a journey of bias tape mastery, transforming ordinary projects into extraordinary works of art.
Single Fold Bias Tape Features and Decorative Touch
In a single fold bias tape, you’ll get a clean finish that’s hidden from the front side of your project, giving you a professional-looking result.
Consider using contrasting color bias tape to add a pop of color and visual interest.
Experiment with different color pairings, patterns, and design flourishes to create a truly unique and eye-catching finish.
Double Fold Bias Tape Benefits
Double fold bias tape presents a clean finish that’s visible from both sides of your project, enhancing its overall aesthetic.
This binding technique allows for precise stitching, ensuring a professional look.
The folded edges add texture to your project, elevating its visual appeal.
Explore creative finishes by using contrasting colors or experimenting with different stitching patterns.
Double fold bias tape is versatile, extending its use beyond traditional binding applications.
Unleash your creativity and explore alternative uses to add a touch of elegance to your projects.
Why Machine Bind a Quilt?
Machine binding a quilt offers several advantages:
- Increased speed and efficiency compared to hand binding.
- Durability and professional finish, ideal for projects requiring a long-lasting and polished look.
- Time-saving, especially for larger quilts or those with intricate designs.
Advantages and Efficiency
When machine binding a quilt, you’ll gain speed, durability, and a professional finish that saves time on your quilting projects.
Speed vs. Hand:
Machine binding is significantly faster than hand binding, allowing you to complete your quilt in less time.
Durability Benefits:
Machine-bound quilts are more durable and can withstand regular use and washing better than hand-bound quilts.
Using a walking foot and adjusting the stitch length can help you achieve a smooth, even finish quickly and easily.
Professional Finish:
Machine binding gives your quilt a polished, professional look that’s difficult to achieve with hand binding.
Setting Up the Sewing Machine
Setting up your sewing machine for quilt binding maximizes efficiency, empowering you with the precision and control you need to create a flawless finish.
Begin by matching your thread to the quilt’s colors, ensuring a cohesive look.
Adjust the stitch length to around 3.5mm, striking a balance between durability and a smooth appearance.
Employ a walking foot to prevent fabric shifting and ensure even feeding, granting you mastery over the binding process.
Making the Quilt Binding
Since you’ll be using a machine to bind your quilt, let’s go over the benefits of machine binding and how to set up your sewing machine for the project:
- Machine binding is faster and more efficient than hand binding, saving you time and effort.
- It creates a durable and professional finish that will last for years.
- The even stitching of a machine binder ensures a consistent and polished look.
- With a machine, you can easily experiment with different bias strip techniques and creative binding ideas.
Machine Binding Tutorial in Steps
Now, let’s discuss how to machine bind a quilt in steps:
Attach the binding to the back of the quilt with a quarter-inch seam allowance.
Create mitered corners for a neat finish.
Join the binding strips together with careful overlap and machine stitch on top of the binding on the front.
Step 1: Attach the Binding to the Back of the Quilt
Start by attaching your quilt’s binding to the back with a quarter-inch seam allowance.
Use pinning techniques to secure the binding in place, ensuring the fabric is aligned correctly.
Stitch along the seam line, backstitching at the beginning and end to reinforce the seam.
Select fabric that complements your quilt’s design and color scheme.
Troubleshooting issues like puckering or uneven seams may arise; address these promptly to achieve a neat and professional finish.
Step 2: Mitered Corner
When you reach a corner, pin the binding at a 45-degree angle to create a triangle flap for a neat and tidy mitered corner.
- Precisely fold the binding at the 45-degree angle to form a triangle.
- Continue pinning and mitering all corners around the quilt, ensuring a seamless transition.
- Press the ends to create creases and trim the excess to about ¼ inch for a clean finish.
- Stitch the ends together on the pressed crease, ensuring a flawless and seamless finish.
Step 3: Join the Binding Strips
Next, join the binding strips together with a quarter-inch seam allowance.
Press the seams open for a flat finish.
Align the strips carefully, ensuring they overlap by about half an inch at each join.
Stitch consistently along the seam line, maintaining a straight and even stitch.
For joining angles, miter the corners precisely for a seamless transition.
Press the seams open using a pressing tool to achieve a flat and professional finish.
Step 4: Machine Stitch on Top of the Binding on the Front
Now, machine stitch on top of your binding on the front, keeping the needle close to the folded edge for a neat finish.
Employ a walking foot to prevent shifting and ensure stitching precision.
Choose a thread that coordinates with your quilt for a cohesive look.
Quilters recommend using a longer stitch length for a more relaxed and antiqued finish.
Experiment with various finishing techniques, like hand-stitching the binding in place for a personalized touch.
How to Miter a Corner on the Quilt Front
Continuing around the quilt, miter each corner by folding the binding strip at a 45-degree angle when reaching a corner.
-
Precision Folding:
Execute precise folding to achieve clean and crisp mitered corners.
-
Corner Alignment:
Ensure meticulous alignment of the binding strip at each corner for a seamless transition.
-
Seam Consistency:
Maintain consistent seam allowances throughout the mitering process to guarantee a uniform appearance.
-
Pressing Techniques:
Employ careful pressing techniques to flatten and shape the mitered corners for a polished finish.
-
Visual Polishing:
Visually inspect each mitered corner to ensure it aligns perfectly and contributes to the overall aesthetic of the quilt.
What Does the Back Look Like?
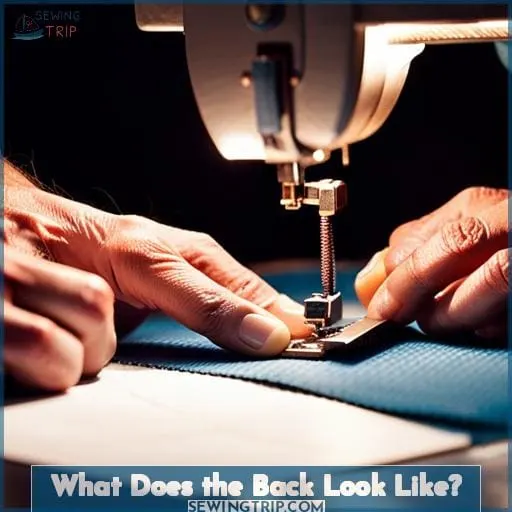
After machine binding your quilt, you’ll notice a clean and professional finish on the back.
The stitching impressions create a subtle yet elegant design element, adding depth and texture to the overall aesthetic.
The backing of your quilt showcases the precision and care taken during the binding process, ensuring a durable and long-lasting finish.
The reverse binding view reveals the meticulous mitered corners, where the fabric seamlessly converges, creating a sharp and polished appearance.
This attention to detail not only enhances the quilt’s visual appeal but also ensures its longevity.
The quilt back details, such as the even spacing between stitches and the consistent seam allowance, reflect the skill and expertise of the quilter.
The backing aesthetics contribute to the quilt’s overall beauty, making it a cherished piece that can be proudly displayed.
Quilt Binding Tutorial Tips Round Up
Often, you’ll hear quilters offer their top tips for achieving a neat and professional finish when machine binding your quilt.
Color coordination:
Choose a binding color that complements the quilt’s overall design. This will create a cohesive look and make the binding appear as a natural extension of the quilt.
Stitch length:
Adjust your stitch length to suit the fabric you’re using. A shorter stitch length will provide a more secure hold, while a longer stitch length will create a looser, more relaxed look.
Precise corner angles:
Take care to miter your corners precisely. This will ensure that the binding lies flat and smooth, without any puckering or bunching.
Fabric choices:
Consider the weight and drape of your fabric when selecting binding material. A heavier fabric will provide more structure and support, while a lighter fabric will be more fluid and flowing.
Hand vs. machine:
Ultimately, the choice between hand and machine binding is a matter of personal preference. Hand binding can be more time-consuming, but it also allows for more control and precision. Machine binding is faster and more efficient, but it can be more difficult to achieve a perfectly smooth finish.
Frequently Asked Questions (FAQs)
How do I choose the right fabric for binding?
Unleash your creative mastery by selecting fabrics that complement your quilt’s design and enhance its visual appeal.
Consider the overall color palette, pattern, and texture to create a harmonious and captivating composition.
What is the best stitch length and tension for machine binding?
Adjust stitch length and tension based on fabric weight, thickness, and desired result.
Experiment with different settings to optimize the machine’s performance and achieve a secure, aesthetically pleasing bind.
How do I handle bulky seams when machine binding?
Conquer bulky seams with finesse using your machine’s adjustable presser foot pressure.
Tame unruly layers by reducing pressure, preventing puckering, and ensuring a smooth, professional finish.
How can I make sure the binding doesn’t pucker or wrinkle?
To prevent puckering or wrinkling in your binding, use a walking foot.
This specialized foot helps maintain control and precision during the sewing process, resulting in a smooth and professional finish.
Use a walking foot to ensure even feeding of the fabric layers.
What are some creative ways to use bias binding in sewing projects?
Unleash your creativity with bias binding’s endless possibilities.
Paint a canvas of colors, textures, and patterns,
adorning garments, quilts, and home décor
with unique, eye-catching accents
that whisper your personal style.
Conclusion
As you embark on machine binding, you may encounter skepticism, with some arguing that it compromises the quilt’s integrity.
However, this technique, when executed properly, enhances the quilt’s durability while preserving its aesthetic charm.
By following the steps outlined in this tutorial and mastering the art of sewing binding, you can elevate your quilting skills and create heirloom-quality quilts that stand the test of time.

