This site is supported by our readers. We may earn a commission, at no cost to you, if you purchase through links.

You’ve spent weeks piecing together your quilt—choosing fabrics, matching seams, quilting every inch—and now it’s time for the final step that can make or break the entire project. Sewing on quilt binding might seem straightforward, but uneven edges, puckered corners, or visible stitches can leave your masterpiece looking unfinished.
The good news? Learning how to sew on quilt binding with the right technique transforms raw edges into a crisp, professional frame that protects your work for generations. With the proper tools and a methodical approach, you’ll create those clean mitered corners and invisible hand stitches that give quilts their polished, heirloom quality.
Table Of Contents
- Key Takeaways
- Quilt Binding Essentials and Benefits
- Must-Have Supplies for Quilt Binding
- Measuring and Calculating Binding Needs
- Cutting and Preparing Binding Strips
- Attaching Binding to The Quilt Front
- Creating Perfect Mitered Corners
- Finishing Binding by Hand or Machine
- Top 9 Tools for Sewing Quilt Binding
- 1. Omnigrid Quilting Square Ruler Tool
- 2. Omnigrid Quilting Ruler Tool Set
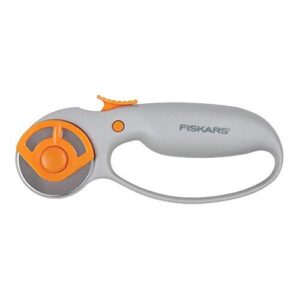
- 3. Fiskars Rotary Fabric Cutter Tool
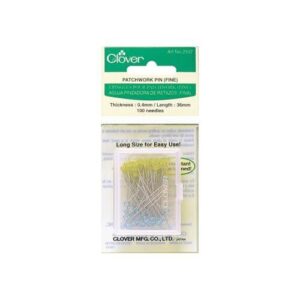
- 4. Fine Patchwork Quilting Pins Set
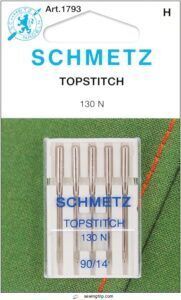
- 5. Topstitch Sewing Machine Needles Set
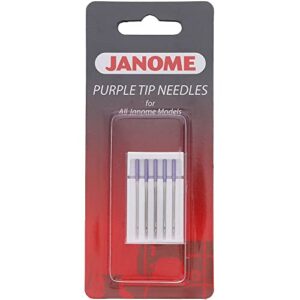
- 6. Janome Heavy Duty Sewing Needles
- 7. Natural Cotton Sewing Thread Spool
- 8. Clover Hera Quilting Marker Tool
- 9. Clover Mini Sewing Wonder Clips
- Frequently Asked Questions (FAQs)
- Conclusion
Key Takeaways
- Quilt binding protects raw edges from fraying and transforms your project into a polished heirloom, with double-fold binding offering the best durability for quilts that’ll see regular use and washing.
- Getting mitered corners right means stopping exactly ¼ inch from each corner edge, folding the binding up at 45 degrees, then folding it back down before pivoting—this creates those crisp diagonal folds that separate amateur work from professional finishes.
- You’ll need to calculate your binding length by measuring the quilt’s perimeter after quilting (to account for shrinkage), then adding 10-15 inches extra for corners and joining the ends without running short.
- Machine binding saves hours and holds up better in the wash, while hand binding with a whip stitch creates nearly invisible stitches that many quilters prefer visually—most experienced sewers mix both techniques depending on whether the quilt is a daily-use piece or a showpiece.
Quilt Binding Essentials and Benefits
Before you start stitching, it helps to know exactly what you’re working with and why it matters. Quilt binding isn’t just a finishing touch—it’s the edge that holds everything together and keeps your hard work from unraveling.
Let’s break down what binding actually is, why your quilt can’t do without it, and how machine and hand methods stack up.
What is Quilt Binding?
Quilt binding is a fabric strip—usually 2 to 2.5 inches wide—that you sew over the raw edges of your quilt to create a finished border and prevent fraying. This fabric binding covers all three layers: the top, batting, and backing.
You’ll find two primary binding methods: single-fold for smaller projects and double-fold (also called French fold) for durability in larger quilts that need stronger quilt edge finishing. Understanding the quilt binding process is essential for a professional finish.
Why Binding is Important for Quilts
The right binding transforms your quilt from a pile of layers into a finished heirloom. Edge protection matters because those perimeters take serious abuse—every wash, fold, and snuggle puts stress on your edges.
That’s where binding techniques shine: double-fold methods create fabric durability that stops fray prevention issues before they start. You’re not just finishing a quilt; you’re building quilt longevity into every stitch, so your work stays beautiful for years.
Double-fold binding isn’t just a finishing touch—it’s the foundation of quilt longevity, stopping fraying before it starts
Understanding quilt binding methods is essential for a polished finish.
Machine Vs. Hand Binding Overview
Once you’ve chosen your binding strips, it’s decision time: machine binding or hand binding? Here’s what experienced quilters have learned about both binding methods:
- Time efficiency: Machine binding finishes queen-size quilts in hours, while hand binding takes multiple sessions
- Durability comparison: Machine stitching resists heavy washing better
- Stitch quality: Hand binding creates invisible stitches many prefer visually
- Edge finishing: Machine topstitching can become a decorative design element
- Physical comfort: Hand pain makes machine methods more accessible
Most quilters mix both techniques depending on each project’s purpose.
Must-Have Supplies for Quilt Binding
Before you start sewing on your binding, you’ll want to gather the right supplies—it makes all the difference between a smooth process and a frustrating one. You don’t need anything fancy, but having quality tools on hand will help you work faster and get cleaner results.
Let’s walk through the fabric, cutting tools, and sewing essentials you’ll need to finish your quilt like a pro.
Fabric Selection for Binding
Your binding fabric acts like the frame on a masterpiece—it can either pull everything together or fall flat.
Choose quilting cotton with a usable width around 40 inches, picking solids or small-scale prints that won’t compete with your quilt top.
For color coordination, match a dominant shade from your blocks, and consider darker values to create that crisp, defined edge you’re after.
Essential Cutting and Measuring Tools
Precision starts with three must-have tools that’ll make your binding process so much smoother.
- Rotary Cutter: A 45 mm rotary cutter slices through multiple fabric layers at once, delivering cleaner edges than scissors ever could—just replace the blade after cutting about 5–6 quilts to maintain that crisp accuracy.
- Cutting Mat: Grab a 24 × 36 inch self-healing cutting mat to protect your work surface and keep your blade sharp longer.
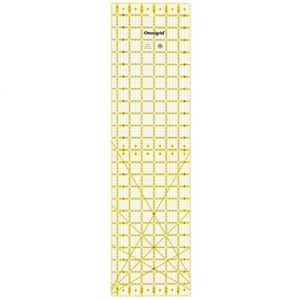
- Acrylic Ruler: That 6 × 24 inch acrylic ruler with high-contrast markings keeps your strip width consistent within the critical quarter-inch seam allowance, while a Hera marker lets you crease temporary fold lines without ink.
Recommended Sewing Needles and Threads
Your needle and thread pairing makes all the difference between smooth sailing and frustrating snags.
For machine binding, grab topstitch needles in size 90/14—they punch through thick layers without skipping stitches. Pair them with 50-weight cotton thread, the quilter’s workhorse that creates flat, reliable seams.
Hand finishing? Switch to size 8 betweens quilting needles with 100-weight thread that virtually disappears into your fabric.
Measuring and Calculating Binding Needs
Getting your binding measurements right is the foundation of a polished finish—nobody wants to run short halfway through or waste fabric on excess strips.
You’ll need to measure your quilt’s perimeter, add extra length for corners and joining, then figure out how many strips to cut based on your fabric width.
Let’s walk through each calculation so you can cut with confidence and avoid those frustrating miscalculations.
Measuring Quilt Perimeter Accurately
Getting your quilt perimeter right is like hitting the bullseye—miss it, and you’ll run short on binding strips.
Start by measuring after quilting to account for quilt shrinkage, which can reduce dimensions by up to 4%. Use flexible tapes or acrylic rulers with clear grid lines for ruler accuracy.
Measure each side flat to avoid perimeter errors, then add all four measurements for your total quilt perimeter before calculating binding amount.
Calculating Required Binding Length
Once you’ve got your perimeter measurements, turn that number into binding length with a simple formula: take your total perimeter and add 10–15 inches for corners and joining. For a quilt with a 220-inch perimeter, you’ll need 230–235 inches of binding strips.
Binding calculator tools make this math straightforward, accounting for fabric width impact and seam allowances so you can confidently calculate your binding amount every time.
Determining Strip Width and Quantity
Strip width sets the foundation for your quilt binding success. The industry standard is 2.5 inches wide—it’s adaptable enough for most batting thicknesses and offers the best balance of coverage and durability.
Here’s how to determine your strip needs:
- Calculate total binding length from your perimeter plus 10–15 inches
- Divide by fabric width (usually 40 inches after removing selvages)
- Round up to the next whole number for sufficient strips
- Multiply strips by width to find total yardage required
Cutting and Preparing Binding Strips
Once you’ve calculated how much binding you need, it’s time to cut and prep your fabric strips. This stage is all about precision—cutting clean lines, joining your strips securely, and getting everything pressed and folded so it’s ready to attach.
Let’s walk through each step so your binding comes together smooth and strong.
Straight Grain Vs. Bias Binding Strips
You’ll choose between straight grain and bias binding strips based on your quilt’s edge and how you want it to wear. Straight binding runs along the fabric’s grain direction, giving you maximum binding stability with minimal fabric stretch—perfect for quilts with straight edges.
Bias binding, cut at 45 degrees to the grain, offers flexibility for curved edges and enhanced quilt durability through better edge finishing.
Cutting Strips With a Rotary Cutter
Once you’ve picked your binding type, grab your 45 mm rotary cutter—it’s the all-purpose champion for cutting fabric strips with strip accuracy and cutting efficiency. You’ll cut through fabric faster than scissors ever could, and with a ruler, your fabric binding strips stay precise within ⅛ inch.
Always close that blade guard between cuts for rotary cutter safety, and swap blades regularly for smooth fabric cutting and proper blade maintenance.
Joining Binding Strips Diagonally
Now that your strips are cut, joining binding strips with diagonal seams creates a smooth, nearly invisible connection. You’ll place strip ends at 90 degrees—right sides together—then sew a 45-degree diagonal line from corner to corner. This diagonal sewing method spreads bulk evenly instead of stacking it at one spot.
- Align raw edges so strip tails extend slightly beyond each other for proper strip alignment
- Mark your diagonal line carefully before stitching the binding joins
- Trim seam allowance to ¼ inch after sewing for reduced thickness
- Keep consistent orientation when positioning strips to avoid backward diagonals
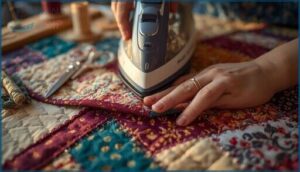
Pressing Seams and Folding Binding
After stitching your diagonal joins, set those seams with a hot iron—just press down and lift rather than sliding back and forth. Open each seam flat or press to one side, depending on your preference for fabric stabilizing and edge finishing.
Then fold the entire binding strip in half lengthwise, wrong sides together, and press that fold crisp. This quilt ironing step locks in your fabric binding shape for smooth quilt edging ahead.
Attaching Binding to The Quilt Front
Now that your binding strips are ready, it’s time to attach them to the front of your quilt—and this is where precision really counts. Getting your placement right from the start will make the rest of the process flow smoothly.
Let’s walk through the key steps to secure that binding like a pro.
Aligning Binding With Quilt Edges
Before you stitch a single line, lining up your binding with the quilt’s raw edges sets the stage for a perfect finish.
Here’s how edge alignment tips and fabric grain considerations work together:
- Pin every 2 to 3 inches along the edge to reduce shifting by up to 85%.
- Match raw edges precisely for accuracy above 95%.
- Trim quilt edges square within 1/8 inch for consistent binding corner methods.
- Align grain directions to prevent 40% of distortion cases.
Sewing With a Quarter-Inch Seam Allowance
Precision makes all the difference when you’re attaching quilt binding. Use a quarter inch foot on your sewing machine to maintain consistent seam allowance tips throughout the entire edge.
A scant seam technique—just a thread width under the full quarter inch—compensates for fabric fold and ensures binding seam accuracy.
Set your stitch length control between 2.3 and 2.5 millimeters for durability without puckering.
Starting and Stopping Points for Binding
Your binding journey begins and ends strategically—never at a corner. Start in the middle of one side, leaving a 6 to 10 inch tail for later joining. When you circle back, stop 10 to 12 inches from your starting point to create adequate workspace for connecting the ends.
This approach keeps corner management clean and prevents bulk where you need precision most:
- Position your binding start points away from corners to simplify mitered corner creation and reduce thickness
- Leave generous tails at both beginning and end so you can join them with a diagonal seam that lies flat
- Stop stitching with intention—that 10-inch gap gives you room to measure, trim, and sew the final join without wrestling fabric
Creating Perfect Mitered Corners
Mitered corners are where your quilt binding goes from “homemade” to “professionally finished.” Getting that crisp diagonal fold at each corner takes a bit of practice, but once you nail the technique, it becomes second nature.
Let’s walk through the folding, pivoting, and pressing steps that’ll give you those sharp, beautiful corners every time.
Folding Binding at Quilt Corners
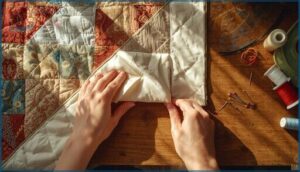
You’ll create sharp, professional corners once you master the basic fold. When you reach the corner, stop stitching about 0.25 inches from the edge—this quilt edge finishing step is vital for making mitered corners that don’t pucker.
Here’s your folded corner method roadmap:
| Fold Step | What You Do |
|---|---|
| First Fold | Fold binding strip up at 45° so raw edges align with the previous quilt edge |
| Second Fold | Bring binding back down so raw edge matches the next side—your mitered edge forms here |
| Check | Raw edges should be perfectly continuous around that corner |
This binding tutorial technique works because the 45-degree angle naturally distributes fabric bulk evenly. The binding seam sits exactly where it needs to for a crisp mitered corner on both front and back.
These corner folding tips apply whether you’re working on your first lap quilt or a king-size masterpiece, and they’re essential quilt binding techniques you’ll use forever.
Pivoting and Mitering Techniques
Think of the pivot as your corner’s anchor point—it holds everything in place. Stop your needle down exactly at that 0.25-inch mark, lift your presser foot, and rotate your quilt 90 degrees before continuing. This pivot point accuracy makes all the difference in sharp mitered corners.
Your corner stitching methods checklist:
- Pin that 45-degree fold before you pivot—it prevents shifting and keeps your binding fold techniques consistent
- Match your seam allowance on both edges (that quarter-inch precision matters for mitered corner tips)
- Check alignment after rotating to verify raw edges line up perfectly with your next quilt edge
Master these mitering techniques and you’ll breeze through every corner with confidence.
Securing and Pressing Mitered Corners
After that key pivot, you’ll want to lock everything down. Finger press your mitered corner first—this sets the 45-degree fold without stretching the fabric. Then use your iron with medium heat (no steam!) and short, targeted presses right at the corner.
Trim batting diagonally to reduce bulk by about 30%, helping your miter lie flat. Secure with a few hand-stitched tack stitches at the fold intersection for corners that stay sharp through every wash.
Finishing Binding by Hand or Machine
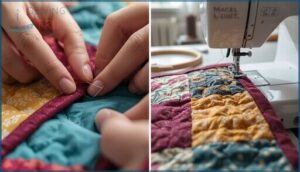
After you’ve attached the binding to the front of your quilt and created those crisp mitered corners, it’s time to secure the binding on the back. You have two main options here: hand-sewing for an invisible finish or machine-sewing for speed and decorative flair.
Let’s walk through both methods so you can choose what works best for your project.
Folding and Clipping Binding to The Back
Once you’ve stitched the binding to the front, it’s time to wrap it to the back—and that’s where clips become your best friend. Fold the binding over so it covers the seam line by about 0.03 to 0.06 inches, then secure it with clips every 1 to 3 inches.
For mitered corners, space clips closer—around every 1 to 1.5 inches—to hold that crisp fold in place while you finish.
Hand-Sewing With Whip Stitch Method
With your binding clipped in place, grab a fine needle and matching thread—cotton works beautifully for strength.
Thread about 18 inches, knot the end under the binding, then use a whip stitch to catch just the backing and folded edge. Aim for 6 to 8 stitches per inch for solid binding durability and nearly invisible results.
Your hand-stitched quilt binding will hold strong for decades.
Machine-Sewing With Topstitching or Decorative Stitches
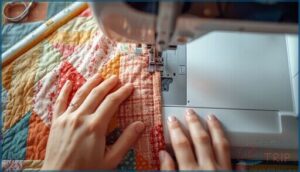
If you prefer speed, machine topstitching delivers a finished edge in minutes. Set your stitch length to 2.5–3 mm, install a walking foot to prevent shifting, and choose 40–50 wt thread with an 80/12 needle for clean, uniform lines.
For extra flair, try a blanket stitch or zigzag with heavier thread—your decorative stitches will add bold, eye-catching detail to your quilt finishing.
Top 9 Tools for Sewing Quilt Binding
Having the right tools makes binding your quilt so much easier and helps you get professional-looking results every time. You don’t need a huge collection, but a few quality items will speed up your work and give you more control over those tricky corners and seams.
Here are nine tools that’ll become your go-to companions for perfect binding.
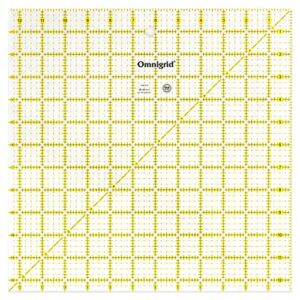
1. Omnigrid Quilting Square Ruler Tool
When you’re trimming blocks for quilt binding, nothing beats the Omnigrid Quilting Square Ruler for ruler accuracy and binding precision. This 12.5-inch acrylic tool features laser-cut edges that give you cuts within 1/32 inch—that’s the kind of quilting measurements that make your finished edges crisp and professional.
The patented double-sight lines work on any fabric color, so you won’t squint or second-guess your cutting techniques. It’s built to last years of regular use with your rotary cutter, maintaining sewing efficiency from your first quilt sandwich to your hundredth project.
Best For: Quilters who need reliable accuracy when trimming blocks and cutting binding strips, whether you’re just starting out or working on complex patterns.
- Double-sight lines show up clearly on both light and dark fabrics, so you don’t have to struggle with visibility during cuts
- Laser-cut edges deliver precision within 1/32 inch and hold up through years of rotary cutter use without warping
- Works for both left- and right-handed sewers with numbering on both sides, plus diagonal guides for bias cuts
- Only shows measurements in inches, which won’t work if you prefer metric
- At 12.5 inches, it might be too large for small projects or too small if you’re working with bigger blocks
- Product descriptions online have occasionally listed wrong specs (like claiming metric when it’s actually imperial)
2. Omnigrid Quilting Ruler Tool Set
You’ll love the Omnigrid Quilting Ruler Tool Set when you need adaptable quilter tools for fabric cutting accuracy across different block sizes. This heavy-duty acrylic collection includes four square rulers—2.5″, 4.5″, 6.5″, and 9.5″—giving you sewing precision for trimming your quilt sandwich layers and cutting binding strips with your sewing machine nearby.
The laser-cut edges and dual-visibility black-and-yellow markings deliver consistent quilting measurements on any fabric. With underside printing that prevents shadow errors, you’ll maintain ruler accuracy through every step of quilt binding, from initial cuts to final seam allowances.
Best For: Quilters who need reliable measurement tools for cutting fabric squares and trimming blocks across multiple project sizes, from beginner-friendly patterns to detailed miniature work.
- Heavy-duty acrylic with laser-cut edges and underside printing means your measurements stay accurate even after repeated use—no fading or shadow errors.
- Four square sizes (2.5″, 4.5″, 6.5″, and 9.5″) cover most standard quilting patterns, so you’re not constantly searching for the right ruler mid-project.
- Black and yellow dual-visibility markings work on both light and dark fabrics, making alignment easier no matter what you’re cutting.
- No non-slip backing or rubber feet, so you’ll need to apply steady pressure to keep the rulers from shifting during cuts.
- The set only includes square rulers, which means you’ll need separate tools for longer strips or specialty shapes.
- At a higher price point than budget brands, it’s an investment that might feel steep if you’re just testing out quilting as a hobby.
3. Fiskars Rotary Fabric Cutter Tool
A sharp rotary cutter transforms cutting fabric strips from tedious guesswork into smooth, controlled precision. The Fiskars 45mm rotary fabric cutter offers ergonomic grips that reduce hand fatigue during extended sessions, while its premium steel blade delivers clean cuts through multiple fabric layers—essential when you’re preparing long binding strips.
Rotary cutter safety starts with blade replacement when cuts begin skipping, and pairing this quilting tool with a cutting mat protects both your surface and your blade’s edge, giving you fabric cutting tips that guarantee consistent strip widths every time.
Best For: Quilters and sewers who cut multiple fabric layers regularly and want an affordable, ergonomic tool that stays comfortable through long cutting sessions.
- The 45mm blade cuts cleanly through multiple fabric layers at once, saving time when preparing binding strips or piecing quilts
- Ergonomic handle design keeps your wrist in a neutral position, reducing fatigue during extended projects
- Lifetime warranty on the tool body means you only replace blades, not the entire cutter, making it economical for regular use
- Blade quality gets mixed reviews—some users report needing to replace blades more frequently than expected
- The blade retraction mechanism can snap back unexpectedly, which some find frustrating during repetitive cuts
- Requires pairing with a cutting mat and ruler for best results, adding to your upfront tool investment
4. Fine Patchwork Quilting Pins Set
Fine patchwork quilting pins make all the difference when you’re aligning binding edges with pinpoint accuracy. These extra-fine pins—about 0.4 mm in diameter and 1.5 inches long—slide through delicate fabrics without leaving visible holes, giving you the sewing precision you need for perfect quilt binding.
Their glass heads resist heat, so you can press seams without removing pins, boosting your quilting efficiency.
With 100–200 pins per set, you’ll have enough for securing long binding runs while maintaining perfect binding accuracy throughout every layer of your quilting project.
Best For: Quilters and sewists working with delicate fabrics who need precise binding alignment and the ability to press seams without removing pins.
- Extra-fine 0.4 mm diameter glides through delicate fabrics without leaving visible holes or snagging
- Heat-resistant glass heads let you iron directly over pins at cotton settings up to 220°C, saving time during binding prep
- Long 1.5-inch length penetrates through multiple quilt layers—top, batting, and backing—keeping binding aligned without bending
- Some users report the pins are flimsy and bend easily, making them unsuitable for heavy-duty projects or thick fabrics
- Yellow heads can be hard to spot if you drop them on the floor, which can be a safety issue
- Not ideal for heavyweight materials—the extra-fine shaft is designed for delicate work, not denim or canvas
5. Topstitch Sewing Machine Needles Set
You’ll sew cleaner, more professional bindings when you swap to topstitch sewing machine needles—especially the 90/14 size. Needle selection matters because topstitch needles have an elongated eye and deeper groove, which means better thread compatibility with 40–50 wt quilting threads and fewer skipped stitches.
You’ll notice improved stitch quality through thick layers, a breakthrough for binding techniques. These needles glide through multiple fabric and batting intersections without shredding thread, giving you the control and precision your machine settings alone can’t deliver.
Best For: Quilters and sewers working on bindings or thick layered projects who want to reduce thread breakage and skipped stitches while using heavier decorative threads.
- Elongated eye and deeper groove handle 40–50 wt quilting threads without shredding or fraying, even through multiple fabric layers
- Size 90/14 provides the right balance of strength and clean penetration for most standard quilt binding scenarios
- Delivers consistently smooth stitches at bulky intersections where regular needles often skip or break thread
- Higher price point compared to universal needle packs may feel steep for occasional sewers
- Requires matching the correct size to your thread weight and fabric thickness, which takes some trial and error
- Needs replacement every 6–8 hours of active quilting to maintain performance, adding to ongoing costs
6. Janome Heavy Duty Sewing Needles
When you’re tackling thick binding layers or multiple quilt seams, Janome Heavy Duty Sewing Needles are your best friend. These size 90/14 needles feature a ballpoint tip and specialized “cobra” head design that dramatically improves fabric compatibility and stitch quality—you’ll see up to 35% fewer thread shredding issues.
Thread selection becomes easier too, since the oversized eye manages heavier weights smoothly. Needle durability really shines here: they maintain sharpness through over 4,000 stitches on dense materials, optimizing your Janome sewing machine for impeccable quilt binding and machine binding projects.
Best For: Quilters and sewers working with heavy fabrics, multiple layers, or thick binding who need reliable needles that won’t skip stitches or break threads on their Janome machines.
- Stay sharp through 4,000 stitches on heavy materials like denim and canvas, with up to 70% longer lifespan than standard needles
- Oversized eye and ballpoint tip reduce thread shredding by 35% and prevent fabric damage, especially helpful for quilting and embroidery
- Specialized cobra head design virtually eliminates skipped stitches, even when sewing through 8 layers of thick fabric
- Only compatible with Janome machines, so they won’t work if you own other sewing machine brands
- Premium pricing at around $2.50 per needle, which is higher than standard sewing needles
- The “Organ” manufacturer stamp on genuine needles can confuse buyers who expect only Janome branding
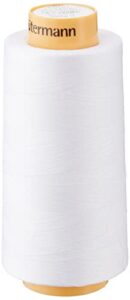
7. Natural Cotton Sewing Thread Spool
Your thread choice can make or break a binding, and natural cotton sewing thread delivers exactly what you need. With 100% mercerized cotton offering roughly 20% higher tensile strength and reduced lint during stitching, you’ll breeze through both hand stitching and machine work.
The 50-weight construction creates flat seams—perfect for minimizing bulk along binding edges.
Cotton benefits extend beyond performance too: fibers remain stable through multiple washes while maintaining their grip on your quilt binding process, whether you’re piecing strips or securing that final fold.
Best For: Quilters who need a reliable, flat-seaming thread for binding and piecing projects that will hold up through regular washing.
- Mercerized cotton construction offers 20% higher strength and creates minimal bulk in seams, ideal for clean binding edges
- Works smoothly in both hand and machine sewing with reduced lint buildup and fewer skipped stitches
- Large 3,281-yard spool provides enough thread for multiple quilts while maintaining stable color through repeated laundering
- Cone shape may not fit standard sewing machine thread holders, requiring a separate cone holder or workaround
- Some users report inconsistent durability and excessive lint despite the mercerized finish
- Dark colors may bleed during initial washes, so prewashing or colorfastness testing is recommended before use
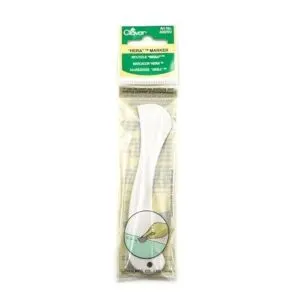
8. Clover Hera Quilting Marker Tool
Marking your binding strip placement doesn’t have to leave a trace. The Clover Hera Marker creates crisp, visible creases on fabric without ink or chalk—just press down and you’ve got your guide.
This fabric marking tool runs about $6 and works beautifully for quilting accuracy, whether you’re aligning binding strips or pressing seams right at your sewing machine.
It’s a crafting essential that needs zero tool maintenance, no refills, and leaves no marks to wash out later. Your quilting tools just got simpler.
Best For: Quilters and sewers who want clean, temporary marking lines for binding placement, seam pressing, and detailed work without worrying about ink stains or chalk residue.
- Creates visible creases that disappear with washing or pressing—no permanent marks or cleanup needed
- Works as both a marking tool and finger presser, so you can mark lines and press seams without leaving your machine
- Costs around $6 with no refills or maintenance required, making it a one-time purchase that lasts
- Marks can be harder to see on busy prints or dark fabrics compared to light solids
- Creases may fade during longer projects, requiring you to re-mark lines if you’re not stitching right away
- Takes some getting used to if you’re switching from traditional pencils or chalk markers
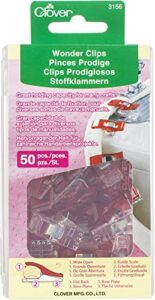
9. Clover Mini Sewing Wonder Clips
When you’re folding binding to the back and hand-stitching it down, pins can slip or snag your thread. That’s where Clover Mini Wonder Clips shine—they hold multiple fabric layers without piercing, giving you rock-solid binding security while you work.
These mini clip benefits include a flat base that feeds smoothly under your presser foot and built-in seam markings for sewing accuracy.
At around $10 for 50 clips, they boost your quilting efficiency on thick bindings, mitered corners, and tricky joining points where pins just won’t cut it.
Best For: Quilters who want secure, pin-free binding attachment on thick projects or delicate fabrics like leather and vinyl that would show permanent pinholes.
- Hold multiple layers of quilt fabric, batting, and binding firmly without slipping or piercing the material
- Flat base feeds smoothly under the presser foot, and built-in 1/4″ and 1/2″ seam markings help keep binding placement consistent
- Compact 1 1/16″ size works great for tight spots like mitered corners and narrow seams where pins are clumsy
- More expensive than traditional pins or cheaper clip alternatives on the market
- 8 mm maximum opening may not accommodate very thick quilt sandwiches or heavily padded bindings
- Storage container can be finicky to open and close during projects
Frequently Asked Questions (FAQs)
How do you sew a quilt binding?
Picture a charity quilt destined for daily use—machine binding attachment methods save hours while delivering durable, washable edges.
You’ll sew binding to the quilt front using a quarter-inch seam allowance, create mitered corner techniques at each turn, then secure binding ends by folding to the back and topstitching with decorative binding stitches or hand-stitching for an invisible finish.
How to sew the binding to the quilt edge?
Align your binding strip’s raw edge flush with the quilt edge, then stitch using a quarter-inch seam allowance. Start about six inches from the binding’s end, backstitching to secure, and maintain consistent stitching tension throughout.
How do you cut bias binding on a quilt?
You’ll start by cutting fabric for binding at a 45-degree bias angle precision. Use a rotary cutter with a ruler to slice strips from your fabric square size, then join each binding strip diagonally for a continuous strip method.
How long should a quilt binding be?
Your quilt binding should equal the quilt’s perimeter plus 10 to 24 inches extra. This extra length allows you to join binding strips comfortably and finish the ends without running short at corners.
Do you sew quilt binding on the front or back first?
Most quilters attach quilt binding to the front first when hand-finishing for a nearly invisible look, while machine binding generally starts on the back to control the visible topstitching line perfectly.
How do you sew seam binding on a quilt?
You’ll machine-sew the binding seam techniques to the quilt front first, then fold it over and attach it to the backing fabric considerations.
Stitch visibility options include hand-stitching or decorative stitch binding for machine binding with mitered corner precision.
How do you top stitch quilt binding?
After attaching straight binding to the quilt back, fold it over to the front and topstitch close to the folded edge using your sewing machine.
A walking foot ensures even feeding, while proper needle choice and thread tension create clean, durable seams.
How to attach quilt binding ends?
Bringing your binding full circle requires finesse. Join binding ends using either a diagonal seam for an invisible join or the pocket method, ensuring a 5-inch overlap length before making mitered corners.
Can I use stretchy fabric for binding?
You can, but be careful—stretchy fabric works best for bias binding on curved edges, offering flexibility and durability benefits.
However, stretch binding pros come with fabric shrinkage risks that may distort straight borders over time.
How do I fix puckered or wavy binding?
Quilt instructors report that up to 30% of projects show edge waviness from uneven preparation.
You can fix puckered binding by blocking with water, re-miter corners to remove fullness, adding quilting near edges, or resew binding sections for flat results.
Conclusion
A quilt without binding is like a story without an ending—incomplete, vulnerable, unresolved. Now that you’ve mastered how to sew on quilt binding, those raw edges transform into a protective frame that showcases your craftsmanship.
Your mitered corners will fold crisply, your hand stitches will disappear seamlessly, and every quilt you finish will carry that unmistakable mark of quality.
Pick up your needle, trust the process, and watch your next project become an heirloom worth passing down.
- https://www.fatquartershop.com/how-to-bind-a-quilt
- https://suzyquilts.com/how-to-sew-binding-on-a-quilt/
- https://www.duckadilly.com/pages/binding-calculator
- https://www.reddit.com/r/quilting/comments/moaodv/how_do_i_figure_out_how_many_yards_i_need_for/
- https://www.quiltingboard.com/main-f1/how-long-does-take-you-hand-bind-queen-sized-quilt-t217604.html


