This site is supported by our readers. We may earn a commission, at no cost to you, if you purchase through links.
 Sewing piping adds a polished look to cushions, garments, or bags.
First, grab your piping and the fabric you’ll sew it onto. Use a zipper foot so you can stitch close to the piping cord.
To start, pin the piping along the edge of your fabric, raw edges aligned, with the cord facing inward. Sew slowly, keeping the stitching even.
For corners, carefully snip the piping’s seam allowance to help it bend smoothly. When joining ends, overlap slightly or tuck one into the other for a clean finish. A little patience goes a long way—practice makes those edges flawless!
Table Of Contents
Key Takeaways
- Use a zipper foot to sew close to the piping cord for a clean, polished finish.
- Pin piping to fabric edges with raw edges aligned, snipping corners for a smooth curve.
- Trim and clip seam allowances to reduce bulk and ensure neat, professional results.
- Match cord thickness and fabric type to your project for durability and style.
Sewing Piping Basics
Learning the basics of sewing piping is easier than it looks and makes your projects look polished right away.
You’ll need just a few tools, like bias tape and a zipper foot, to create neat, professional edges.
Definition and Purpose of Piping
Piping adds a polished touch to sewing projects while serving practical purposes.
It’s a fabric-wrapped cord sewn into seams, providing edge protection and enhancing durability.
Decorative piping adds visual emphasis, while seam definition creates clean lines in designs.
This 3D trim isn’t just functional—it’s a stylish way to make your creations stand out.
Sew piping to elevate any project effortlessly, and for best results, consider suitable fabric choices like medium-weight cottons to achieve a professional finish.
Types of Piping and Applications
Now that you understand what piping is, let’s look at the main types you’ll encounter.
Corded piping gives a structured look perfect for cushions and upholstery. Braided piping adds texture to handbags and home décor.
Flanged piping includes an extra fabric strip for easier sewing. Knit piping works great for stretchy fabrics.
Decorative piping brings visual pop to garment edges. Each type serves both functional and aesthetic purposes, and visual elements in your sewing projects.
Decorative piping instantly elevates your designs, blending function and style for bold, polished edges that make every project unforgettable.
Materials and Tools Needed
To gear up for sewing piping, you’ll need to round up several essential supplies.
Your sewing toolkit should include:
- Bias tape (store-bought or homemade) for wrapping around your piping cord
- A specialized zipper foot or piping foot to stitch close to the cord
- Various cording types depending on your project’s needs
Don’t forget matching thread and sharp scissors to complete your setup.
You can find various bias tape options online. These tools guarantee professional-looking results every time, with the right specialized zipper foot.
How to Sew Piping
Now that we’ve covered the basics, let’s roll up our sleeves and get to the actual sewing! With the right technique, you’ll be sewing piping like a pro in no time.
- Choose between pre-made piping for beginners or custom options for unique projects
- Match your cord thickness guide to your project—thinner for clothing, thicker for home decor
- Consider fabric grain impact when planning your piping placement
- Invest in a piping foot for consistent results (though a zipper foot works too!)
Remember to sew slowly at first. As my grandmother always said, "Rushing piping is asking for ripping!
When working around corners, remember to clip the seam allowance for a smooth finish.
Making Custom Piping
Making custom piping lets you match colors and patterns perfectly to your project.
Match colors and patterns flawlessly with custom piping to add a stylish, professional edge to any sewing project.
By cutting bias tape and choosing the right cord, you’ll create piping that fits your design and adds a professional touch to any edge.
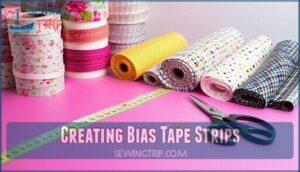
Creating Bias Tape Strips
Creating your own bias tape strips opens a world of piping possibilities.
Cut fabric on the bias grain (45° angle) for maximum stretch and fabric longevity. For striped fabric effects, this diagonal cut creates eye-catching patterns.
Always cut strips wider than needed—typically 1½" wide for standard piping. Save time with the continuous bias method for longer projects.
This approach yields flexible strips that curve beautifully without wrinkling or bunching at corners. For best results, consider pressing creases firmly before sewing.
Choosing The Right Cord or Filling
The perfect piping cord can make or break your project.
For cushions and home décor, choose thicker cording (1/4" to 1/2"), while clothing needs thinner options (1/8" or less).
Cotton cording offers flexibility, while polyester provides durability.
Match your cord thickness to your project’s needs – thicker for structure, thinner for delicate details.
Consider filling density and color matching for a truly professional finish.
For powering multiple devices, consider using multi-outlet cords.
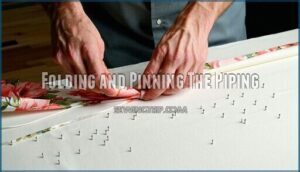
Folding and Pinning The Piping
Once you’ve got your bias tape and cord ready, it’s time for proper folding and pinning.
Follow these steps for perfect piping alignment:
- Center your cord along the wrong side of your bias tape
- Fold the tape over the cord, aligning raw edges precisely
- Pin perpendicular to the fold every 2-3 inches
- Snip curves slightly to release tension
- Position pins as basting guides for your stitching path
This careful setup guarantees your sewing piping techniques create professional results with perfect piping alignment.
Sewing Piping to Fabric
You’ll transform your projects from ordinary to professional once you master attaching piping to fabric edges.
With the right tools and technique, you can create crisp, defined edges that make cushions, garments, and bags look store-bought rather than homemade, and achieve a professional look.
Aligning and Pinning The Piping
Precision is the secret weapon when aligning and pinning piping.
Position your piping along the raw edge of your fabric’s right side, matching seam allowances perfectly.
Pin perpendicular to the edge, spacing pins about 2 inches apart.
| Pinning Technique | Best For | Tips |
|---|---|---|
| Perpendicular pins | Straight edges | Easier to remove while sewing |
| Close-together pins | Curves | Prevents shifting |
| Pin through all layers | Thick fabrics | Guarantees even alignment |
| Pin corners at 45° | Corner placement | Helps navigate tight turns |
| Baste first | All applications | Provides security before final stitching |
The key to successful piping is using the right pinning technique for your specific project, whether it’s working with straight edges, curves, or thick fabrics.
By following these guidelines and choosing the appropriate pinning technique, you can achieve professional-looking results.
Using a Zipper Foot for Close Stitching
The zipper foot becomes your best friend when sewing piping.
It allows your needle placement to get snug against the cord without stitching through it.
Adjust your foot pressure to hold the piping firmly while still allowing the fabric to move smoothly.
Keep your stitch length medium for durability.
For specialized projects, consider zipper foot options.
When guiding fabric, use your left hand to control the piping’s position.
Alternative feet like a piping foot can also work well.
Handling Corners and Curves
When approaching corners and curves with piping, you’ll need to clip strategically to avoid bulk.
Sewing curves requires patience but yields professional results that truly elevate your project.
Here are three essential techniques:
- Clip the seam allowance just to the stitching line at corners
- Snip small triangles along convex curves to release tension
- Use a piping foot to maintain consistent distance from the cord
Don’t rush this step—perfect corners make all the difference!
Handling Seams and Finishes
You’ll need to properly finish your piping seams to achieve that store-bought professional look that makes friends ask "Did you really make that yourself?"
Trim excess bulk and press your seams carefully to create crisp edges that will make your piping stand out and last through years of use.
Trimming Excess Piping and Seam Allowances
Now that your piping’s secured, it’s time for some careful trimming to achieve those clean, professional edges.
After stitching your piping to fabric, trim the seam allowance to about 1/4 inch to reduce bulk.
When working with curves, clipping is your best friend—snip small triangles from curved areas without cutting into your stitching line.
For corners, trim diagonally to minimize thickness where edges meet.
If you’re dealing with thick fabrics, consider seam grading—trimming different layers to varying widths.
This prevents that lumpy piping edge that can ruin your project’s appearance, and remember: neat finishes start with smart trimming, so don’t rush this step!
Pressing The Seam for a Professional Finish
After trimming your seams, proper pressing is what transforms your piping from good to great. Before pressing, open your seam to check piping placement—it should sit exactly where you want it without any puckering or twisting.
For press-perfect piping every time:
- Press seams toward the garment body, away from the piping for a crisp edge
- Use a press cloth on decorative or delicate piping to prevent flattening
- Apply gentle steam rather than heavy pressure when pressing near cords
A quick topstitching 1/8" from the piping adds both security and style, especially when using contrasting piping as a design accent. You’ll maintain accuracy and achieve that coveted professional finish.
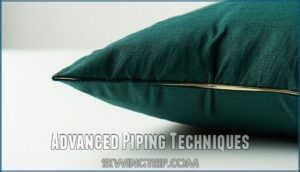
Advanced Piping Techniques
You’ll take your piping skills to the next level with these advanced techniques that transform ordinary projects into professional masterpieces.
Once you’ve mastered the basics, these methods will help you tackle tricky corners, work with thick fabrics, and fix common problems that can trip up even experienced sewers, allowing you to create professional masterpieces.
Using Contrasting Piping for Design Accent
Now that you’ve mastered basic finishes, let’s add some flair. Contrasting piping can transform ordinary projects into eye-catching masterpieces.
The right color combination creates striking visual impact in your sewing projects.
| Design Style | Piping Color Recommendation | Project Ideas | Visual Impact | Fabric Pairing |
|---|---|---|---|---|
| Modern | Bright against neutral | Throw pillows | Bold statement | Linen with cotton piping |
| Classic | Complementary tones | Blazer edges | Subtle elegance | Wool with silk piping |
| Nautical | Navy/white contrast | Cushion covers | Defined borders | Canvas with striped piping |
| Boho | Multi-colored piping | Tote bags | Playful accent | Natural fibers with colorful piping |
| Minimalist | Tone-on-tone | Dress seams | Textural interest | Same fabric for both |
The table provides a range of design styles, each with a recommended piping color and project ideas to create a unique bold statement.
By choosing the right fabric pairing, you can add a playful accent or create subtle elegance in your sewing projects, making them truly stand out with striking visual impact.
Sewing Piping in Cushions and Thick Fabrics
Many cushions benefit from piping, but thick fabrics require special attention.
When sewing piping in upholstery projects, choose thinner cords for bulkier fabrics to prevent seam bulk. Use a zipper foot to stitch as close to the piping cord as possible.
For thin fabrics lacking structure, add light batting underneath. Always cut fabric piping strips on the bias for flexibility around corners in cushion covers.
Your needle choice matters too—heavier fabrics need stronger needles, and this is crucial for the overall quality of the upholstery project.
Troubleshooting Common Piping Issues
While working with thick fabrics, you’ll face unique challenges when adding those finishing touches.
Even experienced sewers run into piping problems.
Uneven piping often results from inconsistent seam allowances, while puckering fabric typically happens when you’re sewing too fast.
Crooked seams? Try more pins.
For bulky corners, trim your cording before folding.
If you notice cording exposure, your stitching may be too far from the cord.
To prevent thread breakage, verify correct machine tension.
Slow down and your piping will look professional.
Frequently Asked Questions (FAQs)
Do you need a special foot to sew piping?
Sewing piping is like painting edges with precision—using a zipper foot isn’t mandatory, but it makes the job easier.
It helps you stitch snugly against the cording for that clean, professional finish!
What is the difference between cording and piping?
Cording is the core material, like rope or twine, inside piping.
Piping is piping wrapped in fabric, creating a decorative edge.
Think of piping as the "dressed-up" version—cording covered and sewn into seams.
What type of thread should I use when sewing piping?
Think of thread as the glue for your piping project—it should match your fabric color for invisibility or contrast for style.
Use strong, polyester thread for durability, and avoid cotton threads that may weaken over time.
What is the difference between bias tape and ready-made piping?
Bias tape is fabric cut on the diagonal, making it stretchy for curves.
Ready-made piping wraps a cord inside fabric, sewing-ready.
With bias tape, you control color and size; piping offers convenience and uniformity.
How do I finish off the end of a piping seam?
Nobody wants a messy project finish.
To end your piping, trim the cord slightly, fold the fabric edge under, and tuck it neatly.
Overlap the ends smoothly, then stitch for a clean, polished look.
How to calculate fabric needed for piping?
Measure the cord’s length you need, then add 5 inches per seam for overlap. For fabric, multiply the cord length by Cutting on bias guarantees flexibility for curves and edges.
Can piping be used on stretch fabrics?
Piping on stretch fabric is like adding a belt to a dancer—it holds shape but flexes with movement.
Use stretchy bias tape or knit fabric for piping, and avoid pulling while sewing to prevent puckering.
How to clean projects with piping detail?
Gently clean piped projects by hand or on a delicate machine cycle.
Use mild detergent, cold water, and avoid bleach.
Air dry flat to prevent shrinking.
For tricky spots, a small toothbrush works wonders!
What are tips for sewing faux leather piping?
Use a leather needle for smooth stitching, and apply a teflon foot to prevent sticking.
Go slow to avoid puckering, and clip corners carefully.
Test on scraps first—it’s better than learning the hard way!
Can piping be added to pre-sewn items?
Think of it like adding icing to a baked cake—yes, you can add piping to pre-sewn items.
Carefully unpick seams where needed, pin the piping in place, and stitch it back together for a polished look.
Conclusion
Did you know that a well-sewn piping can elevate even basic projects to a professional level?
Now that you’ve learned how to sew piping, you’re ready to create cushions, garments, or bags that wow.
Mastering alignment, using a zipper foot, and managing curves takes practice, but it’s worth the effort.
Focus on precision, take your time, and don’t rush corners or overlaps.
With these tips, your piping will always look polished and flawless. Happy sewing!
- https://www.craftsy.com/blog/wp-content/uploads/2013/05/Screen-Shot-2013-05-15-at-10.18.20-AM.png
- https://www.google.be/search?q=spray+on+starch&oq=spray+on+starch&aqs=chrome..69i57j0l5.3295j0j4&sourceid=chrome&ie=UTF-8
- http://www.createforless.com/Wrights-Bias-Tape-Maxi-Piping-2-1/2-yd/plid4333.aspx
- https://www.etsy.com/search?q=piping
- http://www.danamadeit.com/


