This site is supported by our readers. We may earn a commission, at no cost to you, if you purchase through links.
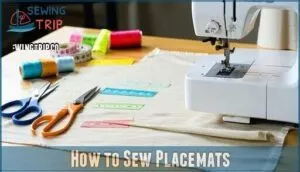
Start by picking a fabric you love—cotton or linen works great—and pair it with fusible fleece for sturdiness. Cut two fabric rectangles and one fleece layer, adding a ½-inch seam allowance.
Sandwich the fleece between the fabric layers, right sides together, and sew around the edges, leaving a small gap for turning. Clip the corners, flip it right side out, and press it flat.
Topstitch around the edge for a polished look. Want to get fancy? Try reversible fabrics or seasonal prints to jazz things up!
Table Of Contents
Key Takeaways
- Pick durable fabrics like cotton or linen and pair with fusible fleece for structure and padding.
- Cut fabric and interfacing precisely, leaving a ½-inch seam allowance and a small gap for turning.
- Sew the layers right sides together, clip corners, turn right side out, and topstitch for a polished finish.
- Get creative with reversible designs or seasonal patterns to personalize your placemats.
Sewing Placemat Basics
You’ll be amazed at how quickly you can create beautiful placemats with just some fabric, interfacing, and basic sewing skills.
Creating beautiful placemats is quick and easy with just fabric, interfacing, and basic sewing skills—perfect for beginners!
With standard sizes ranging from 12" x 18" to 14" x 18", you’ll find these beginner-friendly projects perfect for dressing up your table while practicing those straight seams without the pressure of fitting a garment.
Standard Placemat Sizes
Standard placemat sizes depend on your table size and setting style.
For most uses, 12×18 inches works well, but shape matters too—round, square, or oval placemats can add flair.
For formal meals, larger sizes like 14×20 inches create an elegant overhang.
Use a placemat size guide for custom dimensions.
Sewing placemat sets? Adapt sizes to fit your needs!
A typical placemat measures 12 inches by 18 inches.
Materials and Fabric Choices
Picking the right fabric is like choosing a perfect outfit—durability, fiber content, and pattern selection all matter.
Choosing fabric is crafting with flair—blend durability, style, and texture for placemats that shine at every table setting!
Natural fibers like cotton-linen blends offer texture variety and easy care. Bright colors or subtle hues can transform your table.
For creative fabric placemat ideas, try quilting cotton or chambray. Solid placemat fabric selection means your designs will last through meals and spills!
Selecting from various placemat fabric options can enhance your table decor.
Interfacing and Stabilization Options
When picking fabric for placemats, don’t skip interfacing—it’s like the secret sauce for stiffness, padding, and durability.
Need guidance? Here you go:
- Use fusible fleece for easy padding.
- Try Decobond 908 for firmness.
- Soft and Stable works magic for bulk.
- Skip chemical treatments; they aren’t food-safe.
- Batting adds softness without sacrificing sturdiness.
Your placemats deserve the right stuff!
How to Sew Placemats
Sewing placemats is simpler than you think! Follow this easy placemat pattern:
- Cut your fabric and interfacing to match your desired placemat shapes.
- Sew right sides together, leaving a small gap for turning—trust me, don’t skip this step.
- Turn it right-side out, clip corners, and press the edges smooth for crisp lines.
- Topstitch around the edges for edge finishing and durability.
This sew placemats tutorial makes bulk sewing a breeze, plus you’ll love customizing with embellishment ideas!
Choosing Placemat Size
Picking the right placemat size makes your table look amazing and keeps things practical. Measure your space, think about table settings, and don’t forget a little room for elbows!
Measuring Table Space
Don’t guess in terms of measuring table space! Grab a tape measure and jot down your dining table’s dimensions, seating arrangement, and any space constraints.
Think about placemat overlap—leave enough room for comfortable dining while avoiding cluttered table settings.
For unique layouts or creative table decor, consider shape considerations to make certain your placemats fit just right.
Selecting Fabric Size
Knowing your table size is just the start—now it’s time to make smart fabric choices.
To pick the right fabric size, consider these tips:
- Add room for Border Prints and trims.
- Account for Pattern Matching if using bold designs.
- Minimize Fabric Waste by planning cuts.
- Aim for Fabric Width suited for Multiple Placemats.
- Test different fabric types for flexibility.
Accounting for Seam Allowance
Think of seam allowance as giving your fabric a comfy pair of shoes—it needs room to move! Typically, a ½" seam allowance works best.
Use a quilting ruler for accurate measurements and scissors for clean lines. Consistent seams and bulk reduction are key, especially for corners.
Here’s a quick guide:
| Step | Tool | Tip |
|---|---|---|
| Mark seam line | Quilting ruler | Keep lines sharp and precise. |
| Cut fabric | Sharp scissors | Avoid jagged edges for neatness. |
| Clip corners | Small fabric shears | Reduces bulk for easier turning. |
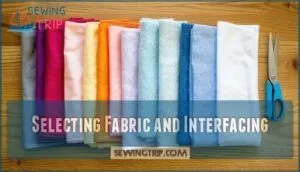
Selecting Fabric and Interfacing
Picking the right fabric and interfacing is key to creating placemats that look great and hold up to daily use.
Stick with durable natural fibers like cotton or linen, and choose a fusible fleece or medium-weight interfacing for the perfect balance of padding and structure.
Natural Fiber Fabrics
Natural fiber fabrics like cotton, linen, canvas, and chambray elevate your placemats with durability and charm.
Cotton’s reliability, linen’s texture, and canvas’s sturdy weight all work beautifully. Chambray adds a mix of versatility and style.
Fiber blends, especially cotton-linen, balance strength and softness. Fabric properties matter for the final product.
Natural fibers handle heat, are washable, and look stunning on any table, providing stunning results. You’ll love the results.
Quilting Cotton and Linen
Quilting cotton and linen are top picks for sturdy, good-looking DIY placemats.
Cotton’s durability and washability make it a go-to, while linen’s texture adds elegance. Blends offer the best of both.
Before sewing, try these:
- Colorfastness tests: Prevent surprises in the wash.
- Wash and press: Pre-shrink and smooth.
- Feel the fabric: Choose what feels great in your hands.
Fusible Fleece and Interfacing
To strengthen your placemats, fusible fleece and interfacing are your secret weapons.
Fusible fleece adds padding and heat resistance, while interfacing boosts fabric stiffness.
Lightweight fleece is perfect for cushioned texture.
Washability tests guarantee durability, and layering techniques combine structure with softness.
You can find a variety of fusible fleece options online.
| Fleece/Interfacing Use | Feature | Best For |
|---|---|---|
| Fusible Fleece | Heat Resistance | Placemats, pot holders |
| Medium-Weight Interfacing | Fabric Stiffness | Structured designs |
| Washable Interfacing | Durability | Everyday use |
Preparing Fabric and Interfacing
Before you start sewing, it’s important to get your fabric and interfacing prepped and ready.
Grab your scissors, fuse the layers together, and trim off any extra bits—it’s quick and totally worth it!
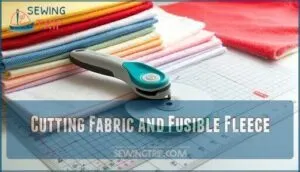
Cutting Fabric and Fusible Fleece
Grab your rotary cutter, self-healing cutting mat, and fabric.
Lay the fabric flat, aligning the fabric grain for straight cuts.
Place fusible fleece on top, considering fleece direction.
Use efficient cutting techniques to match your pattern placement perfectly.
A quality cutter guarantees precise fabric cuts.
Double-check measurements, then cut carefully for clean edges.
Precise cutting tools make all the difference in well-fitted, professional-looking placemats!
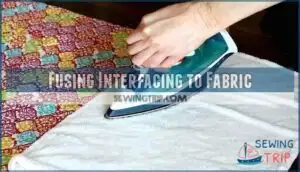
Fusing Interfacing to Fabric
Once your fabric and fusible fleece are cut, it’s time to fuse them. Set your iron to the proper fusing temperature, usually specified on the interfacing package.
Follow these steps:
- Place interfacing glue side down on fabric.
- Cover with a damp cloth.
- Press with steam.
- Hold for 10-15 seconds per spot.
- Check for bubbles and refuse if needed, ensuring a proper bond.
Trimming Excess Fabric
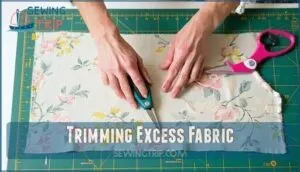
After sewing the fabric pieces together, grab your trimming tools.
Carefully trim the seam allowance to about 1/4 inch, especially near corners. Don’t forget corner clipping—it’ll reduce bulk and help those placemats lie flat.
Use a rotary cutter for straight edges, and pinking shears to prevent fraying. Precision here means smoother turning and a pro-level finish on your sewing machine!
Sewing Placemat Steps
Now it’s time to bring your placemats to life with some simple sewing steps.
Don’t worry—it’s mostly straight stitches, a little turning, and just enough corner clipping to feel like a pro!
Sewing Right Sides Together
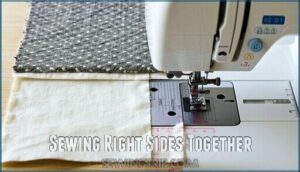
Lay your fabric pieces together, right-sides defined. Sew along the edges with a ½-inch seam allowance to keep things tidy and strong. To prevent puckering, go slow around corners—trust me, your DIY placemats will thank you!
- Align edges evenly.
- Stitch with the seam allowance.
- Pivot neatly at corners.
- Double-check for smooth seams, ensuring a strong and tidy finish.
Leaving a Turning Gap
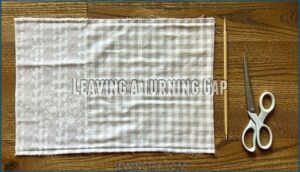
Leave a 5-6 inch opening along one edge to flip the placemat later—kind of like sneaking candy into a movie theater.
Keep this gap centered for easy handling during corner turning.
For durable seams, consider using the backstitch technique.
Use this table to guide your gap placement:
Pro tip: smaller mats might need tighter corners!
Clipping Corners and Turning
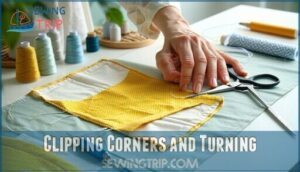
To reduce corner bulk, trim the seam allowance near each corner at a diagonal—just don’t cut the stitching.
Use sharp corner tools, like a chopstick or turning tool, to gently push the corners outward after turning the placemat.
This sewing tip helps beginners nail crisp, professional edges.
Adding Finishing Touches
Now that your placemats are sewn, it’s time to bring out their full potential with a polished finish.
A quick press and a careful once-over for any mistakes will make your handiwork look professional and table-ready!
Pressing Seams and Corners
Once you’ve sewn the seams, it’s time to press for a polished look! Grab your trusty iron and press the seams flat, paying special attention to the corners.
Trimming excess fabric before pressing prevents bulky corners—no one wants lumps ruining the smooth look! Use seam pressing techniques like pressing fabric toward one direction to keep things crisp.
For sharp corners, a turning tool helps shape them neatly. Pro tip: a pressing cloth can protect delicate fabrics.
This small step adds big impact, making your placemats table-ready and professional-looking!
Inspecting and Correcting Errors
Now that your seams are pressed, let’s check for any hiccups. Look closely for missed stitches or uneven edges—your seam ripper is your best friend here.
Spot fabric puckering? A few slow stitches on your sewing machine can fix that. Corners not as sharp as you’d hoped? Use a turning tool or gently pinch and re-sew.
To prevent future problems, verify proper thread tension on your machine. Don’t stress over little flaws; even pros face these!
These sewing tips and techniques are all part of learning and perfecting your craft, not redoing mistakes. Think of it as perfecting your skills over time.
Customizing Placemat Designs
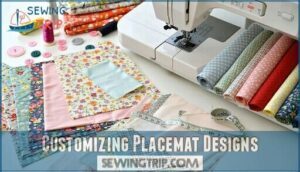
You can make your placemats truly yours by experimenting with reversible designs, seasonal patterns, or mixing fabrics.
Don’t be afraid to get creative—choosing unique fabrics and textures adds personality and makes your table pop!
Reversible Placemat Designs
Reversible placemats are twice the charm! By pairing dual fabric styles, you can create placemats for every occasion.
Think bold patterns for one side and soothing neutrals for the other—it’s like having two DIY placemats in one.
Use clean edge finishes and unique shapes to stand out. Experiment with color coordination to design your perfect reversible placemats pattern!
Seasonal and Themed Patterns
Seasonal and themed patterns bring your placemats to life with endless possibilities! Pick vibrant color palettes or whimsical motifs to match the holiday vibe.
Here’s how to make them special:
- Use appliqué accents for playful touches.
- Try embroidered details for upscale elegance.
- Align pattern placement for standout designs.
Consider adding floral cross stitch for a unique touch. Sewing for holidays and seasonal tables is where fun meets creativity!
Using Different Fabric and Interfacing Combinations
Mixing fabrics and interfacing can feel like blending flavors for a perfect recipe.
Choose fabric weights based on use, test washability, and match interfacing density for balance.
For heat resistance, try quilted cotton with insulated batting.
Play with texture combinations, like canvas tops with linen backs, for a polished look.
| Fabric Type | Interfacing Choice | Use | Benefits | Tips |
|---|---|---|---|---|
| Cotton | Fusible Fleece | Everyday placemats | Washable, soft | Prewash fabric to prevent shrinkage. |
| Linen | Medium-weight Interfacing | Elegant dinner settings | Durable, textured | Press fabric for seamless sewing. |
| Canvas | Light Fusible Interfacing | Children’s use | Stain-resistant | Make certain interfacing fits edge-to-edge. |
| Denim | Quilted Batting | Casual table settings | Thick, heatproof | Match thread with fabric weight. |
| Chambray | Fusible Fleece | Stylish modern look | Lightweight, soft | Use aligned grainlines for precision. |
Frequently Asked Questions (FAQs)
What kind of fabric do you use for placemats?
It’s funny how fabric choice can make or break placemats.
Stick with durable natural fibers like cotton, linen, or canvas.
They’re washable, sturdy, and perfect for daily use—think stylish meets practical!
What kind of batting do you use for placemats?
For placemats, use thin batting like fusible fleece for padding or standard quilting batting for softness.
It adds structure without bulk.
Avoid thick batting—it’s overkill and makes placemats awkward to use and wash, as it disrupts the softness.
What is the best interfacing for placemats?
Finding the perfect interfacing for placemats is like discovering your DIY soulmate – fusible fleece steals the show!
It adds padding, keeps things washable, and avoids stiffness.
Plus, it’s super beginner-friendly, and you’ll love it because it’s so beginner-friendly.
What type of fabric is best for placemats?
Go for durable, natural fabrics like cotton, linen, or canvas.
Cotton’s washable and heat-resistant, linen adds elegance, and canvas offers toughness.
Avoid stretchy options—placemats need structure.
Bonus points if the fabric’s stain-resistant too.
What is the best batting for hot plates?
For handling the fiery power of hot plates, you can’t go wrong with Insul-Bright.
It’s heat-resistant, easy to sew, and shields your table like a superhero cape.
Perfect for practical, durable placemats or hotpads.
How much seam allowance should be used when sewing placemats?
You’ll want a ½ inch seam allowance when sewing placemats.
It’s enough for durability without feeling bulky.
Just leave a small gap for turning, clip those corners carefully, and watch your edges look crisp and professional!
How do I prevent my fabric from fraying?
Keep your fabric from fraying by using pinking shears for a zigzag edge, applying Fray Check, or serging the edges.
You could also finish seams with a zigzag stitch—it’s easy and works wonders!
What is the best way to finish the edges of a placemat?
Think of finishing the edges like wrapping a gift—meticulous work makes all the difference.
Use a tight zigzag stitch or a serger for clean edges, or topstitch after turning for a crisp, polished look.
How do I clean fabric placemats effectively?
Toss fabric placemats in the washer on a gentle cycle with cold water, using mild detergent.
Air-dry or tumble low; skip the bleach to keep colors vibrant.
Stubborn stains? Spot treat with dish soap first!
What tools are essential for sewing placemats?
A needle’s like a compass guiding fabric journeys.
You’ll need fabric scissors, pins, a ruler, sewing machine, and iron.
Add interfacing and a turning tool for finesse.
Don’t forget patience—it’s your secret weapon!
Conclusion
Ready to transform your dining table with your own handmade placemats? Sewing placemats is a simple and rewarding project that lets you customize your space with colors, patterns, and textures you love.
By following these steps, from picking the perfect fabric to adding those polished topstitches, you’ll create functional and stylish table settings in no time.
Don’t be afraid to experiment with reversible designs or seasonal prints—make it uniquely yours! Now, grab your fabric and start sewing placemats!
- https://pages.applegreencottage.com/qsg-sewprettyhome-inline
- https://www.pinterest.com/pin/526710118922677646/
- http://tidd.ly/308208dd
- https://www.instagram.com/craftematics/
- https://arterahome.com/blogs/all/what-is-the-size-of-a-standard-placemat?srsltid=AfmBOooTHGWkGVnNPg5kcMj08hFKTy10e8Nqc1qs4GNy66Z33s2aNyvw

