This site is supported by our readers. We may earn a commission, at no cost to you, if you purchase through links.
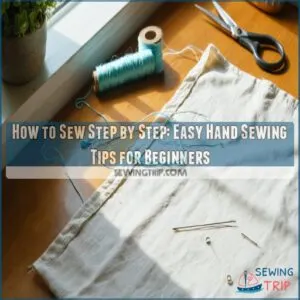 To sew step by step, start by gathering your essentials: a needle, thread, fabric scissors, pins, and a measuring tape.
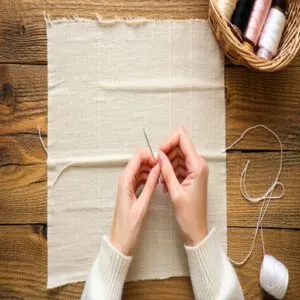
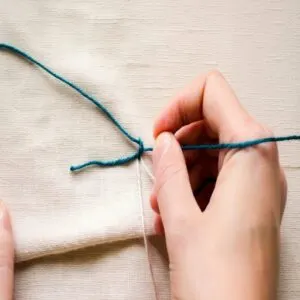
Thread your needle (yes, it can feel like threading a camel through the eye of a needle—patience helps!) and tie a small knot at the end.
For seams, begin with a simple running stitch—just weave the needle in and out of the fabric.
Need something sturdier? Try the backstitch for stronger seams.
Hemming? Use a whip stitch or blind hem for clean edges.
Practice on scrap fabric first—it’s like training wheels for sewing.
Ready for more? Let’s stitch things up!
Table Of Contents
Key Takeaways
- Gather essential tools like a needle, thread, fabric scissors, pins, and a measuring tape to prepare for sewing projects.
- Practice basic stitches such as the running stitch for simple seams and the backstitch for stronger, durable seams.
- Use techniques like the whip stitch for hemming or a blind hem stitch for invisible edges on clothing and fabric projects.
- Start with easy projects on scrap fabric, maintain consistent stitch length, and don’t worry about mistakes—they’re part of learning.
Gathering Supplies for Sewing by Hand
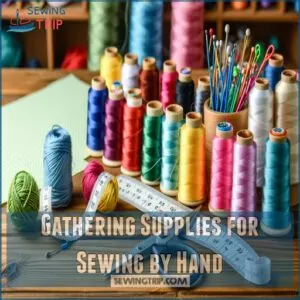
Starting your hand sewing journey? Let’s gather your sewing supplies! First, pick sewing needles that match your fabric—thicker ones for heavy fabrics, finer for delicate.
Choose thread types wisely; cotton works for wovens, while stretchy fabrics need stronger threads. Sharp fabric scissors are a must for clean cuts, and don’t forget a measuring tape for accuracy.
Add colorful pins, a trusty seam ripper, and a small container to keep your sewing kit tidy. With these sewing tools, you’re ready to create magic!
To maintain your workspace efficiently, consider implementing a sewing room organization system to keep all your supplies within easy reach.
Sewing a Seam by Hand
Sewing a seam by hand is easier than you think and doesn’t require fancy tools—just a needle, thread, and a little patience.
With a few simple stitches, you’ll be joining fabric like a pro in no time!
Running Stitch
You’re ready to tackle the running stitch, the bread and butter of hand sewing stitches.
Think of it like a sewing warm-up—simple, but key to mastering the basics.
- Fabric Choice: Start with cotton or linen for smooth practice.
- Stitch Length: Keep it consistent—shorter stitches handle curves like pros.
- Needle Selection: Use sharp needles for clean pierces.
Glide your needle in and out, like stitching a story—steady, even, and satisfying.
Mastering the running stitch tutorial is essential for any embroidery project.
Backstitch
Think of the backstitch as the superhero of hand sewing—it’s strong, reliable, and prevents fabric tearing.
To start, mark your line, thread your needle (no longer than a yard), and knot securely.
Push the needle in, then back slightly, creating overlapping stitches.
Keep your stitch length small and thread tension steady for a neat finish.
Anchor the thread with a few stitches at the end.
Mastering the backstitch technique is essential for creating durable seams.
This sewing step-by-step guide guarantees durability with every seam!
Hand Sewing a Hem
Hemming by hand might sound tricky, but it’s easier than you think with the right stitches.
Whether you’re fixing pants or shortening a curtain, you’ll feel like a sewing pro in no time!
Whip Stitch
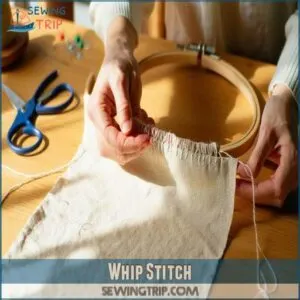
A whip stitch is perfect for hemming or joining fabric edges.
Keep your stitch tension even as you loop the needle through the fabric edge at a slight angle.
Here’s what to remember:
- Use matching thread color.
- Aim for consistent stitch length.
- Control your sewing speed.
- Knot securely at the end.
- Practice for smoother results.
To achieve professional results, mastering the whip stitch tool techniques is essential for beginners.
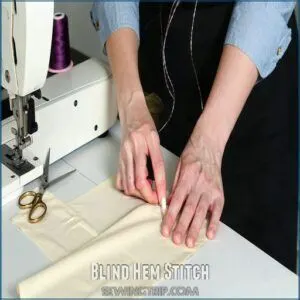
Blind Hem Stitch
The blind hem stitch is your go-to for invisible hems.
It’s all about precision: tiny stitches, even spacing, and snagging just a thread or two from the fabric fold.
Perfect for pants or skirts, this technique hides fraying edges like a charm.
| Step | Details | Tips |
|---|---|---|
| Fabric Folds | Double-fold raw edges neatly | Press folds for crisp lines |
| Stitch Length | Keep stitches small | Use tailor’s chalk for spacing |
| Sewing Notions | Match thread to fabric | Adjust thread tension for smoothness |
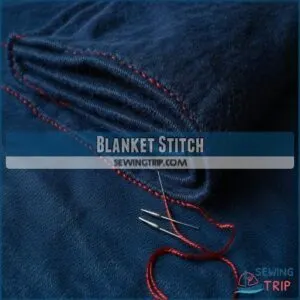
Blanket Stitch
The blanket stitch is a game-changer for edge finishing.
Whether you’re sprucing up a quilt or jazzing up fabric edges, this hand sewing technique is a must-learn.
Keep your stitch tension even, and match your thread color to your fabric choice for a polished look.
- Start 0.5 inches from the edge.
- Push the needle through the fabric.
- Loop the thread under the needle.
- Pull tight.
- Repeat evenly!
Practice, Practice, Practice!
Practice makes perfect—especially in sewing!
Get started with Sewing Drills to build confidence.
Grab scrap fabric and try stitching straight lines, corners, or even curves.
These Fabric Tests will sharpen your control and help you spot areas to improve.
Understanding sewing machine basics is essential for mastering various sewing techniques and projects.
Keep your stitches even and experiment with different seam allowances for precision.
Here’s a quick guide to practice ideas:
| Practice Task | Skill Focus |
|---|---|
| Stitch straight lines | Consistency and spacing |
| Sew along a fold | Edge control |
| Try round edges | Handling curves |
| Adjust seam allowances | Accuracy |
| Tighten loose stitches | Polished finish |
Repeat simple projects like pouches or cushion covers to master Stitch Mastery.
Set Sewing Challenges for yourself, like sewing faster or neater.
Each Project Repeat builds muscle memory and boosts confidence.
Stick with it—soon, you’ll breeze through any sewing tutorial!
Frequently Asked Questions (FAQs)
What are the basic steps in sewing?
Sewing’s like building a puzzle—start by threading your needle, knotting the thread, and aligning fabric edges.
Stitch evenly, keeping tension steady.
Finish with a secure knot, trim excess thread, and admire your handiwork!
How to do a stitch step by step?
Grab your needle and thread, knot the end, and pierce the fabric.
Pull through, repeat the motion in an over-and-under pattern, keeping stitches even.
Finish with a secure knot, you’ve got this!
Can I teach myself sewing?
Absolutely, you can teach yourself sewing.
Start small—learn basic stitches, practice on scrap fabric, and don’t fear mistakes.
With patience, YouTube tutorials, and a bit of trial and error, you’ll stitch like a pro!
How to sew with needle and thread for beginners?
Threading a needle is like lacing a tiny shoe—tricky but doable.
Knot the thread’s end, align fabrics, and sew with a simple over-under motion.
Keep stitches even, about ½ cm apart, for neatness.
How do I learn to sew?
Get started with sewing by mastering basic stitches like running and backstitch.
Grab simple tools—needle, thread, scissors—and start small with easy projects.
Practice patience; mistakes are part of the journey.
Soon, you’ll stitch like a pro!
How do I get started sewing?
Pick a simple project like a pillowcase or tote bag.
Gather basic tools—needle, thread, scissors, fabric.
Practice stitches on scrap fabric first.
Don’t stress mistakes—they’re just part of learning.
You’ve got this!
How do you start a sewing project if you’re a beginner?
Starting a sewing project feels like diving into a treasure hunt!
Choose a simple pattern, grab stable fabric like cotton, pre-wash it, and gather basic tools.
Follow instructions step-by-step—patience and practice make magic happen!
How do I learn hand sewing?
Hand sewing’s all about patience and practice.
Grab a needle, thread, and scrap fabric.
Learn basics like the running stitch or backstitch.
Keep stitches even, knot securely, and don’t sweat mistakes—they’re part of the process!
How do you hand sew a needle?
Don’t worry about threading frustrations—it’s easier than it looks.
Cut your thread at an angle, lick the end (yep, it works!), and guide it through the needle’s eye.
Patience and practice make you unstoppable.
How do I make a sewing kit?
Your sewing kit needs the basics—needles, thread, scissors, pins, a measuring tape, seam ripper, and a pincushion.
Toss in extras like fabric chalk or a thimble.
It’s like building your sewing superpower starter pack!
Conclusion
Learning how to sew step by step is like discovering a new superpower—you’ll conquer everything from torn seams to creative DIYs.
Start small, keep practicing those running stitches and backstitches, and don’t stress over mistakes (they’re just part of the process).
Each project is a chance to get better, soon enough, hemming and stitching will feel second nature.
So grab your needle, thread some patience, and get stitching—your skills (and confidence) will thank you!

