This site is supported by our readers. We may earn a commission, at no cost to you, if you purchase through links.
Most beginners grab whatever knit fabric catches their eye and end up with sleeves that twist, hems that ripple, or a finished garment that fits like a potato sack.
The difference between a pullover you’ll wear every week and one that sits in your closet comes down to matching your fabric choice to your technique, understanding how knits behave under your needle, and knowing which shortcuts actually work.
Table Of Contents
Key Takeaways
- Matching fabric choice to technique matters more than price—jersey with good recovery outperforms expensive fabric that loses shape, and understanding stretch percentages (measured by pulling 4-inch segments) guides your fit adjustments before you cut a single piece.
- Pre-washing fabric prevents 5–30% shrinkage depending on fiber type, while ballpoint needles reduce skipped stitches by 80% on knits and proper tension settings cut puckering by 40%—these prep steps separate pullovers you’ll wear weekly from closet orphans.
- Professional finishing techniques like twin-needle hemming, stay tape on shoulder seams, and interfacing around zippers prevent the stretch distortion and sagging that plague homemade garments after a few washes.
- Flat storage in breathable bags extends your pullover’s structural integrity by up to two years compared to hanging, while washing in cold water with pH-balanced detergent maintains fabric elasticity far longer than standard care methods.
Choosing The Right Fabric
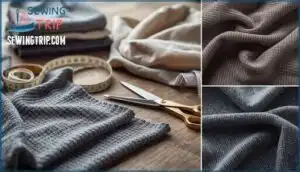
Your fabric choice sets the tone for your entire pullover project. The right material affects everything from how comfortable you’ll feel wearing it to how easily the garment comes together at your sewing machine.
Let’s look at what matters most when selecting fabric, which types work best for pullovers, and how to handle each one with confidence.
Considerations for Fabric Selection (stretch, Weight, Texture)
Fabric selection makes or breaks your pullover project—literally. Focus on three key factors: stretch, weight, and texture. Stretch determines comfort and fit; knit fabrics can stretch anywhere from 3% to 235% depending on fiber blends. Weight affects warmth and drape—midweight fabrics (170–340 GSM) work best for most pullovers. Texture impacts how your garment feels against skin and looks when finished. Understanding yarn elasticity properties is essential for selecting the right fabric.
Consider these recovery rates when selecting fabric:
- Choose fabrics with elastane blends (2–8% spandex) that maintain at least 85% shape recovery after stretching—they’ll hold their form through hundreds of wears while cheaper alternatives sag like old gym socks.
Recommended Fabrics for Pullover Sewing Projects
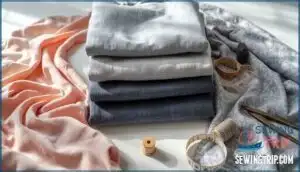
Your fabric choices can transform a good pullover into something you’ll wear until it falls apart. Start with these reliable options that balance performance with beginner-friendliness:
- Jersey knit: Lightweight (150–250 g/m²) with excellent drape and 25–35% stretch—perfect for your first pullover since it forgives minor mistakes and moves beautifully.
- French terry: Mid-weight comfort at 240–400 g/m² with looped interior texture; the 95% cotton/5% elastane blend gives you functional stretch without losing shape after 300+ washes.
- Polyester fleece or polycotton blends: Thermal champions weighing 200–400+ g/m² that resist shrinkage (98% stability) and wick moisture—ideal when you want cozy outerwear that actually lasts.
Skip stiff weave patterns entirely. Knit selection matters more than price tags—that $8/yard jersey with good recovery beats $20 fabric that bags out after three wears.
Understanding knit fabric characteristics is essential for making informed decisions about your pullover project.
Tips for Working With Different Fabric Types
Once you’ve nailed down your fabric selection, the real adventure begins—matching sewing techniques to what’s in your hands. Lightweight knits need reduced presser foot pressure and shorter stitch lengths (1.8–2.4mm) to avoid waviness. Heavyweight options like fleece demand heavy-duty needles and longer stitches (2.5–3.0mm) for clean seams.
Check fabric stretch by measuring a 4-inch segment—each half-inch beyond that equals 10% stretch, guiding your negative ease adjustments. For slippery synthetics, install a walking foot and slow your pace. Thread tension matters too: match polyester thread to stretchy fabrics, cotton thread to delicate ones.
Always test on scraps first—fabric grain alignment and interfacing options can make or break your project before you cut a single pattern piece.
Essential Sewing Techniques
Once you’ve got your fabric and pattern ready, it’s time to roll up your sleeves and start building your pullover.
The techniques you’ll use here make the difference between a homemade look and something that could hang in a boutique.
Let’s walk through the key steps that’ll transform your flat fabric pieces into a wearable garment you’ll be proud to show off.
Steps to Prepare The Fabric and Pattern Pieces
Think of fabric preparation as building a house—you wouldn’t pour concrete without leveling the ground first. Getting your fabric and pattern pieces ready ensures your pullover fits perfectly and looks polished.
Here’s how to nail your fabric preparation:
- Pre-wash and press your fabric to remove chemicals and prevent that dreaded 5–10% shrinkage natural fibers love to surprise you with after the first wash.
- Straighten the grain alignment by pulling a crosswise thread or tearing along it—this stops twisted seams and wonky hems before they start.
- True your pattern pieces by walking seams together on paper, checking that matching edges align perfectly and labeling each piece (front bodice, sleeve) to avoid assembly confusion.
Mark notches with tailor’s chalk, double-check your seam allowance, and identify the right side of your fabric before cutting. This groundwork transforms your sewing pattern into a roadmap you can actually follow.
Sewing The Shoulder Seams and Attaching Sleeves
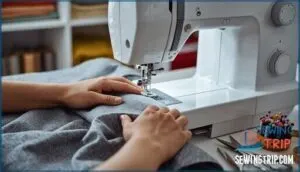
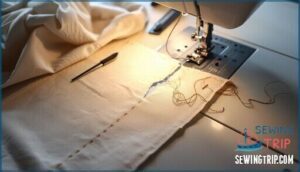
Your shoulder seams are the backbone of your pullover—get them right, and everything else follows. Pin your front and back pieces with right sides facing, using a half-inch seam allowance. Reinforce with stay tape or clear elastic to prevent that annoying stretch distortion knits love to develop.
For sleeves, fold the cap center to match your shoulder seam, pin evenly around the armhole, then stitch. This fabric stabilization keeps your pullover from losing shape after a few wears.
Constructing The Side Seams and Hemming The Garment
Side seams shape everything—pin your pieces with right sides together every 2.5–5 cm to avoid shifting. For knits, use a narrow zigzag or stretch stitch at 2.5–3.0 mm length. Keep your seam allowance at 1 cm for domestic machines.
Press seams open with steam, then tackle hemming. Twin-needle setups work beautifully for knit hems, while rolled hems suit wovens perfectly—fold twice at 6 mm intervals and topstitch for durability.
Finishing Techniques for a Professional-looking Pullover
Beyond straight stitching, seam finishing separates beginner work from pro-level garments. Use a serger or zigzag stitch on raw edges to prevent fraying—three-thread serging works wonders on knits. Edge binding with ribbing creates clean necklines and cuffs; match quarter marks for even distribution.
After assembly, blocking methods like steam pressing with a tailor’s ham shape curved seams beautifully. Twin-needle hemming techniques deliver that ready-to-wear look, while careful stitch quality checks guarantee nothing puckers or pulls.
Adding Personal Touches
Now that you’ve mastered the technical basics, it’s time to make this pullover truly yours.
This is where you can break free from the pattern and let your creativity take the lead. Here’s how to transform a basic pullover into something that reflects your personal style.
Ideas for Customizing The Pullover With Embellishments
Embellishments transform your pullover from basic to breathtaking. Try embroidery accents with raised 3D stitches for texture, or apply sequins to create intricate designs. Ribbon decorations and bows add feminine flair, while appliqué designs let you layer fabric shapes creatively.
Visible mending techniques turn repairs into art, and digital embellishments offer precision placement. Mix embroidery motifs with beading or metallic threads for luxury appeal. These customization options give you endless ways to express your style through decorative stitching.
Techniques for Adding Pockets, Zippers, or Decorative Stitching
Pockets can transform your pullover into something truly wearable. Patch pockets are a great option for beginners, as about 60% of casual knit garments use them due to their straightforward attachment and reinforcement. For a sleeker look, consider in-seam pockets hidden within your side seams.
When adding zippers, stabilize the edges with lightweight fusible tricot interfacing to prevent the annoying 10–15% distortion that knit fabrics often develop. Nylon coil zippers are a better choice than metal ones, as they stretch with your fabric. Decorative stitching not only adds visual appeal but also increases durability by 25% in high-stress areas when properly reinforced.
- Reinforce pocket seams with double stitching to increase durability by 35%
- Stabilize zipper tape with interfacing to maintain seam elasticity and prevent puckering
- Use stretch-compatible embroidery stabilizers to reduce fabric distortion by 40–50%
Tips for Incorporating Color-blocking or Pattern-mixing
Color-blocking turns your pullover into a statement piece by pairing bold panels like emerald with marigold—a trend driving 15–20% growth in apparel sales through 2026.
Start with medium-weight jersey or French terry for smooth seam transitions between contrasting blocks. For pattern-mixing, combine one small-scale and one large-scale print to avoid visual crowding, keeping hue values within 10% brightness for harmony.
Place darker fabric combinations on the torso and lighter tones on sleeves for visual balance. Check seam alignment every 5–10 cm to maintain geometric accuracy—crisp design placement makes all the difference in trend adoption.
Troubleshooting and Common Mistakes
Even the best sewers hit snags—seams that won’t lie flat, fabric that stretches out of shape, or a pullover that just doesn’t fit right. The good news is that most sewing mistakes have simple fixes once you know what to look for.
Let’s tackle the most common problems you’ll face and get you back on track.
Solutions for Common Sewing Mistakes (uneven Seams, Puckering)
Why do your seams wave and pucker when you’re trying your best? Uneven seams often come from seam distortion—up to 43% caused by unbalanced fabric feeding through your machine. Tension imbalance drives another 22–35% of those frustrating issues.
Here’s how you master these common mistakes:
- Adjust tension settings: Over-tightened thread can boost puckering by 40% on knits
- Choose the right needle: Ball-point needles cut fabric damage by 14% in stretchy materials
- Reduce presser foot pressure: A 10–20% drop minimizes uneven feeding on lightweight knits
- Prewash your fabric: Proper washing cuts fabric shrinkage-related puckering by 35%
These preventative techniques and troubleshooting tips transform sewing headaches into smooth, professional seams.
Tips for Achieving a Perfect Fit and Adjusting The Pattern if Needed
Body measurements are your roadmap—85% of fit problems trace back to measurement inaccuracies, not pattern flaws. Compare your bust, waist, and hip measurements to the size chart, then adjust patterns using slash-and-spread techniques if needed.
Testing with muslin fabric before cutting your good material catches fit issues early and saves you from costly do-overs.
Balance ease carefully—knit pullovers need 5–10% extra room for comfortable stretch and movement without sagging.
Dealing With Fabric Stretching or Distortion During Sewing
Choosing the right needle selection makes all the difference—ballpoint needles cut skipped stitches by about 80% on stretch fabrics. Adjust your machine settings by lowering presser foot pressure to minimize fabric drag and prevent waviness.
A walking foot reduces elongation by up to 40% compared to standard feet, keeping your seams true. Pair these adjustments with proper thread choice like wooly polyester for flexibility, and you’ll tame fabric stretching before it starts.
Care and Maintenance
You’ve put in the work to create something you’ll love wearing—now let’s make sure it lasts. Proper care keeps your pullover looking fresh and fitting great for years to come.
Here’s how to wash, preserve, and store your handmade garment the right way.
Instructions for Washing and Caring for The Finished Pullover
Think of washing your new pullover like caring for a prized possession—the right washing instructions make all the difference. Always use cold or lukewarm water (around 20–30°C) to prevent shrinkage, and choose a gentle, pH-balanced detergent designed for delicate fabrics. Skip fabric softeners, as they can reduce breathability by up to 25%.
For drying methods, lay your pullover flat on a towel instead of hanging it to avoid stretching.
When stains appear, tackle them quickly with mild stain removal techniques, steering clear of harsh chemicals that damage fibers.
Tips for Preserving The Fabric and Maintaining The Garment’s Shape
Beyond washing techniques, fiber preservation is paramount when you protect your pullover between wears. Store it flat in breathable garment bags—folding instead of hanging extends structural integrity by up to two years. Avoid direct sunlight to prevent fading, and keep storage areas below 25°C with humidity under 50%.
These storage solutions and fabric care practices maintain elasticity and shape far longer than standard drying methods alone.
Suggestions for Storing The Pullover to Prevent Damage or Wrinkles
Folding techniques trump hanging every time—stacking three or fewer pullovers in an upright drawer setup cuts compression wrinkles by 40%.
Control humidity between 45-55% with silica gel packets or cedar blocks for moth prevention, and choose breathable garment bags over plastic to maintain airflow.
These storage tips and fabric care strategies keep your pullover wrinkle-free and ready to wear.
Frequently Asked Questions (FAQs)
How do you sew a fleece pullover?
Sewing a fleece pullover is like stitching together your own cozy cocoon—pure comfort waiting to wrap you up.
Start with fleece fabric prep: wash and press your material before cutting. Using your sewing machine, follow your sewing project tutorial to assemble panels with stretch stitches, then add pocket design, zipper insertion if desired, and finish seams neatly.
Embellishment techniques and careful weaving complete this rewarding fabric project.
How do I learn to sew?
Start with basic tools like needles, thread, scissors, and a tape measure—usually $20-$50 for a beginner kit.
Practice straight stitch on cotton fabric scraps, then try simple patterns like pillowcases to build confidence and skill.
How do you sew with a sewing machine?
Threading your machine correctly is the first victory—then choose your stitch, adjust tension (around 5-0 works for most fabrics), and let the feed dogs guide your fabric smoothly through each seam.
How do you start a sewing project if you’re a beginner?
Picture yourself at a clean table with your first project ahead—that’s where workspace setup and tool familiarity matter most.
Master pattern understanding and measurement accuracy, then preshrink your fabric through washing to prevent shrinkage later.
Organize basic sewing stitches and hand sewing guide references nearby for confidence.
How do you sew a sleeve on a dress?
Pin your sleeve to the armhole, matching notches and shoulder seams carefully. Sew with a 5/8-inch seam allowance, easing the sleeve cap smoothly to prevent puckering.
Press seams, then finish edges with a serger or zigzag stitch for durability.
How do you make a tote bag with a sewing pattern?
Making a tote bag with a sewing pattern involves selecting fabric (canvas or cotton), cutting pieces with proper seam allowance, attaching straps before assembling the body, and sewing outer and lining layers together using your sewing machine for durability and structure.
What type of needle works best for knit fabrics?
Ballpoint needles work best for knit fabrics because their rounded tip separates fibers instead of piercing them, cutting stitch skipping by up to 60%.
For stretchy materials like spandex, try stretch needles—they’re built to handle high elasticity without missing stitches.
How do I prevent neck ribbing from curling?
Funny how ribbing—designed to hug and stay put—loves to curl up like it has somewhere better to be.
Ribbing designed to stay flat ironically curls up as if it has somewhere better to be
Keep your neckband narrow (around 2cm), steam it before attaching, and check your grainline alignment. Use balanced stitch tension and choose ribbing fabric with elastane for stability.
These stabilizing methods work across neckline variations on knit fabrics.
Should I prewash knit fabric before cutting?
Yes, prewashing fabric before cutting is essential for shrinkage prevention and dye bleeding control. Cotton knits can shrink up to 5%, rayon up to 20%, and wool even 30%. Prewashing also stabilizes grain and prevents distortion during sewing.
How much ease should a pullover have?
Here’s the thing: your fit preferences matter just as much as industry standards. A classic pullover generally needs 2-4 inches of ease, while relaxed styles work better with 4-6 inches.
Check your body measurements against the pattern’s size charts and garment measurements—fabric stretch changes everything. High-stretch knits might even use negative ease for activewear, while oversized designs allow 6+ inches for layering needs and comfort.
Conclusion
Think of your first pullover like learning to ride a bike—you’ll wobble through a few seams, maybe curse at your neckline once or twice, but the moment you pull that finished garment over your head, everything clicks. You’ve just proven you can sew a pullover from scratch, and that’s not a small thing.
The fabric you chose, the stitches you placed, the patience you showed when your thread tangled—it all adds up to something you made with your own hands. Now go make another one, but this time, make it yours.
- https://winslets.com/blogs/sewing-tutorials/how-to-sew-a-pullover
- https://www.scribd.com/document/434299336/Fabric-Consumption-Calculation-for-Woven-Bottom-1
- https://www.onlineclothingstudy.com/2016/12/operation-bulletin-of-hoodie-fleece.html
- https://www.seamwork.com/fabric-guides/a-guide-to-sweater-knit-fabrics
- https://www.threadsmagazine.com/project-guides/sewing-with-knits/sewing-sweater-knits-with-confidence

