This site is supported by our readers. We may earn a commission, at no cost to you, if you purchase through links.
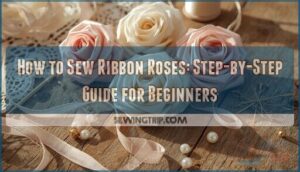
You don’t need expensive flowers to create something beautiful. A single satin ribbon and some basic sewing skills can transform into an elegant rose that lasts forever.
These handmade blooms won’t wilt, they cost pennies to make, and you can craft them in any color you need for your project. The technique looks complicated, but it breaks down into simple folds and gathering stitches that even beginners can master.
Once you learn the basic method, you’ll find yourself stitching ribbon roses for everything from wedding bouquets to hair accessories. The real secret lies in choosing the right ribbon and understanding how those gathering stitches create natural-looking petals.
Table Of Contents
- Key Takeaways
- Essential Supplies for Sewing Ribbon Roses
- Choosing The Best Ribbon for Roses
- Measuring and Cutting Your Ribbon
- Preparing and Shaping The Ribbon
- Sewing The Ribbon Rose Petals
- Assembling and Securing The Ribbon Rose
- Adding Stems and Finishing Touches
- Creative Uses for Handmade Ribbon Roses
- Frequently Asked Questions (FAQs)
- Conclusion
Key Takeaways
- Satin and grosgrain ribbons work best for making roses because they hold their shape well, while wired edges, organza, and printed designs should be avoided since they create problems with fraying and unnatural appearance.
- You’ll need 1 to 2 yards of ribbon per rose, and the ribbon’s width directly determines the finished flower size—a 1.5-inch ribbon typically creates a bloom about twice that width.
- The technique relies on gathering stitches along the ribbon edge to create natural-looking petals, with doubled thread and consistent stitch spacing of 1/4 to 1/2 inch ensuring the rose holds together securely.
- These handmade ribbon roses cost pennies to make, never wilt, and work perfectly for wedding bouquets, hair accessories, gift toppers, and home decor that lasts indefinitely.
Essential Supplies for Sewing Ribbon Roses
You don’t need much to make beautiful ribbon roses, but the right supplies make all the difference. Think of it like baking—you can’t whip up a cake without flour and eggs.
Let’s walk through what you’ll want to have on hand before you start creating your first blooms.
1. Satin Ribbon Assortment Pack
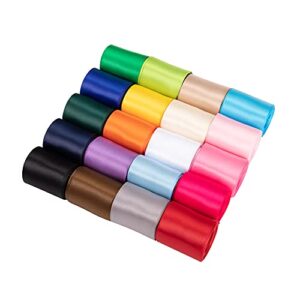
A solid satin ribbon assortment pack puts everything you need in one place. Look for packs with 10 to 24 different ribbon colors so you can create coordinated bouquets without buying separate spools.
The UnionJoy pack offers 20 colors of 1.5-inch wide satin ribbon, with 2 yards per color—that’s 40 yards total for your DIY ribbon roses. You’ll love the smooth satin texture that folds beautifully into petals.
These assortment packs give you flexibility to experiment with ribbon widths and shades while keeping your craft supplies organized and budget-friendly.
Best For: Crafters who want a wide color variety for making ribbon roses, hair bows, and decorative projects without buying individual spools.
- 20 different colors in one pack give you plenty of options for coordinated bouquets and multi-color designs
- 1.5-inch width works perfectly for medium to large ribbon roses with visible, layered petals
- 100% polyester material holds folds well and resists fraying, making it easier to shape petals that stay in place
- Ribbon may arrive with creases that need ironing or steaming before use
- 2 yards per color might not be enough if you’re making large batches of roses in the same shade
- No instructions included for removing folds or specific flower-making techniques
2. Silver Plated Copper Jewelry Wire
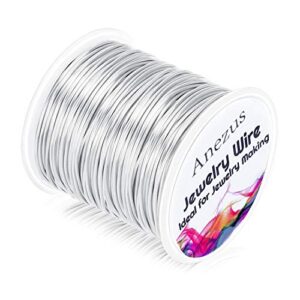
Your ribbon roses need sturdy stems that bend without breaking. Silver plated copper jewelry wire delivers exactly that—20 gauge wire at 0.8mm diameter holds its shape through twists and curves while staying flexible enough for delicate adjustments.
You’ll get 28 yards per spool, enough for dozens of stems. The silver plating resists tarnish better than bare copper, keeping your finished roses looking polished.
Grab your wire cutters and bend a length into a gentle arc—you’ll feel how this material reacts to your touch without snapping.
Best For: Crafters making ribbon roses, beaded jewelry, or floral arrangements who need bendable wire that holds shape without constant re-adjusting.
- 28 yards gives you plenty of length for multiple projects without running out mid-creation
- Silver coating resists tarnish better than bare copper, so your finished pieces stay shiny longer
- 20 gauge thickness hits the sweet spot—strong enough to support flower stems but flexible enough for detailed wire wrapping
- Snaps if you pull too hard or grip it wrong with pliers, so you’ll need a gentle hand
- Black coating can rub off and leave marks on your fingers or beads if you handle it a lot
- Copper underneath may react with skin oils and cause green discoloration over time
3. Satin Ribbon Assorted Color Pack
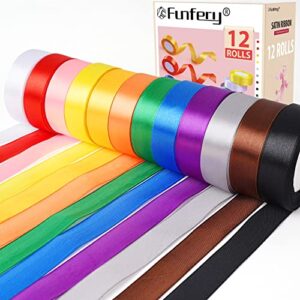
With your wire ready, choose a color palette that brings your vision to life. A 12-color assorted pack gives you creative freedom without buying individual spools. Look for 1-inch wide satin ribbon—it’s perfect for standard-sized ribbon roses and ribbon flower arrangements.
Quality matters here. Polyester satin texture holds folds beautifully while staying soft enough for DIY crafting. You’ll find eco-friendly options made from recycled materials, costing slightly more but worth it for sustainable ribbon crafting. Each roll generally contains 25 yards—plenty for multiple projects.
Best For: Crafters who want color variety for ribbon roses, gift wrapping, and party decorations without buying individual spools.
- 12-color assortment with 25 yards per roll gives you 300 total yards to experiment with different projects
- Soft polyester satin holds folds well for ribbon flowers while staying machine washable and durable
- At under $15 for most packs, you get great value compared to buying single-color rolls separately
- Ribbon can be thin and floppy, which some crafters find frustrating for structured projects
- Factory cuts sometimes appear mid-roll, and edges may unravel if you don’t seal them after cutting
- Colors can look different under various lighting, so what you see online might not match exactly what arrives
4. High Quality Cutting Scissors Tool
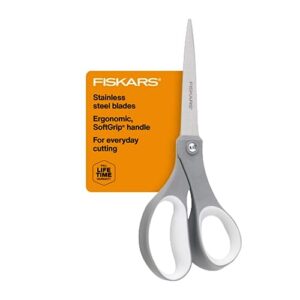
Your scissors make or break every petal. Choose an 8-inch stainless steel model with titanium coating—it stays sharp through hundreds of cuts and resists sticky residue from glue. Ergonomic grips reduce hand fatigue during extended ribbon crafting sessions. Look for SoftGrip touchpoints that let you work comfortably for hours.
Professional-grade blades slice cleanly through satin without fraying edges, giving you precision cutting every time. Regular scissor maintenance keeps blade sharpness intact.
Quality scissors transform DIY crafting from frustrating to satisfying, especially for crafting beginners mastering ribbon roses.
Best For: Crafters, quilters, and DIY enthusiasts who need reliable, comfortable scissors for cutting fabric, ribbon, paper, and other lightweight materials during extended crafting sessions.
- Titanium-coated stainless steel blades stay sharp through hundreds of cuts and resist sticky residue from glue and adhesives
- SoftGrip ergonomic handles reduce hand fatigue and provide excellent control during long crafting projects
- Clean, precise cuts through satin, ribbon, and multiple fabric layers without fraying edges
- Not designed for heavy-duty applications or cutting thick materials like metal or industrial textiles
- Pivot screw may loosen over time with regular use and require occasional tightening
- Blades will eventually need sharpening or maintenance to maintain peak cutting performance
5. Gorilla Mini Hot Glue Gun Kit
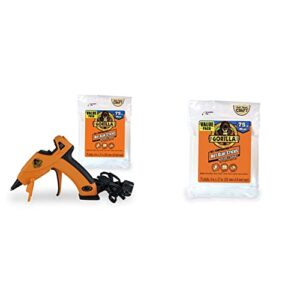
Precision matters when securing petals together. The Gorilla Mini Hot Glue Gun Kit delivers dual temperature settings—low for delicate satin and high for firm bonding techniques. It heats in five minutes and includes 75 mini hot glue sticks for countless ribbon roses.
The insulated nozzle protects your fingers, while the comfort grip reduces hand strain during extended DIY crafts sessions. Glue gun safety features like the built-in stand prevent accidents.
This tool transforms ribbon crafting techniques from tedious stitching to quick, professional results with craft adhesives that hold beautifully.
Best For: Crafters who need precise control and versatility for both delicate materials like ribbon and fabric, and stronger bonds on wood or plastic projects.
- Dual temperature settings let you switch between gentle applications for silk flowers and powerful adhesion for heavier materials without changing tools.
- Heats up in just five minutes and includes 75 glue sticks, so you can start your project quickly and work for hours without restocking.
- Safety features like the insulated nozzle and comfort grip make extended crafting sessions less tiring and protect your hands from burns.
- Requires about two glue sticks just to get the initial flow going, which feels wasteful when you’re starting a quick repair.
- Won’t work if you accidentally use the wrong size glue sticks, and a blown internal fuse means the whole gun might be done for.
- Must be fully unplugged and cooled before storing, which adds wait time when you’re cleaning up after a project.
Choosing The Best Ribbon for Roses
The ribbon you choose makes or breaks your rose. Some ribbons hold their shape beautifully while others just fall flat or feel too stiff to work with.
Let’s look at which types work best, what to skip, and how width and color play into your finished flower.
Recommended Ribbon Types (Satin, Grosgrain)
You’ve got two champions in ribbon crafting techniques: satin and grosgrain. Satin ribbon delivers that luxurious satin finish—it’s smooth, shiny, and perfect for elegant DIY ribbon rose projects. Grosgrain ribbon brings serious grosgrain benefits with its ribbed ribbon texture and enhanced ribbon durability.
In any material comparison, satin wins for beauty while grosgrain takes the prize for structure. Both create stunning ribbon roses. Understanding the differences between ribbon types is essential for selecting the right material for your project.
Ribbons to Avoid for Flower Making
Not all ribbons will give you those gorgeous, professional-looking blooms. Some materials simply won’t cooperate. Skip these problem ribbons to save yourself headaches:
- Low Quality Ribbons with synthetic materials melt when you apply glue or heat.
- Wired Edges create unnatural kinks and resist smooth curves.
- Delicate Fabrics like organza fray immediately and let glue seep through.
- Printed Designs show backwards on half your petals.
- Ribbons narrower than one inch collapse during assembly.
When choosing a ribbon, consider the latest eco friendly trends to guarantee the best results.
How Ribbon Width Affects Rose Size
Your ribbon width determines the entire scale of your rose. Narrow ribbons under 1/4 inch create delicate miniatures barely an inch across, perfect for ribbon embellishment ideas on tiny projects.
Medium widths between 1/2 to 1 inch produce balanced 1.5 to 2-inch blooms with nice petal layering.
Wide ribbons over 2 inches generate dramatic statement roses exceeding 4 inches—the ribbon thickness directly controls flower proportion and visual effects in your DIY ribbon rose.
Selecting Colors and Patterns
Think of color psychology as your secret tool—pastels evoke calm in 58% of gifters, while deep burgundy defines autumn elegance. Pattern trends favor florals and metallics, driving 57% of grosgrain ribbon purchases.
Silk ribbon shines in seasonal hues like spring blush or winter velvet. Fabric ribbon textures add dimension, and customization options let you match any vision perfectly in your ribbon roses.
Measuring and Cutting Your Ribbon
Getting your ribbon cut to the right length makes all the difference in how your rose turns out. You’ll need about 1 to 2 yards of ribbon for a standard bloom, though the exact amount depends on your ribbon’s width and how full you want your flower.
Let’s walk through how to measure accurately and cut clean edges every time.
Determining Ribbon Length for Each Rose
You’ll need 1 to 2 yards of ribbon for each DIY ribbon rose—that’s the sweet spot for most projects.
Ribbon width directly affects rose size and fullness control: wider ribbons demand longer lengths for proper petal formation. A 1.5-inch ribbon usually creates a bloom twice its width.
For smaller flower-making techniques, start with 24 inches; larger ribbon craft designs may need up to 72 inches.
Measuring Tape Tips for Accuracy
Now that you know your ribbon length, let’s nail down those measurements. Keep your flexible tapes flat against the ribbon—any creases can throw off accuracy by up to 5%. Measure twice before you cut; this simple habit slashes measurement errors by 80% in ribbon craft projects.
Light tension is key—pulling too hard expands the tape and distorts your DIY ribbon rose dimensions. Regular tape calibration ensures precision across every flower you create.
Cutting Techniques for Clean Edges
Sharp tools make all the difference. Professional-grade scissors stay sharp for up to 500 cuts with satin and grosgrain ribbon. Dull blades create 36% more fraying, so keep yours honed.
Here are five cutting techniques for clean edges:
- Cut at 45° angles—reduces fraying by 63%
- Try V-cuts with heat sealing for 80% less fray
- Use serrated edges on slippery satin
- Cut one layer at a time for precision
- Apply light pressure to avoid crushing your ribbon
Preparing and Shaping The Ribbon
Before you start sewing, you need to get your ribbon ready. This stage transforms flat ribbon into something that looks like real petals.
Let’s walk through the three simple prep steps that’ll give your rose its beautiful shape.
Folding Ribbon for Petal Formation
Folding shapes your petals and brings your ribbon roses to life. Start with a 90-degree diagonal fold at the ribbon’s midpoint—this creates the crisp petal edges you’ll see in most flower-making techniques.
Meet both ends after folding backward to form a “house shape,” a cornerstone of DIY methods for beginners. This fold technique controls ribbon curvature, petal alignment, and rose shaping in one simple motion.
Burning Edges for a Neat Finish
Once your petals are folded, heat sealing prevents fraying and gives your ribbon roses a polished, professional look. Hold a lighter 3 millimeters from the cut edge for 1–2 seconds—polyester and satin ribbons melt into a smooth bead that locks fibers in place.
This simple DIY method boosts seal integrity and edge finishing, turning beginner crafting into ribbon embellishments that last.
Creating The Center of The Rose
Your first tight roll sets the entire rose in motion. Begin with a 45–60° fold, then wrap 3–4 firm coils around your fingertip—this compact bud anchors everything that follows. Secure each turn with a stitch or hot-glue dot every 1–2 centimeters. Master these bud techniques and your ribbon rose blooms naturally:
- Roll the first 10–15 centimeters into a cylinder for center formation.
- Keep constant tension so petals don’t collapse during petal assembly.
- Stitch or glue at 5–10 millimeter intervals for stability in flower making techniques.
That tiny bud? It’s your foundation for floral details and crafting for beginners success in ribbon rolling.
Sewing The Ribbon Rose Petals
Now comes the heart of your ribbon rose—sewing the petals together. This is where your ribbon transforms from flat strips into something that looks alive and blooming.
You’ll use simple gathering stitches to create the folded, layered petals that give your rose its signature shape.
Gathering Stitches for Petal Attachment
Gathering stitches are your secret weapon for petal gathering in ribbon roses. Thread your needle with doubled thread to prevent breakage when you pull tight.
Stitch about 1/4 inch from the ribbon’s edge using running stitches between 1/4 to 1/2 inch long. Keep your stitch length consistent for even ribbon tension.
Pull the thread taut, then knot twice to hold gathered layers securely during flower assembly.
Sewing The First Petal
Start your ribbon rose by folding the ribbon end at a 60-degree angle. Roll this folded section three to four times to create a tight center tube. Secure it with a knot, using doubled polyester thread for strength.
Your stitch spacing should stay around 2 to 4 millimeters to control petal formation without puckering. This foundation determines your entire rose’s shape.
Adding and Shaping Additional Petals
Now you’ll build your ribbon rose layer by layer. Fold six ribbon squares into cone shapes for your first petal layering ring. Use gathering stitches at each base, then pull tight to form your outer layer.
Add seven petals for the second ring, overlapping slightly for natural rose shaping. Curl upper edges with a bamboo skewer for petal curling.
Finish with five inner petals for flower fullness, creating stunning handmade gifts through creative projects in flower making.
Assembling and Securing The Ribbon Rose
Now comes the moment where your petals transform into an actual rose. You’ll connect everything together and lock it all in place so your flower holds its shape.
Let’s walk through the steps to build and secure your ribbon rose from center to finish.
Attaching Petals to The Center
Your rose comes alive when you connect each petal to the center with intention.
Here’s how to master petal alignment and secure attachment:
- Mark the center point on your rose base to guide symmetrical placement and maintain even ribbon tension throughout.
- Space petals at 72-degree intervals for five-petal roses, overlapping each by 20-30% of their width.
- Gather stitches 1/4 inch from each petal’s base edge before attaching to the center formation.
- Layer concentrically with three rings, reducing each diameter by 40% for natural depth.
Using Thread or Glue for Security
You’ll secure your ribbon roses with either thread or hot glue—each method brings distinct bond strength and adhesive types to weigh. Thread durability wins for washable projects: polyester seams hold 2.7 MPa, outlasting most glue by 30 washes.
Hot glue speeds your crafting techniques, but glue limitations include sun degradation and silk seepage.
For secure attachment on DIY roses, match your method to the rose’s final use.
Adding Filler Petals for Volume
Once your base is secure, you’ll boost rose fullness with filler petals—those extra layers that make flower making truly sing. Tack 7 to 10 filler petals around your center using small stitches at the base, creating petal volume that increases diameter by 20–35%.
Alternate left and right for layering methods that deliver texture effects and balanced coverage.
Velvet ribbon adds 13% more tactile richness than satin in your DIY roses.
Adding Stems and Finishing Touches
Your ribbon rose is nearly complete, but it’s the final details that bring it to life. Adding leaves gives your rose a natural, garden-fresh look, while a little shaping creates dimension and character.
Let’s walk through these finishing touches that transform ribbon into something truly beautiful.
Creating Leaves for Realism
Leaves bring your DIY ribbon roses to life. Start with green satin ribbon, as it’s used in over 85% of floral arrangements for its shine and flexibility. Cut strips about 2.5 to 5 cm wide, then heat seal the edges to prevent fraying. Use a lighter or clear nail polish to seal carefully.
For realistic details, fold the ribbon diagonally to create leaf veining. You can even twist the sealed edges for natural curves. Attach leaves to your wire stem with hot glue at a 45-degree angle. This leaf shaping technique transforms simple ribbon into convincing foliage for your handmade crafting projects.
Shaping The Finished Rose
After your leaves are in place, give those petals some attention. Floral finishing is where your crafting truly shines. Gently lift and separate each ribbon rose layer, aiming for 2–3 mm spacing between petals—this creates the most lifelike appearance. Fluffing increases volume by about 35%, so don’t skip it.
Use your fingertips for petal shaping, curling edges outward to mimic real blooms. Ribbon curling adds dimension to your fabric ribbon flowers. For flower enhancement, adjust the outer petals first, then work inward. This final step transforms flat ribbon roses into stunning DIY décor ready for any project.
Creative Uses for Handmade Ribbon Roses
You’ve created beautiful ribbon roses—now it’s time to put them to work.
These handmade flowers open up a world of decorating possibilities for your home, wardrobe, and gift-giving. Let’s explore the most popular ways to showcase your new creations.
Home Decor and Floral Arrangements
Your handmade ribbon roses shine in home styling and seasonal decor. Tuck them into wreaths or centerpieces to capture floral trends without wilting.
Use floral tape to secure stems in vases for permanent arrangements. These DIY projects transform mantles, tables, and entryways with homemade decorations that cost less than fresh blooms.
Ribbon crafts like these bring handmade decor and DIY home decor charm to any room year-round.
Hair Accessories and Fashion Embellishments
Your ribbon roses enhance daily hair styling with handmade decorations that reflect fashion trends and accessory design. Sew them onto barrettes or headbands using matching thread for a secure, washable finish—a technique celebrity influence has popularized on social media.
- Choose ribbon colors that complement your wardrobe and personal style.
- Attach decorative flowers directly to clips, hair combs, or elastic bands.
- Layer multiple ribbon roses for statement-making hair accessory making projects.
Gift Toppers and Special Occasion Decor
Your handmade ribbon roses transform gift wrapping and special occasion decor with unique touches that stores can’t match. Sew them onto presents for weddings, birthdays, or seasonal decor that reflects current floral trends—satin roses in jewel tones or metallics enhance event themes beautifully.
These decorative flowers work as wedding favors, homemade gift accents, or party embellishments that show thoughtfulness in gift giving.
Frequently Asked Questions (FAQs)
Can I use any type of ribbon?
Not all ribbons work well—satin and grosgrain are your best bets. They hold shape beautifully. Skip wired or silk options, though.
Eco-friendly ribbons offer sustainable fabric selection, while heathered varieties add texture to your ribbon posies.
What size ribbon should I use?
Start with widths between 5 and 1 inch for easier handling. Your finished rose diameter will be roughly twice your ribbon width—so a 25-inch ribbon creates a 5-inch bloom.
Do I need a needle and thread?
Yes, most traditional Sewing Techniques require needle and Thread Options for gathering petals. However, Glue Alternatives work well for Craft Projects.
Sewn roses offer better Rose Durability for Handmade Crafts and Homemade Gift Ideas.
Whats the best way to secure my rose?
Thread stitching offers the strongest hold—your ribbon rose will last nearly four years with proper backstitching.
Combine hot glue with thread for wearable pieces, since this hybrid approach boosts durability by 17% over single methods.
How do I make the petals curve?
Gentle coaxing brings life to flat fabric. Try curling petals with closed scissor blades dragged along the edge, or fold outward before rolling.
Heat shaping and gathering stitches also create natural curves in ribbon roses.
Can you wash items with sewn ribbon roses?
Hand wash your ribbon roses in cold water with mild detergent to preserve their shape and color. Skip the machine—it causes fraying and distortion.
Air dry flat, away from direct sunlight, for best results.
How long does one ribbon rose take to make?
Your crafting speed determines construction time. Basic ribbon roses take 5-10 minutes for beginners, while experienced makers finish in 2-4 minutes.
Rose complexity and folding techniques affect duration—simpler DIY decor projects work faster than intricate creative projects for beginners.
What thread color works best for ribbon roses?
Matching matters most—select shades slightly darker than your satin or grosgrain ribbon for invisible seams.
Neutral tone options like beige, grey, or navy blend beautifully with heathered ribbons, while contrast management keeps visible stitching effects minimal.
How do you store finished ribbon roses properly?
Store your ribbon roses in sealed, acid-free containers away from direct sunlight and moisture. Keep humidity levels between 45-65% and temperatures steady.
This prevents fading, mold, and keeps your handmade gift beautiful for years.
Can ribbon roses be made without any sewing?
Yes, you can absolutely create ribbon roses without sewing. Over 80% of recent tutorials showcase no-sew techniques using folding methods and adhesive options like hot glue, making beautiful ribbon flowers accessible for everyone.
Conclusion
You’ve gathered your stitches, shaped your petals, and watched flat ribbon transform into something dimensional and alive. That’s the magic of knowing how to sew ribbon roses—you’re never just crafting flowers, you’re building skills that open doors to endless creative projects.
Each rose you make will come together faster and look more natural than the last. Pick up your needle, choose a ribbon that speaks to you, and start creating blooms that will never fade.

