This site is supported by our readers. We may earn a commission, at no cost to you, if you purchase through links.
 You’re about to learn how to sew a meri blouse. Start by gathering essential supplies and choosing a suitable fabric.
Measure and cut your fabric accurately, then lay out your pattern pieces. You’ll sew basic seams, attach sleeves and cuffs, and add buttons and buttonholes.
As you work on assembling the blouse, you’ll discover tips to make it fit perfectly, and that’s just the beginning of creating your unique meri blouse.
Table Of Contents
Key Takeaways
- You’ll start by gathering essential supplies, like a sewing machine and high-quality thread, to ensure a smooth sewing process for your meri blouse.
- To guarantee a great fit, you’ll take accurate body measurements and choose the right fabric, considering factors like weight, fiber content, and drape quality.
- You’ll learn how to sew basic seams, attach sleeves and cuffs, and add buttons and buttonholes, using techniques like blind hemming and rolled hems to achieve a professional finish.
- As you assemble your meri blouse, you’ll discover tips for customizing it to fit your style, including adding embellishments like beads and sequins, and making adjustments for a flawless fit.
Sewing Meri Blouse Basics
You’re about to learn the basics of sewing a Meri blouse, starting with essential supplies and fabric selection.
Learn the basics of sewing a Meri blouse with essential supplies and fabric selection
You’ll discover how to choose the right fabric, measure, and cut it accurately to guarantee a great fit and a professional-looking finish.
Essential Sewing Supplies
You’ll need a sewing machine, fabric, measuring tape, scissors, and pins to start.
Choose high-quality thread and cutting tools for accuracy. Measuring accuracy is vital, and various pin varieties will help.
A reliable machine can be found at sewing machine retailers. Gather these essential sewing supplies to guarantee a smooth sewing process for your Meri Blouse.
Choosing The Right Fabric
You’re selecting fabric for your Meri Blouse. Consider fabric weight, fiber content, and drape quality.
Lightweight fabrics like cotton or silk are ideal. Check colorfastness and print scale to guarantee a beautiful blouse fabric guide for your project, making fabric selection a breeze.
You can find various blouse materials online, which helps in choosing the right fabric for your needs, ensuring a beautiful blouse.
Measuring and Cutting Techniques
Take accurate body measurements using a measuring tape to guarantee a perfect fit.
Lay out pattern pieces, considering seam allowance, and cut fabric with precision, making necessary pattern adjustments for a flawless Meri Blouse.
Accurate measurements, including understanding pattern measurements, are vital for achieving the desired fit.
Cutting precision is key to a professional finish, so use sharp tools and follow your pattern carefully.
How to Sew Meri Blouse
So, you wanna sew meri blouse? It’s easier than you think! Think of it as a fun project. The meri blouse pattern is your guide.
Sewing a Meri blouse is a fun and rewarding project
This blouse sewing tutorial will help you.
- Understand the meri blouse history.
- Explore blouse variations.
- Find good fabric sourcing.
- Use styling tips.
Pattern adaptation is key. Follow the how to sew blouse steps. Mastering essential techniques guarantees a successful project. You’ll have a custom meri blouse in no time. Remember, practice makes perfect. Enjoy the process!
Preparing Fabric and Pattern
You’re about to start preparing your fabric and pattern for the Meri blouse.
You’ll begin by laying out your pattern pieces, pinning, and cutting your fabric to guarantee accurate and clean edges, which is a complete concept to ensure the best results.
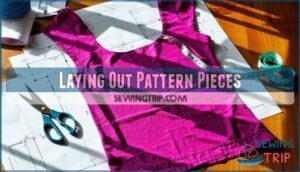
Laying Out Pattern Pieces
You’re laying out pattern pieces for your meri blouse.
Promote efficient layout by considering fabric grain and pattern placement.
Marking notches helps with accurate cutting order, making the sewing process smoother with your meri blouse pattern, which aids in efficient layout.
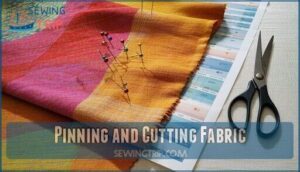
Pinning and Cutting Fabric
You’re now pinning and cutting fabric for your meri blouse.
Make certain accurate pin placement, considering fabric grain and seam allowance.
Use pattern weights for stability and cut carefully, following the meri blouse pattern and blouse cutting method to achieve cutting accuracy with your fabric and pattern pieces.
Creating a Customized Pattern
To create a customized meri blouse pattern, use body measurements and pattern pieces, considering fit adjustments and style variations.
Incorporate personalization options, like design elements, for blouse customization, and make pattern alterations as needed for a perfect fit.
Assembling The Blouse
You’re now ready to assemble your meri blouse, and it’s time to start sewing the basic seams.
You’ll attach the sleeves and cuffs, then add buttons and buttonholes to complete the blouse, following the steps outlined in this section to ensure a complete assembly.
Sewing Basic Seams
You’re now sewing basic seams, a fundamental step.
Use the right seam types, stitch length, and tension control for professional-looking seams.
Mastering seam finishes and cornering techniques will elevate your sewing techniques, ensuring strong, durable seams with the perfect seam allowance using machine stitching.
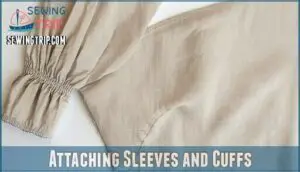
Attaching Sleeves and Cuffs
You’re attaching sleeves and cuffs to your Meri blouse.
Consider:
- Sleeve Ease for comfort
- Cuff Styles like Mitered Cuffs
- Sleeve Gathers for texture
- Professional Finishes for a polished look, enhancing your sleeve design blouse with blouse construction techniques.
Adding Buttons and Buttonholes
Now that you’ve attached the sleeves and cuffs, you’re ready to add buttons and buttonholes to your Meri blouse.
Use your sewing machine to create buttonholes, considering Buttonhole Types and Button Spacing for a professional finish, and reinforce the fabric for secure Button Attachment.
Alternatively, for a unique couture touch, consider hand sewing buttonholes.
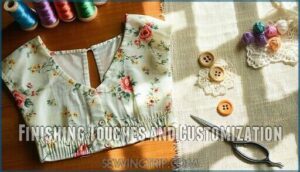
Finishing Touches and Customization
You’re almost done sewing your meri blouse, and now it’s time to add the finishing touches.
You’ll customize your blouse with hemming, edge detailing, and embellishments to make it truly yours.
Hemming and Edge Detailing
When finishing your Meri blouse, consider Blind Hemming or Rolled Hems for a clean look.
You can also add Decorative Edges or Serged Edges for extra flair.
Bias Binding is another option to enhance your hems, making your sewing project truly unique and professional-looking with these sewing tips.
For a different project, remember that you can use a zigzag stitch to prevent fraying, which is a key aspect of professional-looking results, and can be achieved with the right sewing tips.
Adding Embellishments and Accessories
You can add beads and sequins, lace trims, or ribbon accents to enhance your Meri blouse design ideas.
Consider applique designs, collar embellishments, and ribbon trimming for a unique neckline design blouse, making your Meri blouse truly special with creative embellishments.
Many options exist for purchasing blouse beads, to further customize your Meri blouse.
Final Fitting and Alterations
You’re almost done.
To achieve perfection, conduct a fit assessment, noting common issues.
Consider:
- Measurements
- Alterations
- Fit
- Client preferences
Make adjustments using alteration techniques for a flawless blouse fitting, ensuring a great fit.
Frequently Asked Questions (FAQs)
What Type of Fabric Should I Use to Sew a Meri Blouse?
You should use lightweight fabrics like cotton or silk to sew a Meri blouse, as they’re easy to work with and provide a comfortable fit.
What Size Should I Make My Meri Blouse?
You’ll determine your Meri Blouse size by taking accurate body measurements, considering bust, waist, and hips to guarantee a perfect fit and comfortable wear.
What Tools Do I Need to Sew a Meri Blouse?
You’ll need a sewing machine, tape measure, ruler, scissors, pins, needles, and threads to sew a Meri blouse, ensuring precise cutting and assembly.
How Should I Press the Seams of the Meri Blouse?
Press seams with steam, then fold and iron, ensuring crisp folds, you’ll achieve a professional finish on your meri blouse seams.
What Stitches Should I Use to Sew a Meri Blouse?
You’ll sew a Meri blouse with small straight stitches, possibly adding hand stitching for details like collar points or cuffs, and using a zigzag stitch for buttonholes.
How to make a blouse step by step?
You’ll start by laying out your pattern, cutting fabric, then assembling pieces with precision and care.
Using tools like scissors, pins, and a sewing machine to bring your blouse to life.
What is a meri blouse?
You’re looking at a meri blouse, a versatile garment with various designs, fabrics, and customization options, originating as an undergarment and evolving into a staple clothing item over time.
What type of fabric should I use to sew a meri blouse?
You’ll want lightweight fabrics like cotton, silk, or chiffon for a meri blouse, as they drape well and are easy to work with, ensuring a comfortable and stylish finish.
What size should I make my meri blouse?
Notably, you’ll determine your meri blouse size by taking accurate body measurements, considering bust, waist, and hips to guarantee a perfect, comfortable fit for your new garment.
What tools do I need to sew a meri blouse?
You’ll need a sewing machine, tape measure, ruler, scissors, pins, needles, and threads to sew a meri blouse efficiently and effectively.
Conclusion
Now you’ve mastered the basics, it’s time to try something complex.
You’re sewing a meri blouse with ease, learning how to sew meri blouse is fun, and with practice, you’ll create a beautiful garment that fits perfectly.
Using the skills you’ve learned from this guide on how to sew meri blouse.

