This site is supported by our readers. We may earn a commission, at no cost to you, if you purchase through links.
The process breaks down into manageable steps: gathering materials, creating your pattern, cutting precisely, and assembling the pieces with straight seams and a clean waistband.
Once you’ve mastered the fundamentals, you can experiment with different fabrics, pocket styles, and lengths to build a shorts collection that actually fits your body and matches your style.
Table Of Contents
Key Takeaways
- Tracing your favorite shorts and adding seam allowances lets you create a custom pattern for a perfect fit.
- Choosing fabric with the right weight and fiber and properties shapes comfort, durability, and style.
- Accurate cutting and careful grainline alignment help minimize waste and ensure your shorts come together smoothly.
- Sewing straight seams, attaching a well-measured elastic waistband, and finishing hems give your shorts a professional look and lasting wear.
Gather Essential Materials for Sewing Shorts
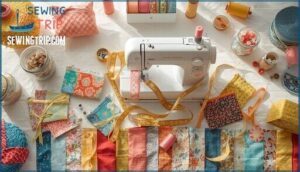
Before you cut a single thread, you’ll need the right materials at your fingertips. Your fabric choice, pattern, and basic supplies will determine how smoothly your project comes together.
Let’s break down what you need to grab before you start sewing.
Choosing The Right Fabric
Your fabric choice shapes everything—from comfort to how long your shorts last. Cotton fabric offers breathability with approximately 25% of global fiber production, while polyester blends bring durability and quick-drying properties.
Consider fabric weight (150–250 GSM for casual wear), fiber properties like moisture-wicking capabilities, and sustainability factors. Lightweight textiles under 150 GSM work best for summer double gauze shorts, while heavyweight options exceed 250 GSM for utility styles.
For enhanced comfort in warmer weather, consider shorts with moisture-wicking properties.
Selecting a Shorts Pattern
Once you’ve picked your fabric, you’ll want a pattern that matches your vision and body. Multi-size patterns from brands like Simplicity and McCall’s span US 4–22, while indie patterns push sizing up to 60+ inch hips. Digital PDF patterns now make up over 70% of new releases, letting you print only your size at home. For beginner-friendly options, consider patterns for elastic waist shorts.
- Pattern sizing: Measure your waist, hip, and rise within ±0.5 inch to prevent 80% of fit errors—don’t assume ready-to-wear sizes match sewing industry standards.
- Fit ease: Casual shorts need 6–8% ease, while performance styles require 10–12% for movement; misunderstanding this causes over 40% of fitting issues.
- Pattern formats: Look for step-by-step photos (72% of learners find these clearest) and video tutorials, which boost beginner success rates by 45%.
- Customization options: Patterns with pockets, adjustable lengths, and lengthen/shorten lines show 25% higher satisfaction and cut alteration time in half.
Tools and Supplies Needed
Now you’ll need the right gear. A sewing machine sits at the heart of your setup—over 90% of sewists rely on one for garment work.
Grab fabric scissors (20–25 cm blades work best) and keep them sharp for clean cuts. You’ll also want straight pins, a measuring tape for accuracy within a millimeter, and an iron to press seams flat.
Don’t forget thread and elastic for your waistband—polyester thread does the trick beautifully.
Create and Adjust Your Shorts Pattern
A good pattern is your blueprint for success. You can trace an existing pair of shorts to capture the fit you already love, then tweak the measurements to suit your vision.
Here’s how to create a pattern that sets you up for a perfect pair.
Tracing Existing Shorts for a Pattern
You can create a custom shorts pattern by tracing your favorite pair. Fold the shorts in half, lay them flat on craft paper, and trace the outline carefully—this captures the crotch curve accuracy and overall shape. Mark the grainline on each pattern piece and label everything clearly: front, back, orientation.
Don’t skip the mock-up creation step; testing your traced pattern first prevents fitting surprises later.
Adding Seam and Waistband Allowances
After tracing your shorts, seam allowance becomes your safety net—usually 1.5 cm (5/8 inch) along straight edges and 1 cm on curved seams to prevent bulk. Industrial standards favor precision here: measure parallel to your traced line, mark clearly, and true your corners.
Add 2.5–3 cm at the waistband for your elastic casing, accounting for fabric weight and shrinkage compensation. When sewing shorts with heavier fabrics, wider margins prevent fraying; lightweight blends need less.
Customizing Fit and Style
How do you balance personal comfort with style goals? Fit preferences and fabric considerations shape every pattern adjustment you make. Start with waist measurement—studies show guided measurement paired with tech optimization improves fit accuracy by 35%.
Adjust pattern rise and hip dimensions for better drape; adding elastic or tabs increases satisfaction by 22%. Shape-adjustable features in your clothing pattern compensate for natural body variance.
Pattern making software cuts adjustment time from 45 minutes to under 10, letting you focus on sewing techniques and style personalization that make your shorts pattern uniquely yours.
Cut Fabric Pieces Accurately
Once you’ve got your pattern ready, it’s time to transfer those shapes to your fabric. This step sets the foundation for how your shorts will fit and come together, so accuracy matters.
Here’s how to lay out, cut, and make the most of your fabric without wasting a single scrap.
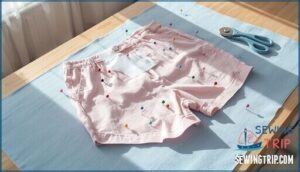
Laying Out and Pinning The Pattern
Before pinning your shorts pattern, think of grainline alignment as your compass—it keeps everything pointing true. Start by checking that both ends of the grainline measure equal distances from the selvage, staying within a millimeter or two.
Position your pattern on the fabric layout, aligning pieces parallel to the selvage for maximum stability. Pin vertically within seam allowances every 2–3 inches to prevent slippage while cutting fabric.
This pinning technique ensures pattern symmetry and helps with waste reduction by keeping everything flat and precise.
Cutting Fabric With Precision
Sharp scissors make all the difference—a clean cut prevents fraying and keeps seam allowances accurate within the industry-standard 1% error margin. Use sewing shears with long, smooth strokes along each pattern edge, cutting through all fabric layers at once. Follow grain alignment exactly to maintain garment shape and avoid distortion.
Proper cutting accuracy reduces recut rates and ensures your pieces fit together perfectly, especially where automated cutting achieves 97% precision, though careful hand-cutting rivals that with practice.
Minimizing Fabric Waste
Every scrap matters when you’re cutting—smart placement turns leftovers into something useful instead of trash. Arrange pattern pieces close together, fitting smaller components like pockets between larger ones to boost fabric utilization past 85%. Align mirror-image pieces along folds to eliminate redundant cuts.
Zero-waste sewing techniques achieve up to 100% efficiency by treating every remnant as an opportunity, whether for patchwork details or future projects. This approach reduces your fabric footprint while keeping end-of-life impact minimal.
Zero-waste sewing turns every leftover scrap into creative possibilities, maximizing fabric efficiency while minimizing environmental impact
Sew and Assemble The Shorts
Now that your fabric is cut, it’s time to bring your shorts to life. This is where your pieces transform from flat fabric into something you can actually wear.
We’ll walk through three key steps that build your shorts from the ground up.
Stitching Center (Crotch) Seams
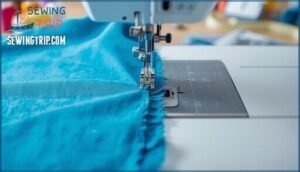
Sewing the crotch seams is where your shorts truly begin to take shape. Align front and back pieces right sides together, matching curves carefully. Set your machine to a 2.5–3 mm stitch length and use polyester thread for strength.
Follow these steps:
- Sew along the U-shaped curve with a standard 5/8-inch seam allowance
- Double-stitch the seam for 40% greater durability
- Press seams flat to reduce bulk near the inner thigh
Proper fabric alignment and curve accuracy prevent distortion and guarantee comfort through the inseam area.
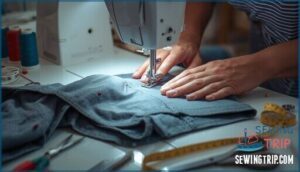
Sewing The Inseam and Side Seams
With crotch seams complete, open your shorts flat to connect the legs. Match the inseam edges right sides together, then stitch from one leg opening down and up the other in one continuous pass. Use a 5/8-inch seam allowance for strength—narrower margins increase fray rates by 28%. Maintain 10–12 stitches per inch for optimal stitch quality.
| Seam Type | Recommended Allowance |
|---|---|
| Inseam | 5/8 inch |
| Side Seams | 5/8 inch |
| Crotch Seam | 5/8 inch |
Apply finishing techniques like serging to prevent defects and boost durability by 17%.
Attaching Pockets or Details (Optional)
Pockets add both function and flair to your shorts. Pin patch pockets to your fabric right sides up, basting with a wide stitch before committing. Use a 1/8-inch seam allowance when topstitching for a clean finish.
In-seam pockets tuck inside side seams—align them 1 inch below the waistband edge.
Embellishments like piping or embroidery turn basic shorts into standout pieces, so let your creativity guide you.
Add Waistband and Finish Edges
You’re almost done—now it’s time to polish your shorts with a professional finish. The waistband and hems are what separate a homemade project from something that looks store-bought.
Let’s lock in these final steps so your shorts fit comfortably and hold up wear after wear.
Creating and Inserting The Elastic Waistband
With the right elastic measurement, you’ll create a comfortable fit that won’t sag or pinch. Cut your elastic band to roughly 80–100% of your waist measurement—this ensures just enough snugness.
Divide it into four equal sections, pinning evenly at the front, back, and sides of your waistband casing. Stretch the elastic gently as you sew, using a zigzag stitch to maintain flexibility.
Topstitching options like a triple straight stitch add durability. Quality control matters: check that your elastic waistband returns to its original size after stretching.
Hemming The Leg Openings
Now you’ll hem the leg openings to lock in durability and stop fraying. Fold each hem up about ½ to ¾ inch, press flat with an iron, then fold again for a clean double-fold finish.
Stitch close to the edge—around ¼ inch—using 10–12 stitches per inch for a solid hold. This weaving technique secures raw edges and gives your shorts that polished, professional look that lasts wash after wash.
Final Pressing and Quality Checks
After your final stitch settles, give your shorts a thorough press using steam at 120–180°C to remove every crease and boost that pro-level finish.
Run through these quality checks:
- Inspect each seam for loose threads or skipped stitches—defects hit about 25% of projects
- Confirm your seam allowance stays consistent and hems lie flat
- Check the waistband casing feeds elastic smoothly without twisting
- Test the overall fit and look for puckering or uneven pressing
This final step locks in durability and ensures your shorts meet industry standards for home sewers.
Frequently Asked Questions (FAQs)
How do I hem the shorts?
To create a hem on your shorts, fold the bottom edge up twice—about half an inch each time—to hide raw edges. Pin it in place, then sew close to the inner fold using a straight stitch.
What kind of thread should I use?
Choose polyester thread for most shorts—it’s strong, resists shrinking, and pairs well with cotton or blends.
Thread Weight Matters; use 40 wt. for balanced seams.
Adjust tension on your sewing machine for smooth, even stitches.
How do I make adjustments if the shorts don’t fit right?
Fit issues sneak up like a fox. For Waist Gapping, take in the waistband or side seams. Tight Hips need extra seam allowance.
Adjust Crotch Fit by raising the curve.
Leg Adjustments and Length Issues? Grade or overlap the pattern.
What type of fabric works best for shorts?
Cotton fabric is a classic choice for shorts, offering breathable materials and comfort.
For activewear, moisture-wicking blends like polyester-spandex work well.
Sustainable textiles—organic cotton, recycled polyester, bamboo—make eco-friendly fabrics ideal for lining fabric and elastic waistbands.
How do I add pockets?
Think of pockets as hidden doors—each style, from Inseam Pockets to Patch or Cargo Pockets, depends on careful Pocket Placement, precise attaching pockets, and strong Pocket Reinforcement.
Use sturdy sewing techniques for shorts to blend function and style.
How do I calculate fabric yardage needed?
To calculate fabric yardage for shorts, check your pattern’s yardage estimates for both 45-inch and 60-inch fabric widths. Add extra for pattern matching and shrinkage allowance. Efficient fabric layout reduces waste, especially with wider fabric.
What stitch length works best for shorts?
For shorts, set your sewing machine to a stitch length around 5 mm. This balances seam strength with fabric density, whether you’re working with high thread count or basic cotton. Adjust stitch tension to avoid puckering.
Can I make shorts without a pattern?
Yes, you can make shorts without a pattern. Use a well-fitting pair as a template, trace, add allowances, and cut.
Patternless shorts advantages include quick fit adjustments, but symmetry and fabric cutting challenges require essential tools and careful measuring.
How do I fix puckered seams after sewing?
Like smoothing out wrinkles in a map, fix puckered seams by adjusting thread tension, using Steaming Techniques, switching Needle Selection, and stabilizing fabric.
Try longer Stitch Length, gentle pressing, and a double top stitch for crisp, flat results.
Whats the best way to store elastic?
Store elastic bands and waistband elastic in airtight containers, away from light exposure and heat. Temperature control and low humidity prevent brittleness.
Inspect elastic casing regularly for loss of stretch. Hanging or flat storage helps maintain shape.
Conclusion
Picture the fabric spread out, your hands guiding each seam, transforming simple cloth into shorts that fit like a favorite memory. With every step—pattern tracing, cutting, stitching—you’re mastering how to sew shorts customized to your style.
The process isn’t just practical; it’s creative freedom at your fingertips. Now, your old pair inspires a new one, and every finished edge marks progress.
Your next shorts project is waiting, ready to reflect your unique vision and skill.
- https://www.wikihow.com/Make-Shorts
- https://www.textileschool.com/28811/fabric-costing/
- https://lowlandkids.com/blogs/news/handmade-clothing-pricing-101-how-to-charge-fairly-and-profit-from-your-creations
- https://www.made-by-rae.com/blog/2018/06/how-to-sew-shorts
- https://www.cognitivemarketresearch.com/sewing-machine-market-report


