This site is supported by our readers. We may earn a commission, at no cost to you, if you purchase through links.
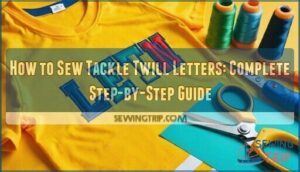
 To sew tackle twill letters, start by cutting your letters neatly from tackle twill fabric.
Apply an iron-on adhesive backing for stability, then position the letters carefully on the fabric, checking alignment and spacing.
Use an iron to fuse them temporarily in place. Next, sew around the edges with a zigzag or satin stitch, keeping your stitches even and close to the edge to secure the twill and prevent fraying.
Finish by cleaning up any raw edges or adding borders for a polished look. Tackle twill letters are durable and stylish—perfect for jerseys or custom projects. Ready for the next steps?
Table Of Contents
Key Takeaways
- Cut your letters precisely from tackle twill fabric, leaving a 1/4-inch margin to prevent distortion during stitching.
- Apply an iron-on adhesive backing to stabilize the letters and hold them in place before sewing.
- Use a zigzag or satin stitch to secure edges and prevent fraying, adjusting thread tension for clean results.
- Align and position letters carefully, checking spacing and using pins or light adhesives to avoid shifting.
Preparing Tackle Twill Letters
Before you start sewing, you’ll need to cut your tackle twill letters with precise edges and prepare them with proper backing.
This preparation step guarantees your letters will stay flat and secure when you attach them to your garment, ensuring a successful outcome with proper backing.
Cutting Letters
Anyone can master the art of cutting tackle twill letters with the right approach. Start by placing your letter templates over the fabric and cutting each shape with a 1/4 inch margin allowance beyond the edges.
Mastering tackle twill cutting is easy—allow a 1/4 inch margin and let precision guide your way to flawless results.
This extra space prevents distortion during stitching and gives you room to work. Use sharp fabric scissors for clean cuts, moving the material instead of the scissors for better control.
Don’t snip into the actual design—stay just outside those template lines. For intricate designs with detailed curves or small elements, cutting machines offer precision that’s hard to match by hand.
Specialized tackle twill scissors can aid in this process. Work on a flat surface to keep your applique letters perfectly shaped and ready for the next step, ensuring a clean cut and precise handling of the material.
Fusing Backing
After cutting your tackle twill letters, you’ll need backing material to create strong applique letters.
Heat-activated adhesive works best for most projects, though repositionable options give you flexibility.
Set your iron to medium heat and apply the backing 1/2 inch beyond each letter’s edges.
This extra margin prevents fraying and keeps letters flat during heat press application.
Test your heat settings on scraps first to avoid scorching.
To avoid puckering, consider thread tension adjustment for best results, using complete concepts and ensuring separate lines for clarity.
Positioning Letters on Fabric
Once you’ve prepared your tackle twill letters, you’ll need to position them correctly on your fabric before sewing.
Proper placement guarantees your lettering looks professional and remains aligned throughout the stitching process, which is crucial for a visually appealing outcome with proper alignment.
Layout and Spacing
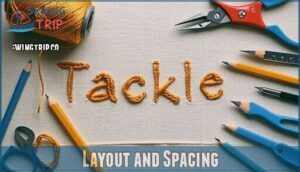
Throughout this critical stage, your letter alignment determines the professional appearance of your finished project.
Proper letter placement creates visual balance that makes your design shine.
Focus on these essential spacing elements:
- Letter size consistency guarantees uniform appearance across your design
- Kerning adjustments create natural-looking spacing between characters
- Font considerations help maintain readability and visual appeal
- Uniformity checks prevent uneven lettering alignment issues
- Lettering durability starts with precise initial positioning
To achieve this, it’s important to account for fabric grain influence for superior results.
Pinning and Checking
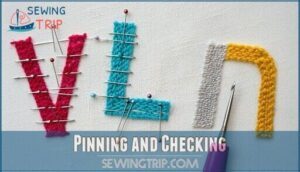
Once your tackle twill letters are positioned, secure them with pins for precise positioning.
Use sharp pins to avoid fabric damage, placing them strategically around each letter’s edges.
This pinning technique prevents shifting during the next steps.
Check your lettering alignment from both front and back views, ensuring consistent spacing and straight lines.
If you’re using stabilizer, pin it securely underneath.
For adhesive alternatives, light spray adhesive works well.
Perform a thorough backside inspection to verify everything’s aligned perfectly before moving forward.
Realigning your design now saves frustration later, and using sharp pins is crucial for avoiding fabric damage.
Attaching Letters to Fabric
Now you’ll secure your positioned letters to the fabric using two key steps: fusing and edge stitching.
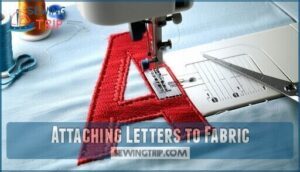
Start by placing a press cloth over each letter and applying steady iron pressure for 10-15 seconds to fuse the adhesive backing.
Then sew around the perimeter with a straight stitch before finishing with a tight zigzag stitch to seal the raw edges.
Fusing
With your tackle twill letters positioned perfectly, it’s time to create that permanent bond. Heat-activated adhesive requires precise technique to avoid fabric damage or weak bonds.
- Place a press cloth over your fabric letters to prevent shine marks
- Set your iron to wool setting with no steam for ideal heat levels
- Apply firm, steady pressure for 10-15 seconds per letter
Different adhesive types need specific heat settings, so test on scraps first. Many crafters find success using iron-on bonding options for this step.
If you’re troubleshooting fusing issues, check that your iron maintains consistent temperature. Let letters cool completely before handling – this cooling period strengthens the bond between your heat press letters and garment.
Sewing Edges
With your letters properly fused, it’s time to secure them permanently. Start with a straight stitch around each letter’s perimeter, keeping your needle position precise at corners. Thread type matters—use coordinating colors for invisible seams. Tension control prevents puckering, so test on scraps first.
Start with a straight stitch for precision, then let coordinated threads and balanced tension bring your design seamlessly to life.
For securing stitches, overlap your starting point by a quarter-inch. A straight stitch machine is fundamental for this process.
| Stitch Selection | Best For | Durability Rating |
|---|---|---|
| Straight Stitch | Initial securing | Good |
| Zigzag Stitch | Edge finishing | Better |
| Satin Stitch | Professional look | Best |
| Overlock | Bulk fabrics | Excellent |
| Blanket Stitch | Decorative edge | Good |
Your tackle twill letters need proper sewing techniques for lasting results, and understanding the stitch selection is crucial. Using the right stitch can make a significant difference in the durability and appearance of your work, ensuring a professional look.
Finishing The Lettering
Now you’ll focus on the final steps that make your tackle twill letters look professional and last for years.
You’ll secure raw edges with tight zigzag stitching and add optional borders to create a polished, finished appearance.
Raw Edges
Once your tackle twill letters are secured, edge finishing becomes critical for preventing edge fraying.
Use a tight zigzag stitch just beyond each letter’s perimeter to encase poly-twill edges completely. This sewing technique guarantees professional letter application results.
For woven fabrics, consider zigzag or overcast stitches for added durability.
Essential steps for perfect edge finishing:
- Adjust stitch density – Set your machine to create closely spaced stitches
- Maintain consistent speed – Keep steady pace for even coverage
- Check thread tension – Ensure balanced stitches on both sides
- Trim excess carefully – Remove stabilizer outside stitching lines
Adding Borders
After securing raw edges, you’ll want to frame your tackle twill letters with coordinating border strips.
Measure border width carefully around your letter application area. Cut border materials that complement your fabric’s color coordination.
Practice corner mitering techniques on scraps first. Choose stitch styles that match your project’s durability needs.
Topstitch borders using steady, even pressure for professional results.
Caring for Finished Letters
Keeping your tackle twill letters looking sharp takes a little attention during washing and care.
Follow a few simple steps to prevent damage, maintain their shape, and keep them securely attached.
Washing
To care for your tackle twill design, follow these washing instructions:
- Choose a mild detergent and wash inside out on a gentle cycle with cold water to protect fabric.
- Avoid bleach and fabric softeners to maintain lettering integrity.
- Air dry flat or line dry in the shade—skip the dryer to prevent damage.
- If needed, iron inside out on low heat and check seams for loose stitches to stay ahead of repairs.
Troubleshooting
If your fabric puckering, thread breaks, or alignment issues are causing headaches, don’t worry.
Fix adhesive failure by reapplying heat. Address uneven stitching or loose stitches by reinforcing sewing with tight zigzag stitches.
Restitch corners securely to prevent fraying. If puckering appears, use proper tension. Check tackle twill letters for stability regularly, and adjust as needed for a perfect finish.
To resolve these problems, consider machine embroidery troubleshooting for a more detailed guide on fixing common issues, including those related to machine embroidery.
Frequently Asked Questions (FAQs)
What is tackle twill embroidery?
Tackle twill embroidery uses polyester fabric pieces, often letters or logos, sewn onto garments with zigzag stitching.
It’s durable, professional-looking, and perfect for sports uniforms or custom designs, outlasting most garments while providing bold, stylish finishes.
How do I remove the lettering from my tackle twill logo?
To remove tackle twill lettering, carefully cut along the stitches with a seam ripper, pulling threads gently.
Avoid tearing fabric underneath. Patience is key—remove leftover adhesive with rubbing alcohol or fabric-safe remover.
The process requires carefully handling the fabric to avoid damage.
What are pre-cut tackle twill letters & numbers?
Imagine a high school football jersey with bold, clean numbers.
Pre-cut tackle twill letters and numbers are pre-shaped fabric pieces, ready to iron or sew, saving time while ensuring consistent, professional-quality designs for garments.
How do you sew a twill patch?
Start by fusing the patch using an iron and press cloth.
Stitch around the edges with a zigzag or satin stitch, ensuring even tension.
Trim excess stabilizer, prevent puckering, and finish with precise stitching.
What is the tackle twill process?
Think of it like piecing a puzzle together.
The tackle twill process involves cutting polyester fabric into shapes, positioning them precisely, fusing with heat, and stitching with durable zigzag or satin stitches for a lasting finish.
How do you use tackle twill appliqué?
Tackle twill appliqué involves cutting your design from twill fabric, positioning it on your garment, securing it with adhesive.
This process is followed by stitching around the edges with a zigzag or satin stitch for durability and a polished look.
How Much Fabric Do I Need to Allow for the Lettering Area?
You’ll want enough polyester twill to cover the letter area, allowing a 1/4-inch margin around each letter.
For precise cuts, use templates or measurements, and slightly overestimate to avoid running short.
Can I Use a Sewing Machine or Do I Need an Embroidery Machine?
You can use a regular sewing machine for tackle twill letters.
Opt for a zigzag or satin stitch to secure edges.
An embroidery machine offers precision, but it’s not essential for most projects.
What Mistakes Should I Avoid When Sewing the Letters?
Don’t rush ironing, or you’ll risk bubbles or uneven fusing.
Avoid cutting too close to edges; fraying happens.
Skip checking thread tension, and stitching may pucker.
Double-check alignment—crooked letters scream amateur, not polished pro, and ensure a polished finish by following these guidelines.
How Do I Fix Letters That Are Misaligned or Loose After Sewing?
Think of misaligned or loose letters as a puzzle piece out of place.
Reposition them by gently removing stitches, realigning with adhesive or pins, and resewing.
Double-check placement to verify everything looks polished and secure.
Conclusion
Mastering how to sew tackle twill letters might feel like scaling a mountain at first, but with practice, it’s achievable.
From cutting precise letters to fusing and stitching with care, each step builds a durable, polished design.
Remember to check alignment and use steady stitches to prevent fraying.
Whether it’s for jerseys or creative crafts, your skill in sewing tackle twill letters guarantees professional results.
Stay patient, and enjoy the satisfaction of completing personal, standout projects!


