This site is supported by our readers. We may earn a commission, at no cost to you, if you purchase through links.
For straight corners, try mitering, and for curved ones, use blind stitching.
Remember to calculate your seam allowance for strong and resilient corners.
With practice, you’ll master how to sew upholstery corners, giving your furniture a polished look.
Now, take your skills to the next level by exploring more advanced techniques for sewing upholstery corners, and become an expert in sewing upholstery.
Table Of Contents
Key Takeaways
- You’ll master sewing upholstery corners by using the right techniques, like mitering for straight corners and blind stitching for curved ones, to achieve a professional-looking result.
- To sew strong corners, you’ll need to calculate your seam allowance, which adds strength and resilience to your upholstery, and prevents fabric unraveling.
- You’ll achieve crisp edges and corners by trimming excess fabric and thread, and ironing your work, which is key to a polished finish and a professional-looking result.
- With practice, you’ll get better at sewing upholstery corners, and you can troubleshoot common challenges, like puckered corners and uneven seams, by adjusting tension, using the right techniques, and reinforcing seams to perfect your upholstery corner techniques.
Understanding The Basics of Upholstery Sewing
You’ll start by understanding the basics of upholstery sewing, which includes choosing the right fabrics and threads.
You’ll learn about the essential tools and techniques needed to sew upholstery corners like a pro, which can be considered a complete concept in upholstery sewing.
Types of Fabrics and Threads Suitable for Upholstery
When selecting upholstery fabric, consider durability and aesthetics. You’ll want to choose fabrics that can withstand daily wear, such as microfiber or leather.
For more information, explore various upholstery fabric types.
- Natural fibers like cotton and wool offer breathability
- Synthetic fibers like polyester provide resilience
- Leather upholstery is a durable option.
For thread selection, match the thread type to the fabric. Fabric selection is key to a successful project. Consider microfiber options for a durable and easy-to-clean choice.
Natural fibers and leather upholstery are also popular choices. Thread types vary, so select one that complements your fabric. Fabric durability matters, so choose wisely.
Essential Tools for Sewing Upholstery
You’ll need sharp scissors, a heavy-duty sewing machine, and measuring tools. A strong sewing machine is essential for upholstery projects.
| Tool | Use | Importance |
|---|---|---|
| Fabric Shears | Cut fabric | High |
| Measuring Tools | Measure fabric | Medium |
| Pin Bowls | Organize pins | Low |
Use staple guns and heavy duty needles for thick fabrics. Invest in quality upholstery tools for best results, which will help you achieve professional-looking outcomes.
Preparing Your Upholstery Project
You’re getting ready to start your upholstery project, and preparing your materials is key.
You’ll measure and cut your fabric accurately, and then pin it in place for precise alignment, to guarantee a professional-looking result.
Measuring and Cutting Fabric Accurately
You’re ready to measure and cut your fabric. Gather your cutting tools, including a measuring tape and straight edge. A quality upholstery measuring tape is essential for accurate measurements.
Measure your fabric carefully, marking lines with chalk. Consider these steps:
- Use precision cutting tools
- Calculate seam allowance
- Double-check measurements
Precision cutting is key to a flawless final product. Use a measuring tape to measure your fabric, and don’t forget to calculate your seam allowance. This will guarantee accurate cuts and a professional finish.
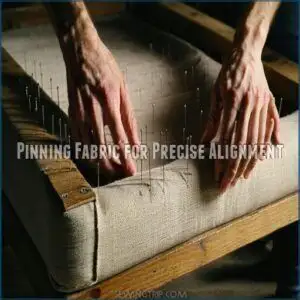
Pinning Fabric for Precise Alignment
You’re now pinning fabric for precise alignment. Use Fabric Pins and Alignment Tools to achieve this.
Proper pin placement techniques are essential for successful upholstery projects.
| Pin Placement | Corner Clipping | Seam Guides |
|---|---|---|
| 3-4 inches apart | for clean corners | for even seams |
| perpendicular to seam | prevents puckering | ensures accuracy |
| angled for easy removal | enhances corner seams | simplifies sewing techniques |
Pinning fabric correctly is key to sewing upholstery corners like a pro, making certain corner seams are clean and professional.
Techniques for Sewing Upholstery Corners
You will learn various techniques for sewing upholstery corners. You can master sewing straight and curved corners by following the steps outlined in this section.
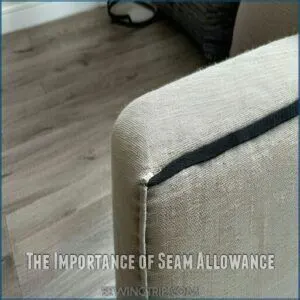
The Importance of Seam Allowance
You’re now focusing on sewing upholstery corners. Seam management is key. Consider these points:
- Strength from proper seam allowance
- Precision for professional corners
- Durability from extra fabric
- Flexibility for adjustments
Seam allowance prevents fabric unraveling and adds resilience. A helpful seam allowance guide provides detailed information. It allows for slight adjustments during sewing.
Proper seam precision confirms clean lines and corners. Mastering seam allowance transforms your upholstery sewing, making it stronger and more durable, and helping you sew upholstery corners like a pro with the right sewing techniques and corner reinforcement.
Step-by-step Guide to Sewing Straight and Curved Corners
To sew upholstery corners, use mitering for sharp edges.
For curves, try blind stitching.
Accurate marking and seam guides guarantee professional results.
Learn more about sewing different corner types.
| Corner Techniques | Sewing Methods |
|---|---|
| Mitering Corners | Blind Stitching |
| Fabric Selection | Stitch Control |
| Sewing Upholstery Corners | Upholstery Corner Techniques |
Master these skills for professional results and understand the importance of sewing upholstery corners.
Finishing Touches for a Professional Look
You’re almost done sewing your upholstery corners, now it’s time to add the finishing touches.
You’ll trim excess fabric and thread, and iron the corners to get a crisp, professional look.
Trimming Excess Fabric and Thread
You’ve mastered sewing upholstery corners, now it’s time to refine them.
Trimming excess fabric and thread is key to a polished finish.
Consider various fabric finishing techniques at home to prevent fraying and enhance the final look.
To do this, you’ll need to:
- Clip away bulk for crisp seams
- Snip loose threads for a neat look
- Prevent fraying with seam binders
Trimming excess fabric and cutting threads creates smooth corners.
This step in sewing upholstery corners perfects your upholstery corner techniques, making your project look professional.
Proper fabric trimming and thread cutting are important for seam finishing and corner clipping, which leads to edge smoothing in upholstery sewing guide.
Ironing for Crisp Edges and Corners
You’ve trimmed excess fabric and thread, now it’s time to iron for crisp edges and corners.
Check the care label for heat settings, using low heat for delicate fabrics and high heat for heavier ones.
For straight corners, press open seams and iron flat.
Use a tailor’s ham or seam roll for curved corners, gently stretching fabric while ironing.
Keep movements controlled and press instead of sliding the iron for crisp lines and clean edges.
Ironing techniques and pressing methods are key to edge finishing and corner pressing, to achieve a professional finish and smooth fabric smoothing, by mastering iron upholstery and sewing upholstery corners with these tips.
Troubleshooting Common Upholstery Sewing Challenges
You will encounter common sewing challenges when working with upholstery corners. You can fix issues like puckered corners and uneven seams by adjusting tension and using the right techniques.
Adjusting Tension for Different Fabric Thicknesses
You adjust fabric tension for thick fabrics by using a higher setting, around 4-6.
Essential tension is key for thick fabric sewing.
- Test bobbin tension
- Choose a larger needle
- Tweak tension screws
- Check stitch length to sew upholstery corners perfectly, ensuring proper thread selection and machine calibration for ideal sewing speed, which requires essential tension.
Fixing Puckered Corners and Uneven Seams
Fixing puckered corners and uneven seams. Check fabric choice and tension. Mastering mitered corners improves results.
For puckers, try seam ripping and re-stitching. Pressing techniques flatten seams. Use correct needle size for thick fabrics.
Add bias binding to hide flaws. Iron with steam for sharp edges.
This Corner Repair method involves Seam Fixing and Pucker Removal for smooth Edge Smoothing, considering Fabric Stretching to perfect upholstery corner techniques, hence fixing upholstery corners and sewing upholstery corners like a pro.
Frequently Asked Questions (FAQs)
How do you make neat upholstered corners?
Can you achieve perfect corners? You’ll make neat upholstered corners by using precise stitching, trimming excess fabric, and reinforcing seams for a professional finish, every time, with practice.
How do you tackle upholstery corners?
You tackle upholstery corners by sewing or stapling, using techniques like mitering, reinforcing, and trimming excess fabric for a clean, professional finish.
How do you sew upholstery corners?
Like a puzzle, you’ll piece together upholstery corners by sewing precise seams, trimming excess fabric, and reinforcing with staples for a sharp, professional finish, every time, with practice.
Can You upholster chair corners?
You can upholster chair corners using staples, sewing, or a combination of both, depending on the fabric and desired finish, to create a professional-looking result with clean edges.
How do you wrap a gift with corner upholstery?
Cutting corners won’t help, literally, when wrapping a gift with corner upholstery, you’ll need to measure and cut fabric precisely to fit the gift’s shape and size perfectly, every time.
How do you staple upholstery?
You staple upholstery by bringing fabric together, stapling at 45-degree angles, and trimming excess, creating a smooth corner with minimal folds, for a professional finish and durability.
How do you tuck corners when upholstering?
You’ll "nail" it by folding fabric at a 45-degree angle, tucking it in, and securing with staples, creating a crisp, professional corner with minimal folds.
How to sew corners on fabric for beginners?
You’ll fold and sew fabric at a 45-degree angle, using a seam allowance, to create crisp corners, then trim excess fabric for a neat finish, practicing makes it perfect.
How to get sharp corners when sewing?
You’ll achieve sharp corners by using a 90-degree angle template, precise stitching, and trimming excess fabric, ensuring a clean, professional finish with minimal folds or bunching, every time.
How to sew angled corners?
You’ll sew angled corners by cutting fabric at an angle, then sewing along the edge, using a consistent seam allowance to create a sharp, clean corner with minimal bulk.
Conclusion
Now you’ve learned how to sew upholstery corners.
You’ll sew strong corners by using the right techniques.
Mastering how to sew upholstery corners takes practice.
You’re getting better at sewing upholstery corners, so keep practicing to get professional results with your upholstery projects by learning how to sew upholstery corners.
- https://jennykomenda.com/2012/07/how-to-upholster-bench-corners.html/
- https://theluckyneedle.com/how-to-sew-square-corners/
- https://homesewingdepot.com/collections/upholstery-tools
- https://hymnsandhome.com/2022/07/01/how-to-reupholster-a-dining-chair-seat-everything-you-need-to-know/
- https://revolutionfabrics.com/blogs/gotcha-covered/upholstery-fabric-types

