This site is supported by our readers. We may earn a commission, at no cost to you, if you purchase through links.
 Navigating the world of sewing thick fabrics can feel like steering a ship through stormy seas. Your sewing machine, a steadfast vessel, requires precise adjustments to sail smoothly.
Adjusting thick fabric tension is not just about avoiding the icebergs of puckered seams or skipped stitches; it’s about mastering the art of creating durable, beautiful creations that stand the test of time.
This guide is your compass, leading you through the intricacies of tension adjustment, needle and thread selection, and sewing techniques tailored for heavy materials.
Embark on this journey to transform your sewing challenges into triumphs, ensuring every stitch is a step towards sewing machine mastery.
Table Of Contents
- Key Takeaways
- How Do You Adjust Thick Fabric Tension
- Understanding Sewing Machine Tension
- Preparing the Sewing Machine
- Selecting the Right Needle and Thread
- Adjusting Tension for Thick Fabrics
- Stitch Length and Type
- Sewing Techniques for Thick Materials
- Troubleshooting Common Issues
- Maintenance Tips for Optimal Performance
- Advanced Tips for Professional Results
- Frequently Asked Questions (FAQs)
- Conclusion
Key Takeaways
- Adjusting the tension for thick fabrics is crucial as incorrect tension can lead to loops, puckering, knots, or loose threads on the fabric.
- The right needle size and thread type are essential for sewing thick fabrics; for example, jeans needles are suitable for densely woven fabrics like heavy twill, canvas, and heavy linens.
- Bobbin tension may need to be loosened when using thicker threads to ensure proper tension balance.
- Recording tension settings for different fabric types can serve as a personal cheat sheet for future sewing projects, aiding in achieving the correct tension more quickly.
How Do You Adjust Thick Fabric Tension
Yes, you can adjust thick fabric tension on a sewing machine. To manage tension for thick fabrics, use a larger needle like a size 90/14 or 100/16, practice on scraps to find the right tension settings, typically a higher thread tension and lower presser foot pressure, and increase the stitch length.
Additionally, consider loosening the bobbin tension slightly for thicker threads.
Understanding Sewing Machine Tension
When sewing with thick fabrics, it’s crucial to understand how sewing machine tension works and its impact on your project.
Incorrect tension can lead to poor stitch quality, making it essential to identify and correct any tension issues for optimal results.
Importance for Thick Fabrics
When you’re tackling thick fabrics, getting your tension just right is like finding the sweet spot on a baseball bat—it can make all the difference between a home run and a strikeout. Thicker fabrics are the heavyweights of the textile world, and they need a tension setting that can handle their heft.
Think of tension recommendations as your playbook; they guide you to the perfect balance where your stitches are neither too tight nor too loose, ensuring stitch durability that can go the distance.
Heavy-duty needles are your MVPs here, punching through the fabric without breaking a sweat. But watch out for fabric climbing—it’s like that pesky player who always tries to steal bases. It can throw your game off, causing missed stitches and tension headaches. So, keep your thread tension in check, your needle sharp, and your settings dialed in for thick fabrics.
With these tips, you’ll be sewing like a pro, avoiding the rookie mistakes that can lead to a major league sewing disaster.
Identifying Incorrect Tension Signs
Identifying incorrect tension signs is like being a stitch detective. You’ll spot the culprits easily: puckered fabric screaming too tight! or loose top thread lounging lazily on your fabric.
Unstable seams may wave at you, hinting at a tension tiff, and thread breakage? That’s the tension tantrum. Remember, the right needle size and thread tension are your sidekicks in crafting those perfect stitches on heavy-duty fabrics.
Keep your stitch length savvy, and you’ll be sewing like a pro.
Preparing the Sewing Machine
When sewing with thick fabrics, it’s essential to set up your machine correctly to handle the increased density. Start by threading your machine with attention to detail, ensuring the thread passes through each guide and tension mechanism as intended.
Adjust the bobbin case tension if necessary, especially for drop-in bobbin systems; a small screwdriver can be used to turn the tension screw slightly for fine-tuning.
Threading for Thick Fabrics
When tackling the challenge of threading your sewing machine for thick fabrics, it’s crucial to nail the setup for flawless stitching.
-
Tension Adjustment: Begin by fine-tuning your machine’s tension. Thick fabrics demand a delicate balance to avoid puckering or loose stitches. Aim for a tension setting that complements the fabric’s heft, ensuring smooth, even stitches.
-
Needle Choice: Select the right needle for the job. A thicker fabric requires a sturdy needle, such as a size 16/100 for denim or canvas. This ensures your machine can penetrate the fabric without breaking the needle or skipping stitches.
-
Thread Selection: Opt for a thread that matches the fabric’s weight. A heavy-duty thread will withstand the stress of sewing through thick materials, reducing the risk of breakage and ensuring your stitches hold firm.
Bobbin Case Adjustment
After mastering threading for those hefty fabrics, it’s time to tackle bobbin case adjustment.
You’ll want to align your bobbin case just right—think of it as setting the stage for a topstitching encore. Grab a bobbin tension gauge to banish the guesswork and dial in that sweet spot.
If your bobbin thread’s playing hooky, a quick bobbin case tension spring tweak might just be the ticket. And remember, cleanliness is next to godliness in the sewing world, so keep that bobbin case spick-and-span and well-oiled.
If you’re swapping needles for different fabric battles, don’t forget to recalibrate.
Selecting the Right Needle and Thread
When sewing with thick fabrics, selecting the right needle and thread is crucial for achieving the best results.
A size 90/14 or 100/16 needle is recommended for its strength, capable of handling the fabric’s thickness without breaking.
For the thread, opting for a heavy-duty type for the upper thread while maintaining an all-purpose thread in the bobbin can prevent breakage and ensure smooth sewing.
This combination allows for proper stitch formation and durability in your sewing projects.
Needle Size for Heavy Fabrics
After threading your sewing machine for those tough, thick fabrics, it’s time to zero in on the needle. Choosing the right needle size and type is like picking the perfect arrow for your bow—vital for hitting the bullseye on your sewing projects.
- Needle Sharpness: For heavy fabrics, a sharp, durable needle penetrates without hesitation, leaving clean stitches in its wake.
- Needle Durability: Opt for needles that can withstand the battlefield of thick fabric sewing. Silicone-coated needles offer enhanced durability.
- Needle Types: Universal needles might be the jack-of-all-trades, but specific tasks call for specific tools. Leather needles slice through tough materials, while denim needles tackle those hardy fabrics with ease.
- Needle Compatibility and Storage: Ensure your needle matches your sewing machine’s specs. Proper storage keeps them sharp and ready for action.
Thread Type and Weight
When tackling thick fabrics, your thread choice is your secret weapon. Think of thread weight and quality as the unsung heroes of sewing mastery.
Opting for a heavier thread can transform a project from meh to wow with just a few stitches. But here’s the kicker: it’s not just about the weight. The thread’s quality, tension, color, and composition play pivotal roles too.
Polyester threads are often the go-to for their strength and versatility across fabric types. Remember, a mismatch in thread type and weight to your fabric can lead to a sewing saga you’d rather avoid.
Keep your machine humming happily with regular cleaning, and let your thread choice be the hero of your thick fabric tale.
Adjusting Tension for Thick Fabrics
When sewing with thick fabrics, it’s essential to adjust your machine’s tension to prevent issues like skipped stitches or puckering.
You’ll need to increase the upper tension control and may also need to fine-tune the bobbin tension for optimal results.
Upper Tension Control
When dealing with thick fabrics, mastering the upper tension control is key. Adjust the tension gauge to suit the fabric’s thickness, ensuring both the upper thread and bobbin thread are in harmony.
This harmony is crucial for maintaining optimal stitch quality and preventing issues like thread bunching or skipped stitches.
Bobbin Tension Fine-Tuning
When sewing thick fabrics, you’ll want to get your bobbin tension just right. It’s like finding the sweet spot on a guitar string – too tight and it’ll snap, too loose and it’ll sound like a flop. Start by turning the screw on your bobbin case a tiny bit, like you’re tuning into a radio station, and aim for that clear signal – a smooth stitch.
For optimal settings, think of the bobbin tension screw as a clock face and adjust in 15-minute increments. It’s a delicate dance between the bobbin and upper tension, so both need to be in harmony. If you’re using a beefy thread in the bobbin, ease up on the tension to let it flow freely.
It’s a bit like letting out the reins on a horse – too much grip and you’ll hold it back.
Don’t skimp on thread quality either. It’s the backbone of your sewing, and using subpar thread is like filling a racecar with cheap fuel – it just won’t run as well. And when it comes to seam allowances, tailor’s ham, cutting and marking, pressing and ironing – they’re all part of the sewing symphony, each playing their part to create a masterpiece.
So, take a breath, adjust with care, and you’ll be stitching through those thick fabrics like a hot knife through butter.
Stitch Length and Type
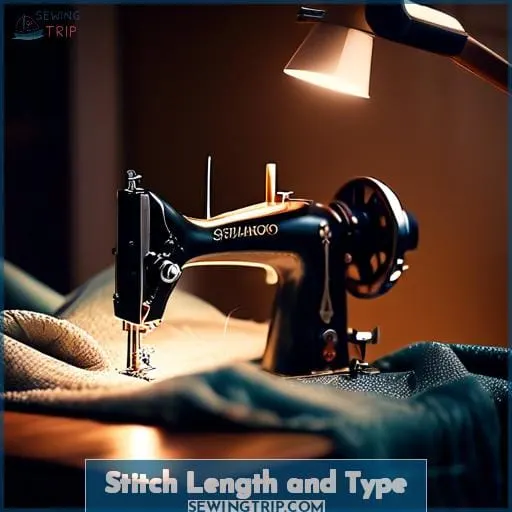
When sewing with thick fabrics, it’s crucial to adjust your stitch length for durability. Opt for a longer stitch, such as between 3.5 and 4.0 mm, to ensure your seams are strong and can withstand the stress of heavy-duty materials.
Additionally, consider the type of stitch you use; some stitches are better suited for heavy-duty sewing, providing extra strength and stability to your projects.
Longer Stitch for Durability
When sewing with thick fabrics, it’s crucial to adjust your stitch length for durability. A longer stitch, around 3.5 to 4.5 mm, not only ensures the fabric moves smoothly under the presser foot but also prevents jamming, a common issue when dealing with denser materials.
This adjustment is akin to shifting gears in a car; just as you’d choose a higher gear for smooth cruising on a highway, a longer stitch length allows your sewing machine to handle thick fabrics with ease.
Moreover, this approach aligns with the principle of working in harmony with your sewing machine’s capabilities. By manually adjusting the stitch length, you’re essentially customizing the machine’s stride to match the fabric’s terrain, ensuring a balanced, even feed that minimizes the risk of needle breakage and uneven stitching.
In essence, when sewing thick fabrics, think of yourself as a pilot navigating through different altitudes; just as a pilot adjusts the plane’s altitude to ensure a smooth flight, adjusting your stitch length ensures a smooth sewing experience, resulting in durable, professional-quality seams.
Stitch Types for Heavy Duty Sewing
When tackling heavy-duty sewing projects, choosing the right stitch type is as crucial as selecting the appropriate fabric and thread. For durable, long-lasting results, consider using decorative stitches, buttonhole sewing, appliqué techniques, patchwork bonding, and zipper application.
These stitch types not only enhance the aesthetic appeal of your project but also ensure structural integrity.
Decorative stitches add a unique flair and can reinforce seams in areas subject to stress or wear. Buttonhole sewing is essential for garments, requiring precision to ensure functionality and strength.
Appliqué techniques allow for creative expression and can add layers of durability, especially in quilted projects. Patchwork bonding benefits from strong stitches that can withstand the rigors of use and laundering.
Lastly, zipper application demands careful stitch selection to secure the zipper in place without compromising the fabric.
By mastering these stitch types, you’ll unlock the potential for innovative, durable, and visually appealing sewing projects. Remember, the key to success lies in practice and experimentation. So, don’t shy away from trying new techniques and stitch patterns to discover what works best for your heavy-duty sewing needs.
Sewing Techniques for Thick Materials
When sewing with thick materials, it’s crucial to manage the fabric feed effectively. This helps prevent the fabric from climbing up the needle. These steps ensure smooth sewing and high-quality stitch formation on heavy fabrics.
Managing Fabric Feed
After mastering the right stitch length for thick fabrics, it’s time to tackle fabric feed issues.
You’ll want to avoid the dreaded fabric climb where materials bunch up around the needle.
If you’re dealing with particularly stubborn textiles, consider strapping on walking foot attachments or roller feet. These gizmos work in cahoots with your feed dog mechanism to keep the fabric tension consistent and prevent any unwanted fabric gymnastics.
Preventing Fabric Climbing
When tackling thick fabrics, the bane of smooth sewing often lies in the dreaded fabric climb. Picture this: you’re cruising along, and suddenly, your fabric decides to scale Mount Everest. To keep your sewing expedition on track, adjusting the presser foot pressure becomes your sherpa.
Too much pressure, and your fabric’s going nowhere fast, creating a mini traffic jam under your needle. Dial it down, and you’ll find the sweet spot where your fabric glides like a pro skater on ice.
Interfacing isn’t just for stiff collars; think of it as the secret sauce that keeps your stitches in line, especially when embroidering on thick materials.
Now, onto hand cranking and counter-stitching—your secret weapons. When your machine’s pedal feels like it’s about to throw a tantrum, switch to hand cranking. It’s like manually steering a boat through choppy waters, giving you control to navigate those thick seams without a hitch.
And counter-stitching? It’s not just going backward for the fun of it. Use it to reinforce those starts and ends, ensuring your thick fabric doesn’t unravel like a poorly kept secret.
Troubleshooting Common Issues
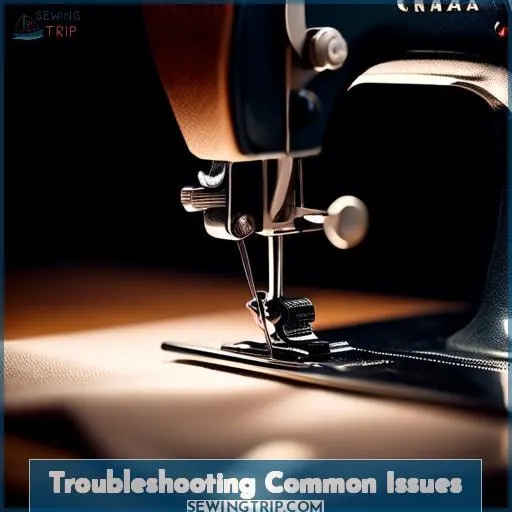
When sewing with thick fabrics, encountering skipped stitches or thread bunching can be particularly frustrating. These common issues can disrupt your sewing flow and affect the quality of your work.
To address skipped stitches, ensure you’re using the correct needle size and type for your fabric, as a mismatch can lead to improper stitch formation.
For thread bunching, often referred to as birdnesting, the root cause is usually incorrect tension settings. Adjusting the tension to achieve a balanced stitch on both the top and bottom of your fabric is crucial.
Additionally, ensuring your machine is correctly threaded and the bobbin is properly inserted can prevent these issues. Regular maintenance, including cleaning and lubricating your sewing machine, can also help avoid these problems and keep your machine running smoothly.
Skipped Stitches and Solutions
When you’re battling skipped stitches, think of your sewing machine as a temperamental artist that demands the perfect tools and conditions to create its masterpiece. If your stitches are playing hide and seek, it’s time to play detective. First off, check if your needle’s throwing a tantrum.
A bent or dull needle is like trying to paint with a broken brush—it just won’t do.
Next, give your thread a once-over. Is it throwing a fit because it’s not the right type or quality for your fabric? Imagine trying to sew denim with thread as fragile as a spider’s web. Not going to end well, is it? Ensure you’re not setting yourself up for a thread-breakage horror show.
Also, peek under the hood—your bobbin case might be staging a rebellion. A jammed or improperly loaded bobbin is like a rock in your shoe; it’s small but can ruin your whole day.
Lastly, if your fabric is puckering like it just tasted a lemon, it might be pulling a diva move. Stabilize it with some tissue paper or a proper stabilizer to keep it in check. Remember, sewing is like cooking—a dash of patience, a sprinkle of humor, and the right ingredients make for a delicious dish.
Resolving Thread Bunching
When tackling the pesky problem of thread bunching, it’s like being a detective in a fabric mystery. First off, let’s talk thread thickness. Imagine your thread as a road-tripper navigating through the narrow streets of your sewing machine.
Too thick, and it’s like a big rig squeezing through an alley—adjust that tension to give it room to breathe. Now, onto needle lubrication. Think of it as the oil in your car; without it, things get noisy and bumpy.
A well-oiled needle glides through fabric like a hot knife through butter, keeping those stitches smooth.
Cleaning frequency is your best friend here. It’s like clearing out the junk drawer; the more often you do it, the less mess you’ll have to deal with. Regular clean-ups ensure your machine doesn’t throw a tantrum mid-project. And bobbin friction? It’s the silent tension killer.
Too much, and your thread’s on a tightrope. Adjust for a smooth dance between needle and bobbin, avoiding those dreaded bunches.
Lastly, tension variations are the spice of sewing life. Each fabric demands its own setting, like choosing the right gear for a steep hill. Experiment, but remember: too tight, and you’re strangling your fabric; too loose, and it’s a saggy mess.
Find that sweet spot, and you’ll be stitching like a pro, leaving thread bunching as just a ghost story in the sewing world.
Maintenance Tips for Optimal Performance
To ensure your sewing machine performs optimally, especially when working with thick fabrics, it’s crucial to maintain it properly.
Regular cleaning and lubrication keep the machine running smoothly, while checking for wear and damage helps prevent unexpected issues.
Regular Cleaning and Lubrication
After tackling those pesky tension issues, it’s time to dive into regular maintenance.
Just like your car needs an oil change, your sewing machine craves a spa day. Regular cleaning and lubrication are your secret weapons against the gremlins of thread tension and fabric feeding.
Think of it as a pit stop; a clean machine is a happy machine, ready to race through any fabric you throw at it. So grab that brush, show some love to your bobbin case, and keep that machine purring like a well-fed kitten.
Checking for Wear and Damage
After you’ve given your sewing machine a thorough cleaning and lubrication, it’s time to check for wear and damage to ensure it’s in top-notch condition.
Keep an eye on the needle’s sharpness; a dull needle can wreak havoc on your fabric and stitches.
Make sure the bobbin case is properly aligned—misalignment can lead to skipped stitches or tension issues.
Examine the hook condition; any nicks or scratches can snag threads and disrupt your sewing rhythm.
Check the needle bar integrity; it should be straight and secure.
Lastly, ensure your thread tension balance is just right; it’s a fine line between too tight and too loose, and only the perfect balance will give you that smooth, even stitch you’re after.
Advanced Tips for Professional Results
To achieve professional results when sewing with thick fabrics, it’s essential to utilize stabilizers and tissue paper. These tools not only improve the feed of tricky materials through your machine but also prevent needle holes and fabric distortion.
Additionally, keeping a record of the optimal settings for needle type, tension, and stitch length for various fabrics can significantly streamline your sewing process.
Using Stabilizers and Tissue Paper
After diving deep into the maintenance tips for your sewing machine, let’s shift gears and talk about using stabilizers and tissue paper—your secret weapons for achieving professional results, especially with those tricky fabrics.
- Tissue Paper Use: It’s not just for gift wrapping! Slipping a layer of tissue paper under your fabric can prevent it from being gobbled up by your machine. It’s like giving your fabric a little bodyguard.
- Stabilizer Types: From tear-away to wash-away, picking the right stabilizer is like choosing the right pair of shoes—it needs to fit the occasion (or fabric, in this case). Each type has its role, ensuring your stitches sit pretty without puckering.
- Stabilizing Tips: Think of stabilizers as the unsung heroes of the sewing world. They keep things smooth and tidy, reducing needle climbing and fabric displacement. It’s like having a best friend who always has your back, or in this case, your fabric’s back.
Recording Settings for Future Projects
Recording your settings for future projects isn’t just about keeping tabs; it’s a game-changer in project management, boosting efficiency, organization, and productivity. Think of it as your personal cheat sheet, offering convenience at your fingertips.
| Fabric Type | Tension-Stitch Combo |
|---|---|
| Denim | 4.5 – Long |
| Leather | 5 – Longer |
| Cotton | 3 – Medium |
| Chiffon | 2 – Short |
This little trick keeps you sewing smoothly, without missing a beat.
Frequently Asked Questions (FAQs)
Can I use regular thread for topstitching on thick fabrics?
Yes, you can use regular thread for topstitching on thick fabrics.
For a standout look, opt for a thicker topstitch thread and adjust tension accordingly.
How does fabric weave affect tension settings?
As the saying goes, A stitch in time saves nine. So too must you adjust tension for different fabric weaves to prevent future issues.
Tighter weaves generally require higher tension settings due to their density.
Is it necessary to adjust bobbin tension for thick materials?
Yes, you may need to adjust bobbin tension for thick materials.
Thicker thread can increase tension, potentially requiring a slight loosening.
Can I sew thick fabrics with a vintage sewing machine?
Navigating the seas of sewing, your vintage machine can indeed sail through thick fabrics. It’s not a walk in the park. You’ll need to adjust tension, use the right needle, and perhaps employ a longer stitch length.
How do different presser feet impact sewing thick fabrics?
Different presser feet can make or break your thick fabric sewing game. They’re like secret weapons, ensuring smooth sailing over bulky terrain without skipped stitches or a wrestling match with your fabric.
Conclusion
Embarking on this journey, you’ve armed yourself with the knowledge to adjust thick fabric tension, ensuring your sewing projects are nothing short of masterpieces.
By fine-tuning your machine’s settings, selecting the appropriate needle and thread, and applying specialized sewing techniques, you’re now equipped to tackle heavy materials with confidence.

