This site is supported by our readers. We may earn a commission, at no cost to you, if you purchase through links.
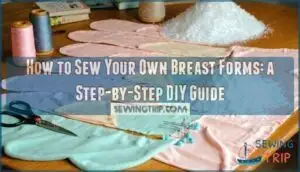
Trace a teardrop or oval shape onto paper for your template, cut it out, and use it to shape your fabric. Sew two pieces together along the edges, leaving a small opening to add your filling.
Fill the forms with foam or microbeads, adjusting for size and weight. Once you’re happy with the shape, sew the opening closed.
For a snug feel, consider adding interfacing or fleece.
Table Of Contents
Key Takeaways
- Choose soft, stretchy fabric like jersey or swimsuit material for comfort and natural shape.
- Use accurate templates for tracing, ensuring symmetry and a good fit.
- Fill the forms with lightweight materials like microbeads, and adjust for weight and size.
- Sew the edges securely, adding interfacing or fleece for structure and durability.
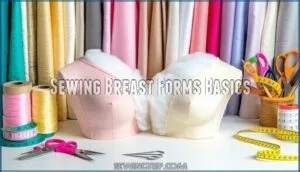
Sewing Breast Forms Basics
Sewing your own breast forms starts with the right materials, tools, and fabric to make the process smooth and stress-free.
Choosing the right materials transforms a sewing project from stressful to seamless, making DIY breast forms a joy to create.
By choosing stretchy, durable fabric and lightweight filling, you’ll create forms that look natural and feel comfortable.
Materials Needed
To make DIY breast forms, gather these materials:
- Microbeads: Lightweight filling with microbead alternatives like foam or polyfill.
- Fabric: Use 4-way stretch fabric, like swimsuit material, for shaping.
- Interfacing: Choose medium-weight interfacing and fleece for structure.
- Static Reduction Tools: Anti-static spray or dryer sheets help keep those pesky microbeads in check.
These essentials guarantee smooth sewing! You can find various sewing microbeads online.
Tools Required
You’ll need a sewing machine for smooth, strong stitching and fabric scissors for clean cuts.
Measuring tools keep patterns accurate, while hand-sewing needles handle delicate areas.
A filling funnel makes adding microbeads simple, with less mess.
For basic stitches, an Artika kit provides the essentials.
Remember, sewing tips often suggest keeping your workspace organized—misplacing tools is like playing hide-and-seek, but nobody enjoys that game!
Fabric Selection
Choosing fabric for breast forms? Select something soft, stretchy, and skin-friendly.
Materials like cotton or knit fabrics make sewing easier and guarantee a comfortable prosthesis.
Keep these in mind:
- Stretch Factor: Swimsuit fabric works wonders.
- Skin Sensitivity: Go soft with cotton.
- Breathability: Lightweight fabrics prevent overheating.
- Color Options: Neutral or fun—your pick!
Comfort first, always.
Sew Your Own Breast Forms
Sewing your own breast forms can feel empowering and creative—like crafting a little secret masterpiece just for you.
Crafting your own breast forms is a journey of creativity and comfort—a personal masterpiece designed just for you.
Start by combining soft, stretchy fabric with thoughtful weight distribution for comfort. Use a bra pattern adaptation to trace shapes that fit you perfectly.
Sew the front and back pieces together, leaving a small opening for filling. For lightweight, soft breast forms, try microbeads, or explore alternative filling options like poly pellets.
Keep closures adjustable so you can tweak the weight or size later. Stitch up the fill hole securely using seamless finish techniques for a professional look.
Follow this breast form tutorial step by step to create a homemade prosthesis that’s practical, comfortable, and truly yours.
Creating Breast Form Templates
To start crafting your breast forms, you’ll need to create precise templates by tracing around a foam form or using specific measurements.
This step sets the foundation for a perfect fit. Keep your scissors sharp and your fabric steady—this is crucial for achieving the desired outcome, making it a complete process from start to finish.
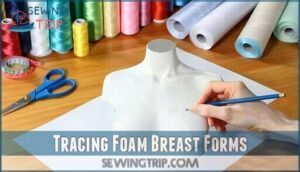
Tracing Foam Breast Forms
How do you guarantee your breast form sewing tutorial starts with a bang? Trace foam breast forms carefully for template accuracy.
Lay your foam form flat and trace its shape onto paper, adjusting for size variations. Smooth your outlines for form symmetry.
With careful tracing, you can then consider selecting proper materials for design transfer.
- Use thin paper for easy pattern alterations.
- Double-check edges for consistent tracing techniques.
- Label templates for easy fabric pairing later.
This approach ensures that your sewing tutorial is well-structured and easy to follow, allowing you to create a professional-looking breast form with accurate tracing techniques.
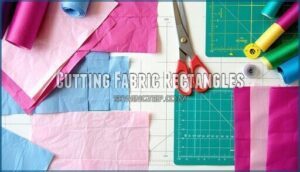
Cutting Fabric Rectangles
Once you’ve traced your templates, it’s time to cut fabric rectangles. Make sure the grain alignment matches your sewing pattern for stretch and durability. Use sharp scissors or a rotary cutter for cutting precision and minimize fabric waste.
For ideal results, consider investing in specialized cutting tools. Here’s a quick size guide for rectangles:
| Breast Form Size | Rectangle Width | Rectangle Length | Grain Direction | Notes |
|---|---|---|---|---|
| XXS | 4 inches | 5 inches | Horizontal | Best for snug fit |
| XS | 5 inches | 6 inches | Horizontal | Adjust if needed |
| S | 6 inches | 7 inches | Vertical | Add extra stretch |
| M | 7 inches | 8 inches | Vertical | Use swimsuit fabric |
| L | 8 inches | 9 inches | Either | Check flexibility |
Keep your workspace tidy to avoid misplacing your cut pieces. A clutter-free table can save your sanity! Fabric breast forms need a sturdy rectangle foundation before the fun of sewing begins—so cut carefully.
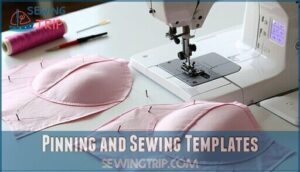
Pinning and Sewing Templates
Line up your templates carefully to nail that template accuracy—crooked seams are no friend here.
Use snug pin placement along the edges to keep fabric tension even. Leave a small seam allowance as you stitch with your machine, keeping steady hands.
Practice stitching techniques on scrap fabric first if needed; fabric breast forms deserve your best work, using techniques that ensure template accuracy.
Filling and Shaping Breast Forms
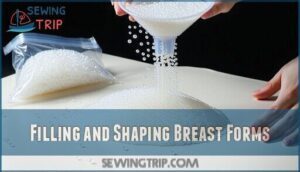
Filling and shaping your breast forms is where the real magic happens, so grab your funnel and microbeads.
Keep things tidy with a plastic bag and anti-static spray—it’s a bit like taming glitter, but way more rewarding.
Using Microbeads
Filling your DIY breast forms with microbeads makes them lightweight, flexible, and long-lasting.
Use a funnel for precise bead density, ensuring the form hugs your chest naturally. Adjust the bead amount to match the form weight you need.
Want alternatives? Poly pellets work too, but microbeads provide unmatched durability and shape.
You can find more information about purchasing microbead forms online. Safety tip: handle beads carefully—they’re slippery escape artists!
Managing Static Electricity
Static electricity can make microbeads stick everywhere, creating a frustrating mess.
Combat this by lightly spraying an antistatic spray on your fabric or running a dryer sheet over it.
For extra grounding, work on a humid day or keep a damp cloth nearby.
Choosing anti-static materials helps, too—less zap, more zen while you fill your breast forms.
Adjusting Filling Levels
Once you’ve tackled static cling, focus on achieving great symmetry balance and shape customization.
Adjust filling by adding or removing microbeads slowly, testing the weight distribution and firmness in your bra’s cup.
To achieve a perfect fit, consider adjusting dart size for superior shaping.
Comfort testing helps refine DIY breast forms for a natural fit, and perfecting this step guarantees your mastectomy project feels as good as it looks, with great attention to customization.
Customizing and Securing Forms
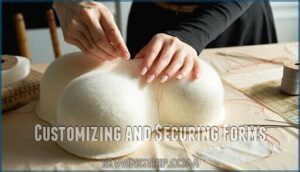
Now it’s time to make your forms sturdy and secure, so they look and feel just right.
By adding interfacing and fleece for structure and carefully sewing the fill holes shut, you’ll guarantee they hold their shape and stay comfortable all day, which is crucial for them to be secure.
Adding Interfacing and Fleece
To add stability and comfort to your breast forms, layer fleece over interfacing.
Use dense fleece for softness and interfacing to prevent fabric from stretching. Pin layers securely and stitch around the edges, guaranteeing no shifting.
This layering technique stabilizes the shape, creating a firm yet soft base. Proper stitching patterns guarantee durability and keep your forms looking natural.
Sewing Fill Holes Closed
When you’re sewing the fill hole closed, focus on secure closures to prevent bead leakage.
Use small, reinforced stitching for durability, and place the hole discreetly to guarantee seam concealment.
Work patiently, tightening each stitch for a clean finish. Think of it like sealing an envelope tightly—precision matters!
A matching thread color guarantees an invisible repair. Once done, test the form for any weak spots before celebrating your handiwork.
Frequently Asked Questions (FAQs)
How do you make a foam breast form?
Like shaping clouds into form, trace a foam insert onto fabric.
Cut, stitch layers with interfacing, and stuff carefully.
Add microbeads for weight, sew securely, and test it in your bra for fit.
Should you sew your own forms?
If you enjoy hands-on projects, want a custom fit, and value cost-saving alternatives, sewing your own breast forms is worth it.
It’s creative, rewarding, and lets you tailor every detail to your comfort.
How do you make a microbead breast form?
Start by cutting stretchy fabric and sewing it into two breast shapes.
Leave an opening to fill it with microbeads using a funnel.
Once filled, stitch it closed securely to prevent spills.
Can you wear foam breast forms in the store?
Yes, you can wear foam breast forms in the store.
They’re lightweight, comfy, and discreet under clothing.
Just make certain they fit your bra well, so they stay secure while you shop with confidence.
How do you wear a bra with a foam breast form?
Choose a pocketed mastectomy bra to secure the foam breast form snugly.
Slip the form into the pocket, adjusting for a natural look.
Make certain the bra fits well to avoid shifting or discomfort.
How do you make a breastplate with a bra?
Imagine blending function and flair—attach a bra’s cups to a stable chest plate using craft foam or thin cardboard, secure with fabric glue or stitching.
Line it for cushioning, ensuring comfort and durability.
Can you make your own breast form?
Sewing your own breast forms is a fun, rewarding project.
With microbeads, stretchy fabric, and basic sewing tools, you’ll create lightweight, comfy forms fitted to your shape.
Quick, creative, and customizable!
What is the best shape for breast forms?
The best shape for breast forms depends on your body and bra style.
Triangular forms work well for most bras, while teardrop shapes fit lower necklines.
Ultimately, go with a shape that feels natural and fits comfortably.
How to apply self-adhesive breast forms?
Applying self-adhesive breast forms is like placing a puzzle piece perfectly—clean your skin, peel the backing, and gently press them on.
Adjust for comfort, ensuring they stick firmly. Reapply adhesive spray if needed.
How long do self-adhesive breast forms last?
Self-adhesive breast forms can last anywhere from 6 months to 2 years, depending on wear, care, and cleaning.
Keep the adhesive clean and avoid oils or lotions to extend their stickiness and overall lifespan.
Conclusion
Ready to show off your sewing skills? Learning how to sew your own breast forms isn’t just empowering; it’s also practical and fun.
With a soft fabric, accurate templates, and thoughtful filling choices, you can create forms that fit comfortably and look great.
Adding fleece or interfacing guarantees a snug finish, while sealing the fill hole completes your project.
Take your time, adjust for the perfect size, and enjoy crafting something truly personal and functional!

