This site is supported by our readers. We may earn a commission, at no cost to you, if you purchase through links.
You’ll cut fabric pieces according to your pattern, then sew shoulder seams first. Next, attach sleeves by pinning them carefully into armholes and stitching with a steady hand.
Side seams come next, connecting front and back pieces in one smooth line. For necklines, you’ll either add a collar or finish with bias tape.
Hems require precise measuring and pressing before final stitching. The process builds confidence as each seam comes together.
Professional techniques for buttonholes, plackets, and collar construction separate amateur work from polished results.
Table Of Contents
- Key Takeaways
- How to Sew a Basic T-Shirt From Scratch
- Tips for Sewing Stretch Knit Fabrics
- How to Sew a Button Stand on a Shirt
- How to Sew a Shirt Yoke
- How to Sew on a Shirt Collar
- How to Sew a Sleeve Placket
- How to Sew on a Shirt Cuff
- How to Easily Sew in a Sleeve
- Frequently Asked Questions (FAQs)
- Conclusion
Key Takeaways
- You’ll need essential supplies including a sewing machine, sharp scissors, ballpoint needles for knits, and quality thread – proper tools make the difference between amateur and professional results.
- Start with jersey knit or cotton knit fabrics since they’re forgiving for beginners, and always use zigzag stitches instead of straight stitches to accommodate fabric stretch.
- Follow the logical construction sequence: sew shoulder seams first, attach sleeves by pinning carefully into armholes, then connect side seams in one continuous line from underarm to hem.
- Master professional finishing techniques like proper collar attachment, buttonhole placement, and precise hemming – these details separate homemade-looking garments from polished, store-quality shirts.
How to Sew a Basic T-Shirt From Scratch
Creating your first T-shirt from scratch requires just basic supplies, the right knit fabric, and a clear step-by-step approach that transforms simple pattern pieces into a wearable garment.
You’ll start by selecting stretchy jersey or cotton knit fabric, then follow precise cutting and sewing techniques to construct shoulder seams, attach sleeves, and finish with professional hems.
Supplies and Materials
The essentials for shirt sewing start with your sewing machine, a well-drafted sewing pattern, and quality materials.
Your workspace setup should include sharp cutting tools, measuring tape, pins, and fabric scissors. Thread choices matter – polyester works best for stretch fabrics.
Needle types include ballpoint for knits and universal for wovens. Fabric selection comes next, but proper sewing tools and materials create your foundation for success.
Many sewers begin with a simple shirt pattern to master the basics.
Choosing The Right Fabric
Your fabric choice makes or breaks your shirt project.
Quality fabric transforms ordinary home sewing into professional-looking garments that last.
Jersey knit fabric offers the perfect stretch for comfortable t-shirts, while cotton provides breathability and easy care.
Consider fabric weight—lightweight knits work best for fitted styles, medium weights for casual wear.
Fabric drape affects how your shirt hangs, and fabric prints add personality.
Jersey knit options are widely available online.
Skip heavyweight or scratchy materials that’ll frustrate beginners.
Step-by-Step Instructions for Sewing a T-Shirt
Now you’ll transform fabric pieces into your finished t-shirt using your sewing machine. Start by pinning shoulder seams with right sides together, then stitch using a zigzag stitch that accommodates knit fabric stretch.
Next comes sleeve insertion – pin each sleeve to the armhole, easing any fullness. Sew the side seams from underarm to hem in one continuous line.
Focus on proper fabric grain alignment throughout this sewing shirt tutorial. Finish with hemming techniques for neckline, sleeves, and bottom edge. Consider seam finishes like serging for durability.
Pattern adjustments can be made during fitting. This sewing tutorial creates a professional-looking garment when you sew a shirt methodically.
Tips for Sewing Stretch Knit Fabrics
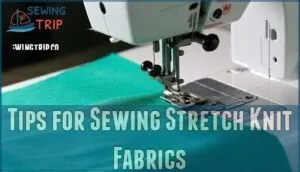
Working with stretch knit fabrics requires specific techniques to prevent puckered seams and maintain the fabric’s natural stretch.
You’ll need to use ballpoint needles, polyester thread, and zigzag stitches to accommodate the fabric’s movement while creating durable, professional-looking seams.
Using The Right Stitch for Stretchy Fabrics
Your sewing machine’s stitch selection can make or break your knit fabric project. Skip straight stitches—they’ll snap when stretched.
Instead, use zigzag or lightning stitches for stretch control and durability. These stitch types flex with your fabric’s movement, preventing seam failure.
Adjust your machine’s settings to accommodate stretch knit fabrics, ensuring professional results in your sewing shirt tutorial every time. For more specialized techniques, consider sewing knit stitches for superior results.
Selecting The Right Sewing Machine Needle
Your sewing machine needle choice can make or break your knit fabric project. The wrong needle creates skipped stitches, fabric damage, and frustration.
Here’s your needle selection guide:
- Use ballpoint needles for jersey knits and t-shirt fabrics
- Choose stretch needles for spandex blends and athletic wear
- Select size 75/11 or 80/12 for lightweight knits
- Pick size 90/14 for medium-weight stretch fabrics
- Replace needles frequently to prevent snagging and skipped stitches
Proper needle selection is key for preventing fabric distortion.
Techniques for Sewing Neckbands
Now that you’ve got the right needle sorted, let’s tackle neckband construction – where many beginners hit their first roadblock.
Getting neckband fabrics to behave requires patience and proper technique. Without stretching the fabric during stitching, you’ll avoid that dreaded gaping collar that screams "homemade."
Here’s your roadmap for perfect neckband stabilization:
- Clip curves when sewing neckband ends together
- Grade seams to reduce bulk and improve neckband shaping
- Apply fusible interfacing only to outer neckband piece
- Notch seam allowances for smooth neckband finishes
- Press thoroughly before and after each sewing step
These sewing techniques transform amateur shirt collar sewing into professional-looking results with knit fabric.
How to Sew a Button Stand on a Shirt
Once you’ve mastered basic shirt sewing, adding a button stand elevates your project from amateur to professional. This essential placket provides structure and houses your buttonholes perfectly.
Start by determining your Button Stand Width based on button diameter. Add 2.5 cm to your shirt’s center front, extending down the fold line. Interfacing Button Stand adds essential body and prevents stretching.
Follow these step-by-step instructions for success:
- Cut interfacing and fuse to wrong side of stand
- Create Hong Kong Seams or serge edges for clean finish
- Mark precise Buttonhole Placement before stitching
- Complete with careful Edge Stitching for crisp appearance
Proper Buttonhole Placement guarantees smooth operation. Press thoroughly between steps—precision prevents gapping and creates that coveted polished look.
How to Sew a Shirt Yoke
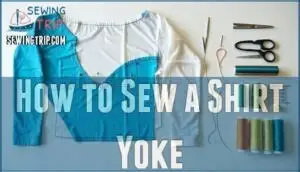
Your shirt’s yoke creates the foundation for a professional-looking garment. This triangular piece spans across your shoulders, providing structure and shape to the upper back.
Master these essential yoke construction techniques:
- Apply yoke interfacing to both pieces for added body and stability
- Staystitch curved seams at ⅜" to prevent stretching during handling
- Clip inner curves every ½" so fabric spreads smoothly when turned
- Grade enclosed seams by trimming layers to different lengths, reducing bulk
- Press yoke seams open or toward the back for crisp yoke attachment
The burrito method simplifies yoke shaping by sandwiching the back panel between yoke pieces. Pin carefully, matching notches before sewing. Your shirt sewing pattern will guide yoke placement, ensuring proper fit across shoulders.
How to Sew on a Shirt Collar
Attaching a collar transforms your basic shirt into a polished, professional-looking garment that requires precise alignment and careful stitching techniques.
You’ll need to interface the collar pieces, match the center points perfectly, and use proper seam allowances to create a clean finish that won’t pucker or gap.
Preparing The Collar and Bodice Pieces
Foundation work sets the stage for collar success.
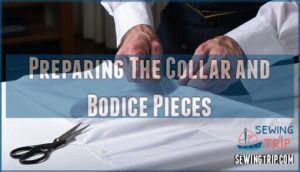
Cut your collar stands, top collar, and under collar pieces first.
Apply interfacing to one collar stand and the top collar piece for proper bodice shaping.
Place collar pieces face-to-face, then stitch the outer edge carefully.
Trim corners 2mm from stitching to reduce bulk, turn right side out, and press seams flat.
Attaching The Collar to The Bodice
Now you’ll connect the collar to your bodice. Pin the lower collar stand edge to the neckline, carefully matching notches for perfect collar placement. Stitch along the seam, then tuck seam allowances into the collar stand and press firmly.
For a professional finish, consider using lightweight fusible interfacing on one layer of the collar.
Here’s your finishing sequence:
- Topstitch the collar stand 3mm from edge
- Sink-stitch along neckline seam
- Press the completed collar attachment
How to Sew a Sleeve Placket
Creating professional sleeve plackets transforms your handmade shirt from amateur to expert-level craftsmanship. These functional details require precision but aren’t intimidating once you master the technique.
Placket Construction starts with careful pattern preparation and reinforcement stitching. Placket Attachment involves sewing the tower piece to your shirt sleeve using precise seam allowances. Placket Alignment guarantees clean edges through proper folding and edgestitching techniques.
Your sewing machine handles placket reinforcement easily with zigzag stitches at stress points. Following established sewing patterns and shirt sewing techniques, you’ll achieve placket finishes that rival ready-to-wear garments through consistent shirt sleeve sewing practice.
For different sleeve styles, like shirt sleeves, understanding the basic sleeve types is vital for success.
How to Sew on a Shirt Cuff
Anyone can master professional-looking cuff construction with proper techniques and attention to detail. Start by measuring your wrist line to determine the correct cuff length, then draft your pattern accordingly. Cut two mirrored cuff pieces and prepare them for attachment.
Cuffs in ready-to-wear garments are often attached using <strong>one-step methods</strong> for efficiency.
Here’s your step-by-step process:
- Cuff Alignment – Match cuff seam to sleeve seam before pinning
- Initial Assembly – Sew cuff pieces right sides together with proper seam allowance
- Cuff Pressing – Press flat before proceeding with attachment
- Edge Stitching – Use edge stitch foot for precise topstitching
- Cuff Seam Finish – Trim seam allowances to reduce bulk
Your sewing machine handles shirt sleeve sewing beautifully when you follow these shirt sewing techniques. Proper cuff construction transforms ordinary sleeves into polished details that elevate your entire garment.
How to Easily Sew in a Sleeve
Perfect shirt cuffs mean nothing if your sleeves don’t fit properly. Sleeve insertion might seem intimidating, but it’s surprisingly manageable with the right approach.
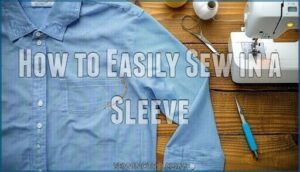
Start by checking that your sleeve cap shape matches your armhole perfectly. Mark the armhole notches on your sleeve for proper sleeve alignment – this prevents twisted or lopsided results. Pinning sleeves comes next, but don’t rush this step.
Easing sleeves into the armhole requires patience. Begin at the underarm seam and work your way around, distributing fullness evenly. Use gathering stitches or strategic pinning to control excess fabric. Baste the sleeve just inside your seam allowance, then try on the garment to test the fit.
Here are key sewing techniques for perfect sleeve insertion:
- Match notches precisely before pinning
- Use your sewing machine’s longest stitch for basting
- Ease fabric gradually to prevent puckering
- Check shoulder mobility during fitting
- Trim seam allowances to reduce bulk
- Press seams toward the body of the shirt
With practice, you’ll master this fundamental skill.
Frequently Asked Questions (FAQs)
How do you sew a shirt?
Picture fabric transforming into your perfect garment.
Start by drafting a pattern from an existing well-fitting shirt, then cut your chosen fabric, sew shoulder seams, attach sleeves, stitch sides, and hem edges for completion.
How to sew the sleeves of a T-shirt dress?
Pin sleeves to armholes, matching notches and shoulder seams.
Stretch fabric gently while sewing with a zigzag stitch. Use ballpoint needles to prevent snags.
Ease sleeve cap smoothly into armhole for professional fit.
Can you sew a shirt with a sewing machine?
Funny how you’re wondering about machine sewing just as many hand-sewers are!
Yes, you can absolutely sew a shirt with a sewing machine. It’s faster, creates stronger seams, and handles various fabrics beautifully.
How do you sew a T-shirt with an iron?
You’ll use your iron to press seams flat after sewing each section, creating crisp edges on hems.
It’s essential for professional-looking results and helps fabric lay properly, setting the neckline binding.
Are T shirts easy to sew?
T-shirts are surprisingly beginner-friendly! You’ll need basic stitching skills and a sewing machine.
The stretchy knit fabric forgives mistakes, making it perfect for learning.
Start with simple patterns—you’ll create wearable results faster than expected.
What is the best stitch for sewing shirts?
Thread glides smoothly through fabric as your machine hums along.
Choose zigzag or lightning stitches for knit shirts since they stretch with the fabric, preventing broken seams when you move and wear your creation.
Is it cheaper to sew your own shirts?
You’ll save money long-term by sewing shirts yourself, especially if you make multiple garments.
Initial costs for fabric, patterns, and tools can be high, but homemade shirts cost $5-15 versus $20-50 retail.
How is a shirt made step by step?
Ironically, making something you wear daily seems impossible.
You’ll draft patterns from existing shirts, cut fabric pieces, sew shoulder seams, attach sleeves and collar, stitch sides, then hem edges for a finished garment.
How to fix puckered seams on shirts?
Check your tension settings first – loose upper tension creates puckering.
Use a ballpoint needle for knits, reduce presser foot pressure, and don’t pull fabric while sewing.
Press seams gently with steam to relax fibers.
Whats the best way to hem curved edges?
Use bias tape or a narrow rolled hem for curved edges.
Stay-stitch first to prevent stretching, then ease the fabric around curves.
Press carefully with steam, clipping seam allowances at tight curves for smooth results.
Conclusion
Mastering how to sewing a shirt transforms fabric into wearable art, builds essential skills, and creates garments you’ll treasure.
You’ve learned pattern cutting, seam construction, and professional finishing techniques.
Your sewing machine becomes a trusted tool as you progress from basic t-shirts to complex button-ups with plackets and collars.
Each project strengthens your abilities while saving money on store-bought clothing, and allows you to craft custom shirts that fit perfectly and reflect your personal style.
Start with simple designs, practice consistently, and soon you’ll be able to create shirts that you’ll treasure.
- https://www.youtube.com/watch?v=YRI8SQ4LTIE
- https://www.freepik.com/free-photo/closeup-tailors-table-with-male-hands-tracing-fabric-making-pattern-clothes-traditional-atelier-studio-man-female-profession-gender-equality-concept_10249382.htm
- https://blog.fabrics-store.com/2017/12/05/sewing-glossary-how-to-draft-and-sew-a-sleeve-placket-with-cuff/
- https://sewing.patternreview.com/SewingDiscussions/topic/89496
- https://fairfitstudio.com/blog/how-to-sew-cuffs

