This site is supported by our readers. We may earn a commission, at no cost to you, if you purchase through links.

Place fabrics right sides together, pin around edges, and sew with a 1/2-inch seam allowance, leaving an 8-inch opening.
Trim corners, turn right side out, and press flat.
Topstitch around all edges, closing the opening, and for extra stability, add quilting stitches through both layers in a grid or pattern.
This technique creates a blanket that’s twice as warm and gives you two looks in one, wait until you see how easy it is to customize with different fabric combinations!
Table Of Contents
Key Takeaways
- Pin your fabrics right sides together, sew around with a 1/2-inch seam allowance, and leave a 5-10 inch gap for turning.
- Trim excess fabric and corners, turn the blanket right side out, and press for crisp edges.
- Topstitch around all edges to close the opening and reinforce the blanket’s structure.
- Use complementary fabrics and consider adding quilting stitches for extra durability and a polished look.
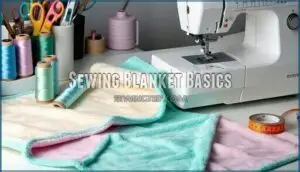
Sewing Blanket Basics
To start sewing a double-sided blanket, you’ll need the right tools, fabrics, and a clear setup.
Gather materials like a sewing machine, thread, scissors, and pins, making sure everything is ready before you begin, which involves having all the necessary items for a clear setup.
Gathering Materials and Tools
Start by gathering your sewing supplies. You’ll need a sewing machine, quality fabric, and the right thread types for durability.
Include sharp cutting tools, measuring implements for accuracy, and plenty of pinning supplies to keep layers aligned. Your fabric choice matters—ensure it suits the blanket’s use.
Proper tools make the process smoother and your project shine. Many sewers find machine attachments helpful for various projects, which can be a key factor in achieving a professional finish with the right thread types.
Choosing Fabric and Thread
Picking the right fabric and thread can make or break your blanket.
Think about fabric durability, weight, and texture variety—fleece and minky are cozy choices. Match thread type to fabric, like polyester for strength or cotton for a softer touch.
Pay attention to color coordination, too. Ensuring the needle size matches the fabric weight is also essential for preventing damage.
Sewing supplies should reflect your fabric choice for a polished, professional finish.
Preparing Sewing Machine
With your fabric and thread ready, it’s time to set up your sewing machine for blanket creation.
Your machine needs proper preparation for smooth sewing:
- Check the needle – use a universal 80/12 needle for medium-weight fabrics or 90/14 for thicker materials
- Adjust thread tension to medium (usually 4-5) for balanced stitches
- Set stitch length to 2.5-3mm for standard seams
Don’t forget to clean lint from your machine’s bobbin area before starting to ensure smooth sewing.
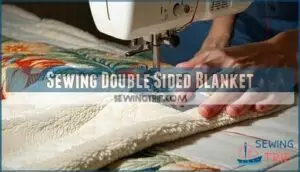
Sewing Double Sided Blanket
In the field of blanket creation, sewing a double-sided blanket offers both warmth and versatility.
You’ll combine two complementary fabric combinations to create a reversible masterpiece that showcases different patterns or textures. Begin by selecting fabrics with similar weights to guarantee proper blanket weight and drape. Cotton paired with flannel or minky with cotton are popular choices.
When joining your fabrics, use secure stitch techniques like a straight stitch with 1/2-inch seam allowance. Don’t forget to leave a 6-8 inch opening for turning. Corner finishing requires special attention – trim excess fabric at angles before turning to create crisp points.
Advanced sewers might incorporate quilting patterns between layers for added dimension and stability. This blanket construction method creates a professional-looking piece without the complexity of binding or advanced sewing techniques.
Your double-sided blanket will become a cozy favorite for years to come. The minky fabric provides unmatched comfort and warmth.
Fabric Preparation Steps
You’ll need to prepare your fabric properly before sewing to guarantee your double-sided blanket turns out perfect, which includes washing, measuring, and cutting your materials to the correct size.
Properly preparing your fabric is the secret to a seamless, professional-looking double-sided blanket that’s both beautiful and durable.
Proper preparation includes squaring up fabric edges, removing selvages, and verifying both fabric pieces match exactly, saving you from frustration later when everything needs to align, which is crucial for a perfect double-sided blanket and to ensure that both sides are exactly matched.
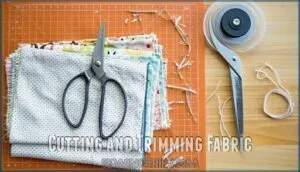
Cutting and Trimming Fabric
Now that you’ve gathered your materials, it’s time to cut your fabric. Use sharp scissors or a rotary cutter with a cutting mat for clean edges.
Measure twice, cut once! Allow for a ½-inch seam allowance around all sides.
For softer blankets, try rounding the corners using a plate as a guide. Always cut along the fabric grain to prevent fraying and guarantee your blanket holds its shape.
Consider using specialized fabric shears for improved precision.
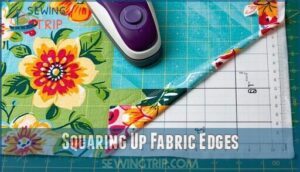
Squaring Up Fabric Edges
Now that your fabric is cut, you’ll need to square up those edges for a truly professional-looking blanket.
Lay your fabric on a cutting mat and use a rotary cutter to trim any uneven edges. Accurate measurements are your best friend here—check that opposite sides match exactly.
Proper fabric alignment prevents skewing and guarantees corner precision when you sew. Don’t worry if it takes a couple tries; fabric preparation done right makes all the difference, ensuring a professional-looking blanket.
Removing Selvages and Excess Threads
Now that you’ve squared up your fabric, let’s clean it up properly.
First, identify and trim off those selvages—the tightly woven edges that prevent fabric from fraying. They can cause puckering in your finished blanket.
Next, clip any loose threads hanging from your fabric edges. This simple step prevents unwanted threads from getting caught in your seams and guarantees your corner detailing looks professional when your sewing blanket is complete.
Pre-washing helps address potential dye bleeding to ensure a proper finish and prevent issues like dye bleeding.
Assembling Blanket Layers
You’ll now place your fabric pieces right sides together and secure them with pins placed 2-3 inches apart to prevent shifting.
Next, you’ll sew around the edges using a 1/2-inch seam allowance, leaving a 5-10 inch opening for turning the blanket right side out later, which is a crucial step for completing the blanket.
Pinning Fabric Layers Together
Now that your fabric pieces are ready, it’s time for proper layer alignment.
Place both fabric pieces right sides together, ensuring all edges match perfectly. Insert pins perpendicular to the edges every 2-3 inches to prevent shifting during sewing.
Don’t forget to secure corners with extra pins, as they’re prone to misalignment.
For thick fabrics, safety pins offer better grip than straight pins; consider using specialized quilting pins for larger projects.
Sewing Edges With Seam Allowance
After pinning your fabric layers together, it’s time to start sewing the edges with a consistent seam allowance.
Set your machine to a straight stitch and begin with a 1/2" seam allowance width.
When approaching corners, practice corner pivoting by stopping with the needle down, lifting the presser foot, and rotating the fabric.
For curved edges, sew slowly, maintaining even pressure, and remember to backstitch at the beginning and end to reinforce seams.
Leaving Opening for Turning
One essential step when assembling your double-sided blanket is leaving an adequate opening for turning. This 4-6 inch gap should be planned strategically on a straight edge, not at corners.
- Mark your opening with double pins as a visual reminder.
- Backstitch at both sides of the opening for seam strength.
- Keep track of your opening size for easy turning later.
- Proper corner notching makes the final product look polished.
Finishing Blanket Edges
You’ll need to trim excess fabric and threads carefully before ironing the edges flat to achieve a professional finish.
The final touches transform your double-sided blanket from a homemade project to a polished creation that looks store-bought.
Trimming Excess Fabric and Threads
After securing the blanket edges, it’s time to neaten everything up. You’ll need to trim excess fabric and threads for a polished finish.
| Trimming Technique | Purpose | Tools Needed | Skill Level | Time Required |
|---|---|---|---|---|
| Seam Allowance Trimming | Reduces bulk | Sharp scissors | Beginner | 5-10 minutes |
| Corner Fabric Reduction | Creates sharp corners | Small scissors | Intermediate | 2-3 minutes |
| Curve Clipping Techniques | Prevents puckering | Small scissors | Intermediate | 5-8 minutes |
| Thread Tail Management | Eliminates loose ends | Thread snips | Beginner | 3-5 minutes |
| Fray Prevention Methods | Maintains durability | Fabric sealant | Beginner | 1-2 minutes |
Trim seam allowances to 1/4 inch for ideal blanket quality and sewing precision. To further prevent fraying, consider finishing raw edges for added durability. This step is crucial for a professional-looking blanket, and it helps in preventing fraying.
Ironing for Professional Finish
Now that your excess fabric is trimmed, iron your blanket for that professional touch.
Lay it flat and press with long, straight strokes to create fabric smoothing without stretching.
Test heat on a hidden area first to avoid scorching.
For perfect corner sharpness and edge alignment:
- Gently push corners out with a point turner
- Press seam allowance flat for crisp edges
- Work methodically from center outward
- Pay special attention to the sewn-closed opening to achieve a crisp edge.
Frequently Asked Questions (FAQs)
How do you sew a double sided blanket?
Place two equal fabric pieces right sides together.
Sew around edges with a 1/2-inch seam allowance, leaving a 5-10 inch opening.
Turn right side out, topstitch around edges to close the opening.
How do you sew a blanket on a sewing machine?
To sew a blanket on a sewing machine, you’ll need to cut your fabric pieces to size.
Pinning them right sides together is the next step, which is crucial for the blanket’s appearance and functionality.
Stitch around the edges with a 1/2-inch seam allowance, leaving an opening for turning.
How do you sew a blanket with an iron?
You’ll need fusible web tape between fabric layers.
Line up edges, fold under 1/2", insert tape, and press with hot iron until bonded.
It’s like fabric glue that activates with heat—no needle required!
What should I consider when sewing a blanket?
You’ll want to take into account fabric type, size requirements, thread selection, and cutting tools.
Don’t forget proper measuring, pinning techniques, and leaving space for turning.
Your sewing machine should be ready with matching thread.
How do you sew a reversible fleece blanket?
To create a reversible fleece blanket, you’ll need two pieces of fleece fabric.
Cut them to identical sizes, pin right sides together, sew around the edges leaving an opening, then turn right-side out and topstitch.
Then, you can enjoy your new blanket.
How do you turn a blanket?
To turn a blanket, leave a 5-10 inch opening when sewing the edges.
Trim corners, then pull the fabric through this opening.
Use a pencil or chopstick to push out corners for crisp edges.
How to make a two-fabric blanket?
Crafting a two-fabric blanket is simple and rewarding.
Pin your fabrics, right sides together, sew with a 1/2-inch seam, leave an opening, flip, then topstitch for polish.
Choose colors that spark joy!
How to blanket stitch two pieces together?
To blanket stitch two pieces together, thread a needle, knot the end, and sew from the back.
Bring the needle through both layers, looping around the edge, creating evenly spaced, decorative stitching along the seam.
How to do a blanket stitch step by step?
Start by threading your needle and knotting the end.
Push the needle through both fabric edges.
Loop the thread over and repeat evenly along the edge, pulling gently to create neat, decorative stitches.
How to sew two pieces of fleece together?
Fleece fabric feels forgiving for beginners.
Pin two pieces together, right sides facing in, and sew along edges with a ½-inch seam.
Leave a gap to flip it, then topstitch for a polished finish.
Conclusion
Who knew "how to sewing blanket 2" could be this simple?
With two layers, a touch of careful pinning, sewing, and pressing, you’ve created a cozy, double-sided masterpiece.
Remember, those quilting stitches aren’t just for looks—they’ll keep your blanket durable and snug for years.
Whether you’re gifting it or keeping it, you now have the skills to combine fabrics creatively for warmth and versatility.
So, grab your machine and start stitching your next blanket adventure!


