This site is supported by our readers. We may earn a commission, at no cost to you, if you purchase through links.
 Sewing your own curtains costs about 50% less than buying custom ones, and you’ll get exactly the fit and style you want. The process looks intimidating at first—measuring, cutting, hemming—but once you break it down into clear steps, even beginners can create professional-looking panels in an afternoon.
With the right fabric, a few basic tools, and some patience at your machine, you’ll transform plain windows into polished focal points that actually complement your space.
Table Of Contents
- Key Takeaways
- Essential Tools and Materials for Sewing Curtains
- How to Choose The Right Curtain Fabric
- Measuring Windows for Perfect Curtains
- Calculating Fabric Yardage for Curtains
- Preparing and Cutting Curtain Fabric
- Step-by-Step Sewing Instructions
- Finishing Touches and Hanging Curtains
- Tips for Success and Common Mistakes to Avoid
- Frequently Asked Questions (FAQs)
- Conclusion
Key Takeaways
- Sewing your own curtains costs roughly 50% less than buying custom ones, and even beginners can create professional-looking panels in an afternoon with the right fabric, basic tools, and clear step-by-step guidance.
- Proper fabric preparation—including prewashing to prevent up to 10% shrinkage and precise measuring with fullness multipliers of 1.5× to 2.5×—is essential for curtains that hang beautifully and fit your windows perfectly.
- The core sewing process follows a logical sequence: sewing side seams with double-fold hems, attaching lining for structure and light control, creating the header or rod pocket, and finishing with weighted bottom hems for proper drape.
- Final pressing and proper installation techniques—positioning rods 4-6 inches above the frame and ensuring even panel distribution—transform homemade curtains into polished, custom-quality window treatments that elevate any room.
Essential Tools and Materials for Sewing Curtains
Before you start sewing, you’ll need the right supplies on hand. Having everything ready makes the process smoother and helps you avoid mid-project trips to the store.
Here’s what you should gather before you begin.
Must-Have Sewing Supplies
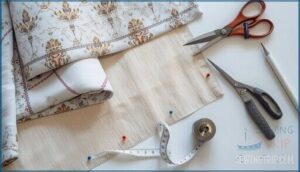
You’ll need a few core sewing supplies to get started. A reliable sewing machine manages the stitching, while fabric scissors or a rotary fabric cutter make clean cuts through layers. Keep a flexible measuring tape on hand—professionals use 60-inch versions to guarantee accuracy. You’ll also need matching thread for your fabric choice, plus an ironing board and iron to press seams flat. Sharp pins and a seam ripper round out your essential toolkit.
The global market is seeing growth in DIY hobbies, which is driving demand for these supplies.
Recommended Curtain Fabrics
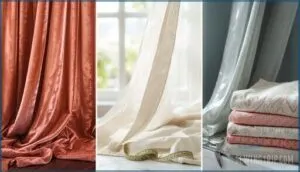
Once you’ve assembled your tools, fabric selection becomes your next focus. Cotton remains popular—accounting for 25% of textile fiber use—because it’s breathable and holds color for up to 50 washes. Polyester offers durability and costs 40–60% less than linen, while linen itself lasts 30% longer under sunlight. Blackout fabrics are ideal for bedrooms and media rooms.
Consider these factors when choosing curtain fabric:
- Fabric Weight and Light Blocking: Heavier weaves filter more sunlight; cotton generally blocks 30–40%, while dense velvet exceeds 80%
- Print Scale and Cleaning Methods: Large patterns suit spacious rooms, and machine-washable options simplify maintenance
- Cost Analysis: Polyester provides budget-friendly durability, while silk and velvet deliver luxury at premium prices
Match your lining fabric to your main material for proper drape and insulation.
Optional Add-Ons and Accessories
Beyond your basic supplies, you can enhance curtains with smart features and decorative touches. Decorative trims, such as tassels or fringes, saw a 30% increase in popularity during 2024, while metal and rope tiebacks now account for 63% of accessory sales. Smart curtains reached a market value of USD 500 million this year, offering automated control.
| Accessory Type | Purpose | Average Cost Range |
|---|---|---|
| Curtain tiebacks | Hold panels open, add style | $8–$35 per pair |
| Decorative trim | Border embellishment | $3–$12 per yard |
| Blackout linings | Block light, improve insulation | $15–$40 per panel |
| Grommet kit | Create modern ring-top curtains | $10–$25 per set |
| Fusible hem tape | No-sew hemming option | $4–$8 per roll |
Curtain weights prevent panels from billowing, while curtain rods—valued at USD 5.54 billion globally—anchor your finished project.
How to Choose The Right Curtain Fabric
The fabric you choose shapes how your curtains look, perform, and hold up over time. Different materials offer distinct benefits, from light control to durability, and the right lining can add structure and polish.
Let’s break down your options so you can match fabric to function and style.
Fabric Types and Their Benefits
Cotton accounts for 42% of curtain demand thanks to its breathability and easy care—you can machine wash it at up to 60°C. Linen offers 50–70% light transmission with natural strength, perfect for soft diffusion.
Polyester blends resist wrinkles and fading, making them low-maintenance winners. Velvet advantages include sound absorption up to 65%, while sheer fabrics and thermal options cut heat transfer by 33–45%, lowering energy costs.
Selecting Lining and Interfacing
Adding lining to your curtains transforms them from simple panels into high-performance window treatments. Polyester dominates at 60% of the market because it’s affordable and durable, while cotton fabric selection suits premium projects.
Blackout lining blocks up to 99% of light for bedrooms, and thermal benefits include 2.5–17% energy savings. Acoustic performance reaches 11–22 dB noise reduction with PVC-coated options.
Fusible interfacing types strengthen headers by 10–20%, preventing stretch under hanging weight.
Matching Fabric to Room Style
Your room style dictates fabric weight, color impact, and light management choices that shape the entire design. Furniture coordination and thematic alignment keep your curtain fabric feeling intentional, not random. Here’s how to match fabric patterns to your interior design:
- Contemporary spaces use minimalist cotton or linen in 72% of modern interiors for clean design elements
- Bohemian rooms integrate mixed-pattern fabrics with 30–40% higher chromatic diversity than neutral schemes
- Classical settings feature silk or brocade in 68% of traditional designs for reflective luster and elegant drape
Measuring Windows for Perfect Curtains
Getting your measurements right is the foundation of professional-looking curtains. You need to measure three key areas: width for proper fullness, length for your preferred drop, and extra allowance for hems and headers.
Let’s break down each measurement so your curtains fit perfectly the first time.
Measuring Width for Fullness
Think of your curtain width like a custom suit—it’s all about a precise fit. Start by using a measuring tape to measure your window width. Multiply that number by your ideal fullness ratio (usually 2× for regular gathers), then add a fabric allowance. This creates enough fabric width for proper window coverage and gives you beautiful, billowy folds.
| Window Width | Fullness Ratio | Fabric Width Needed |
|---|---|---|
| 36″ | 2× | 72″ |
| 55″ | 1.5× | 82.5″ |
| 72″ | 2.5× | 180″ |
| 90″ | 1.8× | 162″ |
| 120″ | 3× | 360″ |
Measuring Curtain Length
Accurate measuring is your curtain’s foundation. Use a metal measuring tape to measure length from your rod’s mounting point straight down to where you want the curtain to end—floor, sill, or slightly puddled. Measure at three spots (left, center, right) to account for uneven floors or ceilings.
Standard rod placement sits 4–6 inches above the window frame, which helps your room feel taller. Remember that fabric shrinkage can happen, so measure width and height carefully before cutting.
Calculating Extra Allowance for Hems and Headers
Your finished length includes hems, headers, and seam allowance—think of it as building in breathing room. Standard hem allowance standards call for 7–8 inches total: a 3–4 inch double-folded bottom hem for weight and stability, plus 2 inches at the top for header tape depths or rod casings.
Fabric weight adjustments matter—sheer voiles need less, velvet needs more. Common practices suggest measuring for curtains with an extra 0.5 inches so panels hover just above the floor after fabric measurements and curtain hems are complete.
- Floor-length curtains: Add 16 inches combined for hems and headers to prevent a too-short panel
- Lightweight fabrics: Use smaller 2–3 inch hems to avoid visible bulk
- Heavy drapes: Go deeper with 10–15 cm hems for proper hang and visual balance
- Pattern repeats: Round up your calculated drop to the next full repeat before cutting
Calculating Fabric Yardage for Curtains
Getting your fabric yardage right means the difference between curtains that hang beautifully and ones that fall short—literally. You’ll need to account for window width, desired fullness, and hem allowances before you cut a single inch.
Here’s how to calculate exactly what you need for professional-looking results.
How to Determine Fabric Amount Needed
Calculating fabric yardage begins with understanding your panel width and fabric measurements. Multiply the number of fabric widths by your adjusted cut length to determine the fabric length for one panel. For a pair of curtains, simply double this measurement. A standard 54-inch fabric width can be divided into your total panel width to find out how many widths are needed. Remember to account for lining yardage, which should match the face fabric unless using narrower blackout material, and include a shrinkage allowance of 2–3%. If working with prints, add extra fabric for pattern repeats.
Here’s a quick reference table to guide you:
| Component | Measurement Basis | Typical Range |
|---|---|---|
| Panel width | Window width × fullness factor | 1.5× to 2.5× window width |
| Fabric length per panel | Cut drop + hem allowances | Desired drop + 25–30 cm |
| Lining yardage | Equal to face fabric yardage | Match main fabric or adjust for width |
| Pattern repeats | Vertical repeat height | Add 27–63 cm per width |
| Shrinkage allowance | Percentage of total yardage | 2–3% extra fabric |
Measure twice, cut once—this timeless rule ensures you save fabric and avoid frustration.
Using Fullness Multipliers
Fullness multipliers shape how your curtains drape and gather. A 2× multiplier means your fabric width is double your rod width—standard for most residential curtains.
Sheer fabrics need 2.5×–3× for opacity and flow, while heavyweight materials like velvet work best at 1.5×–1.8×.
Pinch pleat styles use 1.5×–2×, pencil pleats need 2×–2.5×, and goblet pleats require 2.5×–3× for rounded folds.
Calculate by multiplying your rod width by your chosen ratio, then adjust panel count as needed for precise curtain fullness calculation.
Fabric Cutting Tips for Accuracy
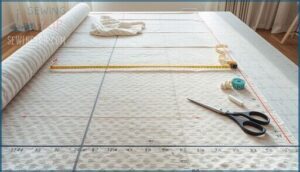
Once you’ve calculated your yardage, proper cutting techniques make all the difference. Start by prepping your fabric—prewashing prevents post-sewing shrinkage, and ironing creates a flat cutting surface.
Here’s how to cut like a pro:
- Use a rotary cutter on a self-healing mat for precision within 1 mm, keeping blades fresh and following safety protocols
- Check grain alignment before cutting fabric to prevent diagonal drift and maintain drape consistency across panels
- Limit layers to 4–6 maximum when cutting multiple pieces simultaneously to avoid slippage and dimensional errors
Always position your fabric flat with proper grain alignment. A steady, continuous stroke beats choppy cuts every time.
Preparing and Cutting Curtain Fabric
Before you cut your first piece of fabric, you’ll need to prep your materials properly. This step prevents costly mistakes and ensures your finished curtains hang beautifully.
Let’s walk through the three essential tasks that set you up for sewing success.
Prewashing and Ironing Fabric
Skipping the prewash step is like building on shaky ground—your carefully measured curtains could shrink up to 10% after their first wash. You’ll want to machine wash your fabric in warm water using a gentle cycle and mild detergent to eliminate chemical residues and prevent dye bleeding, especially with bright colors like red. After washing, air dry or tumble on low heat to maintain dimensional stability. Once dry, iron your fabric at the appropriate temperature—150–200°C for cotton, 110–120°C for synthetics—to restore its original dimensions and create the smooth surface you need for accurate cutting.
| Fabric Type | Washing Temperature | Ironing Temperature | Expected Shrinkage |
|---|---|---|---|
| Cotton/Linen | 30–60°C (warm) | 150–200°C | 5–10% |
| Polyester | 30–40°C (cool) | 110–120°C | <1% |
| Wool | Cold water (hand wash) | Low heat with steam | Up to 8% (if mishandled) |
| Cotton-Polyester Blend | 40°C (moderate) | 120–150°C | 2–5% |
This fabric preparation technique prevents texture alteration and ensures your finished curtains hang beautifully without surprises.
Marking and Cutting Panels
With your fabric smooth and ready, accurate panel measurement ensures your curtains hang perfectly. Lay your fabric on a large cutting surface and use a measuring tape to mark panels according to your calculated dimensions—usually 50 to 54 inches in fabric width for standard windows.
Use tailor’s chalk or water-soluble pens to mark cutting lines, spacing pattern weights every 12 to 15 inches to prevent slippage. Cut fabric along grain lines with sharp fabric shears or a rotary cutter for precision under 1 mm deviation, reducing waste by up to 12% through careful material optimization.
Cutting Curtain Lining
After cutting your main panels, trim the lining fabric to size—lining fabric alignment is essential for a professional finish. Cut the lining one inch shorter than your outer fabric’s finished length, allowing the curtain face to wrap cleanly at the hem. Use sharp shears and square the fabric against your cutting surface to prevent off-grain distortion.
Standard hem allowance for lining runs 12 to 16 cm depending on curtain length, ensuring structural integrity when adding curtain linings to your panels.
Step-by-Step Sewing Instructions
Now that your fabric is cut and prepped, it’s time to bring your curtains to life at the sewing machine. The process follows a clear sequence—sewing side seams, attaching the lining, creating the header, and finishing the hems.
Here’s how to work through each step with confidence.
Sewing Side Seams
Sewing side seams correctly is like building a strong frame — everything else hangs on this foundation. Start by prewashing and pressing your fabric to avoid shrinkage, then follow these steps:
- Fold each side edge twice (about 1 inch per fold) to create a double-fold hem that hides raw edges
- Press the folds flat to lock in your seam allowance and keep fabric grain aligned
- Stitch 1/4 inch from the inner folded edge using a medium stitch length on your sewing machine
- Backstitch at the beginning and end for stitch reinforcement to prevent unraveling
This hem folding technique reduces fraying by 40% and keeps your seam finishing clean and professional-looking.
Attaching The Lining
Adding lining gives your curtains a polished finish and better performance. Place your lining fabric and main curtain fabric right sides together, aligning the top edges. Pin along each side edge, then sew using a 1-inch seam allowance and a stitch length between 2.5 and 3 mm. For blackout linings, use Wonder Clips instead of pins to prevent light leaks.
After sewing, turn right side out and press seams flat with your iron — proper pressing keeps lining smooth against the fabric and improves drape quality. Hand-stitching works well for invisible hems on patterned fabrics.
Creating Top Casing or Header
Your header determines how curtains hang on the rod, so getting this right is important. Fold the top edge down at least 3 inches, then pin securely. Use your sewing machine to stitch a line 1 inch from the fold to form the decorative header.
Next, sew another line 1.5–2 inches below for the rod pocket itself. A 1.5-inch pocket works with standard 1-inch curtain rods, while larger decorative rods need 3-inch pockets for proper rod compatibility and header aesthetics.
Sewing Bottom and Side Hems
Your bottom hem is the foundation for a smooth drape and professional appearance. Fold the fabric up 8 inches, press it flat, then fold another 4 inches for a double fold hem. Pin carefully along the fold to prevent shifting. Stitch 1/4 inch from the inner edge using medium tension adjustments.
For side hems, fold the fabric 1 inch twice, press, and stitch close to the fold. These hemming techniques add weight, eliminate billowing, and create clean seam finishes throughout your curtain panels.
Finishing Touches and Hanging Curtains
You’ve stitched the last seam—now it’s time to make those curtains look polished and professional.
This section covers pressing, adding optional decorative details, and getting your finished panels hung on the rod.
These final steps transform your project from homemade to custom-made.
Pressing for a Professional Look
Think of pressing as the secret ingredient that transforms homemade curtains into custom-looking window treatments. This final fabric care step ensures your hard work truly shines. Here’s how to achieve that professional finish:
- Set your iron to the right temperature – cotton works with 160–180°C, while polyester needs cooler settings around 150–160°C to prevent scorching
- Use a press cloth on delicate fabrics – silk organza or cotton layers protect against shine marks and surface damage during ironing
- Iron lengthwise from top to bottom – this maintains grain alignment and creates those crisp, smooth lines that make curtains hang beautifully
- Apply steam for stubborn wrinkles – hold your steamer 2–3 cm away for effective wrinkle removal without direct fabric contact
- Press seams as you sew – don’t wait until the end; pressing each seam during construction keeps everything aligned and eliminates up to 95% of creases
Your sewing techniques mean nothing if wrinkles steal the show, so take time with these fabric smoothing steps.
Adding Decorative Features or Trims
Once your curtains look crisp and smooth, decorative details can enhance them from basic to boutique. Trim types like bullion fringe, flat tape, and beaded accents add texture and reflect current design trends favoring tactile, individual interiors.
Application techniques matter—pretreat trims to prevent shrinkage, use a 3.0–3.5 mm stitch length, and coordinate thread colors for invisible seams. Fabric tiebacks with braids or tassels introduce dimensional design accents without major cost analysis concerns, though complex trim applications can raise material expenses by 10–25%.
For sustainability factors, choose recycled polyester or organic cotton trims that reduce waste while adding decorative accents.
Installing Curtain Rods and Hanging Panels
With your panels looking polished, it’s time to install the curtain hardware. Rod mounting height should sit 10–15 cm above the window frame, or higher for dramatic effect.
Bracket placement requires wall anchors in drywall and a central support for rods over 60 in to handle hardware load. Pre-drill holes using a level, secure brackets, then thread or clip panels based on header style.
Adjust for even panel distribution—curtain bottoms should hover just above the floor for a balanced finish.
Tips for Success and Common Mistakes to Avoid
Even the best curtain project can hit a snag, but knowing what to watch for makes all the difference. A few smart habits will help you avoid uneven hems, wonky measurements, and fabric mishaps that eat up time and money.
Let’s walk through the key fixes, quality checks, and care tips that’ll keep your handmade curtains looking sharp for years.
Troubleshooting Sewing Issues
When tension adjustments don’t resolve uneven stitches, you might be facing one of several common sewing machine issues. About 70% of sewing problems stem from incorrect thread tension settings, but other factors can derail your curtain project too.
- Thread tension and needle problems: Re-thread your machine with the presser foot raised—this simple step fixes roughly 40% of tension issues. Change needles every 6–8 hours of use to reduce skipped stitches by up to 60%.
- Stitch quality and fabric feeding: Clean tension discs and bobbin cases regularly, cutting imbalanced stitching by 50%. Adjust presser foot pressure to prevent seam puckering, which affects about 15% of finished curtain seams.
- Machine maintenance: Routine cleaning and oiling extend your machine’s life by 40% and prevent dust-related errors. Match needle size to thread weight—improper pairing increases breakage risk by 45%.
Ensuring Even Length and Fullness
Once you’ve solved machine tension issues, your focus shifts to panel alignment and curtain balancing.
Prewash your fabric to cut shrinkage by up to 10%—cotton and linen can shrink 4–7%, while polyester stays under 2%.
Use a 2× fullness ratio for formal looks; this creates 50–60% denser folds than 1.2×.
Measure exact fabric length from rod to floor, add 10 inches for hems, and align grain lines during cutting to prevent 2-inch length variations.
Care and Maintenance of DIY Curtains
Regular washing and storing curtains correctly keeps your handmade panels looking fresh for years. Follow these fabric care essentials:
- Washing Frequency: Clean cotton and polyester curtains every 3–6 months; kitchen panels need washing every 2–3 months due to grease exposure.
- Preventative Maintenance: Inspect seams and hardware every six months to catch fraying early.
- Storage Tips: Roll curtains instead of folding to prevent creases, and use acid-free materials to reduce yellowing by 90%.
- Repair Techniques: Re-stitch loose seams annually and replace hooks every two years to maintain even hanging.
Iron with medium heat after washing to restore 95% of your curtains’ original drape.
Frequently Asked Questions (FAQs)
How long does it take to sew a curtain?
A simple rod pocket curtain usually takes 30 minutes to 1 hour to complete, depending on your sewing skills and fabric choice.
More complex styles with pleats or lining can extend your sewing project to 4–8 hours, especially if you’re following step-by-step sewing instructions for intricate curtain basics.
How to sew curtains?
Like a tailor’s first stitch anchoring fabric to form, you’ll start by pinning your curtain and lining together along the sides, then sew straight seams.
Next, create hems at the bottom, sew the top casing for your rod, and finish with a final press for that crisp, custom look.
Do you need a sewing machine to sew curtains?
You don’t need a sewing machine—hand sewing works fine for curtains, though it’s slower.
A machine speeds up the process, delivers stronger seams, and manages heavy fabrics better, making it ideal for multiple panels.
Can I use any type of fabric to make curtains?
Not every fabric works well for curtains. Fabric shrinkage, light transmission, and wear resistance are the most critical factors. Cotton and linen shrink considerably, while polyester remains stable.
Material composition affects durability, with synthetics outlasting natural fibers.
Consider aesthetic suitability as well: choose a curtain fabric that aligns with your room’s style and functional requirements.
How do I determine the right size of fabric for my curtains?
Measuring window dimensions is your starting point. Multiply the width by 5 to 5 for curtain fullness, then add hem allowance—usually 7 to 8 inches total. This fabric calculation ensures proper fabric width and yardage for beautiful, functional curtains.
What are the best ways to hang curtains?
Think of hanging curtains like framing artwork—placement transforms the entire view. Position your curtain rod 4-6 inches above the window frame and extend it 6-12 inches beyond each side to improve perceived height and width.
Select hardware that accommodates your fabric weight, whether metal for heavier panels or tension rods for lightweight treatments.
How do I care for my curtains?
Washing curtains regularly prevents allergen buildup and extends fabric durability. Use gentle cycles at appropriate temperatures, air-dry to prevent shrinkage, and iron carefully.
Proper maintenance and care of curtains protects health while reducing environmental impact.
Where can I find inspiration for unique curtain designs?
Browse online platforms like Pinterest and Instagram for thousands of curtain style ideas. Explore design publications for professional interior design trends, and check DIY communities on Etsy and YouTube for handmade inspiration.
Study cultural influences and textile trends to discover unique curtain designs for your room decor.
How do you fix uneven curtain panels?
Your beautiful new curtains hang like a mismatched pair—one puddles on the floor while the other floats awkwardly above it. Shrinkage solutions and hem adjustments rescue uneven panels quickly.
Hang both curtains, then mark and pin them to match, accounting for fabric distortion or measuring errors. Iron carefully, fold the hem, and sew using a blind stitch for durability and an even length across both panels.
Can you sew curtains without a machine?
Yes, hand-sewing techniques work well for curtain projects. You’ll need sharp needles, durable thread, and sewing pins for fabric alignment.
Expect 8 to 20 hours per pair depending on complexity. Hand stitching gives excellent control over delicate fabrics and stitch durability.
Conclusion
Think of sewing curtains like learning to ride a bike—wobbly at first, then second nature once you trust the process. Now that you know how to sew curtains from measuring through hanging, you’ve gained the skill to customize any room without overpaying for alterations.
Your first panels might need extra pressing or minor adjustments, but each window you tackle sharpens your technique.
The confidence you’ve built here transfers to cushions, table runners, and beyond—one straight stitch at a time.
- https://www.grandviewresearch.com/horizon/outlook/curtains-market-size/global
- https://www.linkedin.com/pulse/curtain-fabric-market-key-scope-tech-trends-2025-fcykf
- https://www.expertmarketresearch.com/prefeasibility-reports/curtain-panel-manufacturing-plant-project-report
- https://www.anysew.com/blog/the-impact-of-advanced-household-sewing-machines-on-productivity
- https://grata.com/market-research/314120-curtain-linen-mills

