This site is supported by our readers. We may earn a commission, at no cost to you, if you purchase through links.
Cut your pieces precisely, paying special attention to finger length and joints. Sew with shorter stitches for detailed work, carefully joining fingers and thumb sections while maintaining even tension.
Add a professional touch with neat hemming and facings. Whether you’re creating cozy winter mittens or elegant evening wear, the right fabric and careful attention to detail make all the difference.
Your handmade gloves might just become your signature accessory, with the potential to elevate your style and provide elegant evening wear.
Table Of Contents
Key Takeaways
- Trace your hand accurately, add seam allowances, and cut fabric precisely for a custom glove pattern that fits perfectly.
- Use stretchy fabrics like neoprene or wool for comfort and durability, and pre-wash to prevent shrinkage.
- Sew with short stitches for detailed work, ensuring even tension while assembling fingers, thumbs, and main pieces.
- Add finishing touches like hemming, facings, or decorations such as ribbons and beads to elevate your gloves’ style and professionalism.
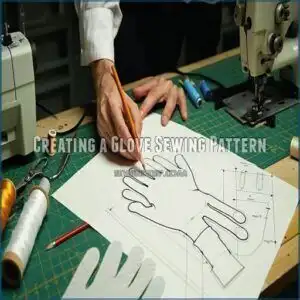
Creating a Glove Sewing Pattern
You’re about to create a custom glove sewing pattern that fits your hand perfectly.
To get started, you’ll trace your hand onto paper, including your fingers and thumb.
Then, you’ll add a seam allowance to assure a comfortable fit.
Tracing Your Hand
Tracing your hand, start by placing it on paper, ensuring accurate measurements.
Consider:
- Hand tracing for a custom fit
- Finger alignment for comfort
- Wrist measurement for seam allowance.
This step is essential for creating a glove pattern that fits your hand shape perfectly, allowing for precise pattern drafting and hand measurements.
Designing The Fingers
When designing glove fingers, consider finger length, shape, and tips.
Make sure a comfortable fit by accounting for finger joints and stretch.
Follow glove pattern instructions to sew fingertips accurately, whether making a finger glove or sewing fingerless gloves, focusing on precise finger shape and length for a comfortable fit.
Thumb Pattern for Gloves
Now that you’ve mastered finger design, let’s tackle the thumb. To achieve a comfortable Thumb Fit, consider the glove pattern’s Thumb Shape.
When Pattern Drafting, don’t forget a Seam Allowance. Key tips include:
- Using a glove sewing tutorial
- Mastering Glove Fitting
- Creating a custom thumb shape for perfect glove making tips and sewing gloves with ease.
Accurate measurements are important for creating custom sewing patterns with custom fit solutions. This is crucial for achieving a custom fit.
Cutting and Assembling The Fabric
You’re now ready to cut and assemble the fabric for your gloves, which is an essential step in bringing your design to life.
By following the steps outlined in this section, you’ll learn how to choose the right fabric, pin and cut it accurately, and assemble the pieces to create a comfortable and stylish glove.
This process will help you to bring your design to life, and with careful attention to detail, you’ll be able to create a pair of gloves that are both functional and fashionable.
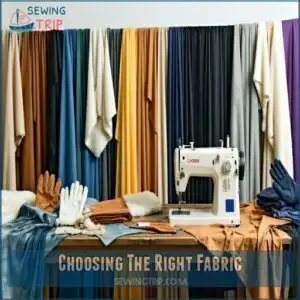
Choosing The Right Fabric
A well-chosen fabric can make or break your glove-making journey.
For snug-fitting gloves, opt for stretchy materials like neoprene, Lycra, or velour. Natural fibers like wool and cotton provide warmth and breathability, while leather offers durability.
For more information, explore different glove fabric options.
Consider your gloves’ purpose – winter warmth needs thicker fabrics, while touchscreen compatibility requires conductive materials. Pre-wash fabric to prevent future shrinkage and ensure a long-lasting glove.
Pinning and Cutting The Fabric
Now that you’ve got your fabric, let’s prep it for your gloves.
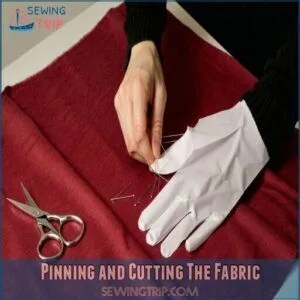
Fold your fabric in half with right sides together, smoothing out any wrinkles. Place your glove pattern on the folded fabric, making sure to leave enough seam allowance.
Pin the pattern securely every few inches, paying extra attention to the finger areas.
Cut carefully along the pattern lines. To make accurate cuts, using the right sewing pins is essential for a professional finish, and having the correct tools is crucial for a good result.
Sewing The Gloves
Now that you’ve got your fabric pieces ready, you’ll start bringing your gloves to life with careful stitching of the finger sections, thumb area, and main pieces.
You’ll need to work with precision as you sew along the traced lines, making sure to secure each section properly for a snug and comfortable fit.
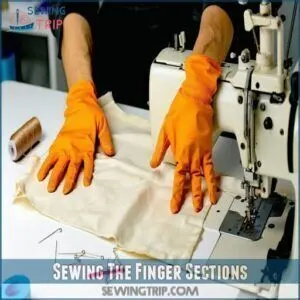
Sewing The Finger Sections
Now that your fabric is cut and ready, it’s time to bring those finger sections to life.
Start with a straight stitch setting on your machine, keeping your stitch length short for better control.
For a professional finish, consider adding a facing to your gloves.
Work your way around each finger tip carefully, maintaining consistent seam allowance, and remember to backstitch at critical points for durability. You’ll want to sew steadily – it’s like threading a tiny maze!
Sewing The Thumb Section
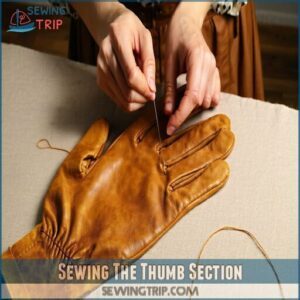
Now that your fingers are sewn, it’s time to tackle the thumb section of your glove.
Accurate glove pattern drafting is critical for a good fit.
Start by sewing the thumb’s side seam from tip to notch, then turn it inside out.
Position your thumb piece carefully in the thumbhole, aligning the edges.
Pin it in place and stitch around the opening, making sure there’s no bunching or twisting, and your glove’s getting closer to completion with a good fit.
Sewing The Glove Pieces Together
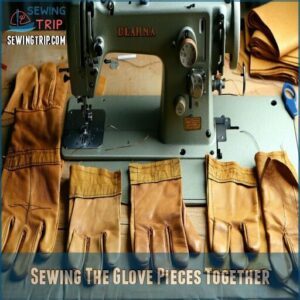
With all your glove pieces laid out, it’s time to bring everything together.
Start by aligning the finger sections with proper seam allowance, maintaining even fabric tension throughout.
Set your machine to a shorter stitch length for detailed work.
Pin the pieces carefully, then sew each section methodically, working from fingertips down, ensuring each seam is secure and aligned perfectly.
Adding The Facing
You’ll need to add a facing to give your gloves that professional, store-bought finish you’ve been dreaming of.
The facing both makes your gloves look polished and provides extra structure to keep their shape, just like the gloves you’d find in high-end boutiques.
Creating a Facing
Now that you’ve mastered the basic glove construction, let’s enhance your creation with a professional-looking facing. Start by selecting a complementary fabric that adds both structure and style to your gloves.
Cut two facing pieces using your original pattern, adding a 1/4-inch seam allowance. Position each piece against the glove openings, right sides together, and stitch carefully along the edges. Remember to leave a small gap for turning.
- Your heart will flutter seeing those crisp, clean edges emerge
- You’ll beam with pride at your growing sewing expertise
- Feel the satisfaction of mastering a professional technique
- Experience the joy of creating something truly unique
- Savor the moment your skills level up
Attaching The Facing to The Gloves
With your facing prepared, let’s attach it to your gloves for a polished finish. Pin the facing around your glove opening, right sides together, matching seam allowances. Stitch carefully using a glove sewing pattern that works for your fabric choice.
Proper facing application techniques are essential for a professional finish.
| Step | Action | Tips |
|---|---|---|
| Align | Match notches | Keep edges even |
| Stitch | Use 1/4" seam | Go slow and steady |
| Press | Iron carefully | Test heat first |
Turn the facing inward, press the edge finishing, and topstitch for a professional look.
Adding Decorations
You’ll love adding your personal touch to your handmade gloves with decorative elements that match your style.
Whether you’re adding ribbons, bows, or other embellishments, you’ll find it’s easy to transform plain gloves into eye-catching accessories that reflect your personality.
Embellishing With Bows or Ribbons
Once you’ve mastered the basics, it’s time to add personality to your gloves with elegant bows and ribbons.
Select ribbon types that complement your glove’s fabric – satin for formal wear, grosgrain for everyday style, or velvet for luxury appeal. You can find various glove ribbon embellishments online.
Consider bow placement carefully; typically, wrist cuffs or side seams work best.
- Create a delicate bow with 1/4-inch satin ribbon for a classic touch
- Layer contrasting ribbons for a modern, dimensional effect
- Add tiny pearl beads to ribbon ends for extra sparkle
- Experiment with asymmetrical bow placement for drama
- Try metallic ribbons for evening gloves
Test different decorative stitches to secure your embellishments permanently.
Other Decoration Ideas
Five stunning decoration ideas can transform your handmade gloves into wearable art.
Apply fabric paint to create intricate patterns, or add delicate lace details along the cuffs for vintage charm.
Sew bead embellishments in geometric designs, or attach ribbon ties at the wrist for adjustable elegance.
For evening glamour, try sequin accents that catch the light.
DIY glove accessories like removable flower clips or pearl buttons offer versatility, while glove embellishments such as embroidered monograms add a personal touch, and create wearable art.
Hemming and Finishing Touches
You’ll need to give your gloves those final touches to make them look store-bought rather than homemade.
Now you’ll learn how to hem the openings neatly and trim any excess threads, transforming your handmade gloves into professional-looking accessories.
Hemming The Glove Openings
Every well-crafted glove deserves a polished finish, starting with a perfectly folded hem at the opening.
Begin by folding the fabric’s edge inward about 1/2 inch, creating a clean glove edging.
Use hemming techniques suited to your fabric choice – lighter materials need narrower seam allowances.
Pin the folded section in place, then carefully sew around the glove opening, maintaining even glove seams for an ideal fit.
Trimming Excess Thread
Thread trimming transforms your handmade gloves from homespun to haute couture.
With sharp scissors or thread clippers, carefully snip away excess threads along your glove seams, working methodically from fingertips to wrist.
Keep your cuts close to the fabric surface for fray prevention, but don’t nick the seams, and pay special attention to glove fingertips and edge binding areas where threads tend to bunch.
This final step in your glove sewing tutorial guarantees professional-looking seam finishing that’ll make your creation rival designer pieces.
Fingerless Gloves
You’ll find that making fingerless gloves is easier than crafting full-fingered ones since you won’t need to sew individual finger sections.
With just a few simple adjustments to your pattern and some basic sewing skills, you can create stylish fingerless gloves that’ll keep your palms warm while leaving your fingers free for texting or typing.
Modifying The Pattern for Fingerless Gloves
Creating fingerless gloves starts with adapting your basic glove pattern.
When pattern drafting, you’ll want to modify your design with these key adjustments:
- Measure desired finger length, stopping at knuckles or mid-finger
- Add seam allowance to finger openings
- Maintain thumb gusset dimensions for proper fit
- Keep glove cuffs at original length for stability
Mark your adjustments clearly on the pattern before cutting, ensuring balanced proportions for a stylish, comfortable fit, which will result in a glove with proper fit.
Sewing Fingerless Gloves
Once you’ve prepared your hand measurements, sewing fingerless gloves becomes straightforward.
Start by pinning fabric pieces right sides together, then stitch around the pattern edges using a 1/4" seam allowance.
Leave finger openings unstitched, turn the gloves right side out, and finish edges with a simple hem.
Add glove linings for extra comfort or incorporate sewing notions like buttons for style.
Different fabric choices let you create seasonal variations—lightweight cotton for summer, cozy fleece for winter.
Finalizing The Gloves
You’ll need to try on your completed gloves to check for proper fit and make any final adjustments.
Turn your gloves right-side out, slip them on, and examine how they feel around your fingers, thumb, and wrist.
Trying on The Gloves
Now that your fingerless gloves are complete, it’s time to try them on.
Slip your hand inside and check your glove fit against your hand shape.
When trying on your gloves, notice:
- That satisfying moment when your DIY creation hugs your hand perfectly
- How the finger alignment feels natural, not twisted or tight
- The way the wrist adjustment sits comfortably at your pulse point
- Whether the glove opening allows easy on/off without stretching seams
Making Any Necessary Adjustments
Now that you’ve tried on your gloves, let’s tackle any fit issues. Start by checking thumb placement – if it feels tight, add 1-2mm to the seam allowance. For fingers that feel too short, review your pattern measurements and extend as needed.
Evaluate the overall glove size by making small pattern alterations one area at a time. Too loose around the wrist? Add a dart or reduce the sizing adjustment there specifically.
For high-stress areas like fingertips and thumb joints, reinforce the stitching with an extra seam. Stiff fabric causing discomfort? Consider switching to a stretchier material or adding small elastic inserts.
Remember, perfect fitting techniques take practice, so don’t get discouraged if your first glove pattern needs several adjustments.
Showcasing The Final Gloves
Now that you’ve stitched your beautiful handmade gloves, it’s time to show them off! Your custom glove sewing project deserves proper presentation to highlight your sewing glove techniques.
To achieve a professional finish, consider using techniques for seam finishing methods to prevent fraying and give your gloves a clean look.
- Create a simple Hand Model display using foam forms or rolled cardboard
- Take professional Glove Photography with natural lighting against neutral backgrounds
- Style your gloves with complementary outfits for a Fashion Show effect
Frequently Asked Questions (FAQs)
How Do I Determine the Right Size for My Gloves?
Trace your hand on paper, adding 1/2 inch for seam allowance. Measure wrist circumference and finger lengths. Test fit with scrap fabric. You’ll need snug measurements for stretchy materials.
What Type of Fabric Should I Use for Sewing Gloves?
Choose stretchy fabrics like cotton, fleece, or satin for comfortable gloves. You’ll want 4-way stretch material for cosplay gloves, while leather or vinyl works best when you’re hand-sewing custom pieces.
Can I Add Embellishments or Decorative Elements to My Gloves?
You’ll love personalizing your gloves with beads, ribbons, bows, or embroidery.
Add them after construction but before hemming.
Don’t overdo it – strategic placement near wrists or backs creates elegant impact.
How Do I Adjust the Fit of the Gloves if They Are Too Loose?
You’ll need to take in the seams by turning the gloves inside out and sewing along existing seams.
Start at fingertips, work down to wrist, adjusting gradually until they fit perfectly.
They should now be ready to use after these adjustments.
What Are Some Tips for Wearing Wedding Gloves on My Special Day?
When the big day arrives, slip on those wedding gloves like a pro.
Remember, practice makes perfect, so try them on beforehand to make sure a flawless, fairytale-like fit always.
Are gloves easy to sew?
Sewing gloves can be tricky but totally doable with patience and practice.
Precise cutting, stretchy fabrics, and small seam allowances are key.
Start simple—fingerless gloves are a great beginner project to build confidence!
How to do glove stitch?
Picture threading a needle through a maze—glove stitching is precise yet thrilling.
Use a straight stitch, sew along traced lines, and secure seams tightly.
Keep stitches short for durability, turning fabric inside out for a seamless finish.
What fabric is good for making gloves?
Stretchy fabrics like spandex or knit work wonders for snug gloves, while faux suede or satin adds elegance.
For cosplay, try 4-way stretch fabric.
Leather’s classy, but sewing it by hand might test your patience!
How are leather gloves sewn?
Measure twice, cut once" applies here—precision is key!
Trace your hand, add seam allowances, and cut leather carefully.
Use strong thread, hand-stitch seams tightly, and reinforce stress points for durable, well-fitted leather gloves.
How do I determine the right size for my gloves?
Lay your hand flat on paper, trace it, and add 1/2 inch for seam allowance.
For a snug fit, measure each finger’s length and width.
Adjust the pattern to match your unique hand shape.
Conclusion
Crafting gloves is like piecing together a puzzle—each step fits perfectly when you follow the process.
By mastering how to sewing gloves, you’ve learned to trace, cut, and stitch with care, creating something both functional and stylish.
Whether you’re making cozy mittens or chic fingerless gloves, your attention to detail guarantees a perfect fit.
Now, grab your favorite fabric, experiment with decorations, and let your creativity shine. Your handmade gloves are ready to impress!
- https://www.wikihow.com/Sew-a-Glove
- https://olfa.com/blogs/craft/how-to-make-easy-versatile-cosplay-gloves
- https://www.instructables.com/How-to-Make-Gloves/
- https://iamsewcrazy.com/2019/01/18/how-to-make-your-own-gloves/
- https://www.theshapesoffabric.com/2022/02/15/exploring-how-to-make-gloves-from-scratch/

