This site is supported by our readers. We may earn a commission, at no cost to you, if you purchase through links.
Start with waxed thread, a sturdy needle, and a good-quality leather.
For hand stitching, use a stitching awl to pierce holes evenly and consider a saddle stitch for strength.
To machine sew, use a leather needle, adjust your tension, and go slow to avoid skipped stitches.
Always work with rubber cement or clips instead of pins to hold pieces together—no one wants extra holes.
Prepping and marking your leather carefully makes all the difference.
Ready to create something amazing? Let’s get started with the techniques!
Table Of Contents
- Key Takeaways
- Materials
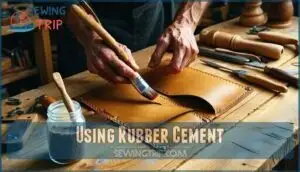
- Using Rubber Cement
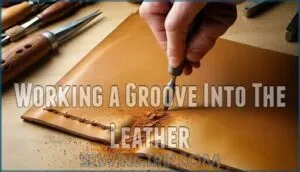
- Working a Groove Into The Leather
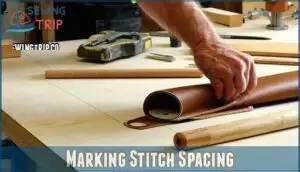
- Marking Stitch Spacing
- Using a Stitching Awl
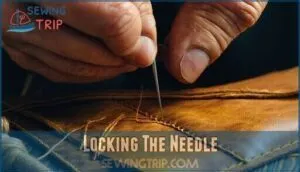
- Locking The Needle
- Starting to Stitch
- Locking The Stitch
- Choosing The Right Needle for Leather Sewing
- Sewing Machine Settings for Sewing Leather
- Buying and Preparing Leather for a Project
- Pressing Leather Seams
- Saddle Stitching With One Needle
- Using The Stitching Pony for Two Needle Saddle Stitch
- Leather Sewing Quiz
- Sewing a Pocket to Your Bag
- Creating a Turned Edge Seam on The Front of Your Bag
- Edge Binding
- Creating a Cut Edge Seam on The Back of Your Bag
- Prepping Fringed Trim for Sewing
- Making a Braided Cross Strap
- Sewing in The Braided Strap and Fringed Trim
- Checking Your Progress
- Frequently Asked Questions (FAQs)
- Conclusion
Key Takeaways
- You’ll need specialized tools like leather needles with triangular points, waxed thread, and a stitching awl to pierce holes cleanly without tearing the material.
- Use rubber cement or clips instead of pins to hold leather pieces together—this prevents unwanted holes and allows for repositioning during assembly.
- Master the saddle stitch technique for maximum strength and durability, whether you’re hand-sewing with one or two needles using a stitching pony for stability.
- Prepare your leather properly by creating grooves for stitch alignment, marking spacing with overstitch wheels, and adjusting your sewing machine settings with appropriate presser feet for smooth feeding.
Materials
To start leather sewing, you’ll need the right leather crafting supplies. First, choose leather types based on your project—soft calfskin for wallets or thick cowhide for belts.
Exotic options like reptile skins add flair but require careful handling. Next, focus on needle sizes. Leather needles come with a triangular point to pierce without tearing, and larger sizes are perfect for thicker materials.
Combine these with strong, durable threads. Waxed thread is a favorite for hand stitching, adding strength and preventing fraying. For tools, grab a stitching awl to create precise holes, and consider punch types like diamond punches for evenly spaced marks.
A leather thread guide helps maintain neat stitches when combining leather materials. For adding color and design, consider that leather paint differs from fabric paint.
With the right tools and supplies, your leather sewing projects will turn into polished, lasting creations.
Using Rubber Cement
Rubber cement is a game-changer in leather sewing, giving you a repositionable bond that keeps everything aligned as you work.
This leather adhesive is perfect for precision alignment, especially in situations requiring intricate designs or multi-piece assembly.
Before applying, make certain your leather pieces are clean and dry. A thin, even layer of rubber cement on both surfaces provides the best grip.
Let it dry until tacky, then press the pieces together for a firm hold. Whether you’re experimenting with cement alternatives or sticking to traditional adhesive methods, this step guarantees everything stays in place.
For a temporary hold, Elmer’s glue works as well. What’s great about rubber cement is its flexibility—it lets you adjust pieces for perfect alignment without leaving marks or damaging the leather.
For cleanup, rub off excess cement gently once it dries. Proper Cement Application opens up new possibilities in crafting stunning leather projects.
Working a Groove Into The Leather
When working leather, creating a groove is like sketching a roadmap for your stitches. A grooving tool, often called a stitching groover, carves a shallow trench into the surface.
A stitching groove is your leatherwork blueprint, guiding stitches for precision and protection, ensuring every project looks polished and professional.
This leather groove keeps stitches aligned and offers stitch protection by sinking them below the surface, minimizing wear over time.
Adjust the groover tool for consistent groove depth, depending on your leather thickness. Thicker leather might require a slightly deeper groove for a polished look.
Hold the tool steady and guide it along the edge—smooth, even pressure is vital. Remember, a consistent groove guarantees your stitching line flows seamlessly and looks professional.
Take your time with this step, as the groove sets the foundation for the rest of your project, ensuring that your work has a strong basis for a successful outcome with consistent groove.
Marking Stitch Spacing
After grooving your leather, it’s time to map out stitch spacing. Overstitch wheels are your go-to leather crafting tools for this step. Glide the wheel along the edge to imprint tiny, evenly spaced marks. These act as a stitch spacing guide, ensuring smooth, consistent rows that bring your project together beautifully.
For added precision, explore Groover vs Creaser options or try using templates for uniformity. If you prefer Pricking Wheel Use, lightly press the wheel to mark without punching through.
- Tools to keep in mind: overstitch wheels, pricking wheels, or diamond hole punches.
- Run smoothly: keep steady pressure while rolling.
- Channel importance: protect thread from wear over time.
- Spacing matters: align with project size properly.
Using a Stitching Awl
After marking stitch spacing, it’s time to use your stitching awl. Hold it steady and puncture the marked points with precision. Keep the awl angle consistent, and align holes perfectly for neat, professional results.
Adjust pressure based on leather thickness to avoid tears. Regular awl maintenance, like sharpening, guarantees smooth use.
Hand sewing leather benefits greatly from clean, even leather holes, which lead to better stitch consistency. Practice this technique to make each project look polished and well-crafted.
Locking The Needle
After using the stitching awl to prep your leather, it’s time to lock your needle. Securing your thread ensures smooth stitching and prevents it from unraveling.
Try these steps:
- Thread the Needle: Cut your thread at an angle for easier threading. Slide several inches of thread through the needle’s eye.
- Knotless Securing Method: Pierce the thread with the needle and pull it tight, forming a secure loop at the needle’s base.
- Dual Needle Setup: For two-needle saddle stitching, repeat the process on both thread ends.
- Thread Tail Management: Make certain both ends are even to avoid uneven stitches or wasting thread.
These leather sewing tips make needle locking quick and keep your project tidy, vital for leather sewing beginners or advanced crafters.
Starting to Stitch
Start by threading your needles evenly, guaranteeing balanced thread length.
For a smooth initial stitch, secure the leather layers using clips that won’t damage the material.
Use these leather sewing tips:
- Pierce Precisely: Angle the stitching awl slightly for clean, aligned holes.
- Control Tension: Pull threads snug, avoiding tightness that puckers leather.
- Maintain Stitch Flow: Alternate needle threading carefully to prevent tangles.
- Method Matters: Employ classic leather stitching methods like saddle stitching for strength.
These leather sewing techniques guarantee professional results with every hand-stitching project.
Locking The Stitch
When you finish a stitch run, locking the stitch guarantees it won’t come undone.
Backstitching is a simple method to secure it—just pass the needles back through the last two or three holes, repeating the saddle stitch technique in reverse.
For a clean look, pull the thread tight but avoid puckering the leather.
Knotless securing is another option—loop the thread under nearby stitches and pull it snug before flush cutting it close to the leather surface.
Looping methods like this keep the thread locked without bulky knots.
Make sure your stitches are evenly spaced to maintain a professional finish.
Take your time during leather sewing to guarantee each thread locking step offers durable backstitch security and a flawless finish.
Choosing The Right Needle for Leather Sewing
Choosing the right needle for leather sewing makes a big difference in achieving clean, professional results.
Leather needles are designed with sharp, triangular points to easily pierce tough material without tearing it, which is a complete concept in understanding how to work with leather effectively.
Special Sewing Machine Presser Feet
Step up your sewing game with the right presser feet.
A Teflon foot reduces friction, while a roller foot keeps leather moving smoothly.
For trickier tasks, like zippers, rely on a zipper foot.
A walking foot handles thick materials effortlessly, and a hemmer foot refines edges.
These leather sewing machine modifications guarantee precision, making tough projects easier.
For enhanced sewing, consider a non-stick sewing option.
Thread for Leather Sewing
When stitching leather, thread strength and material make all the difference.
Waxed threads, especially polyester or nylon, are top picks for their durability, water resistance, and ease of use.
A strong thread, like the NYKKOLA Waxed Leather Hand Stitching Thread, can hold up to 44 pounds when doubled—ideal for heavy-duty leather projects like belts or bags.
Its wax coating also guarantees smooth stitching and a professional finish.
Pay attention to thread color and stitch appearance, as these details influence the project’s overall look.
For dark leather, opt for deep or matching tones, while lighter threads add contrast.
Pair waxed threads with sturdy leather thread types and suitable needle sizes, such as Schmetz 90/14 or 100/16.
Matching thread and needle to leather weight is vital for superior results.
With the right materials, your leather creations will be as strong as they’re stunning.
Basting Leather Pieces
When aligning leather pieces, adhesive alternatives like basting tape work wonders for keeping everything steady.
Temporary fasteners such as clips help maintain leather alignment without leaving marks. Basting stitching is a classic method that offers flexibility during adjustments.
Be mindful of leather creep, as slight shifts can affect precision. For leather sewing beginners, mastering these alignment techniques and using proper leather sewing supplies guarantees professional results while preventing frustration during sewing leather projects.
Using a leather roller foot can also help with tight curves and multiple layers.
Tools for Cutting Leather
Cutting leather cleanly is the backbone of any great leatherworking project.
With the right leather tools, this task becomes precise and efficient. Here’s what you’ll need:
- Cutting Mat: Protect your surface while ensuring straight, smooth cuts.
- Rotary Cutter or Leather Shears: Perfect for straight lines or curves—choose based on your design.
- Skiving Knife: Thin edges or reduce bulk effortlessly.
- Clicker Press: Handle repetitive shapes with ease and accuracy.
Master these tools to elevate your leather crafting skills. A quality cutting surface is essential for safety.
Sewing Machine Settings for Sewing Leather
Mastering sewing leather on a machine is all about precision. Adjust stitch length to around 3-4mm to prevent tearing. Increase the tension adjustment, as leather needs stronger thread control.
Use a heavy-duty machine with a leather needle size suited for the material. A walking or Teflon presser foot guarantees smooth feeding, while keeping the feed dog engaged helps maintain control.
Always test settings on scrap leather first to avoid mishaps. Proper leather sewing machine settings make any beginner’s project seamless, and following these steps ensures a successful outcome with stronger thread control.
Buying and Preparing Leather for a Project
Choosing the right leather is essential for a successful project, so start by considering the thickness, type, and finish that match your design.
Once you’ve made your selection, prepare the leather by cleaning, cutting, and marking it carefully to guarantee professional results.
Calculating How Much Leather You Need
When planning your leather project, start by measuring your pattern’s dimensions carefully, accounting for seam allowances and potential waste.
Remember, leather doesn’t come in neat rectangles; its natural hide shape may require adjustments.
Use a leather thickness guide to choose the right type for your project. Thicker leather increases durability but can affect cost estimation.
Smart leather project planning minimizes waste, so always overestimate slightly to guarantee you’ve got enough for unexpected developments.
Where to Buy Leather
Finding the right leather for your project starts with knowing your options.
Local tanneries are excellent for exploring textures, while online retailers like Tandy Leather offer diverse leather grades and remnant sales for budget-conscious crafters.
Wholesale options work well if you’re tackling bigger leather projects.
Whether it’s calfskin for detailing or sturdy hides for durability, a good leather crafting guide and the right leatherworking tools can help elevate your leather sewing to a professional level.
Pressing Leather Seams
Seam finishing is the final step to making your leather project feel polished and professional.
When sewing leather seams, their thickness and material demand careful attention. Start by determining the leather type and its moisture content—these affect how effectively heat can mold and secure seams.
Use pressing tools, like a seam roller or warm iron (on a low setting), to apply even pressure. Avoid excessive heat application; leather can scorch easily.
Press seams flat, focusing on consistency to enhance both appearance and leather seam strength. For thicker seams, add light moisture before pressing for better results.
Seam finishing combines artistry and technique, giving your project a clean, durable finish that lasts.
Saddle Stitching With One Needle
The saddle stitch technique with a single needle is a reliable and beginner-friendly method for leather handsewing.
This approach is great for smaller projects and allows you to precisely focus on each stitch.
Start by threading your needle using proper knotting techniques to secure the thread.
Use a thick, waxed thread for durability and pull enough—about three times your seam length—to prevent rethreading midway.
Guide the needle through pre-punched holes, keeping thread tension consistent to prevent puckering or loosening.
Stitching with a single needle is slower than the two-needle saddle stitch, but it lets you control placement and tension more easily, ideal for intricate designs.
Once you reach the end of your seam, backstitch a few times to lock it in place securely.
This method guarantees neat, durable stitches while simplifying thread management.
Embrace the benefits of single needle stitching and create professional, polished results on any leather project.
Using The Stitching Pony for Two Needle Saddle Stitch
A stitching pony is your best friend regarding two-needle saddle stitching. It acts like a reliable third hand, holding your leather steady for consistent stitching.
This tool frees both hands, so you can focus on maintaining even stitch tension and smooth thread control. Here’s how to master it:
- Secure your leather in the pony, making certain it’s snug but not overly tight.
- Position the pony at a comfortable height for proper hand positioning.
- Use both needles to alternate stitches evenly through marked holes.
- Keep tension steady on both threads to avoid buckling the leather.
- Check your stitches as you go to guarantee a neat, symmetrical pattern.
If you lack a pony, explore Pony Alternatives like clamps or homemade devices.
Leather Sewing Quiz
Ready to test your leather sewing knowledge? A well-designed quiz can sharpen your skills and boost your confidence.
This Leather Sewing Quiz challenges you with a mix of questions ranging from beginner basics to advanced techniques. It covers essential topics, like stitch alignment, needle types, and thread selection, offering a complete learning experience.
A scoring system evaluates your progress, while a time limit adds an exciting layer of focus. With question variety, you’ll never feel stuck in a rut, and retake options allow you to refine your understanding.
Whether you’re following a leather sewing tutorial or exploring new techniques, this quiz helps bridge the gap between practice and mastery. Ready to ace it?
Sewing a Pocket to Your Bag
Adding a pocket to your leather bag boosts both style and function. Start by choosing the pocket size and placement that feels practical and visually pleasing.
Use a stitching awl to punch precise holes along the edges you’ll attach. Secure the pieces using a strong, waxed thread for seam reinforcement.
For beginners, try these steps:
- Mark the leather with an overstitch wheel.
- Align and clip the pocket.
- Use consistent tension for your stitches.
- Finish neatly by backstitching.
You’re mastering leather sewing techniques one stitch at a time.
Creating a Turned Edge Seam on The Front of Your Bag
To create a turned edge seam on the front of your bag, start by marking your seam allowance using a groover or a silver ink pen. Apply a thin layer of leather glue or glue alternatives like rubber cement to keep edges neat and stable.
Press the edges together firmly, ensuring alignment. If your design involves curves, consider corner rounding for smoother edges.
Once the glue dries, fold the edges inward for a clean, polished look. Secure the fold temporarily with binder clips or paper clips, avoiding marks on the leather.
Use topstitching options to sew along the folded edge, strengthening the seam and adding detail. Finally, trim excess material for even leather edge finishing, completing your sewing leather project.
Edge Binding
Edge binding is where your leather project starts to look truly polished. After finishing the turned edge seam, it’s time to strengthen and refine the edges.
Leather edge binding is more than just functional—done correctly, it can elevate your piece by adding that professional, structured finish.
First, choose the right binding materials based on your leather’s thickness. A thin binding may not hold well on thicker leather, while overly thick material might overwhelm smaller seams.
Carefully align the binding along the edge, securing it temporarily with clips to avoid shifting. Slowly sew along the edge, keeping your stitching neat and even.
For decorative binding, experiment with contrasting or patterned materials for a unique touch. Don’t forget to focus on securing ends, as clean finishes make all the difference. This is one of the most practical and rewarding leather finishing techniques!
Creating a Cut Edge Seam on The Back of Your Bag
A cut edge seam on the back of your bag showcases a rustic aesthetic appeal while keeping sewing simple.
This technique is great for projects where exposed seam durability matters most, especially when structural integrity is key. First, verify clean cuts—smooth edges prevent fraying and make leather stitching easier.
Depending on your leather type suitability, consider burnishing or applying edge finishing options like wax or edge paint for a polished look. For a more refined approach, consider how a clean finish seam could prevent fraying.
Reinforcement techniques, such as doubling up the thread or backstitching, can strengthen your stitches for everyday wear. When sewing leather by hand or machine, keep your seam lines straight and evenly spaced for consistency.
Using proper leather techniques guarantees a professional look that complements your bag’s design.
Prepping Fringed Trim for Sewing
Ready to add some personality to your leather project? Fringed trim can take your design from simple to stunning.
Start by considering the Fringe Length and Trim Density. Longer fringes make a dramatic statement, while shorter ones create a subtle texture. Choose a Leather Type that complements the trim, ensuring both materials blend seamlessly.
Align the trim carefully along the edge and secure it in place using binder clips instead of pins to avoid marks. For Securing Fringe, use strong polyester or waxed thread—these are durable and won’t fray over time.
Stitch along the base of the fringe, ensuring even spacing for a clean look. Focus on Edge Finishing to prevent unraveling. A stitching pony can also help keep everything steady while you sew.
Follow these leather sewing steps for a professional-looking accent!
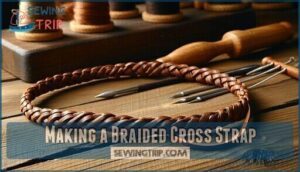
Making a Braided Cross Strap
Braiding a cross strap adds durability and sophistication to your leather goods. Choose quality leather for flexibility and style, keeping the Strap Length precise for your project.
A simple Braid Pattern, like a three-strand weave, works well for beginners, while advanced leather lacing techniques can elevate your design.
- Measure accurately to match the strap’s purpose.
- Trim and finish edges for a polished look.
- Secure hardware before braiding for easy attachment.
- Experiment with colors or accents to make unique leather accessories.
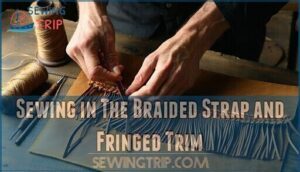
Sewing in The Braided Strap and Fringed Trim
Attaching braids and securing fringes adds the perfect finishing touch to your leather project.
Start by verifying the braided strap and fringe are the correct length for your design. Carefully align your strap placement, marking where it will attach to the leather.
Use leather lacing techniques or a sturdy saddle stitch to secure the braided strap, making sure each stitch is tight and even.
For the fringe, layer it in position, verifying it drapes evenly and complements the braid style. Stitch it with firm, small stitches to keep it from shifting.
Take your time to align every piece so the leather sewing looks polished. These steps guarantee your braided strap and fringe stay secure, giving your project a professional finish.
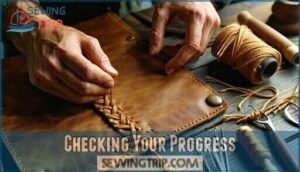
Checking Your Progress
Once your braided strap and fringed trim are secured, it’s time to pause and assess your progress. Step back and review your work carefully—every detail matters when crafting leather pieces.
Check your seams and stitching. Ask yourself: are your stitches consistent and evenly spaced? Is the tension under control to avoid puckering or sagging? Seam alignment guarantees your project looks polished, so keep an eye on any uneven edges.
Evaluate the overall appearance of your piece to confirm it matches your vision. Smooth out imperfections and address any thread management issues that might compromise its durability.
Here’s a quick checklist for progress checks:
- Stitch Consistency: Are stitches uniform and neat?
- Tension Control: Is the thread’s tightness balanced?
- Seam Alignment: Do edges line up as planned?
- Thread Management: Is excess thread trimmed neatly?
- Overall Appearance: Does everything look refined?
Keep practicing—your leather sewing journey builds precision with every project.
Frequently Asked Questions (FAQs)
Can I sew leather on a regular sewing machine?
Around 80% of sewing machines struggle with leather’s thickness.
You can try using a stronger needle and walking foot, but for heavy leather projects, investing in an industrial or specialized machine is best.
What is the best stitch for sewing leather?
The saddle stitch is your best bet for sewing leather.
It’s strong, durable, and works well for thick material.
With two needles and waxed thread, you’ll create even, long-lasting stitches that won’t unravel easily.
Is leather difficult to sew?
Leather isn’t hard to sew, but it requires patience and the right tools.
Unlike fabric, leather doesn’t forgive mistakes, so precision is key.
Start small, use practice pieces, and you’ll build confidence quickly.
Is it possible to sew leather by hand?
Where there’s a will, there’s a way!
Yes, you can sew leather by hand!
With tools like stitching awls, waxed thread, and leather needles, plus some patience, you’ll achieve strong, professional-grade results.
How to maintain tools used for sewing leather?
Keep your leather sewing tools sharp, rust-free, and clean.
Wipe them after use, oil metal parts to prevent corrosion, and store them in a dry spot.
Regular maintenance guarantees precision and extends their lifespan.
Can leather projects be safely hand washed?
You shouldn’t hand wash leather projects.
Water can weaken leather fibers, warp its shape, and strip natural oils.
Instead, use a damp cloth for surface cleaning and a leather conditioner to maintain flexibility and durability.
What leather types are easiest to sew?
Imagine stitching a soft, buttery fabric—vegetable-tanned leather offers that ease.
It’s pliable, forgiving, and ideal for beginners.
Avoid thick bridle or chrome-tanned varieties; their stiffness and resilience test your patience, even for seasoned hands.
How to choose a leather dye for projects?
Pick leather dye based on your project’s type and use.
Alcohol-based dyes offer deep, vibrant color but can stiffen leather, while water-based dyes are eco-friendly and easier for beginners.
Test colors beforehand to avoid surprises.
Do humidity and temperature affect leather sewing?
When it rains, it pours—even in leatherwork.
High humidity swells leather, making stitching uneven, while extreme heat dries and cracks it.
Work in balanced conditions to prevent warping, ensuring smooth, durable seams every time.
Conclusion
Picture your finished leather project in your hands – the smooth texture, the perfect stitches running along each seam like tiny soldiers in formation.
You’ve now mastered how to sewing leather using both hand and machine techniques. From selecting the right needles to perfecting your saddle stitch, you’ve gained skills that’ll last a lifetime.
Remember, leather work rewards patience and practice. Start with simple projects, build your confidence, and soon you’ll be creating beautiful, durable pieces that’ll impress everyone around you.
- https://www.weaverleathersupply.com/pages/4-best-leather-threads-for-hand-sewing-leather
- https://sparrowrefashion.com/2025/06/02/best-thread-for-leather-sewing-choosing-essentials
- https://tandyleather.com/blogs/tandy-blog/how-to-choose-the-right-thread-and-needle-size-for-hand-sewing-leather
- https://www.buckleguy.com/waxed-thread
- https://weallsew.com/sewing-leather-with-a-domestic-machine

