This site is supported by our readers. We may earn a commission, at no cost to you, if you purchase through links.
Are you looking for the perfect way to express yourself through your clothing? Hand-sewing is a great way to create one-of-a-kind pieces that are all your own. With just a few essential tools and knowledge of some key hand stitches, you can have fun creating unique clothes and accessories in no time.
In this article, we’ll explore the basics of how to do sewing by hand so you can make beautiful items with confidence. We’ll cover everything from gathering materials to mastering the running baste stitch and learning how whip stitching works.
Read on for an easy guide that will help you get started on your next sewing project today!
Table Of Contents
Key Takeaways
- Hand-sewing requires essential tools such as needles, thread, and scissors. Different types of thread are suited for different fabrics and projects.
- Different types of stitches, such as the running stitch, catch stitching, blanket stitch, and whipstitching, are suited for different purposes and fabrics.
- Good posture, lighting, and technique are essential for successful hand-sewing. Using a thimble can help protect fingers while sewing.
- Organizing hand-sewing supplies in an easily accessible and labeled manner, using dividers and boxes, can help keep everything organized and easily accessible.
Essential Tools for Hand-sewing
You’ll need the right tools to get started with hand-sewing: needles, thread, scissors, and more. Threads come in a variety of types, such as cotton, polyester, or silk. Choose the type that is most suitable for your project and check care instructions on fabric labels when selecting thread.
Needle selection is important too. Different sizes are used for lightweight fabrics versus heavier materials like denim or canvas, so make sure you use the right needle size to avoid damage! For best results, prepare fabric before stitching by pressing it flat.
Knotting techniques vary depending on the stitch, but all should be secure enough not to hold up during wear yet easy enough to undo if needed without damaging material fibers. Seam finishing can also add additional strength while giving garments a professional look.
With these essential tools at your disposal, you’re ready to tackle any sewing job, whether it’s adding buttons, fixing tears, or creating new clothes from scratch.
Running Baste Stitch
Now that you have the necessary tools for hand-sewing, let’s talk about the running baste stitch. This type of stitch is often used in patching seams, mending rips, and hemming fabric. It provides a temporary hold while finishing edges or sewing shank buttons, but it can also be used to sew leather with a straight stitch over longer distances.
To do this correctly, it is important to use the appropriate size needle for your fabric. If the needle is too small, it will be difficult to push through thick fabrics like leather. If it is too large, it will leave an unsightly hole in delicate fabrics such as silk or chiffon.
When stitching, start by threading your needle with an adequate amount of thread so you don’t need to stop mid-project due to running out. Begin with two tiny stitches on either side of where you want your line before creating even rows along each side until complete.
The Running Baste Stitch creates strong yet flexible lines, making it ideal when working around curves.
Running Stitch
Experience the satisfaction of creating a beautiful garment with a running stitch! The most basic form of hand sewing, learning the running stitch is essential in order to advance your skills. It has one of the shortest learning curves and will save you time when stitching together garments quickly.
When selecting thread for this technique, make sure it matches both fabric type and color, as well as being strong enough for multiple layers if needed. Even tension is important while making this stitch; too tight or too loose can lead to uneven stitches which won’t look neat or professional on any garment.
When using a large needle, be aware that it can pull at fragile fabrics like silk and cotton lace, so use smaller sized needles instead to avoid damage. You also need an overhand knot in order to begin your project, but try not adding knots between each individual stitch unless absolutely necessary since they may show through light fabrics once finished.
To sew on flat buttons without damaging them, select thinner needles with sharp points – thicker ones could cause holes. Then make small even X-shaped stitches from corner-to-corner across the button before looping around its base several times, then finishing off with an overhand knot.
Once confident in mastering all types of seams by using different sizes, shapes, and colors, get creative by mixing designs up! Have fun experimenting with various techniques such as 3D embroidery, smocking, ruching, etcetera until you find something unique that suits your style best.
Catch Stitch
Catch stitching requires small, short stitches to create a zigzag pattern along hems and overlapping fabric. This is an ideal binding method for pieces of fabric that need a secure seam without being visible from the outside.
It’s important to use the right sewing needle for your particular type of fabric, as well as appropriate thread types when doing catch stitch work. You should also familiarize yourself with knot techniques in order to finish off your threads properly so they don’t come undone while you are working on them or afterward.
When you start catching, make sure both layers of fabrics have been pressed flat first before starting at one end and gradually moving up toward the other end until completion. To begin, insert your needle through the back side of just one layer. Then move diagonally upward into the back side above the folded hem before inserting it horizontally into the fold again in the same direction each time, forming a zigzag pattern all across the desired length of the hemming area.
The hemming area must be done securely but not too tightly so there’s no puckering or wrinkling effect once finished. Binded objects will look crisp, neat, and tidy every time! To achieve this kind of professional-looking result, always practice how to catch stitch correctly by hand using scrap pieces of similar materials like those ones going to be used in the actual project.
Experiment with various pressures, tension times, try different lengths, sizes, patterns, and even colors if wanted to see what looks best and works better. Results obtained? Go over the steps described here a few times to get the hang of the technique.
Blanket Stitch
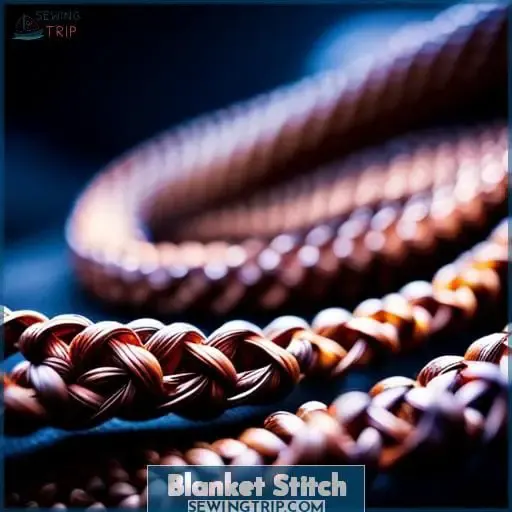
Create a decorative and visible finish with the blanket stitch! This key hand-sewing stitch is great for adding tension to curved hems, weaving patterns into fabric, or creating decorative designs.
To begin your project, you’ll need the right sewing needles for your chosen fabric type, as well as an appropriate amount of thread. After pressing the material, start by inserting the needle from the backside of the garment and pull through to the front side about one-eighth inch away from the edge.
Then, insert the needle again at the same point on the other side so that it creates a small loop before pulling through the backside once more, but this time starting further along in the direction you are stitching.
Continue looping in this manner until reaching the desired length, then knot off securely on the wrong side after the last stitch is pulled tight.
For best results, add tension while weaving the pattern to create an even design – perfect when making blankets or finishing edges of clothing items such as collars and sleeves! With proper practice, you can soon master basic stitches like these with ease, so get started today!
Whip Stitch
Drawing on its nearly invisible and durable qualities, whipstitch your way to a professional finish! Whipstitching is an invaluable sewing technique that uses small, short stitches to create zigzags along the fabric’s edge.
When selecting materials for this stitch, it’s important to choose the right thread type and needle size for the specific fabric type. Heavier fabrics will require a thicker thread, while fine fabrics may need thinner threads.
To begin, you’ll need about two inches of thread, as well as anchoring stitches before starting with whip stitching. These anchor stitches help keep everything in place, regardless of how much movement or stress is placed on them later.
Once ready, start by inserting your needle from the front side through the back side at regular intervals – but not too close together – working up one row then down another until you reach the end of the seam where knots must be tied securely at the backside.
For added strength, use multiple strands instead of a single one when stitching heavy material like denim. Another great tip when using finer fabrics like chiffon is to make sure knot tying is done carefully so they don’t show up through the front part.
Just tie off with a small, tight knot near the center rear side, making sure all stray ends are tucked away neatly.
Whip stitch also makes a good choice for securing edges overlapping pieces, such as flaps and pocket openings, ensuring secure fastening every time without having to worry about visible topstitching ruining the look of the garment.
How to Secure Hand-sewing
To secure your hand-sewn masterpiece, use the Catch Stitch to stitch it in place like a master tailor – tightly woven yet elegantly crafted.
To begin, press the fabric so that you have a clean crease and straight line along the hem edge. Then thread your needle with an appropriate amount of button or carpet thread for strength. Start from one end of the fabric and make small stitches at an angle as you move towards the other end until you reach your starting point again.
On this final pass, insert each stitch through both layers of fabric near where they meet without piercing any extra material between them to ensure invisibility when finished.
For attaching buttons by hand sewing, start by anchoring some stitches first before pushing through shank or hole on flat buttons several times using a toothpick or pin to keep tension loose if needed.
Then wrap around the base multiple times before knotting off securely at the backside with remaining thread ends tucked away neatly afterwards.
Hem stitching is also essential when making garments since whipstitches are used nearly invisibly while blanket stitches offer decorative visible options too depending on preference required for project completion purposes.
No matter what sort of sewing project is being created, having knowledge about catch stitches always comes in handy. It involves zigzagging pattern across overlapping fabrics which secures them together quite effectively plus adds a nice touch aesthetically speaking too.
Overall, practicing all three types regularly will help build skills over time, allowing anyone to achieve great results every single time, regardless of whether it’s attaching buttons, hemming garments, or anything else related!
How to Mend a Tear by Hand-sewing
Mending a tear by hand-sewing is an easy way to repair clothing without requiring any special tools or skills.
When selecting thread, choose a color that matches your fabric for best results. However, if it’s not available, opt for one of a similar shade and weight. When selecting needles, ensure they are sharp enough to easily penetrate the fabric but also strong enough not to break when sewing through thick layers of material.
Once you have gathered everything needed, make sure to prepare your garment properly so it can be sewn together seamlessly. Start by pressing out any wrinkles in the area needing repair, then place pins along either side of the tear, holding them firmly in place until ready for stitching.
This will help keep things even while sewing, as well as secure seams after knotting off threads at the end of the project.
Next, take up the needle with the chosen thread, looping it securely around the shank before pulling tight on the right side. Once securely knotted, repeat on the left side, ensuring both sides are secured tightly against the base button before moving onto the next step.
The last thing is bringing the needle down from the backside folded hem, piercing diagonally into the back fabric horizontally above the fold.
Tips for Practicing Hand-sewing
Practicing hand-sewing requires patience and a steady hand. You can expect to spend around eight hours mastering the basics! To begin, it is important to have matching threads for your project. Selecting the wrong needle or thread type could lead to problems down the line. Additionally, selecting a fabric that is too thick or thin will cause difficulty when trying to stitch beautiful stitches.
For finer fabrics, opt for shorter needles but don’t go too short as this may result in broken needles during sewing. When choosing seam placement, remember that even tiny adjustments make all the difference between an average job and a professional one.
When practicing techniques like running stitches or slipstitches, use scrap material rather than expensive fabrics so mistakes won’t be costly. Also, try different sized loops on each side of fabric edge until you find what works best for you.
Always start with backstitching at the beginning and end of seams as this creates strong joints that won’t come undone easily over time – plus, it looks neat once pressed flat against garment edges! Practice gradually increasing speed while keeping tension consistent throughout the loop formation process.
This helps build confidence when working on larger projects with multiple layers of materials requiring more intricate stitching patterns.
To ensure successful outcomes every time, it’s important not only to pick up new skills quickly but also to maintain good posture while doing so. Keep elbows close into sides while forming a small loop using the index finger from the left hand (if right-handed) through which the thread passes before being pulled taut again after passing through the second layer.
Make sure the light source is adequate enough, enabling better visibility, thereby avoiding missed spots due to incorrect placement along lengthwise lines created by pressing iron beforehand. Otherwise, the entire project might need redoing altogether! With proper guidance, plenty of dedication, plus lots of hard work, anyone can become proficient at any kind of sewing task, regardless of whether it’s something they’ve done numerous times already.
How to Sew Leather by Hand
Sewing leather by hand can be tricky, but with the right tools and techniques, you’ll master it in no time. First, make sure to select good quality leather and avoid fading or dyeing it as this may damage the material.
After cutting out your pattern pieces of leather using an appropriate tool such as scissors or rotary cutter for precision cuts, apply glue on both sides if needed to keep layers together while stitching.
A sewing machine isn’t ideal for thicker fabrics like leather, so use thicker needles when hand-sewing these projects instead.
Here are five tips that will help you practice your hand-sewing skills:
- Use a shorter stitch length than regular fabric.
- Pull the thread tautly after every few stitches.
- Select a thimble that fits well on your finger.
- Secure knots neatly at the backside of the project.
- Try different kinds of stitches like running stitch, slipstitch, etc., which suit best with the type of fabric used.
These little tricks go a long way toward success when crafting beautiful projects from this tough yet versatile material! With patience and dedication, along with the correct tools and techniques, anyone can learn how to sew by hand and quickly become an expert seamstress – all without needing access to fancy equipment!
Frequently Asked Questions (FAQs)
What type of thread should I use for hand-sewing?
For hand-sewing, use thread that is strong and durable, such as button or carpet thread. This will ensure that your stitches hold firmly and securely with minimal effort.
How do I make sure my hand-sewing stitches are secure?
To ensure secure hand-sewing stitches, begin with an anchor stitch to secure the threads. Then, sew through the fabric multiple times. To keep stitches loose, add a toothpick or pin.
How long does it usually take to complete a hand-sewing project?
The time it takes to complete a hand-sewing project varies depending on the complexity and size of the project. Generally, simple projects can be completed quickly, whereas larger or more intricate ones may take longer.
What type of needle should I use for hand-sewing different fabrics?
Choose the appropriate needle for the fabric you are sewing. The size and shape of the needle should be based on the thickness of the material to prevent fraying or damage. For thin fabrics such as silk or chiffon, use a small needle. For thicker materials like denim or canvas, use a larger needle.
What is the best way to store my hand-sewing supplies?
Store your supplies in an easily accessible place. Use a box, bin, or drawer with dividers to organize small items such as needles and thread. Keep scissors sharpened and safely out of reach of children. Store fabric off the floor to protect against dust and insects.
Conclusion
Hand-sewing is an art form that requires skill and practice. With the right tools and knowledge of the various stitches, you can create beautiful garments and repairs that will last. With the correct technique, you can stitch with confidence, knowing that your work will be beautiful and strong.
By using the stitches and techniques outlined in this article, you can be sure that your hand-sewing projects will be nothing short of masterful.

