This site is supported by our readers. We may earn a commission, at no cost to you, if you purchase through links.

First, mark your desired length while wearing the dress.
Remove it, then cut the dress horizontally at this mark. Trim excess fabric, leaving enough for a 1/2-inch seam allowance on both pieces.
Pin the sections right sides together, matching patterns if needed. Sew the pieces with a straight stitch, press the seam open, and try it on.
This technique preserves both the original neckline and hemline details—perfect for dresses with special trims or when you’re a bit short on length but not on determination!
Table Of Contents
Key Takeaways
- You’ll preserve both the original neckline and hemline details when shortening from the middle, making this technique perfect for dresses with special trims or decorative edges.
- Always measure twice before cutting by marking your desired length while wearing the dress with appropriate shoes, then add a 1/2-inch seam allowance on both pieces.
- You can achieve a professional finish by pinning the sections with right sides together, matching patterns if needed, and sewing with a straight stitch before pressing the seam open.
- You’ll need to try on your shortened dress to check the fit, making small adjustments as needed to ensure the waistline sits comfortably and the fabric drapes naturally.
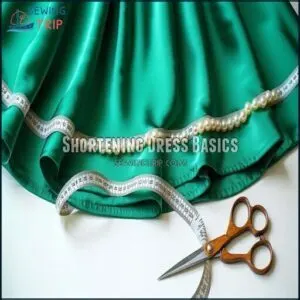
Shortening Dress Basics
You’ll need to measure your dress carefully at the natural waist before making any cuts.
Shortening from the middle gives your dress a better fit and lets you keep those pretty details at the hemline that might get lost with traditional shortening.
Determining Garment Length
Every successful dress shortening project starts with precise garment length determination. Your measuring technique makes all the difference between a professional-looking alteration and an awkward hemline.
- Place your measuring tape at your natural waist placement (the narrowest part of your torso)
- Extend the tape down to your desired hemline while wearing shoes you’ll pair with the dress
- Mark the perfect length with chalk, creating clear guidelines for cutting
Remember: measure twice, cut once! Your future self will thank you.
Evaluating Wearability Factors
Now that you’ve measured, let’s check if shortening from the middle makes sense for your dress.
Body type matters—some dress styles work better with waist adjustments than others.
Try sitting and walking to assess comfort level. Run simple wearability tests like reaching up and bending down.
Your fabric choice affects how the alteration hangs, so pin it temporarily before committing to scissors!
Fabric and Drape Considerations
While evaluating your garment, fabric choice plays a major role in your alteration success.
Different fabric types affect how your dress will hang after you shorten it from the middle.
- Lightweight silks and chiffons tend to flow differently when cut and rejoined
- Structured cottons maintain shape better during waistline adjustment
- Stretch materials require special handling to prevent wavy fabric layers
Think of your fabric as your partner in this transformation – it’ll tell you what it needs!
How to Shorten a Dress
Five amazing methods exist for shortening a dress from the middle – a technique that transforms both fit and style with one clever alteration.
When you’re ready to take up your dress middle, you’ll need:
- Sharp fabric scissors to make clean, precise cuts through the material
- Seam ripper to carefully separate the bodice from the skirt without damaging either piece
- Measuring tape to confirm you’re removing exactly the right amount of fabric
- Straight pins or clips to align and hold everything together during reassembly
- Thread that matches your dress color perfectly for invisible sewing techniques.
The magic of dress alterations happens at the waist, where you can remove excess fabric and cinch dress waist for a custom fit. Many dresses already have a seam here, making this the perfect place to work your transformation.
Understanding hemming techniques is vital for achieving a professional finish when shortening a dress.
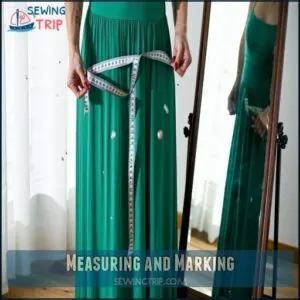
Measuring and Marking
You’ll need to measure carefully before making any cuts to shorten your dress from the middle.
Standing in front of a mirror with your measuring tape at your natural waist, mark where you want your new waistline with chalk or pins so you don’t mess up when it’s cutting time.
Standing tall with your measuring tape at your natural waist, mark your new waistline clearly—this moment of precision prevents heartbreak at cutting time.
Initial Measurement Techniques
How exactly do you get those perfect measurements for shortening your dress? Start by standing tall with a measuring tape wrapped around your natural waist placement – the narrowest part of your torso.
Have a friend help measure from your waist down to where you want your dress to end. This initial measurement technique guarantees accuracy without awkward bending.
For flawless dress length measurement, wear the shoes you’ll pair with the dress. Mark the desired length with chalk while standing straight.
If you’re working solo, try using a similar-style dress as your guide. Just line up the shoulders and trace the hem marking onto your dress-in-progress.
Using a measuring tape tool can help achieve precise measurements.
Remember, precise measurements now save headaches later!
Marking The New Hemline
Now that you’ve gotten your measurements, it’s time for marking the new hemline. Grab your chalk or fabric marker and measuring tape.
Accurate hem marking techniques are important for achieving a polished look. Wear the dress and have a friend mark your desired length all around the dress.
Make small dots at consistent intervals, then connect them with smooth lines. Always add 1-2 inches for seam allowance.
Double-check your hemline alignment by measuring from the floor up – this prevents any lopsided edges. Use pins to secure your markings before moving to the cutting stage.
Fabric Cutting and Preparation
How carefully you prepare your fabric can make or break your dress-shortening project! With your hemline marked, it’s time for fabric cutting and preparation.
Lay your dress flat and inside out on a clean surface. Double-check your measurements with a measuring tape before cutting. Use sharp cutting tools like a rotary cutter for cleaner edges than scissors provide.
Create a proper seam allowance by measuring about 1-inch below your chalk line. Smooth out any wrinkles for even, precise cuts.
For a temporary fix, consider using no sew methods to shorten your dress without committing to permanent alterations.
Cutting The Dress
Now that you’ve got your dress marked, it’s time to grab your sharp scissors and make that cut.
You’ll want to keep the fabric smooth and flat as you cut along your chalk line to guarantee you get a perfectly even edge.
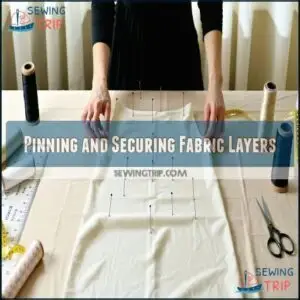
Pinning and Securing Fabric Layers
Now that you’ve marked your cutting lines, it’s time to secure those fabric layers.
Start by placing pins perpendicular to your marked line for maximum fabric stability. Space pins about 2 inches apart, ensuring consistent pin placement throughout.
For slippery fabrics, use more pins and add seam allowance markers. Double-check your layer alignment before proceeding—proper pinning now means cleaner cuts later.
Remember, pins should hold firmly without distorting the fabric’s natural drape.
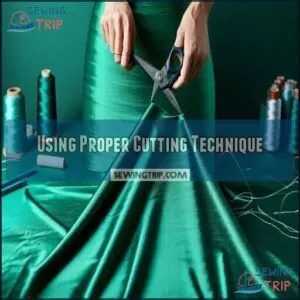
Using Proper Cutting Technique
Now that your pins are securely holding your fabric in place, it’s time for the big cut! Sharp scissors are your best friend here.
Accurate garment length determination is essential for a successful outcome.
Hold the fabric steady with one hand while cutting with the other. Follow your chalk markings exactly, moving in small sections rather than big sweeps. Keep your cutting tools at a 90-degree angle to the fabric for clean edges.
For delicate fabrics, consider using smaller scissors for better control. Remember to cut slowly and steadily—this isn’t a race! A wobbly hand leads to jagged edges that are hard to fix later.
Ensuring Straight and Even Cut
Now that your fabric is prepared, let’s focus on getting that perfect straight cut.
Align your fabric grain properly on a flat surface to prevent uneven hemlines.
Use sharp scissors or a rotary cutter for clean edges. Secure all layers with pins 2-3 inches apart before cutting.
Follow your chalk marks precisely and cut with slow, steady movements for those even cuts that’ll make your shortened dress look store-bought!
Removing Excess Fabric
You’ll need to cut away the extra fabric carefully to achieve your perfect dress length, making sure to follow your chalk markings for an even result.
Now’s the time to take those scissors and snip away confidently, just like removing the middle slice from a sandwich to make it the right size for your appetite.
Measuring and Marking Fabric to Remove
Always start by laying your dress flat on a smooth surface. Grab your measuring tape and determine exactly how much fabric measurement you need to remove from the middle.
Use chalk or fabric markers to create clear marks around the waist alignment point where you’ll cut. Don’t forget to add a 1/2 inch seam allowance on both sides of your marking line!
| Step | Action |
|---|---|
| Lay dress flat and smooth fabric layers. | |
| Measure desired new hemline length. | |
| Use chalk to mark points evenly around fabric. | |
| Add extra seam allowance before cutting. |
Double-check symmetry before marking lines.
Remember, precise measurements lead to perfect results! Taking your time now saves headaches later.
Cutting Away Excess Material
The big moment has arrived! With your marked lines as guides, it’s time for the fabric removal phase. Take your sharpest scissors and prepare to trim away excess material.
- Cut slowly along chalk marks to prevent fabric shifting
- Keep fabric taut while trimming for precision
- Leave 1/2 inch beyond your marks for seam allowance
- Follow curves carefully when altering dress midsections
- Double-check measurements before each significant cut
Adjusting for Desired Length
Now that you’ve cut away the excess material, it’s time to perfect your target dress length. Double-check your waistline measurement to verify everything lines up properly.
Use a measuring tape from the middle dress adjustment point to verify your desired hemline falls exactly where you want it. Don’t go it alone—grab a friend to hold the tape while you stand naturally.
Fabric Type Best Technique Finishing Method
Try the dress on before final stitching—fabric drape impact can surprise you! Make small adjustments until it’s just right.
Reattaching Top and Bottom
You’ll need to carefully match up your cut pieces like you’re putting together a puzzle that fits your body just right.
Now it’s time to pin the top and bottom together, making sure everything lines up perfectly before you start sewing your newly shortened dress.
Aligning Cut Edges
With your fabric pieces now cut, it’s time for the magic of edge alignment to begin. Proper seam matching guarantees your shortened dress looks store-bought, not homemade.
For perfect pattern continuity:
- Smooth both fabric layers completely flat
- Match key features like side seams and fabric grain
- Trim any uneven areas with sharp scissors for precise fabric cutting
Iron the pieces before continuing—this simple step prevents alignment headaches during the next steps.
Pinning Sections Together
Now that you’ve got your fabric layers lined up, it’s time to secure everything with pins.
Place pins perpendicular to the cut edge, spacing them about 2-3 inches apart for even pin distribution.
Work your way around the entire circumference, smoothing fabric as you go.
This essential step in your DIY dress alteration prevents shifting when you start sewing the two sections together.
Basting to Secure Placement
You’ll find that basting is your secret weapon for keeping everything in place before permanent stitching. Think of it as a dress rehearsal before the main show!
Follow these simple basting techniques for perfect placement:
- Thread a needle with contrasting thread (makes removal easier)
- Create long, loose basting stitches about 1/4 inch from the edge
- Maintain even tension as you stitch around the entire circumference
- Remove pins as you go to avoid fabric puckering
- Try on the dress to check fit before permanent sewing
This temporary step prevents shifting and guarantees your shortened dress looks professional, not homemade!
Sewing The New Waistline
You’ll need to stitch that new waistline with care, making sure both pieces line up perfectly before you start sewing.
Now’s when your patience pays off as you connect the top and bottom parts with even, steady stitches that’ll hold your newly shortened dress together.
Machine Sewing Techniques
When sewing your shortened dress, sewing machines offer the most efficient way to join the top and bottom pieces.
Select proper thread types that match your fabric and adjust stitch length to 2.5-3mm for most fabrics.
Maintaining proper tension is essential for a smooth seam, so consider reviewing essential sewing machine techniques.
Maintain even fabric tension by guiding without pulling, and control your sewing speed—slower is better for precise curves.
Remember to backstitch at the beginning and end to secure your seam. This garment alteration technique guarantees professional-looking results when you shorten a dress from the waist.
Hand Sewing Methods
While machine stitching offers speed, hand sewing provides precision for your waistline seam. You can find a variety of hand sewing needles online.
Here are five hand-sewing techniques for joining your dress sections:
- Slip stitch – nearly invisible on the outside
- Blind stitch – perfect for thin fabrics
- Backstitch – strongest hand stitch, ideal for waistlines
- Catch stitch – flexible for stretch fabrics
- Whip stitch – quick finish on internal seams
Don’t rush—your careful stitches will shorten your dress beautifully!
Finishing The Seam
Your dress’s new waistline deserves a professional finish that prevents fraying and guarantees durability.
Seam finishing is the final touch that separates homemade from high-end. Here’s how to secure your work:
- Trim excess fabric to reduce bulk, leaving a consistent 1/2-inch allowance
- Zigzag stitch or serge raw edges to prevent fraying
- Press the seam open or to one side with a hot iron
- Topstitch 1/8-inch from the seam for extra strength and a polished look
For lightweight fabrics, try edge binding with bias tape. For heavier materials, fabric interfacing provides structure and prevents stretching at the waist.
Finishing Touches
You’re almost there with your dress shortening project, and these final touches will make all the difference in how your dress looks and feels.
Now you’ll need to press your new seam flat with an iron and carefully reattach any embellishments.
Before trying on your newly shortened dress to admire your handiwork, ensure that all steps have been completed accurately.
Pressing The New Seam
After all your careful sewing, it’s time to make that new seam look professional with proper pressing techniques.
Lay your dress completely flat on your ironing board, smoothing out any wrinkles or folds in the fabric first.
Select the right heat setting for your material—lower heat for delicates, medium for cotton blends.
Step Tool Setting Action Tip
seam security
For stubborn seams, a light spritz of water helps finish the seam perfectly without damaging your hard work!
Reattaching Embellishments
Now that your new seam looks crisp, it’s time to bring back the sparkle! After careful embellishment removal earlier, reattach those special details with precision.
Bead reattachment requires patience—use matching thread and tiny stitches. For trim replacement, align patterns exactly where they belong on your newly shortened dress.
- Your fingers might cramp, but seeing those sequins catch the light again is worth it!
- That feeling when the lace repair turns out invisible? Pure magic!
- Nothing beats the satisfaction of saving your favorite dress’s character!
Trying on The Shortened Dress
Every successful dress alteration requires a thorough fit check before the final celebration.
Now it’s time to try on your shortened masterpiece:
- Check the fabric drape and overall symmetry from all angles
- Sit, walk, and stretch to test wearability and comfort
- Examine waist adjustment for smooth, even shifts
- Verify your body proportions look balanced with the new length
You’ve done it! Your dress transformation is complete and ready to shine.
Final Adjustments
You’ll need to make final tweaks to guarantee your newly shortened dress fits and feels just right.
Step back and check for any uneven hemlines or tight spots, then make small adjustments until your dress looks like it was always meant to be this length.
Making Necessary Alterations
After your initial alteration, a second look can reveal necessary tweaks. Check your work carefully to confirm your dress reconstruction looks professional.
Notice something off? Here’s your quick-fix guide:
| Problem | Fix | Time Needed |
|---|---|---|
| Twisted seam | Re-pin and resew the seam adjustment | 10 mins |
| Wavy hemline | Press with steam and rehemming techniques | 15 mins |
| Visible thread | Switch to matching color thread | 5 mins |
For puckering fabric after you shorten dress from waist, try loosening your machine tension. When fabric cutting created jagged edges, trim with sharp scissors for a clean line.
Remember that dress alterations often need fine-tuning—don’t be discouraged if your first attempt at alter dress midsection needs a touch more work!
Ensuring Comfort and Fit
With your alterations complete, it’s time to check that your shortened dress feels right on your body. Your comfort level matters just as much as how it looks!
When testing your fit adjustment, try these simple checks:
- Sit, stand, and walk around to confirm the fabric moves naturally with you
- Raise your arms to verify the dress silhouette doesn’t pull awkwardly at the waist
- Take deep breaths to confirm the altered midsection isn’t too tight
Different body types need different allowances, so trust how it feels!
Troubleshooting Common Issues
Tackle those pesky issues that might pop up after shortening your dress from the middle. Watch for uneven seams, fabric puckering, and fraying edges that can ruin your hard work.
If you notice thread breakage, try rethreading your machine or changing the needle. For additional help, explore common sewing machine problems.
Mismatched patterns can be fixed by realigning fabric pieces before final stitching.
Don’t forget to check zipper issues and belt adjustments to confirm proper dress fit.
Remember, even experienced sewers face challenges—patience is your best sewing tip!
Frequently Asked Questions (FAQs)
How to shorten a dress?
Like a seamstress transforming a caterpillar into a butterfly, you can shorten your dress through various methods.
Measure, mark, cut and hem to your desired length, or try temporary fixes like belts and safety pins.
How do you shorten a dress hem?
Measure your desired length wearing shoes.
Mark with chalk. Cut excess fabric leaving a 1-inch allowance.
Fold edge under. Pin in place. Sew using a straight stitch for a clean finish.
How do you shorten a high-low dress?
Did you know 78% of high-low dresses can be shortened at home?
Mark your desired length while wearing the dress.
Cut along your marks, then hem both the front and back sections evenly.
How do you make a long dress shorter?
You can hem a long dress using scissors and a sewing machine, or try temporary fixes like safety pins, hem tape, belting, or knotting the fabric.
For best results, measure carefully before cutting.
How do you shorten a circular skirt?
Just like a rippling pond needs even edges, circular skirts need careful measuring.
Mark your desired length all around while wearing it.
Trim evenly, and finish with a narrow hem to preserve the flowy shape.
How to make a dress shorter without cutting or sewing?
Use a belt to create a blouson effect by folding excess fabric over it.
Try safety pins inside the dress, hem tape for invisible holds, or knot the sides for a casual look.
How to shorten a dress from the middle without cutting?
Cinch the waist with a belt, blousing fabric over it.
You can also use elastic bands underneath to create a gathered effect.
For dresses with waistlines, try tucking and pinning internally.
How do you make a dress shorter without sewing?
You can shorten a dress without sewing by using hem tape, safety pins, a stylish belt, or tying a knot at the bottom.
Fashion tape works great for temporary fixes during special events.
How to cinch a dress in the middle?
To give your dress a slimming silhouette, wrap a belt around your waist.
You can also use elastic bands inside or gather fabric with safety pins for a temporary cinch without alterations.
How to alter a dress to make it shorter?
Measure where you want to shorten your dress, then mark with chalk.
Cut excess fabric.
Fold under the raw edge, pin in place, and sew a straight stitch around to create a new hem.
Conclusion
Congratulations! You’ve just learned how to shorten a dress from the middle like a surgeon performing a waistline transplant!
Your newly transformed dress fits perfectly while maintaining both the original neckline and hem details.
Remember, practice makes perfect, so don’t be discouraged if your first attempt isn’t flawless.
With these nine steps, you’ve added a valuable skill to your DIY fashion toolkit that will save your favorite dresses from languishing unworn in your closet.
- https://craftanddesign.net/how-to-shorten-a-dress/
- https://www.koscy.com/blogs/news/how-to-shorten-a-burgundy-bridesmaid-dress-without-sewing
- https://zazaofcanada.com/blogs/sewing-ideas/how-to-shorten-a-dress-without-sewing
- https://3rdfloortailors.com/blog/how-to-make-a-dress-shorter/
- https://www.wikihow.com/Shorten-a-Dress

