This site is supported by our readers. We may earn a commission, at no cost to you, if you purchase through links.
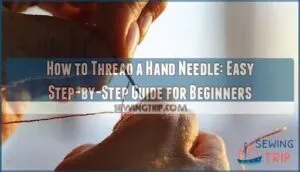
Good lighting makes all the difference, so position yourself near a window or bright lamp. Cut your thread to about 18 inches to prevent tangling, and don’t rush the process.
With practice, threading becomes second nature, and there are several clever tricks that can make even the tiniest needle eyes manageable.
Table Of Contents
Key Takeaways
- Cut your thread at a sharp 45-degree angle with sharp scissors to create a clean point that won’t fray, making it much easier to guide through the needle’s eye.
- Position yourself in bright, direct lighting and keep your thread length to about 18 inches to prevent tangling and make the threading process smoother.
- Match your needle size to your fabric weight and thread thickness—larger needle eyes are much easier for beginners to work with successfully.
- Use a needle threader or slightly wet the thread tip if you’re struggling, and don’t rush the process since steady hands and patience lead to better results.
What is Thread and Its Sewing Uses?
Thread is the foundation of all hand sewing—it’s that thin, flexible strand that holds your fabric pieces together and brings your projects to life.
Once you get the basics of thread down, you’ll be amazed how much smoother your sewing goes from day one.
Dictionary Definition and Etymology of Thread
Ever wonder why that simple strand you’re about to push through a needle’s eye carries a name that’s been woven through human language for over a thousand years? "Thread" comes from Old English "thrǣd," meaning "twisted filament." This etymology reveals how our ancestors saw thread as more than just sewing material—it represented connection and continuity.
Here are thread’s key dictionary definitions:
- Physical filament – A thin strand of spun fibers used for sewing
- Figurative connection – Something that links ideas or events together
- Technical term – In weaving, the yarn that runs lengthwise
- Cross-cultural usage – Similar words exist globally, showing thread’s universal importance
The word carries rich historical usage across cultures, appearing in figurative language like "thread of conversation" or "losing the thread.
Different Meanings of Thread in Textiles
When most people hear "thread," they picture that familiar spool sitting in their sewing basket, but in the textile world, this simple word actually weaves through several different meanings. Thread as fiber refers to the basic building blocks of fabric—those tiny strands twisted together. In weaving, thread becomes the foundation for creating fabric weave patterns, whether you’re working with a single strand or double strand technique.
| Thread Meaning | Textile Application | Common Example |
|---|---|---|
| Basic fiber | Raw material for spinning | Cotton fibers |
| Sewing thread | Stitching and construction | Polyester thread |
| Warp/weft threads | Fabric weaving structure | Loom threading |
| Thread grain | Directional fabric strength | Following the grain |
Knowing which type of thread works best for what can save you time and frustration on your next project.
Common Types of Thread for Hand Sewing
Your sewing thread choice makes all the difference in how smoothly your project turns out. Cotton Thread works beautifully for quilting and lightweight fabrics, giving you that classic finish. Polyester Thread tackles most fabrics like a champ—it’s strong and won’t shrink. Silk Thread brings elegance to delicate work and buttonholes.
For heavy-duty projects like leather or outdoor gear, Nylon Thread won’t let you down. Metallic Thread adds sparkle to embroidery, though it can be tricky with thread ends.
When sewing heavier fabrics, consider using topstitching for decoration.
Thread Vs. Fiber, String, and Wire
At first glance, thread, fiber, string, and wire might look like they do the same job. But if you’ve ever tried using the wrong one for a sewing project, you know they’re definitely not interchangeable.
- Thread – Specifically designed for fabric work, with the right twist and strength for hand sewing through woven materials
- Fiber – The raw building blocks that get spun into thread, like cotton or polyester strands before processing
- String and wire – Too thick, rough, or stiff for delicate fabric weaving, better suited for crafts or electrical work
Essential Tools for Threading a Hand Needle
Before you can thread a needle like a pro, you need the right tools in your sewing kit.
Having quality scissors, the proper needle size, and maybe a needle threader can turn a frustrating task into a breeze.
Choosing The Right Needle and Thread
Success starts with smart pairing. Needle size should match your fabric weight—fine size 12 needles work best for delicate silks, while heavy canvas needs sturdy size 1 needles.
Your thread type matters too. Polyester offers excellent project durability and stitch quality, while cotton suits lightweight fabrics. Sharps are ideal for general sewing.
The needle eye must accommodate your sewing thread without forcing it through.
Must-have Accessories (scissors, Needle Threaders)
Sharp scissors and a trusty needle threader can transform threading from a squint-inducing battle into a smooth, easy process. Look for sharp scissors with fine points for clean thread cuts—no frayed ends to wrestle with.
A needle threader with good ergonomics saves your eyes and sanity, especially with tiny sewing needle eyes. Check needle compatibility before buying, and consider DIY threaders using thin wire for backup accessory storage.
How Needle Size Affects Threading Success
Picture trying to thread a piece of yarn through a keyhole versus sliding it through an open doorway—that’s the difference needle size makes in your threading success. Fine needle challenges increase with smaller eyes, where thread thickness ratio becomes critical. Larger sewing needle eyes improve beginner success rates considerably, while threader compatibility varies by needle eye size.
- Size 16-18 needles: Your best friend as a beginner—threading needle becomes almost simple
- Size 9-11 needles: The sweet spot for most hand sewing projects without frustration
- Size 6-8 needles: Require steady hands but worth mastering for delicate work
- Tiny embroidery needles: Can make even experienced sewers want to throw them across the room
- Tapestry needles: Large eyes that welcome thread like an old friend’s warm hug
Step-by-Step Guide to Threading a Hand Needle
Now that you have your tools ready, it’s time to actually thread that needle.
Sure, it takes some practice at first, but once you nail the technique, threading becomes second nature.
Cutting and Preparing The Thread
Before you can even think about threading that needle, the thread itself needs some attention – and believe it or not, a clean cut can make the difference between success and endless frustration. Sharp scissors create a smooth end that slips through the needle eye easily, while dull blades cause fraying that blocks your path.
| Cutting Tool | Best For |
|---|---|
| Sharp fabric scissors | All-purpose sewing thread preparation |
| Thread snips | Quick, precise cuts for fine threads |
| Embroidery scissors | Delicate work requiring thread grain awareness |
| Craft knife | Thick threads needing single strand precision |
Cut your thread at a 45-degree angle for the sharpest point. This prevents thread damage and respects the thread’s natural grain, whether you’re working with a single strand or preparing for double strand threading.
Techniques for Stiffening and Shaping Thread Ends
A floppy thread end is like trying to push cooked spaghetti through a keyhole—it just won’t cooperate no matter how hard you try. To create a firm point for threading a needle, wet the end with your tongue or a damp finger. This simple thread end stiffening technique works like magic.
You can also try alternative stiffening methods like rolling the tip between your fingers with a touch of beeswax, or even a light spray of hairspray for DIY thread shapers that make threading a breeze.
Manual Threading Method Explained
Threading a needle by hand might seem old-fashioned, but it’s still the most reliable way to get that thread exactly where it needs to go.
Hold your needle steady with good lighting—that’s half the battle right there. Keep your thread angle straight as you guide it toward the needle’s eye.
With steady hand dexterity and proper thread end prep, you’ll master this essential hand sewing skill quickly.
Using a Needle Threader for Easier Threading
If your fingers feel like they’re playing a losing game of "thread the impossibly tiny hole," a needle threader might just be your new best friend. These simple tools make threading needles a breeze, especially with fine needle eyes.
Here are three popular threader types:
- Wire loop threaders – Basic metal loops that pull thread through the eye
- Automatic threaders – Spring-loaded designs for one-handed operation
- Ergonomic threaders – Larger grips for comfortable grip and control
Tips to Prevent Threading Frustration
We’ve all been there—trying to thread a needle and wanting to throw the whole thing across the room. But honestly, a couple of simple tricks make all the difference.
These simple prevention tips will help you thread your needle smoothly every time, making your sewing projects more enjoyable from start to finish.
Avoiding Frayed or Split Thread
Nothing kills your sewing momentum faster than a thread that looks like it went through a paper shredder. Here’s how thread quality impacts and split thread repair work together:
| Thread Fray Causes | Prevention Method |
|---|---|
| Dull scissors | Use sharp fabric scissors |
| Old thread | Check expiration dates |
| Rough needle eye | File smooth or replace |
| No thread conditioner | Apply beeswax before threading |
Cut your thread end at a 45-degree angle for cleaner needle entry.
Managing Thread Length to Reduce Tangling
Too much thread turns your needle into a fishing line—and trust me, you’re not trying to catch anything but frustration. The best thread length is about 18 inches—roughly from your fingertips to your elbow. This prevents snarling and reduces the thread weight impact on your stitches.
Longer pieces tangle easily and require constant re-threading. For double strand work, cut slightly shorter since you’re folding it in half.
Store your thread properly between uses, and practice simple winding techniques to keep everything neat. Your single strand will glide through fabric smoothly when it’s the right length, making knot tying at the end much easier too.
Feeding Thread With The Grain for Smoother Threading
Just like wood has a grain that determines how smoothly it cuts, thread also has a natural direction that can make or break your threading success. When threading needles, always use the leading edge from the spool—this follows the thread grain impact for smoother passage through the needle’s eye. Identifying thread grain prevents reverse threading frustrations and assures proper grain direction.
Thread has a natural grain direction—always use the leading edge from your spool for smoother passage through the needle’s eye
- Watch your thread glide through like butter instead of fighting every step
- Feel that satisfying moment when the thread slips right through on the first try
- Save precious minutes that add up to hours of stress-free sewing time
- Build confidence knowing you’ve mastered this essential threading technique
- Experience the joy of fluid starts to every hand-sewing project
Troubleshooting Common Threading Problems
When threading needles techniques fail, check these quick fixes. Thread fraying affects 33% of sewists, so use sharp scissors for clean cuts.
Poor lighting causes 45% of threading errors—grab a lamp or move near a window.
If your thread keeps tangling, cut it shorter than 24 inches since longer pieces increase knotting by 53%.
Wrong eye size creates 60% of breakage issues. Consider threader use for tiny needles—they boost success rates by 75% and save time.
Starting Hand Sewing: Securing and Managing Thread
Now that your needle is threaded, tie a small knot at the end of your thread. This keeps everything anchored so you won’t lose your thread halfway through a seam.
The way you start and manage your thread can make the difference between smooth sewing and constant re-threading frustrations.
Tying Knots and Securing The Thread
Your beautifully threaded needle won’t stay that way for long without a proper knot to anchor everything in place. The simplest method? Make a small loop at your thread tail, then pull the working thread through to tie a knot.
For knotless starts, try weaving your thread end under several stitches instead. This securing technique works beautifully with single strand threading and keeps your stitches neat.
Double Vs. Single Strand Threading
One strand or two—this simple choice can make or break your entire sewing project. Your fabric type and project needs determine the best approach. Single strand threading works perfectly for delicate fabrics and fine detail work, while double thread provides extra thread strength for heavy-duty sewing.
Consider these factors when choosing:
- Thread Strength – Double thread withstands stress better
- Fabric Type – Lightweight fabrics need single strands
- Stitch Visibility – Single strands create cleaner lines
- Project Needs – Quilting often requires double threading
- Knot Security – Double strands anchor more securely
Threading a needle with double thread means folding your thread in half, creating a loop that’s harder to pull through fabric but offers greater knot tying strength.
Burying Thread Tails for Neat Finishes
Those messy thread ends sticking out from your finished seam can make even your best stitching look sloppy and unprofessional. Professional finish methods involve weaving these concealed thread ends between fabric layers using your needle.
Simply thread your needle with the tail, slip it between layers, and pull through about an inch away. This fabric layer technique prevents unraveling while securing tails invisibly for that polished look every hand sewing project deserves.
Hand Sewing Basics and Beginner Project Ideas
Once you’re comfortable threading your needle and knotting your thread, you’re ready to tackle some real projects. These simple hand-sewing ideas will help you practice your stitches while making something useful.
Start small with fabric scraps and basic techniques like running stitch and backstitch. Each project builds on what you’ve learned:
- Button repair – Practice securing thread while fixing loose buttons on shirts
- Fabric bookmarks – Use running stitches to hem colorful fabric scraps
- Simple pouches – Try backstitch to join two fabric pieces with basic seams
- Embroidery samplers – Learn decorative stitches on plain cotton squares
- Hem repairs – Master blind stitching on pants or skirt edges
Look for beginner pattern choices or project kits that include pre-cut fabric, needle, and thread. These take the guesswork out of your first few projects.
Frequently Asked Questions (FAQs)
Can you thread different needle types the same way?
Different needles require technique adjustments based on needle eye shape and size impact. Material differences affect thread passage through each needle’s eye.
Self-threading needles use built-in mechanisms, while traditional needles need threading tools for compatibility.
What lighting conditions work best for threading needles?
Bright light strikes the needle’s eye just as shadows fall across your workspace—this common coincidence frustrates sewers daily. Position your Task Lighting Options directly overhead to eliminate shadows while reducing Light Glare Reduction on the needle’s surface.
Best Light Spectrum from daylight bulbs enhances thread visibility. Magnification and Light combinations help with fine needles eye threading.
Proper Light Source Placement transforms threading a needle from struggle into smooth hand sewing basics success.
How do you thread needles with poor eyesight?
Poor vision makes threading challenging, but magnifying tools and bright lighting solutions help tremendously.
Self-threading needles eliminate frustration entirely, while large-eye needles and automatic needle threaders serve as excellent adaptive aids for improved thread visibility.
Should you use magnification tools when threading needles?
Clear as day, magnification tools are a major advantage for threading needles. Vision impairment or tired eyes benefit tremendously from magnifying glasses or illuminated magnifiers.
Threading accuracy improves dramatically, reducing frustration and ergonomic strain from hunching over tiny needle eyes.
Whats the ideal thread angle for successful threading?
When threading a needle, hold your thread at a 45-degree angle to the needle eye. This best entry angle helps guide the thread smoothly through, especially when combined with proper Thread Stiffness Impact from dampening the tip beforehand.
Conclusion
Funny how something as simple as learning how to thread a hand needle can feel like rocket science at first. Yet once you master the basics—cutting at an angle, using good light, keeping thread short—it becomes as natural as breathing.
Don’t let those tiny needle eyes intimidate you. With patience and the right technique, you’ll be threading needles like a pro in no time.
- https://clothingdigest.com/how-to-thread-a-needle/
- https://www.hooptalent.com/blogs/news/ultimate-guide-to-needle-threaders-durable-choices-usage-tips-solutions
- https://infectiousstitches.com/2014/07/06/sewing-tip-threading-hand-sewing-needles/
- https://maggieframestore.com/blogs/maggieframe-news/effortless-needle-threading-a-comprehensive-guide-to-choosing-and-using-the-best-tools
- https://www.cnib.ca/en/news/how-thread-needle-without-sight

