This site is supported by our readers. We may earn a commission, at no cost to you, if you purchase through links.
 Threading a Singer sewing machine is easier than it looks.
Start by turning off the machine and raising the presser foot—this keeps the tension discs open.
Place your thread spool on the spool pin, then guide the thread through the numbered threading path, following each thread guide and tension mechanism.
For the bobbin, wind it evenly using the bobbin winder and insert it into the bobbin case, ensuring the thread flows smoothly.
Pull the bobbin thread up by turning the handwheel.
Check the tension and stitch quality before sewing.
With a little practice, you’ll be threading like a pro!
Table Of Contents
Key Takeaways
- You’ll need to start by turning off your machine and raising the presser foot – this keeps the tension discs open and prevents thread tangles while you’re threading.
- When winding your bobbin, guide the thread through the tension disk and distribute it evenly to ensure proper tension and prevent issues with your stitches later.
- You should follow the numbered threading path on your machine for the upper thread, using all thread guides and tension mechanisms to maintain consistent thread flow and prevent skipped stitches.
- After inserting the bobbin in its case, you’ll need to pull up the bobbin thread by holding the upper thread and turning the handwheel – this ensures both threads are properly positioned for smooth sewing.
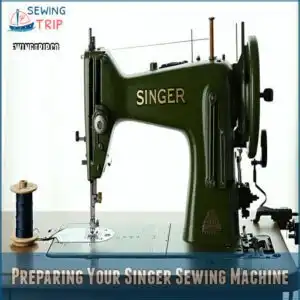
Preparing Your Singer Sewing Machine
You’re about to start threading your Singer sewing machine, so first, make sure it’s turned off and the presser foot is up for easy access.
You’ll need to select the correct spool and bobbin, and get familiar with the machine’s components, such as the thread spool pin and take-up lever, to prepare it for threading.
Raising The Presser Foot and Needle
To start threading a Singer sewing machine, raise the Presser Foot using the foot lever and position the Needle at its highest point. This guarantees smooth thread feeding and proper Needle Alignment.
Key steps include:
- Lifting the Presser Foot
- Checking Needle Position
- Inspecting lever operation
- Avoiding the foot pedal
- Troubleshooting issues early to maintain correct Thread Tension, following singer sewing machine threading instructions for easy threading a singer sewing machine, which ensures smooth thread feeding.
Selecting The Correct Spool and Bobbin
When threading a Singer sewing machine, selecting the correct spool and bobbin is essential. You’ll want to choose thread types and bobbin sizes that match your machine’s specifications.
Consider spool materials, fiber selection, and color matching to confirm compatibility. For example, plastic bobbins work well for lightweight fabrics, while metal ones handle thicker materials.
Proper bobbin placement is essential for smooth stitching. Refer to Singer sewing machine threading instructions for guidance on threading a singer sewing machine, including sewing machine bobbin and spool management, bobbin thread, and proper fiber selection for a smooth sewing experience.
You can learn more with this Singer threading guide, which provides detailed information on sewing machine management and maintenance for optimal performance.
Winding The Bobbin
You’re now ready to wind the bobbin, a critical step in threading your Singer sewing machine.
To do this, you’ll need to set up the bobbin winder and thread the bobbin evenly, making sure to follow the machine’s specific guidelines for the best results.
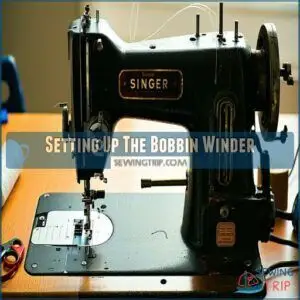
Setting Up The Bobbin Winder
You’re now setting up the bobbin winder. Place your chosen bobbin on the spindle, ensuring it’s the right size.
Secure the thread spool and guide it through the tension disk. Push the winder to the right until it clicks, then use the foot pedal to control winding speed, maintaining even thread tension for proper bobbin alignment.
Proper bobbin winding techniques are essential for smooth sewing operations.
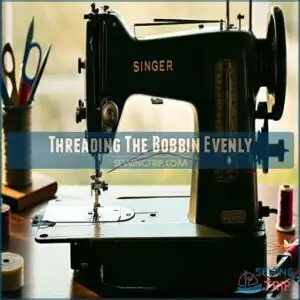
Threading The Bobbin Evenly
You’re now winding the bobbin, a step that requires patience. To achieve even winding and Bobbin Thread Control, guide the thread through the tension disk.
Maintain proper Thread Alignment and Bobbin Balance by distributing thread evenly. Key points to remember:
- Use the correct thread type
- Maintain consistent tension
- Avoid overwinding
- Check the bobbin regularly.
This will help you master threading a Singer sewing machine and prevent Bobbin Tension issues, making the process of how to thread a sewing machine easier, especially pertaining to sewing machine bobbin winding and managing the bobbin.
Understanding the proper sewing machine bobbin is essential for successful sewing projects.
Threading The Upper Thread
You’re now ready to thread the upper thread, which involves placing the thread spool on the spool pin and guiding it through the machine’s thread guides and tension discs.
As you thread the upper thread, make sure to follow the numbered threading path and use the thread guides and tension mechanisms to make sure proper thread flow and tension.
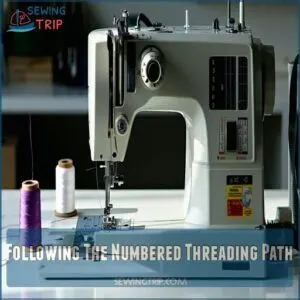
Following The Numbered Threading Path
Now that you’ve wound your bobbin, it’s time to thread your Singer sewing machine.
Follow the numbered threading path, usually labeled on the machine.
Proper bobbin winding and insertion are essential for smooth operation.
Make sure proper thread alignment and tension control.
Refer to your Singer sewing machine threading instructions for guidance.
By following the threading sequence, you’ll avoid common mistakes like skipped stitches.
This step is key to successful bobbin installation and machine calibration, so take your time and get it right for smooth sewing with your Singer sewing machine.
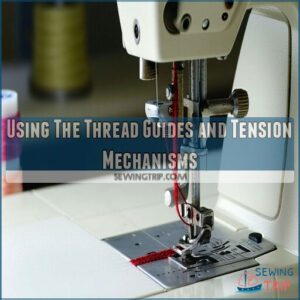
Using The Thread Guides and Tension Mechanisms
Mastering the thread guides and tension mechanisms is key to threading a Singer sewing machine.
Balanced tension is critical for strong seams, and you can learn more about achieving balanced tension.
You’ll use:
- Thread Guides to direct thread flow
- Tension Discs to regulate tension
- Take-Up Lever to control thread flow
- Bobbin Tension to balance thread
- Proper threading technique to guarantee smooth stitching.
By following these steps, you’ll guarantee perfect tension and alignment, making threading a Singer sewing machine a breeze, and guaranteeing your sewing machine thread and tension are perfectly balanced for ideal results.
Inserting and Threading The Bobbin
You’re now ready to insert and thread the bobbin, an important step in threading your Singer sewing machine.
You’ll need to properly place the bobbin and make sure the correct thread tension to achieve smooth stitching and prevent machine malfunction.
Proper Bobbin Placement
Now that you’ve threaded the upper thread, it’s time to focus on proper bobbin placement. You’ll want to confirm the bobbin is securely aligned in the bobbin case, with the thread unwinding smoothly.
This is key to achieving the right thread tension and preventing issues like thread jams. When threading a Singer sewing machine, remember to check the bobbin type and match it with your machine.
A snug fit is essential for bobbin security and synchronization, so take your time to get it just right, and you’ll be sewing like a pro in no time with your bobbin thread. Understanding the correct sewing machine parts is essential for successful operation.
Ensuring Correct Bobbin Thread Tension
Now that your bobbin is seated, let’s fine-tune the bobbins thread tension for smooth stitching.
A detailed bobbin threading guide offers step-by-step instructions.
Uneven stitches or thread breakage? Here’s how to fix it:
- Adjust the tiny screw on the bobbin case for proper tension.
- Verify the bobbin winder settings are spot-on, avoiding loose or tight winds.
- Keep the bobbin case clean—lint buildup can sabotage sewing machine calibration.
Follow Singer sewing machine threading instructions for perfect results!
Final Steps Before Sewing
You’re almost ready to start sewing, but a few final checks will save you from headaches later.
Make sure both threads are pulled into position and test the tension to confirm smooth, even stitches.
Drawing Up The Bobbin Thread
Pulling up the bobbin thread is the final touch before smooth sewing begins.
Follow these steps:
- Hold the upper thread with one hand, leaving a 6-inch tail for control.
- Turn the handwheel in the direction of you, lowering and raising the needle to catch the bobbin thread.
- Correct bobbin case installation is essential for this process.
- Gently pull the upper thread, bringing the bobbin thread loop through the needle plate.
This step makes sure proper thread flow and prevents tangled sewing stitches.
Checking Thread Tension and Stitch Quality
Before sewing, it’s smart to fine-tune your thread tension and stitch quality.
Uneven stitches or puckered fabric? Adjust the tension dial until the top and bobbin threads balance. Your sewing machine tension might also depend on fabric choice, thread weight, or sewing speed.
Here’s what to check:
- Needle and fabric pairing: A mismatched needle can ruin stitch quality.
- Stitch length settings: Too short or too long affects the look and strength.
- Threading alignment: Follow Singer sewing machine threading instructions to avoid loose threads.
A few tweaks, and you’re ready to sew smoothly!
Frequently Asked Questions (FAQs)
How to thread a Singer sewing machine?
Start by placing your thread spool on the pin, guiding it through the thread guide, tension discs, and take-up lever.
How to thread the needle on a Singer sewing machine?
Threading the needle is like threading a tiny eye of a storm.
Guide the thread through the take-up lever, down the guides, and finally insert it front-to-back through the needle’s eye, leaving a small tail.
How do you thread a sewing machine?
To thread a sewing machine, place the thread spool on the pin, guide it through the tension discs and take-up lever, then thread the needle front-to-back.
Follow your manual’s path for smooth sewing!
What is the best thread for sewing workwear?
For workwear, go for polyester or polyester-cotton blend thread.
It’s strong, durable, and resists wear from heavy use or washing.
Avoid cheap threads—they’ll snap faster than your patience on a Monday morning!
How to thread a Singer sewing machine step by step?
Think of threading as weaving a story.
Place the spool on the pin, guide the thread through tension discs, the take-up lever, and guides.
How to thread a sewing machine for beginners?
Start by placing your thread spool on the pin and raising the presser foot.
Follow the threading path shown in your machine’s manual, ensuring the thread flows smoothly through tension discs, guides, and needle.
How do you thread a spool on a Singer sewing machine?
Place the thread spool on the spool pin, letting it spin freely.
Guide the thread through the machine’s thread guide, tension discs, and take-up lever, then thread it through the needle’s eye from front to back.
How to thread a Singer 7256?
You’ll thread your Singer 7256 by following the manual’s path, guiding thread through tension discs, take-up levers, and the needle, ensuring proper tension and a secure bobbin installation for smooth sewing.
How often should I replace my sewing machine needle?
You should replace your sewing machine needle every 8-10 hours of use or when it’s damaged, to maintain smooth sewing and prevent breakage or damage to your machine.
Can I use any brand of thread on my Singer sewing machine?
Imagine a marathon runner wearing the wrong shoes—threads work similarly.
You can use any brand, but make sure it’s high-quality, compatible with your Singer’s specifications, and matches your fabric to avoid tangles or breaks.
This ensures that your sewing experience is smooth and that you can achieve the desired results without interruptions, by choosing threads that are compatible with your equipment.
Conclusion
Threading a Singer sewing machine is like learning a simple dance—once you know the steps, it flows smoothly.
By raising the presser foot, following the threading path, and setting the bobbin correctly, you’ll avoid tangles and guarantee smooth stitching.
Don’t skip checking the tension and pulling up the bobbin thread—it’s key for clean, precise stitches.
With practice, you’ll master how to thread a Singer sewing machine and be ready to tackle any sewing project confidently.
- https://www.wikihow.com/Thread-a-Singer-Sewing-Machine
- https://manuals.answerbase.com/4873055/How-do-I-thread-the-Singer-SIMPLE-3223-3229-Sewing-Machine
- https://www.singer.com/manuals
- https://sewingtrip.com/how-to-thread-a-singer-sewing-machine/
- https://www.singermachines.co.uk/sewingmachineparts/bobbins/

