This site is supported by our readers. We may earn a commission, at no cost to you, if you purchase through links.
You pull out your sewing machine for a quick hem repair, thread the needle on the first try, and end up with a tangled bird’s nest on the underside of your fabric. Sound familiar? Threading a sewing machine ranks among the most frustrating hurdles for beginners, yet it’s the foundation of every successful project.
The process involves more than simply pushing thread through a needle—your machine relies on a precise path that coordinates tension, timing, and two separate thread sources. Miss one step or skip a thread guide, and you’ll battle broken threads, skipped stitches, and puckered seams.
Once you understand how each component works together, threading becomes second nature, transforming your machine from a confusing tangle of metal parts into a reliable tool that reacts to your creative vision.
Table Of Contents
Key Takeaways
- Threading your sewing machine correctly requires following a precise path through spool pin, thread guides, tension discs, take-up lever, and needle—skip even one step and you’ll face broken threads, skipped stitches, and fabric puckering.
- The bobbin system works as the bottom half of your stitch team, and proper bobbin winding with correct tension (tested by a 3-4 inch drop in weight) prevents 85% of thread bunching and loose stitch problems.
- Thread tension controls stitch quality through metal discs that squeeze your thread—always thread with the presser foot up so the discs open, and adjust the dial between 3-5 for standard cotton while matching needle size to fabric weight.
- Regular maintenance prevents 70% of common threading issues, so clean your bobbin area after each project, replace needles every 8-10 hours of sewing, and oil moving parts weekly to keep your machine running smoothly.
Essential Parts for Threading a Sewing Machine
Before you can thread your sewing machine, you need to know what you’re working with. Each part plays a specific role in guiding the thread from the spool to the fabric.
Let’s walk through the key components you’ll use every time you set up your machine.
Spool Pin and Thread Guide
At the heart of threading a sewing machine, you’ll find the spool pin and thread guide working together. The spool pin holds your thread spool—vertically or horizontally—depending on whether you’re using stacked or cross-wound thread. Match the spool pin type to your thread spool for compatibility.
The thread guide, positioned near the pin, keeps your thread aligned and prevents tangling, directly impacting sewing performance. Proper threading involves understanding the machine’s threading path to guarantee smooth operation.
Tension Discs and Take-Up Lever
After the thread guide, you’ll pass your thread through the tension discs—two metal plates that squeeze it to control stitch quality. Slide the thread between them with your presser foot up.
Next comes the takeup lever, which moves up and down as you sew, pulling thread through the fabric. The lever regulates thread uptake for consistent stitch quality. Skip this lever, and you’ll face thread breakage.
Proper tension adjustment prevents loops and puckering, while regular tension cleaning keeps your stitches balanced.
Needle and Presser Foot
Once the thread leaves the takeup lever, it heads toward two final partners in the threading process: your needle and presser foot. Both determine sewing accuracy and fabric handling.
Here’s what they do:
- Needle alignment affects stitch formation and prevents thread damage
- Presser foot adjustment controls fabric grip during sewing
- Thread tensioning relies on proper needle size (9/70 for silk, 16/100 for denim)
- A needle threader simplifies threading through the tiny eye
- Presser foot pressure prevents puckering or slipping
Bobbin and Bobbin Case
Below the presser foot sits the bobbin and bobbin case—the bottom half of your stitch team. The bobbin holds the lower thread, while the bobbin case controls thread tension through its spring mechanism. About 95% of home machines use Class 15 bobbins (13/16″ diameter), though L-style and M-style variations exist. Proper tension is crucial: your threaded bobbin case should drop 3-4 inches in a weight test.
| Bobbin Materials | Case Designs | Thread Tension |
|---|---|---|
| Metal bobbins last longer | Top-loading drops in easily | Too loose creates loops |
| Plastic resists rust | Front-loading needs alignment | Too tight breaks thread |
| Transparent shows thread level | Oscillating hooks move side-to-side | 1 oz weight tests tension |
| Color-coded for organization | Rotary systems spin continuously | Small screw adjusts pressure |
| Match your machine’s specs | Must fit your hook system | Check every 3-12 months |
How to Wind and Load The Bobbin
The bobbin is the heart of your sewing machine’s stitch formation, and loading it correctly makes all the difference between smooth sewing and frustrating tangles.
Before you can start any project, you’ll need to master the simple process of winding thread onto your bobbin and placing it in its compartment.
Let’s walk through each step so you can get your machine ready to sew.
Winding The Bobbin Correctly
Getting your bobbin winder set up right makes all the difference. You’ll want to wind at full speed for even thread layering across the bobbin.
Make sure your bobbin thread passes firmly through the tension discs—think of it like flossing between your teeth. Wind in a crisscross pattern until you’re about 1-2 mm from the edge.
Proper bobbin tension prevents those frustrating tangles later.
Inserting The Bobbin (Top-Loading Vs. Front-Loading)
Your machine likely features one of two bobbin systems. Top-loading bobbin systems let you drop the bobbin straight down through a clear cover—you’ll see your thread level at a glance. Front-loading bobbin systems hide behind a trap door, requiring you to slide the bobbin into a removable metal case first.
Check your machine’s manual to confirm which style you’re working with.
Ensuring Proper Bobbin Thread Direction
Beyond simply placing the bobbin in its case, you need to check the thread direction. For top-loading models, the thread should exit on the left, forming a “P” shape from above. Pull gently—the bobbin must rotate counterclockwise to maintain proper bobbin thread tension.
Thread direction errors cause loose stitches and thread bunching in 85% of cases. Route your bobbin thread under the tension spring for balanced winding.
Step-by-Step Guide to Threading The Top Thread
Threading the top thread might seem tricky at first, but once you understand the path, it becomes second nature. Your thread needs to follow a specific route through several guides and components before reaching the needle.
Let’s walk through each step so you can thread your machine with confidence.
Placing The Thread on The Spool Pin
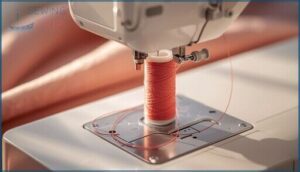
Think of the spool pin as your thread’s home base. Start by placing your thread spool on the spool pin—horizontal for cross-wound thread or vertical for stacked spools. Use a spool cap slightly larger than your spool to keep it secure.
The thread should unwind counterclockwise for smooth feed. If you’re using specialty threads, an auxiliary spool pin helps maintain tension.
Guiding Thread Through Thread Guides
Thread guides are like traffic signals for your thread—they direct its path and prevent tangling. You’ll find these small metal hooks, loops, or screws near the spool pin and along the machine’s body.
Thread through each guide in sequence, ensuring smooth placement without excessive tightness. Missing even one guide causes bunching, thread breakage, and skipped stitches, so follow your machine’s numbered path carefully.
Passing Thread Around Tension Discs
Tension discs control your thread’s grip—too tight and it snaps, too loose and stitches go wild. Before threading, lift the presser foot so the discs release and open up.
- Slide the thread fully between both discs to create proper tension
- Pull thread taut to the one o’clock position after exiting
- Wrap thread around the retaining fork to maintain consistency
- Set your tension dial between 3 and 5 for standard cotton thread
Threading The Take-Up Lever and Needle
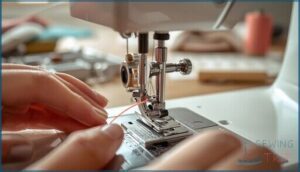
After securing your thread around the tension discs, the take-up lever awaits. Turn the handwheel to raise the lever to its highest position—this makes threading easier. Guide your thread through the eyelet from right to left using a “flossing” technique: pinch the thread near the spool and pull it taut as you slide it through. Then raise the needle to its highest point and thread it front to back, leaving 3–4 inches hanging. A wire-loop threader helps with stubborn needles.
| Threading Component | Direction & Technique |
|---|---|
| Take-Up Lever Eyelet | Thread right to left while applying tension |
| Needle Position | Raise to highest point before threading |
| Needle Eye | Pass thread front to back |
| Thread Tail Length | Leave 3–4 inches below needle |
| Verification Step | Turn handwheel to check thread stays seated |
Pulling Thread Through The Presser Foot
Now raise the presser foot before continuing—it opens the tension discs and gives you breathing room. With the foot up, gently guide your thread through the small gap or wire guide in the presser foot, just above the needle. Keep it tension-free and smooth. Lowering the foot now would trap the thread and cause loops underneath your fabric later.
Follow these threading best practices:
- Always lift the presser foot first
- Thread passes through the foot guide smoothly
- Check thread isn’t snagged or twisted
- Leave thread loose until you’re ready to sew
- Lower foot only after full threading completion
Bringing Up The Bobbin Thread
Once you’ve threaded the top and loaded the bobbin, you need to bring that bottom thread up to the surface. This step connects your two threads so they can work together to form stitches.
Here’s how to pull up the bobbin thread and get both threads ready for sewing.
Using The Hand Wheel to Lower The Needle
With your top thread in place, you’ll use the handwheel to lower the needle. Always turn it toward you—never away—to avoid damaging your sewing machine’s internal mechanism.
This manual stitching control gives you precise needle positioning and maintains proper thread tension. Rotate the handwheel slowly until the needle reaches its lowest point, where fabric alignment begins and the threading process gets ready for the next step.
Catching and Pulling Up The Bobbin Thread
Once the needle rises back up, you’ll notice a small thread loop management opportunity—the bobbin thread appears near the needle plate. Hold your top thread firmly and use tweezers or your fingers to gently pull that loop upward. This handwheel technique ensures proper bobbin case alignment and thread pickup.
If the thread doesn’t appear, check your bobbin thread tension and try rotating the handwheel again toward you.
Positioning Both Threads for Sewing
With both threads now visible, your next move sets the stage for smooth stitch formation. Pull both the upper thread and lower thread together under the presser foot, extending them about four inches behind the needle. This thread alignment prevents tangles and guarantees proper tension control from your first stitch.
- Hold both threads firmly as you position them toward the back of the machine
- Check that neither thread has knots or tight loops that could jam the needle
- Ensure the threads lie flat beneath the presser foot without crossing each other
- Verify the thread guide and takeup lever still hold the top thread securely
- Keep gentle tension on both threads as you begin your sewing technique
Troubleshooting Common Threading Issues
Even when you’ve threaded your machine carefully, you might still run into frustrating hiccups like broken threads or uneven stitches. Don’t worry—most threading problems have simple fixes once you know what to look for.
Let’s walk through the most common issues and how to solve them so you can get back to sewing smoothly.
Fixing Thread Breakage and Skipped Stitches
When thread breakage or skipped stitches disrupt your sewing, start by checking your needle size and thread quality. Old or wrong-sized needles often cause these issues. Match your needle type to your fabric type, and inspect for burrs on the needle plate. Fresh, high-quality thread makes a real difference in preventing breaks.
Clean lint from the bobbin case and tension discs regularly.
Adjusting Thread Tension
Before you panic over wonky stitches, look at your tension disc function first. The tension assembly controls how tightly thread flows through your machine. Turn the dial clockwise to increase pressure—try 4-5 for everyday cotton—or counterclockwise to loosen it.
Poor thread quality forces extreme adjustments, while fabric tension settings shift between 2-4 for lightweight material and 4-6 for denim. Incorrect tension effects create puckering or visible loops.
Checking Needle and Thread Compatibility
Mismatched needles and threads cause 83% of common machine headaches, from skipped stitches to broken threads. Think of needle size and thread type as partners—fine 70/10 needles pair with lightweight thread for delicate fabrics, while heavy-duty 100/16 needles handle thick thread on denim.
- Check the eye of the needle—it should be 40% wider than your thread diameter
- Match fabric choice to both needle size and thread weight for consistent stitch quality
- Swap to ballpoint needles for stretch fabrics to prevent skipped stitches
- Adjust tension settings after changing needle-thread combinations
Using the wrong pairing damages your fabric and reduces stitch quality by over 30%.
Cleaning and Maintaining The Machine
Most threading issues stem from a machine that’s overdue for care. Clean your bobbin area after every project to prevent lint removal problems that disrupt tension. Oil moving parts weekly, replace needles every 8-10 hours of sewing, and schedule professional servicing annually. Keep a maintenance log to track these tasks—this simple habit prevents 70% of common sewing machine troubleshooting scenarios.
Most threading problems disappear when you clean your bobbin area after each project, oil weekly, replace needles every 8-10 hours, and service annually
| Maintenance Task | Frequency | Purpose |
|---|---|---|
| Lint Removal & Cleaning | After each project | Prevents tension issues |
| Oiling Frequency | Weekly | Reduces friction, extends life |
| Needle Replacement | Every 8-10 hours | Avoids skipped stitches |
| Professional Servicing | Annually | Handles complex problems |
Frequently Asked Questions (FAQs)
Can different thread types affect machine threading?
Absolutely—your choice of thread material, twist direction, and thickness selection can influence threading success. For instance, poor thread quality or mismatched thickness may cause breakage, tension issues, or bobbin jams, especially when fabric interaction isn’t considered.
How often should I replace my sewing needle?
Curious about needle replacement frequency? Most industry guidelines say change your needle every 6–8 hours of sewing.
Watch for skipped stitches or thread breakage—signs your needle’s worn. Fresh needles protect sewing quality and prevent damage to your needle plate.
What is the function of the stitch length control?
The stitch length control lets you adjust how far the fabric moves with each stitch. Shorter stitch lengths boost seam strength and durability, while longer ones speed up basting stitches and improve fabric compatibility and production efficiency during stitching.
How do I maintain consistent thread tension?
Think of thread tension like tuning a guitar—small tweaks matter.
Clean tension discs often, replace needles after every project, use high-quality thread, check bobbin tension, and schedule regular machine servicing to keep your top and bottom thread balanced.
Why does my machine make a knocking noise?
A knocking noise often points to Lubrication Issues, Loose Components, Lint Buildup, Needle Problems, or Gear Problems.
Start troubleshooting by checking for tangled thread, cleaning debris, and performing routine machine maintenance—these Common Threading Issues can disrupt smooth sewing.
What type of thread works best for beginners?
If you want to sidestep tangled disasters, start with all-purpose polyester thread. It’s stronger than cotton, glides through guides, and blends into mistakes.
Brands like Gutermann and Coats offer reliable options—neutral colors help beginner sewing look polished.
How often should sewing machine thread be replaced?
For beginner sewing, replace thread every five years, or sooner if you notice fuzz, easy breakage, or fading.
Testing thread strength and checking storage conditions helps protect your sewing machine and ensures top thread quality and reliable stitching.
Can you use pre-wound bobbins in any machine?
Not all machines accept pre-wound bobbins—bobbin compatibility depends on size and system type. About 60% of models work with standard pre-wound bobbins, but front-loading bobbin systems, top-loading bobbin systems, and machine sensors vary widely across brands.
Is it safe to use metallic or specialty threads?
Yes, but metallic threads need special care. Thread safety demands a metallic or topstitch needle, looser tension control, and slower stitching speeds. These specialty threads prevent breakage risks when you handle them correctly.
Why does my thread keep tangling during sewing?
Troubleshooting tangled thread often points to threading mistakes, incorrect thread tension, or poor bobbin quality.
Check your needle compatibility, slow your sewing speed, and verify your thread guide and tension disks are correctly aligned.
Conclusion
The moment you master how to thread a sewing machine, those tangled messes vanish and your projects flow without interruption. Each thread guide, tension disc, and bobbin placement works together like gears in a clock—miss one, and the whole system fails.
Now you control the machine instead of fighting it. Your next hem won’t unravel, your seams won’t pucker, and that needle will stitch exactly where you want it. That’s real confidence.
- https://textile-yarn.com/blog/how-to-thread-the-sewing-machine/
- https://www.easysewingforbeginners.com/a-step-by-step-guide-for-how-to-thread-a-sewing-machine/
- https://www.marketgrowthreports.com/market-reports/home-sewing-machines-market-112738
- https://www.amefird.com/wp-content/uploads/2010/01/MinimizingThread-BreakageSkips-2-5-10.pdf
- https://journals.uran.ua/eejet/article/view/315129

