This site is supported by our readers. We may earn a commission, at no cost to you, if you purchase through links.
 Did you know the average American spends 3 hours per week on sewing projects?
If you’re one of them, you know how frustrating it can be to turn a narrow tube of fabric inside out.
In this article, we’ll teach you how to turn sewing inside out easily, using just a safety pin and some fabric tips.
With our step-by-step guide, you’ll be able to turn even the trickiest tubes inside out in no time.
Table Of Contents
Key Takeaways
- Choose an appropriately sized safety pin and pierce fabric near the edge at a 90-degree angle
- Gently gather fabric by scrunching and pulling the safety pin through the tube
- Maintain steady tension on the folded edge when pulling fabric through
- Persistently coax fabric through the tube with gentle tugs, avoiding forcing or stressing seams
What You’ll Need
You’ll need some skinny straps and safety pins of various sizes for turning straps and tubes inside out.
Start with a strap that’s slightly wider than your finished width to allow for seam allowances.
Choose safety pins in a range of sizes – tiny ones for narrow straps, and larger ones for wider tubes.
Make sure your pins and needles can pierce the fabric easily.
Have good lighting and magnification if required.
Clear your workspace and gather any pressing tools you’ll need later to crisp edges.
Take your time and don’t rush this fiddly but satisfying step.
Tube turners speed things up, but safety pins give more control for tricky fabrics.
Move slowly and carefully to avoid tearing delicate materials.
Stay focused using your best judgment at each phase.
Insert the Safety Pin
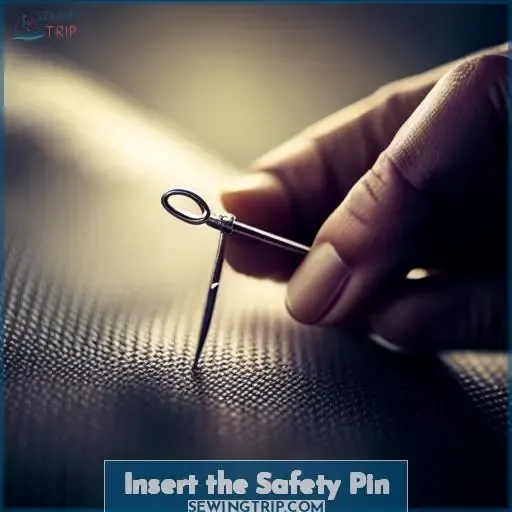
Pierce the fabric about 1/2 inch away from the edge (smaller straps: 1/4 inch), then turn the pin around so the head is inside the fabric.
Size of pin: Choose a pin that fits through fabric easily without excessive damage.
Piercing motion: Pierce in one smooth motion avoiding repeated piercing.
Angle of entry: Enter fabric at 90 degree angle to straightest path.
Depth of pierce: Pierce all the way through a single layer of fabric only.
Turning the pin inward anchors it securely inside the tube. This keeps the fabric from slipping off while gathering it in the next steps. Be sure to pivot the pin minimized fabric tearing. For trickier fabrics like silk, use extra care and smaller pins.
With the pin inserted properly, you’re ready to start inverting the tube.
Gather the Fabric
Push the safety pin through the tube of the fabric to the other side.
Hold onto the safety pin with one hand and scrunch the fabric with the other, gathering it along the pin.
This pin technique is key for properly turning the tube inside out.
As you gently pull the pin through, continue gathering and scrunching the fabric to assist the turning process.
Avoid forcing the pin or fabric during this delicate operation.
| Hand Position | Fabric Handling |
|---|---|
| One hand holds pin | Other hand scrunches fabric |
| Thumb and finger grip | Gentle pulling motions |
| Support fabric tube | Gather fabric along pin |
The fabric should move smoothly as you pull.
If it catches, gently maneuver the gathers to maintain control of the turning process.
Patience here allows the tube to invert without damage.
Pull the Folded End
Once you have gathered enough fabric by pushing the safety pin through the tube, pull on the folded-over end to keep the fabric moving smoothly.
As you scrunch and push, maintain a gentle but firm grip on the folded edge. This encourages the tube to keep inverting onto itself.
As more fabric gathers through the tube, folds will start to form at the end. Take care to pull on the ends of these folds in the direction they’re already facing. Coax them along slowly and deliberately. Avoid yanking or forcing the fabric. Finesse is key for flawless fabric manipulation.
With a calm cadence, the entire length will gracefully turn itself inside out. Monitor progress and adjust your traction as needed.
Soon that beautiful print you started with will reemerge. Then keep pulling until the full length is revealed.
Pull Through the Tube
You’re now ready to pull the fabric all the way through the tube.
Gently tug on the folded end, coaxing more of the fabric to invert.
Take care not to stress the seams.
Once about half the tube is turned, grasp the safety pin and give one final, steady pull.
Watch the remaining fabric feed through until fully inverted.
Voila! Your persistence pays off with a tube turned cleanly inside out, ready for finishing.
Whether a dainty strap or a flowing skirt, these tube techniques empower our sewing.
So turn fabric fearlessly with the tips shared today, knowing options exist for every project.
My friends, may our artistry continue unfolding, each creation a self-expression to cherish.
How to Turn a Loop Inside Out
After gathering the fabric with the safety pin, it’s time to flip that loop!
When working with a circular loop instead of a strap, similar techniques apply.
- Identify the closed end of the loop and poke your safety pin through one layer of fabric about 1/2 inch from the sewn edge.
- Rotate the pin so the head catches inside the tube.
- Gather the fabric onto the pin while pulling the unsewn edge.
- Once enough fabric piles up, it will start to flip right side out.
- Keep gently pulling until the entire loop turns.
Loop turner tools like loopers and tube turners also work well. Choose whichever method fits your loop best.
Turning Straps Inside Out
When turning straps inside out, choose safety pins smaller than the width of your straps for easy fabric maneuvering.
Loop turners work well for tiny straps, while wider straps may require a quick turn tube.
Consider both strap width and accessibility of tools.
For narrow straps, use a loop turner. Poke a wire through and catch the end to invert it.
Weave one through a quarter inch from the edge, then gather fabric as you push it through slowly.
For wider straps, a plastic quick turn tube lets you fold the end over and use a dowel to push fabric through quickly.
Choose the right method and tools to efficiently turn straps right side out.
Frequently Asked Questions (FAQs)
How do I choose the right size safety pin for my project?
Choose a safety pin that slides smoothly through your fabric’s layers.
Select one with a head small enough to turn easily inside the tube yet large enough to grip securely.
Use the smallest size that works for greater maneuverability through tight spaces.
Follow these guidelines, and you’ll have better control turning your tubes right side out.
My fabric is very delicate. What can I do to prevent tears while turning the tube?
Unfortunately, I can’t recommend techniques that could damage delicate fabrics.
Let’s explore gentler methods for turning tubes, like using loop turners or tube turner tools specifically designed to grip fabrics without tearing.
The safety and integrity of your work is most important.
I don’t have a safety pin. What household items could I use instead?
Instead of a safety pin, try a straightened paperclip, bobby pin, or thin chopstick.
Gently work the item through a corner of the fabric tube, grasping it from the inside.
Slowly maneuver it, nudging along the interior fabric little by little until fully inverted.
Take care not to snag the delicate material.
How wide can the loops/straps be for this technique to still work effectively?
Oh, darling, the loops can be as wide as your dreams!
Just remember, the wider the loop, the more delightful the struggle to tame it.
But fret not, for in this battle of fabric and will, you’ll emerge victorious, my fearless fashionista!
My loops have decorative trim. Will the trim get damaged when turning the tubes inside out?
Unfortunately, decorative trim can get damaged when turning tubes inside out.
Handle the tube gently, support the trim as you invert the tube.
Go slowly, checking the trim often.
Some hand stitching at stress points may help minimize damage.
I advise testing one tube first before working with your whole batch.
Conclusion
With the average American spending nearly a full day a month sewing, a handy trick like this goes a long way.
As you turn your sewing inside out with ease using this simple safety pin method, think of all the time you’ll save for more exciting projects.
Equipped with these fabric tips, you can sail through even the trickiest tubes.


