This site is supported by our readers. We may earn a commission, at no cost to you, if you purchase through links.
Your sewing machine just quit mid-project, or maybe you never owned one in the first place. Either way, fabric glue offers a legitimate escape route from needle and thread.
It won’t replace every stitch in your life, but for quick hems, last-minute costume repairs, and decorative work that doesn’t need to survive a hundred wash cycles, it’s surprisingly capable. The trick isn’t whether you can skip sewing—it’s knowing when glue actually works better, which formulas hold up under stress, and how to prep your fabric so the bond doesn’t fail when you need it most.
Master the basics, and you’ll handle more projects without ever threading a bobbin.
Table Of Contents
- Key Takeaways
- Can You Use Fabric Glue Instead of Sewing?
- Choosing The Right Fabric Glue
- Preparing Fabric for Gluing
- Applying Fabric Glue for Best Results
- Securing and Drying Glued Fabrics
- Best Fabrics and Materials for Fabric Glue
- Tips for Strong and Lasting Bonds
- Common Mistakes When Using Fabric Glue
- Removing or Correcting Fabric Glue Errors
- Practical Projects Using Fabric Glue
- Frequently Asked Questions (FAQs)
- Conclusion
Key Takeaways
- Fabric glue works best for hems, appliqués, and quick repairs on cotton or linen, but it cannot match the durability of traditional sewing for high-stress seams or items that need frequent washing.
- Choosing the right glue formula matters—permanent formulas need 24-48 hours to cure and survive multiple washes, while temporary options let you reposition pieces but will not hold long-term.
- Proper fabric prep is non-negotiable: pre-wash to remove sizing and finishes, iron flat to eliminate wrinkles, then apply thin, even layers with steady pressure to create bonds that actually last.
- Skip fabric glue entirely on slippery synthetics like satin, stretchy knits without specialized formulas, or coated materials like oilcloth—these create weak bonds that fail under stress.
Can You Use Fabric Glue Instead of Sewing?
You don’t always need a needle and thread to work with fabric. Fabric glue can handle plenty of projects on its own, though it’s not a magic fix for everything.
Before you start, check out these clever sewing shortcuts and tips to make your fabric glue projects even easier.
Here’s where it shines and where it falls short.
When Fabric Glue is a Good Alternative
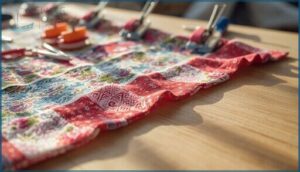
Fabric bonding opens up new possibilities when you don’t want to thread a needle. Quick fixes on cotton or linen hems become completely doable without a machine, giving you instant control over your wardrobe repairs. You’ll find fabric adhesive especially useful for craft projects where precision stitching would slow you down or create unnecessary bulk.
For those times when adhesive isn’t practical, keeping a few essential hand sewing accessories nearby ensures you’re ready for repairs that truly need a needle and thread.
Here’s where textile adhesives really shine:
- Attaching appliques and decorative patches where sewing would damage delicate details
- Creating Halloween costumes that only need to survive one night of trick-or-treating
- Finishing projects when your sewing machine breaks down mid-creation
This sewing alternative encourages beginners to keep creating instead of giving up. For additional insight, learn about the differences in fabric glue versus sewing applications.
Limitations Compared to Traditional Sewing
While adhesive solutions work great for quick fixes, they can’t match the fabric durability that traditional sewing delivers. Bond strength weakens when you wash glued items repeatedly, and material limits become obvious on slippery fabrics like satin or stretchy knits. Flexibility issues pop up as adhesive seams stiffen over time, changing how garments drape and move.
For projects where you need both hold and flexibility, using stabilizers with spray adhesive gives you better control than gluing fabric pieces directly together.
| Aspect | Fabric Glue | Traditional Sewing |
|---|---|---|
| Longevity | Degrades with washing/heat | Lasts years with proper care |
| Alterations | Nearly impossible to adjust | Easy to unpick and resew |
| Flexibility | Stiffens and cracks over time | Moves naturally with fabric |
For fabric repair and maintenance requiring adhesive longevity, sewing remains your most reliable choice.
Choosing The Right Fabric Glue
Not all fabric glues are created equal, and picking the wrong one can leave you with a mess instead of a masterpiece.
The glue you choose depends on what you’re making, how long you need it to last, and whether it’ll end up in the washing machine. Here’s what you need to know to match the right adhesive to your project.
Permanent Vs. Temporary Fabric Glues
Understanding glue types isn’t about choosing sides—it’s about breaking free from one-size-fits-all thinking. Permanent glue locks in bond strength with flexible adhesive flex that survives wash cycles after 24-hour cure times. Temporary glue gives you control to reposition before committing.
Here’s what separates them:
- Permanent holds through repeated washing; temporary loosens quickly
- Cure times differ: 24 hours versus minutes
- Permanent needs fabric prep; temporary forgives shortcuts
- Adhesive flex matters more on synthetics with permanent formulas
- Your project dictates the winner Temporary fabric glue is essential for tasks such as basting and appliqué, as detailed in this temporary fabric adhesive guide.
Washable and Non-Washable Options
Once you’ve chosen permanent or temporary glue, wash durability becomes your next decision point. Machine-washable formulas handle 15-30 cycles if you let bonds cure 24-48 hours before laundering.
If you’re working without traditional equipment, explore creative ways to use common sewing tools to press seams and smooth fabric edges.
Non-washable options lock decorative work in place but crack under water exposure. Your fabric prep and fabric types determine which bond strength you need—cotton absorbs differently than polyester, and heavier glue formulas deliver stronger holds on natural fibers.
Fabric-Specific Glue Types
Different materials demand specialized formulas for ideal fabric bonding. Polyester and synthetics flex constantly, so you’ll need stretchable adhesives with moderate glue viscosity that won’t crack.
Material compatibility charts guide your selection:
- Cotton and linen: Thick, high-adhesive-strength permanent glue for durable holds
- Silk and delicate weaves: Clear, flexible craft glue that dries invisible
- Leather and suede: Polyurethane-based fabric adhesive designed for non-porous surfaces
- Quick basting: Temporary glue for surface preparation before final stitching
Preparing Fabric for Gluing
You can’t just slap glue on fabric straight out of the package and expect it to stick. The surface needs to be ready, or you’ll end up with weak bonds, puckering, or glue that peels right off.
Here’s how to prep your fabric so the adhesive actually does its job.
Cleaning and Pre-Washing Fabrics
Pre-washing your fabric preparation before gluing isn’t optional—it’s essential for shrinkage control. You’ll want to wash new materials in cold water with mild detergent to eliminate excess dye and prevent color preservation issues later.
Before you start any adhesive project, make sure you have quality fabric scissors and a seam ripper on hand to trim frayed edges after washing.
This fiber cleaning step also removes manufacturing residues that interfere with fabric adhesive bonds. If you spot stains, tackle stain removal first with a gentle pretreatment. Once washed, air dry completely before moving to your fabric repair or fabric crafting project.
Removing Sizing and Finishes
Factory finishes create a barrier that fabric glue can’t penetrate. You need to strip sizing and finishes before bonding if you want adhesion that lasts. Think of it like trying to glue plastic wrap—nothing sticks.
Factory finishes coat fabric like plastic wrap—strip them first or glue won’t stick
Desizing Methods and Finishing Techniques for Textile Preparation:
- Soak fabric in warm water with enzyme detergent to dissolve starch-based sizing
- Use acetone or nail polish remover on stubborn residues (test first)
- Try Goo Gone for synthetic fabric finishing agents
- Rinse thoroughly to remove all chemical traces
- Air dry completely before applying fabric glue
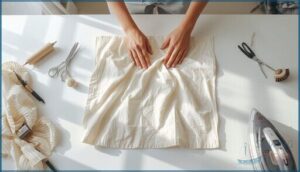
Ironing and Stabilizing The Fabric
Wrinkled fabric won’t bond evenly with fabric glue—heat pressing smooths the surface and locks fibers into position. Use your iron’s steam settings to relax the material, then apply moderate pressure in smooth strokes.
Cotton tolerates high heat, while polyester needs cooler temperatures to avoid shine. Let the fabric cool flat after ironing. This prep step makes sewing with fabric glue far more reliable than skipping straight to application.
Applying Fabric Glue for Best Results
Getting the glue on fabric is where most mistakes happen, but it doesn’t have to be complicated. The trick is controlling how much you apply and where it goes.
Let’s break down the techniques and tools that’ll keep your project clean and professional-looking.
Even Glue Application Techniques
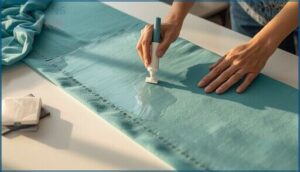
A smooth coat is the foundation of any solid bond—think of it like painting a wall without streaks. Start by laying a thin, uniform film across your fabric surface prep area using steady, continuous strokes. Work in small sections to prevent premature drying, and check edges for consistent adhesive thickness before pressing.
Proper glue spread methods and bonding pressure create professional results every time:
- Apply enough adhesive to cover without creating puddles or runs
- Maintain steady motion to avoid gaps or thick spots that weaken bonds
- Keep layers thin; multiple coats beat one heavy application
- Align pieces carefully before pressing to prevent shifting during cure
- Use flat pressure across the entire surface for maximum contact
Tools for Spreading Fabric Glue
The right spreader tools transform your fabric glue techniques from guesswork to precision. Silicone spreaders glide smoothly without sticking, while foam adhesive rollers deliver uniform coverage on larger patches.
For tight corners and hems, grab a plastic palette knife or fine-tip fabric brushes that control thin layers. Precision tips let you trace seam lines with zero spillover, keeping your adhesives exactly where you want them.
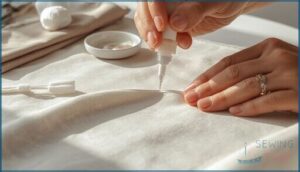
Preventing Glue Overflow and Mess
Even with precision tools, glue control starts before you uncap the bottle. Pre-wash your fabric to eliminate oils that trigger seepage, then press seams flat so you’re working on smooth terrain.
Use a fine-tipped nozzle and apply thin, continuous lines instead of blobs. Master these adhesive management tricks and you’ll turn overflow tips into second nature, keeping mess prevention simple and your adhesive bonding tips actually useful.
Securing and Drying Glued Fabrics
Getting the glue on your fabric is only half the battle. What happens next determines whether you end up with a rock-solid bond or a frustrating mess that peels apart.
Here’s how to lock everything in place and give your glue the time it needs to work its magic.
Using Weights or Clamps for Bonding
After applying your fabric glue, proper bonding pressure transforms a weak connection into lasting adhesive bonding. Weight distribution matters more than you’d think—grab flat objects like books or ceramic tiles to keep pressure even across the whole seam during adhesive curing.
Here’s your fabric stabilization game plan:
- Place weights strategically across bonded areas to prevent edge lifting
- Use spring clamps with fabric scraps underneath to avoid imprint marks
- Keep pressure light and even—too much squeezes out adhesive and weakens bonds
Recommended Drying Times
Your glued pieces need patience—drying time factors like fabric thickness and humidity effects can make or break bond strength tests. Cotton blends usually hit initial tack in 10 to 20 minutes, while polyester stretches to 45 minutes. Most adhesive technology requires a full 24 hours for maximum cure rates before you stress-test those seams.
| Fabric Type | Initial Set Time | Full Cure Time |
|---|---|---|
| Cotton Blends | 10–20 minutes | 24 hours |
| Polyester/Synthetics | 20–45 minutes | 24 hours |
| Silk/Delicates | 15–30 minutes | 4–12 hours |
| Denim/Heavy Fabrics | 30–45 minutes | 48 hours |
| Leather | 2–6 hours (tack) | 24 hours |
Permanent fabric glue uses usually demand 48 to 72 hours before washing, especially for fabric crafting projects. Temporary options dry faster but won’t survive the sewing vs glue durability test long-term.
Avoiding Fabric Movement During Curing
Once your glue reaches initial tack, fabric stabilization becomes mission-critical. Place weights evenly across the bonded area—no edge lift allowed.
Work on a flat surface between 68 and 75 degrees to nail those curing techniques. Thick glue viscosity helps, but avoid drafts or vibrations.
Pressure application matters more than you think. Don’t touch anything until full cure, or you’ll ruin hours of work.
Best Fabrics and Materials for Fabric Glue
Not all fabrics play nice with glue, and choosing the wrong one can leave you with a sticky mess or a bond that fails the first time you wear it.
The material’s fiber type, texture, and stretch all affect how well the glue grabs and holds. Let’s break down which fabrics work best with adhesive and which ones you should skip entirely.
Cotton, Polyester, and Blends
Your fabric types determine which glue selection gives you the strongest bond. Cotton’s absorbent fibers grab adhesives like a sponge, so washable permanent glues—Aleene’s Fabric Fusion, for instance—lock in beautifully. Polyester’s slick surface needs industrial-strength formulas to compensate for weaker material compatibility.
Blends combine both worlds:
- Cotton: Use flexible, washable glues that soak into porous fibers
- Polyester: Choose waterproof, high-grip adhesives for slick surfaces
- Blends: Pick all-purpose formulas that handle mixed fiber structures
Synthetic Vs. Natural Fibers
Fiber bonding behaves completely differently on smooth synthetics versus absorbent naturals. Natural fibers like cotton and linen invite glue penetration deep into their porous weave, creating strong textile bonding through mechanical grip and hydrogen bonds. Synthetics like polyester resist surface tension, demanding specialty crafting with fabric formulas or primers for material compatibility.
Flexible glues handle fabric stretch on activewear, while thicker sewing alternatives anchor better in natural fibers without bleeding through.
| Fiber Type | Best Glue Approach |
|---|---|
| Cotton, linen, wool | Thicker washable glues that soak into weave |
| Polyester, nylon | Industrial-strength flexible formulas or primers |
| Stretch synthetics | Thin, flexible glues that move with fabric |
| Heavy natural fibers | High-viscosity permanent adhesives |
| Mixed blends | All-purpose formulas rated for both categories |
Incompatible Fabrics to Avoid
Coated surfaces like oilcloth and PU leather resist fabric glue, creating weak bonds that fail under stress. Texture clash between pile fabrics and slick synthetics traps air pockets that prevent solid textile bonding.
Weight disparities stress joints when heavy canvas meets delicate chiffon. Surface finish conflicts appear with metallic threads or glittered fabrics, causing discoloration.
For reliable fabric crafts, skip these fabric mismatch combinations and choose sewing alternatives instead.
Tips for Strong and Lasting Bonds
Getting fabric glue to stick isn’t just about slapping it on and hoping for the best. You need the right techniques to create bonds that actually last through wear and washing.
Here’s how to make your fabric glue work like a pro every time.
Pressing for Better Adhesion
Applying firm pressure during glue set-up isn’t optional—it’s the difference between a bond that holds and one that fails.
Heat pressing with an iron at medium temperature pushes the adhesive into the fiber weave while fabric smoothing removes air pockets that weaken adhesion. Think of it as fusible webbing applications without the web.
This bond enhancement technique works across adhesive technology and applications, making gluing rival traditional methods when done right.
Applying Multiple Thin Layers
One thick bead might seem faster, but layer adhesion science says otherwise—thin coats cure evenly and outlast heavy globs every time. Build your fabric bonding strength with this approach:
- Apply each layer at 0.5 to 1.0 mm thickness using consistent glue consistency for even coverage
- Wait 10 to 15 minutes between passes to respect proper curing times
- Stack five ultra-thin applications for applique techniques and fabric lamination that won’t crack or peel
Using adhesives in crafting this way beats single-layer shortcuts.
Reinforcing With Fabric Tape
Tape selection transforms weak glue lines into permanent bonds—fusible hem tape spreads stress across glued hems while seam tape keeps knit shoulder seams from stretching out.
For edge reinforcement and fabric stabilization, press fusible strips along necklines before gluing facings to prevent warping. Pair heat-activated tapes with moderate-temp glues for adhesive compatibility.
Combining tape with fabric glue substantially extends bond strength through applique, fabric lamination, and weaving projects beyond sewing alone.
Common Mistakes When Using Fabric Glue
Even a simple tool like fabric glue can go sideways if you’re not careful.
The good news is that most problems come from just a few common slip-ups that are easy to avoid once you know what to watch for. Let’s break down the biggest mistakes people make so you can skip the frustration and get clean, lasting results.
Over- or Under-Applying Glue
Getting the glue application just right is where most fabric projects either shine or stumble. Too little adhesive means your bond strength won’t hold through a single wash, while drowning fabric in glue creates stiff, tacky disasters.
Here’s what happens when you mess up:
- Excess glue seeps through edges, leaving visible stiffness and uneven hems
- Thick layers take forever to dry and leave sticky residue on surfaces
- Heavy application kills fabric flexibility and distorts seam lines
- Using more glue doesn’t improve adhesion—it just wastes material
- Skimpy coverage creates weak spots that peel with handling
The sweet spot? A thin, even layer that disappears into the weave. Think brushing on just enough to coat the surface without saturation. Fabric prep matters here too—clean, dry material needs less adhesive than you’d expect. Control your application with precision tools like applicator tips or small brushes instead of squeezing straight from the bottle. Watch your drying times carefully; rushing to handle pieces before the adhesive cures guarantees failure. When using adhesives in crafting, restraint beats excess every time. If you’re gluing delicate fabrics like silk, even slight overuse mars finishes permanently. Master this balance and your projects will look professionally finished, not homemade. Glue removal becomes necessary when you’ve overdone it, but prevention beats cleanup.
Gluing Stretched or Unstable Fabric
Stretched fabric is a glue killer you can’t ignore. When you bond fabric under tension, the adhesive cures in that position—then springs back, creating ripples and stippling that ruin your finish. Stretchy materials like knits need flexible glues, not standard formulas that crack with movement. Unstable surfaces demand fabric stabilizers before gluing.
Here’s your defense:
| Problem | Solution |
|---|---|
| Fabric tension during bonding | Let material relax flat before applying glue |
| Knits and jersey stretch | Use flexible adhesives designed for stretch |
| Unstable weaves shifting | Apply fusible webbing or fabric stabilizers first |
Master bonding techniques by keeping fabric relaxed and supported—using adhesives in crafting means respecting material behavior, not fighting it.
Not Allowing Sufficient Drying Time
Rushing the curing process destroys your bond before it begins. Most fabric glues need 24 hours to cure fully, but humidity extends that timeline and weakens adhesive longevity. Testing bond strength too early gives false confidence—your project fails later during handling or washing.
Respect drying time factors:
- Humid conditions slow solvent evaporation and invite edge curling
- Poor ventilation traps moisture and compromises adhesive longevity
- Moving pieces prematurely creates weak spots that peel apart
- Skipping cure time turns crafting tips into disaster recovery
Patience delivers permanent results.
Removing or Correcting Fabric Glue Errors
Even careful work can go sideways when you’re dealing with fabric glue. The good news is that most mistakes aren’t permanent, as long as you act quickly and use the right approach.
Here’s how to fix glue errors, remove stubborn adhesive, and keep your fabric looking clean.
Cleaning Wet and Dried Glue
Catching glue while it’s still wet gives you the upper hand. Blot fresh spills gently with a clean cloth—don’t rub, or you’ll push it deeper into the fibers. Warm water and mild dish soap work wonders on water-based adhesives.
Once glue dries, you’ll need to scrape carefully with a plastic edge before trying solvents like acetone or Goo Gone, always testing first.
| Glue State | Best Method | Tool or Product |
|---|---|---|
| Wet | Blot gently | Clean cloth |
| Fresh residue | Warm soapy water | Dish soap |
| Dried | Scrape and treat | Acetone or Goo Gone |
Using Removers Safely
When you reach for acetone or Goo Gone, ventilation safety matters—crack a window or work outside.
Glove protection and eye shielding aren’t optional; these solvents can irritate skin and eyes fast.
Keep flame precautions in mind since many removers are flammable.
Follow storage guidelines on the label, and always test your chosen glue removal method on a hidden fabric scrap first.
Preventing Stains and Discoloration
Stain prevention starts before you even uncap the bottle. Pick speckle or matte fabric finishes to hide marks, then test your glue on a hidden seam to check for color guard issues.
Water-based glues resist dye transfer on cotton-polyester blends better than on pure wool. If discoloration creeps in during glue removal, treat it fast with a fabric-safe stain remover following your care label.
Practical Projects Using Fabric Glue
You don’t need a sewing machine to tackle real-world fabric projects.
Fabric glue works beautifully for quick fixes, creative touches, and home decor upgrades.
Here’s where fabric glue really shines and how to use it with confidence.
Hemming and Mending Clothes
You can skip the needle for everyday clothing repairs and minor hemming jobs without sacrificing durability. Fabric glue takes care of quick fixes that traditional sewing once monopolized, giving you control over garment alteration on your own terms.
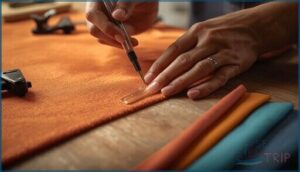
- Hem pants or skirts by folding the edge, applying thin glue lines, and pressing firmly with weights.
- Close small seam gaps along original stitch lines for instant clothing restoration.
- Patch small tears by positioning fabric-backed patches and bonding securely.
- Reinforce frayed edges with strategic glue application to prevent further unraveling.
- Reattach loose trim on garments using fabric-specific permanent adhesive for textile fixing.
Applique and Embellishments
You can layer glittering sequins, holographic patches, and dimensional motifs onto garments using fabric glue instead of traditional fusible webbing applications. Position your applique pieces on the base fabric, then apply thin adhesive lines along edges for secure decorative accents.
Press firmly and let cure completely before handling. These adhesive methods transform plain textiles into custom fabric designs, giving you creative control over embellishment tips and applique techniques without needle or thread.
Crafting and DIY Home Decor
Fabric glue unlocks DIY home decor projects without a single stitch, letting you transform raw textiles into polished pieces. You can secure fabric to lightweight wooden frames for textile art, bond drop cloth table runners with clean hems, or attach linen to foam panels for home upholstery accents.
- Fabric framing on backing boards creates decorative panels with archival grade adhesives
- Wall hangings combine fabric painting with clear drying glues for invisible bonds
- Quick tack formulas set cushion covers in under 20 minutes for fast crafting techniques
These glue-based methods give you creative control over crafting and textile arts, bypassing traditional sewing constraints entirely.
Frequently Asked Questions (FAQs)
Can I glue fabric instead of sewing?
Yes, you can glue fabric instead of sewing for many projects. Fabric bonding works well for hems, appliqué, and crafts, though adhesive strength won’t match traditional stitching on high-stress seams.
What is the best way to use fabric glue?
Apply a thin, even layer to clean, dry fabric using a brush or toothpick. Press firmly for 30 to 60 seconds, then let it cure fully before handling.
How to seal fabric without sewing?
Think of it as edge insurance—you can stop fraying by applying fabric glue along raw seams, bonding hems, or using adhesive techniques like applique and fabric lamination for strong, stitch-free finishes.
Can fabric glue be used on delicate fabrics safely?
You can use water-based glues on silk, chiffon, and satin, but test on scraps first. Apply thin layers with a fine brush to prevent stiffness and puckering on delicate fabrics.
Are there alternatives to fabric glue for outdoor projects?
When traditional fabric glue won’t cut it, epoxy adhesives and polyurethane bonds deliver weatherproof strength for outdoor bonding.
Solar adhesives and mechanical fasteners offer sewing-free alternatives that outlast hot glue in crafting projects.
How does fabric glue affect the durability of fabric?
Fabric glue forms flexible chemical bonds that preserve fabric strength without stiffening fibers.
Bond longevity depends on glue type, proper curing, and washing methods, while even application maintains seam integrity and prevents degradation over time.
Can fabric glue be used on stretchy or elastic fabrics?
Ironically, the materials designed to move resist being stuck down.
Yes, you can glue stretchy knits with elastic adhesives formulated for flexible bonding, maintaining fabric stretchability through knit compatibility and proper textile repair methods.
Are there eco-friendly alternatives to traditional fabric glue?
Yes. Plant adhesives like soy or corn starch offer biodegradable options with lower environmental impact.
Water-based formulations reduce VOCs, while natural latex and gelatin provide sustainable materials for eco-conscious textile arts and DIY fashion projects.
Can fabric glue be used on stretchy fabrics?
Like a safety net that moves with an acrobat, the right adhesive bends without breaking.
Stretch fabric bonding needs flexible adhesives designed for elastic material and knit fabric glue that won’t crack when textiles move.
How long does fabric glue typically last?
Unopened fabric glue lasts 12 to 36 months in cool storage, while opened tubes stay usable for 6 to 12 months. Bond durability depends on glue longevity, fabric adhesion quality, and proper storage conditions.
Conclusion
Like a backup key hidden under the doormat, knowing how to use fabric glue instead of sewing gives you freedom when the main tool fails.
You’ve learned which projects tolerate glue, which fabrics bond cleanly, and how to dodge the mistakes that turn adhesive into a sticky disaster. Not every seam needs thread. Sometimes you just need the right glue, steady hands, and confidence to skip the machine entirely.
- https://en.wikipedia.org/wiki/Adhesive
- https://www.hooptalent.com/blogs/news/washable-fabric-glue-choosing-non-toxic-adhesives-that-survive-laundry
- https://www.maggieframes.com/blogs/embroidery-blogs/permanent-fabric-glue-for-clothes-ultimate-guide-for-strong-washable-repairs
- https://speed-sew.com/best-glue-for-gluing-fabric-to-fabric/
- https://www.visionlinens.com/blog/cotton-fabric-manufacturing-part-5-the-finishing-process

